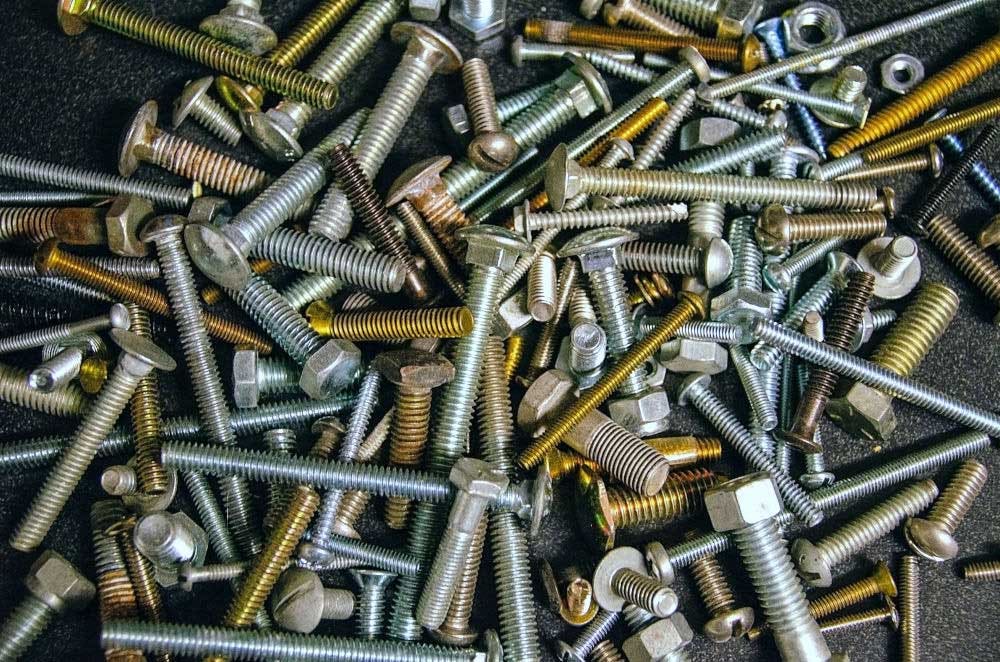
From the cell phones in our pockets to the rockets that put our astronauts into space, fasteners are used everywhere in the world around us. The products we work on daily as engineers and designers are no exception.
When designing in SOLIDWORKS, often the easiest (and most comprehensive) way to include and track fasteners in our designs is to use actual CAD models. Doing so gives us a better picture of our designs’ overall form, fit and function. It also helps us manage part data and automate aspects of our design documentation, such as in SOLIDWORKS drawings or bills of materials (BOMs).
Thankfully in SOLIDWORKS, we have a dedicated way to include fasteners in our designs with a built-in tool called the SOLIDWORKS Toolbox.
In this blog post, we will dive into what the SOLIDWORKS Toolbox is, how it brings efficiency to our workflows, and explore how we can use it in our designs.
What Is the SOLIDWORKS Toolbox?
The SOLIDWORKS Toolbox is an add-in included with SOLIDWORKS 3D CAD Professional and Premium to manage standardized components, like fasteners, in our designs.
At first glance, many users think of the Toolbox as a simple repository of components akin to a design library. And unfortunately, due to this perception, many users often miss out on the efficiency that the Toolbox can add to our workflows.
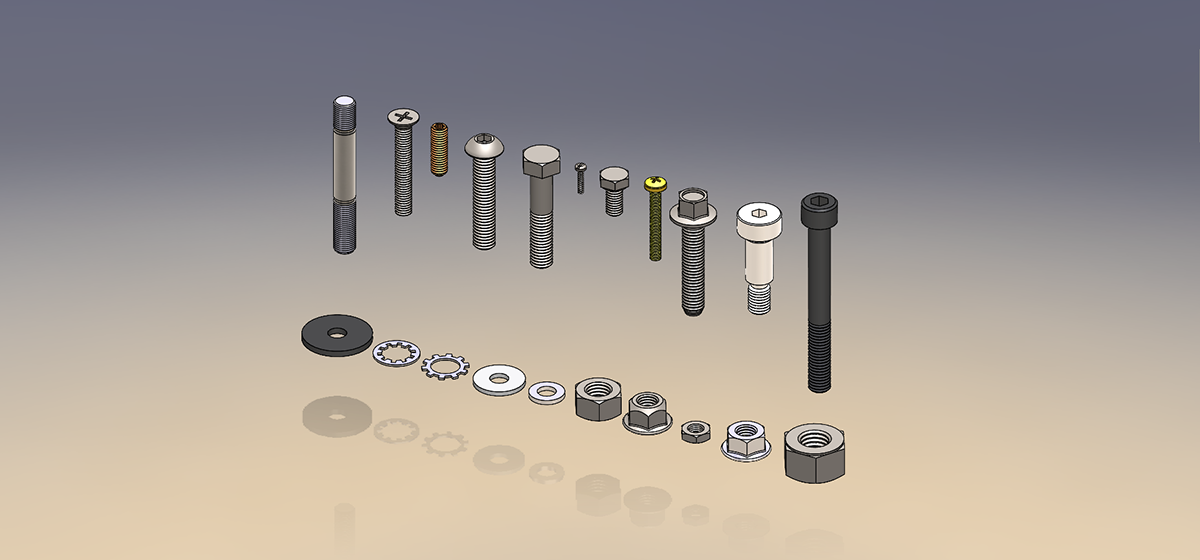
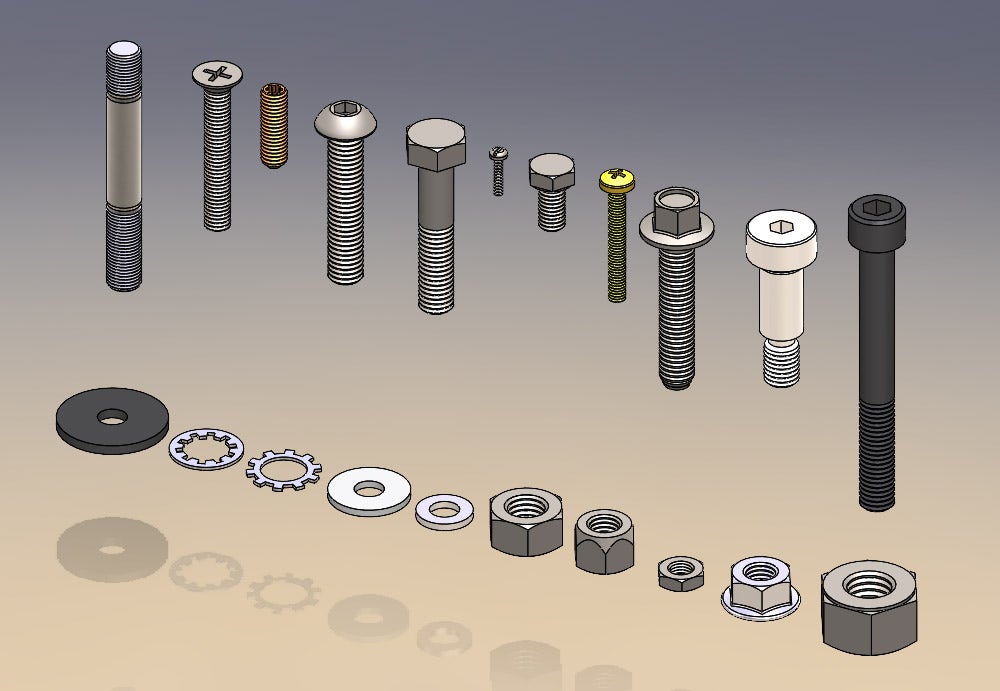
There are many different types, sizes and shapes of fasteners. While manually modeling them is possible, using an add-in like the SOLIDWORKS Toolbox to include them in our assemblies is more efficient.
How Does the Toolbox Help with Your Designs?
You might wonder, “What exactly does the SOLIDWORKS Toolbox do if it’s not just a library of parts?”
If I had to sum it up in a sentence, I would say that the primary purpose of the Toolbox is to improve our workflows by automating how we use standardized components.
So, what does that mean?
At its core, the Toolbox is an intelligent database of standardized components with known geometry, such as fasteners. These components are grouped and defined by relevant engineering standards, such as ANSI, ISO, DIN or JIC.
With the Toolbox enabled, we pull components from this database to drop them into our assemblies, and the model geometry is generated automatically.
The Toolbox eliminates the time-consuming task of scouring the internet for a third-party model of the fastener we need — something we’ve all had to do at one point or another. Instead, we can grab it from the Toolbox with a few clicks without ever leaving our SOLIDWORKS window.
Customize Your Data in the Toolbox
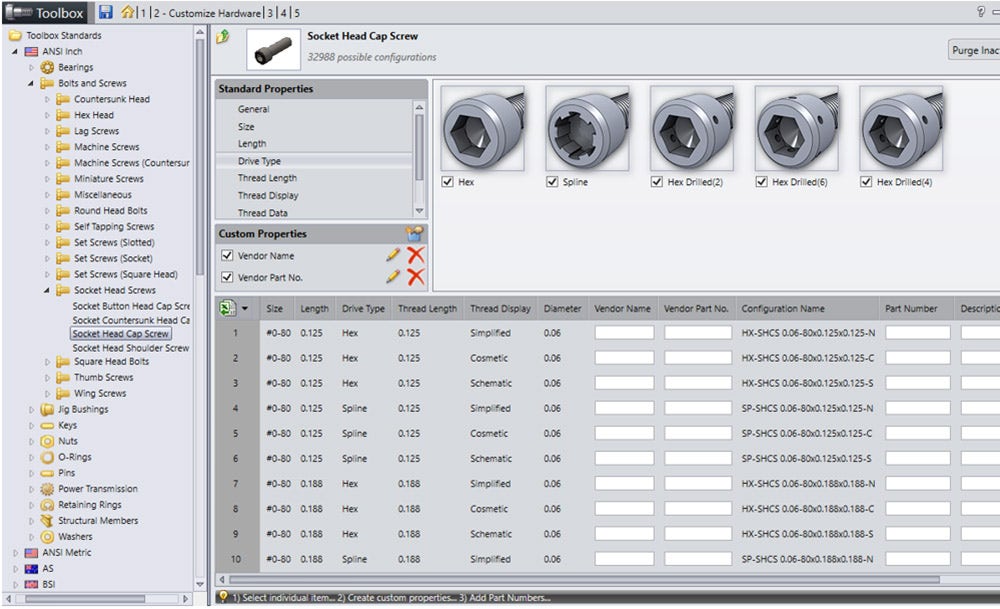
Along with the model geometry, the Toolbox database contains useful engineering data for each component, including the relevant engineering standard, BOM information, thread data and dimensions.
We can specify custom data, such as vendor name, ordering information, vendor part number and material. And whenever we insert a Toolbox model into our SOLIDWORKS assemblies, all that data comes with it, simplifying the creation of callouts, drawings and BOMs.
The SOLIDWORKS Toolbox is also fully configurable. You can manage available fastener types, custom components additions, Toolbox access and permissions, component part numbers and custom descriptions in the Toolbox.
Note: While we focus on fasteners for the topic of this blog post, the Toolbox contains many different types of standard components.
Installing SOLIDWORKS Toolbox
If you’re unsure if you have access to the Toolbox, double-check your SOLIDWORKS installation — if you have Professional or Premium, you have the Toolbox.
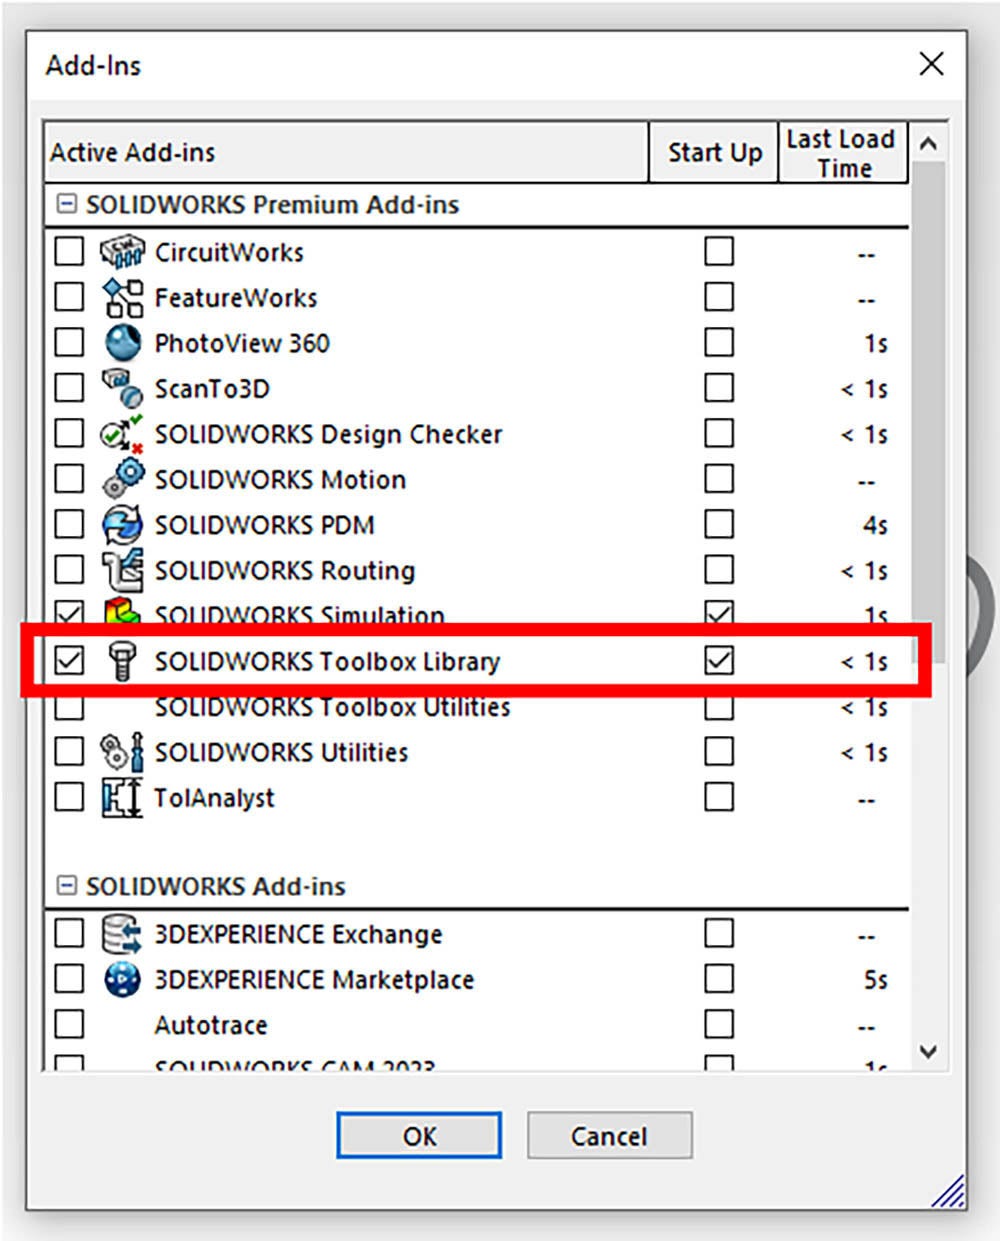
To enable the Toolbox, go to the “Add-Ins” menu to toggle it on.
The Toolbox can be implemented for a single user, multiple users, or even across an entire organization. Installing the Toolbox on a network drive or in a PDM Vault ensures everyone has access to the same pool of components and pulls the correct component and part number every time.
We don’t discuss configuring the Toolbox in-depth in this post, as that’s a subject all on its own. Check out our webinar on SOLIDWORKS PDM: Toolbox Customization and Utilization to learn more.
Making the Most Out of the SOLIDWORKS Toolbox
So now that we know what the SOLIDWORKS Toolbox is, how do we use it? Thankfully, it’s a very straightforward process you can do in three steps:
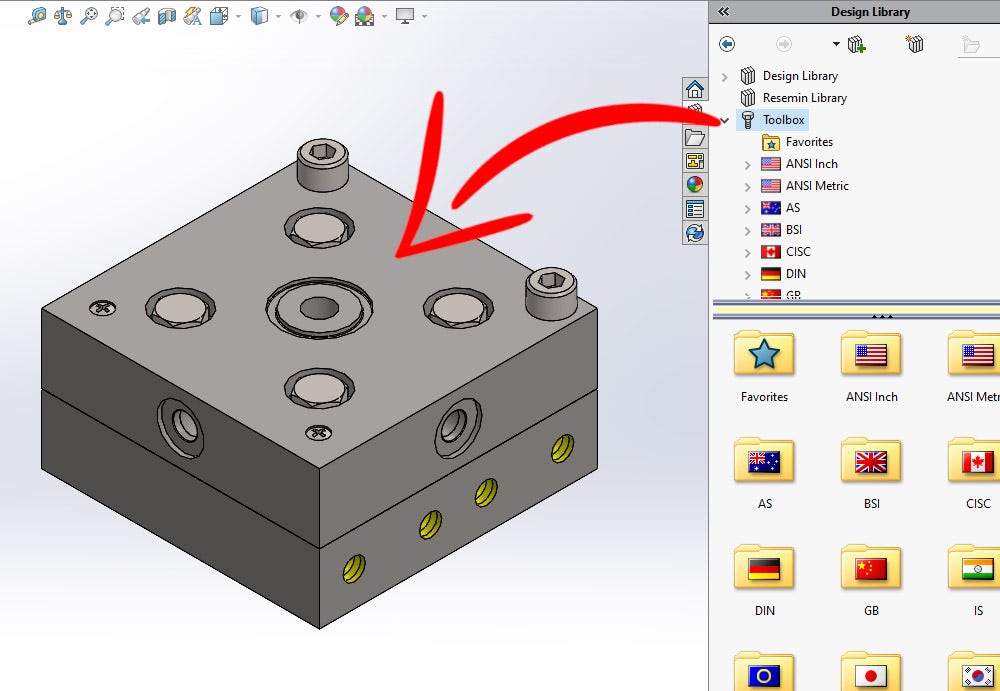
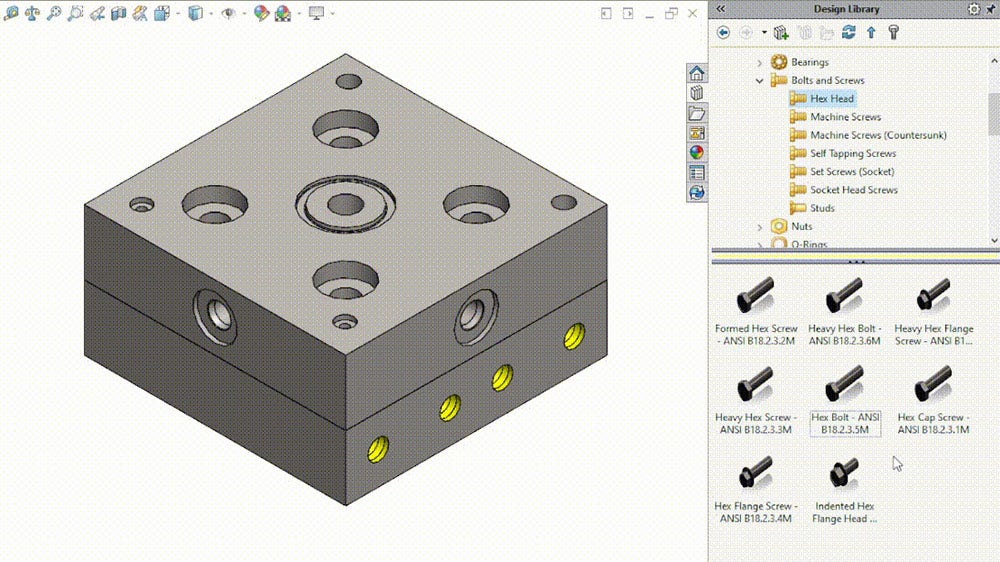
- Open the Toolbox folder in the Design Library tab of the Task Pane.
- Navigate to the standard and component type we need.
- Drag and drop the component into the graphics area.
And that’s it — no sketching, dimensioning or modeling required.
Additionally, the Toolbox has built-in intelligence that recognizes relationships between components in an assembly.
Auto-Sizing and Mating Fasteners
Because of the Toolbox’s intelligence, it can auto-size our fasteners for us.
If we drag and drop a Toolbox fastener onto an existing hole in an assembly, SOLIDWORKS knows the exact type, size and length of fastener that fits into that hole.
Mates are also automatically added to constrain the fastener within the assembly properly.
This automation means that with just a simple drag and drop, the Toolbox generates a complete fastener model, correctly sizes it, and fully mates it in our assembly.
Using the Toolbox this way helps to improve design flexibility, reduces errors, and greatly simplifies the assembly process. Achieving the same results manually takes significantly longer than a quick drag and drop.
And we haven’t even touched on Smart Fasteners, which bring even more automation to the process. Smart Fasteners allow us to automatically populate nearly every hole in an assembly with the correct fastener with only a handful of clicks.
To learn more about Smart Fasteners, check out our blog post on how to use the Smart Fasteners tool.
More Flexibility to Customize Your Fastener
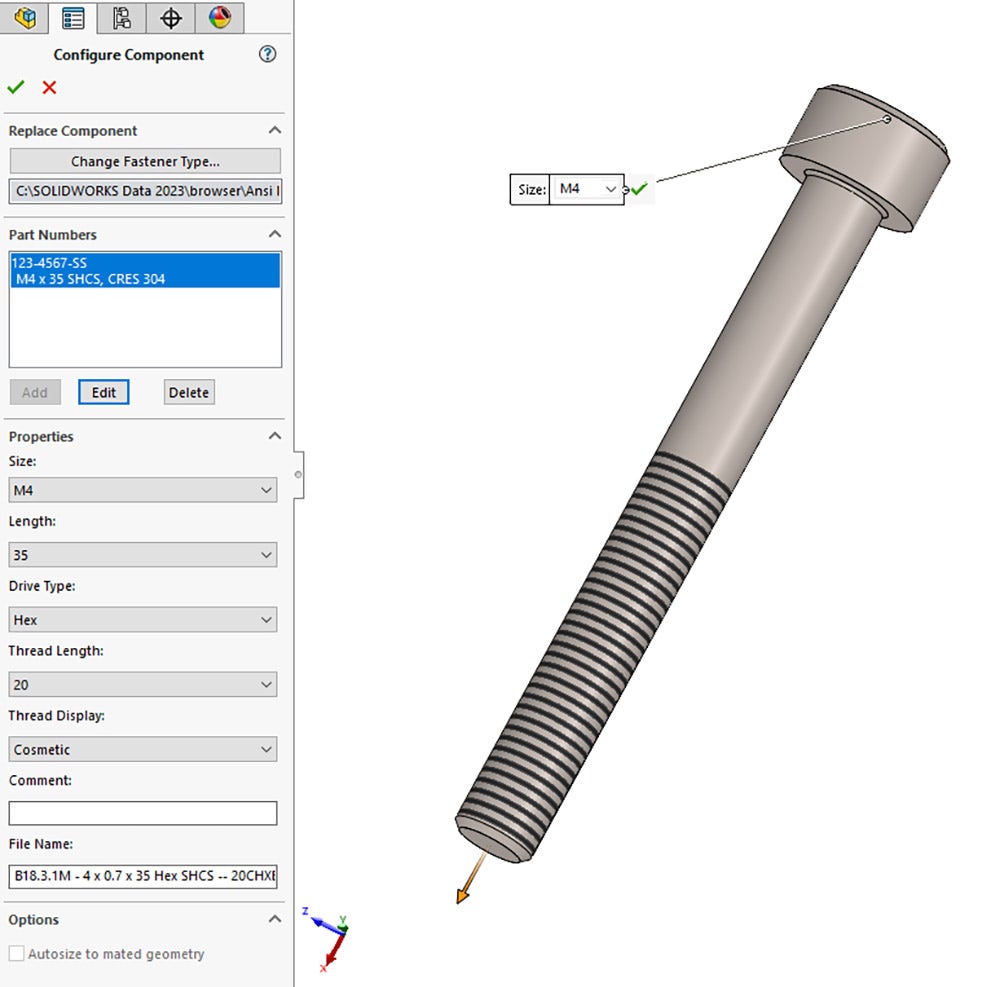
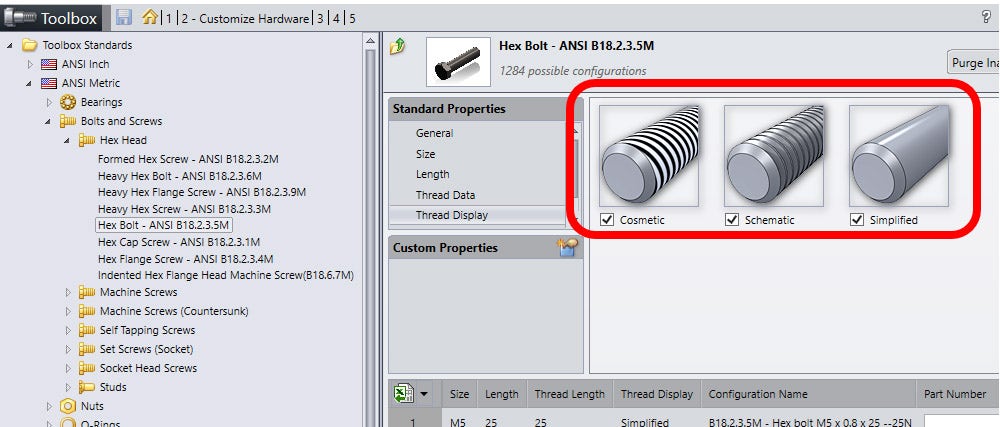
After a fastener has been dropped into an assembly, we can customize it to fit our specific application as necessary. You can adjust the fastener size or length (if we didn’t use auto-size functionality), threaded length, drive type and visibility of threads.
If your Toolbox components somehow show wrong sizes in your assemblies, you can readjust or fix any fasteners that are sized incorrectly.
Adding Unique Part Numbers
We can save our fastener into the Toolbox library with a unique part number. While it’s typically best practice to configure part numbers ahead of time, we can do it on the fly as well.
Once configured, the next time we want to use that fastener, we point to our previously defined part number.
Assigning part numbers beforehand or as we first use them helps to streamline fastener usage and maintain consistency between different designs and users.
This way, the Toolbox becomes a powerful tool for tracking fasteners on drawings and BOMs or as a larger part of our Quality Management System (QMS).
What Types of Components Are Included in the SOLIDWORKS Toolbox?
Although we focus primarily on fasteners in this blog post, the SOLIDWORKS Toolbox has more than 2,000 components from various engineering and industry-specific standards.
Altogether with the different sizes and configurations of the components in the Toolbox, we have access to millions of different standardized parts.
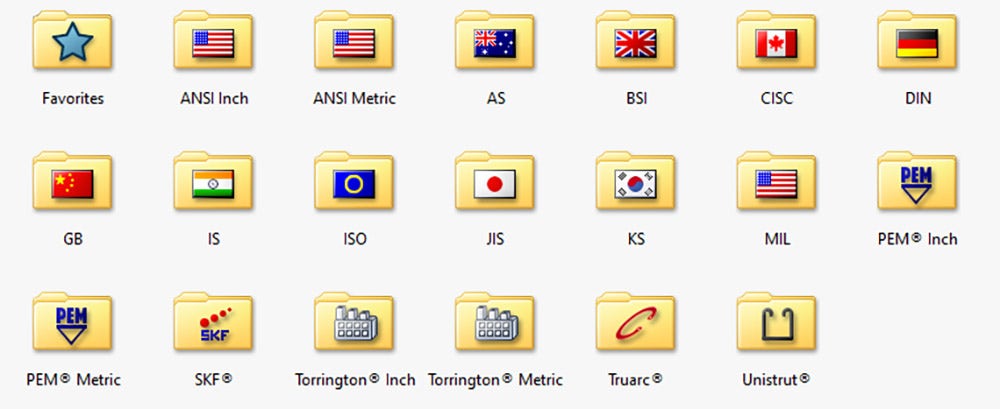
International Standards
- ISO – International Organization for Standardization (International)
- ANSI (inch & metric) – American National Standards Institute (USA)
- MIL – Military Specification (Mil-spec, USA)
- DIN – Deutsches Institut für Normung (Germany)
- JIS – Japanese Industrial Standards (Japan)
- BSI – British Standards Institution (Britain)
- AS – Australian Standard (Australia)
- CISC – Canadian Institute of Steel Construction (Canada)
- KS – Korean Industrial Standards (South Korea)
- GB – Guojia Biaozhun (China)
- IS – Indian Standards (India)
Proprietary Standards
- PEM® – Penn Engineering & Manufacturing (fasteners)
- SKF® – Svenska Kullagerfabriken (bearings)
- Torrington® – Torrington Bearings (bearings)
- Truarc® – Waldes Truarc (retaining rings)
- Unistrut® – Unistrut (structural members)
Component Types
- Standard fasteners
- Bolts
- Screws
- Washers
- Nuts
- Power/motion transmission
- Gears
- Sprockets
- Bearings
- Ball bearings
- Needle bearings
- Tapered roller bearings
- Thrust bearings
- Miscellaneous
- Cams
- Jig bushings
- PEM® inserts
- Pins
- Retaining rings
- Structural shapes (aluminum and steel)
- Timing belt pulleys
- Unistrut® structural members
The SOLIDWORKS Toolbox vs. The McMaster-Carr Add-In
A few common questions we get when discussing the Toolbox are: what about other options? Does the SOLIDWORKS Toolbox reign supreme? Or are there similar alternatives?
The most popular alternative we see people using is the add-in from McMaster-Carr — an equipment, tool, and material supplier that I’m sure most of us are familiar with.
Though, as a quick side note, I hesitate to call it an “alternative” to the Toolbox — more on that below.
The McMaster-Carr add-in is free and is directly linked to the McMaster-Carr catalog.
We even have a blog post discussing the McMaster-Carr add-in and how to use it. It can be very useful, but it’s important to establish that it’s a very different tool than the SOLIDWORKS Toolbox.
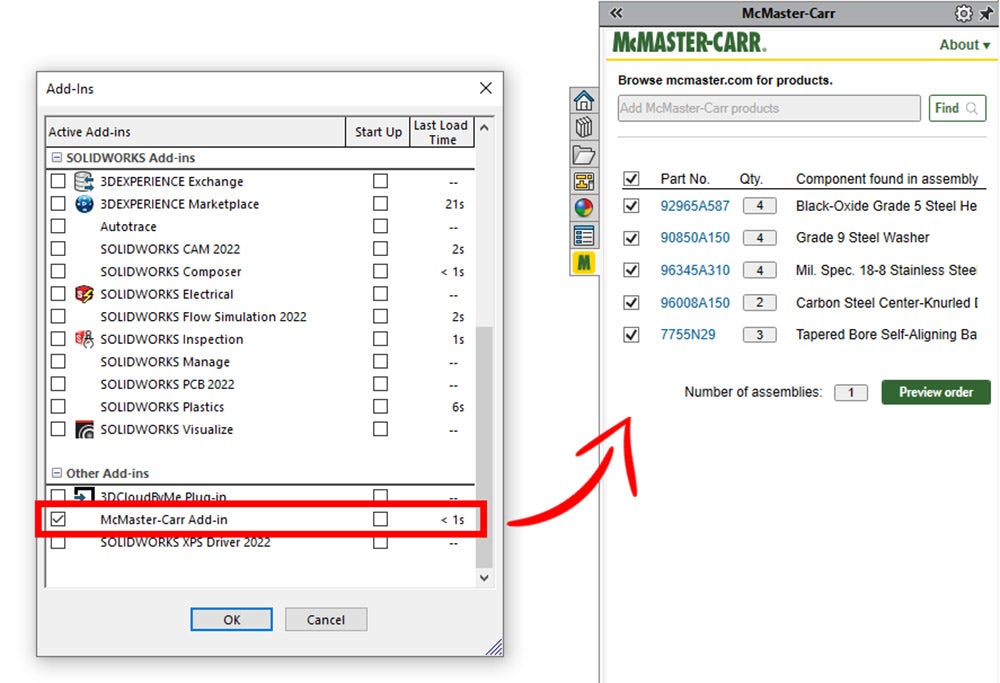
The McMaster-Carr add-in is a procurement tool to get McMaster-Carr models into your SOLIDWORKS assemblies, so you can eventually purchase those components from McMaster-Carr.
McMaster-Carr is a great supplier, no doubt, but that’s precisely why the company has developed its add-in: to supply you with its products. That’s opposed to the SOLIDWORKS Toolbox, which, as we’ve seen, is focused on managing and automating standardized components.
Determining which one is right for you comes down to your use case. Are you a hobbyist or a one-person show who doesn’t need a robust system for tracking and automating fasteners?
Then the McMaster-Carr add-in could be a good fit. It works fine for those of us who just want to grab parts here and there. It doesn’t track, manage or automate fasteners like the Toolbox, but it is good for quickly grabbing CAD models and ordering parts.
Does the SOLIDWORKS Toolbox Fit My Application?
The Toolbox comes into its own when our needs go beyond a simple procurement tool.
To determine if the Toolbox is the right choice, we must ask ourselves these types of questions:
- Do we want to manage our fasteners and how they are used?
- Do we need a QMS? Or do we already have one in place?
- Do we want to integrate our fasteners with our PDM Vault?
- Do we work with large or complex assemblies where fastener automation could save significant modeling time?
- Do we need a shared library to ensure that every engineer or designer is always using the correct part numbers and models every time?
If you answered “Yes” to any of these questions, the Toolbox will likely be the right choice.
If you have a SOLIDWORKS subscription with us, you also have access to Technical Support directly from our engineers here at Hawk Ridge Systems when you run into an issue when using the Toolbox. Unfortunately, the same can’t be said of the McMaster-Carr add-in, as it is a third-party add-in.

Ultimately, the SOLIDWORKS Toolbox and the McMaster-Carr add-in can be valuable tools. It’s important to evaluate your application and needs when determining which one is the right fit for you.
Learn More About Toolbox Functionality
The SOLIDWORKS Toolbox is much more than a mere collection of CAD models. It’s a robust tool to configure, manage and automate standardized components like fasteners.
The Toolbox helps bring efficiency to our design work in SOLIDWORKS. Hopefully, you now have insight into how the Toolbox improves your workflow.
Given how comprehensive the Toolbox is, there’s no way we could cover everything it does in a single blog post. So, to learn more about the Toolbox (and related tools), check out our other blog posts and videos below.
Further reading:
- How To Add Nuts and Bolts Quickly with Smart Fasteners in SOLIDWORKS
- How To Use the McMaster-Carr Add-in for SOLIDWORKS
- SOLIDWORKS: Difference Between Hole Wizard, Advanced Hole and Hole Series
- SOLIDWORKS: Fixing Incorrectly Sized Toolbox Hardware
YouTube videos:
- SOLIDWORKS: Toolbox Your One-Stop Shop
- SOLIDWORKS Fixing Incorrectly Sized Toolbox Hardware
- Webinar – SOLIDWORKS PDM: Toolbox Customization and Utilization
As always, if you have any questions, contact us! We can also discuss how the suite of SOLIDWORKS software can help improve your workflows and products.