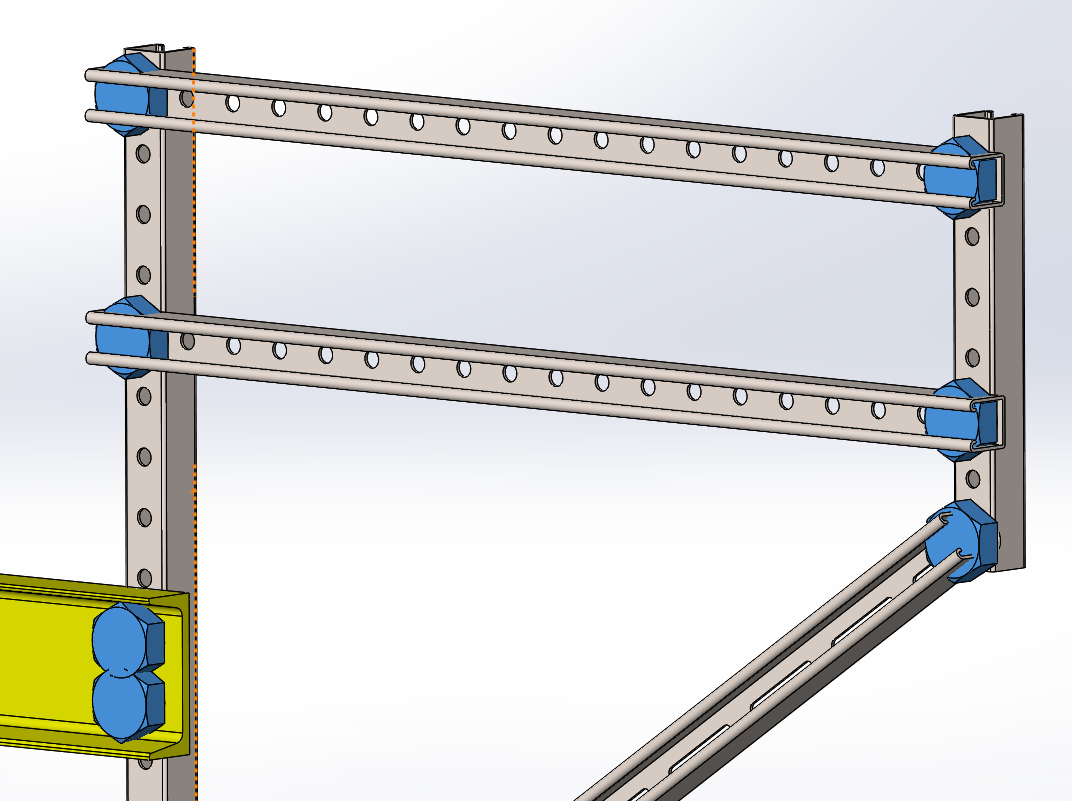
Have you ever opened an assembly to the sight of gigantic bolts, washers, nuts, or other incorrectly sized hardware from the SOLIDWORKS Toolbox? Why is this happening and more importantly how can it be fixed?
Why are my Toolbox components the wrong size?
The Toolbox works through a database that governs what sizes are available for each piece of hardware. When a specific size of hardware is inserted into an assembly, the Toolbox Database generates either a new configuration or new part (depending on your Toolbox settings) just for this size. Note: missing sizes should be created when opening assemblies—if this is a recurrent problem for you, then contacting our Support team is the best solution. But if you just need a quick fix, or a little more understanding of the issue, then continue on!
Why do I get the wrong sized Toolbox components when opening some assemblies?
When an assembly with Toolbox components is opened and the correct size is not generated as a part/configuration the active configuration (or default part) is used instead, leading to the incorrect size. This can happen when collaborating with people who use a different Toolbox database, or after upgrading SOLIDWORKS and choosing to create a new Toolbox.
Fixing this problem:
- Sync your Toolbox with coworkers by using a network location to store the SOLIDWORKS Data folder. First, move the appropriate network folder or create it there when first installing SOLIDWORKS.
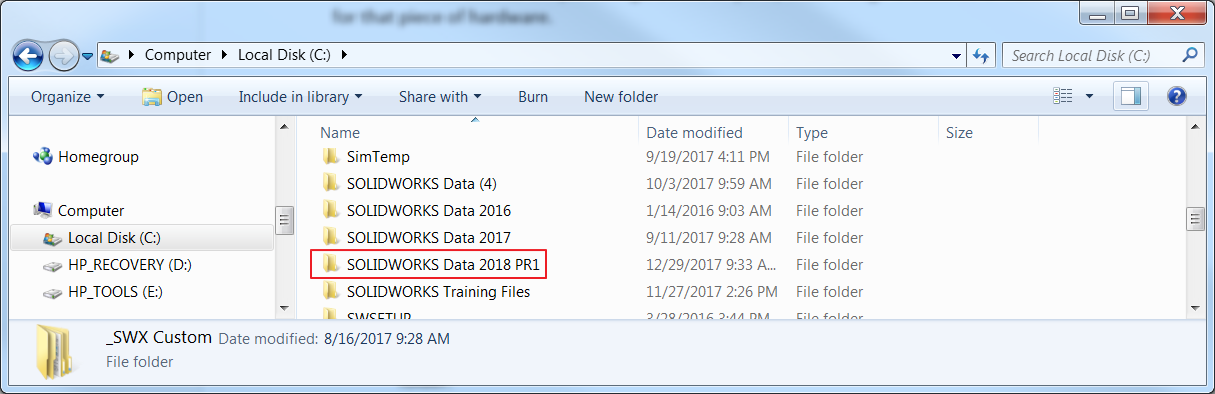
Then make sure that SOLIDWORKS is pointed to it in System Options > Hole Wizard/Toolbox> Hole Wizard and Toolbox folder.

- Generate the sizes you need, when you need them. If you open an assembly with the wrong sizes, right-click a component and select Edit the Toolbox components and choose the correct sizes for one of each of the incorrectly sized types of hardware.
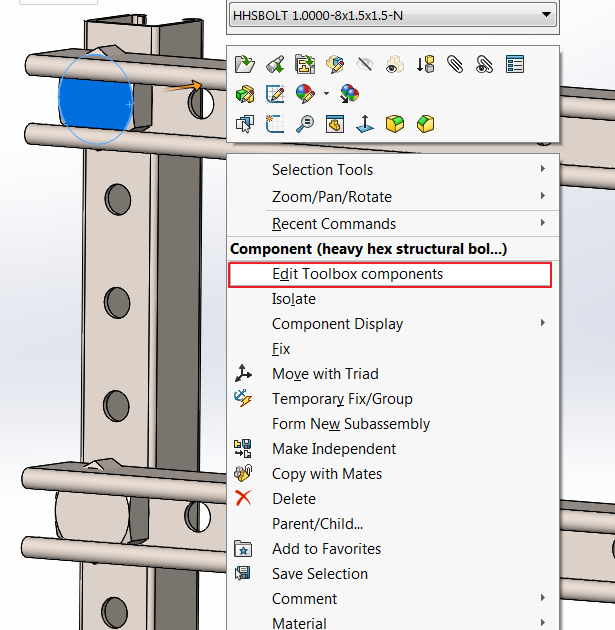
Do not save the assembly. Reload, or close and reopen, the assembly and the correct sizes should appear. These sizes will also now be available for future assemblies.
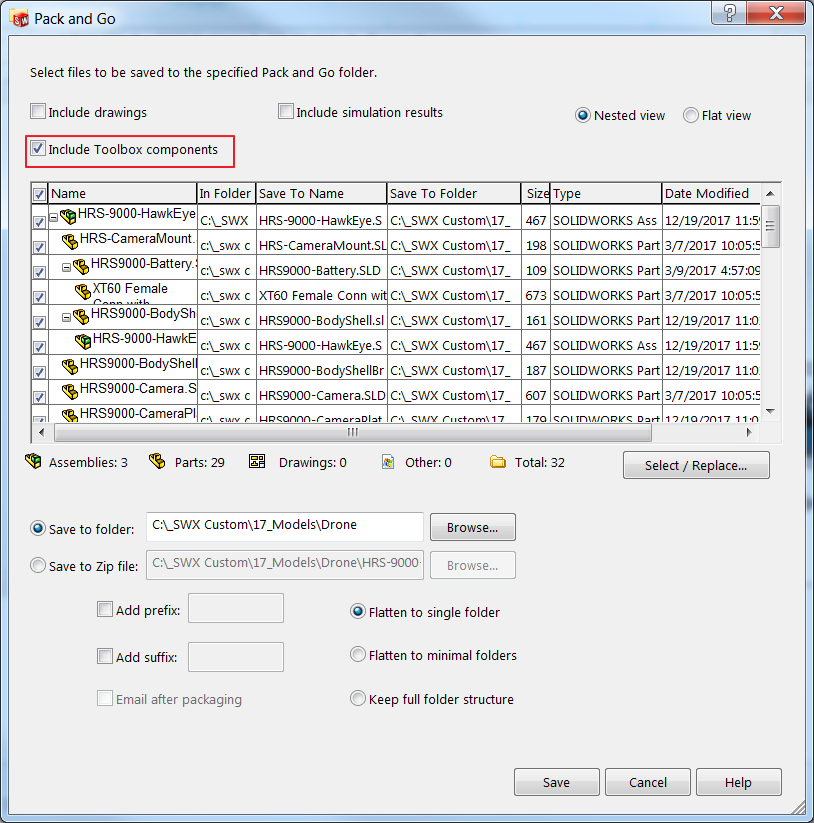
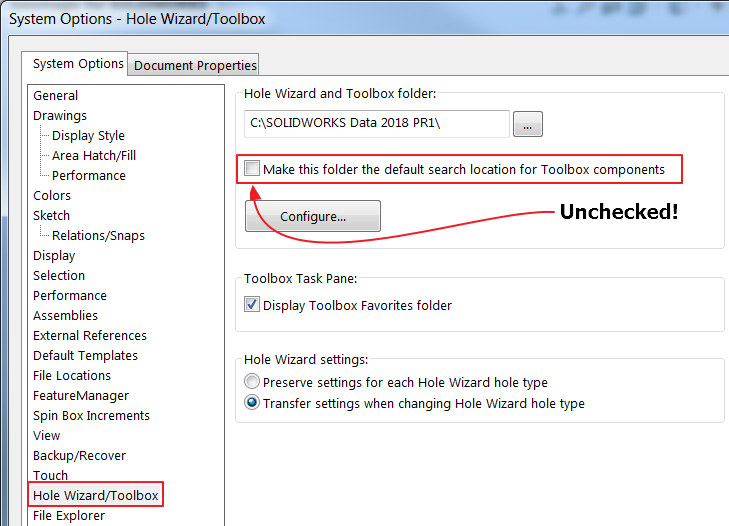
- If receiving an assembly from somebody who you do not share a toolbox with, have the other user check the “Include Toolbox components” checkbox in the Pack and Go for the assembly.
Then, before opening this assembly, go to System Options > Hole Wizard/Toolbox on your machine and uncheck the option “Make this folder the default search location forToolbox components”.
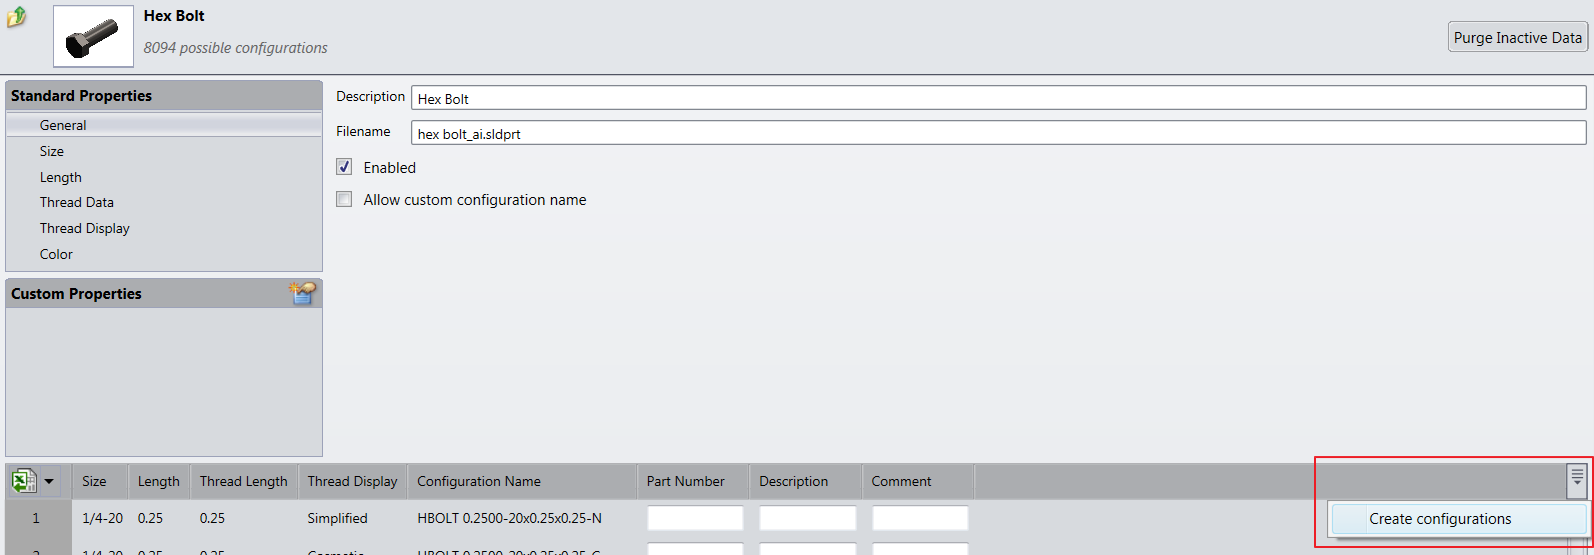
- Generate all possible sizes for specific pieces of hardware. Through the Toolbox Settings, all possible parts/configurations for hardware can be created. This is done per individual types of hardware and generates many parts/configurations, often in the thousands (the ANSI Inch Hex Bolt has ~8000 possible parts/configurations). If you are using configurations, this will dramatically increase the file size of the part.
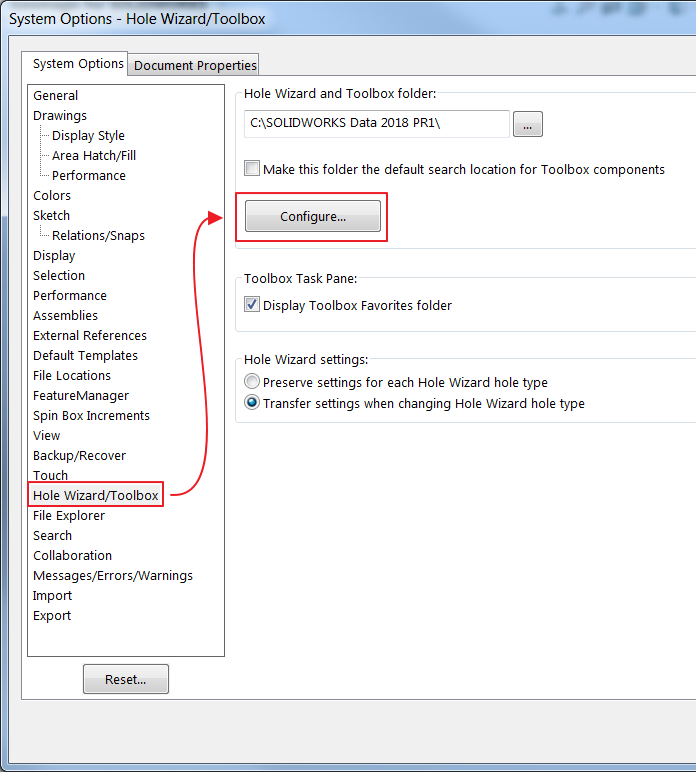
The Toolbox Settings can be found in System Options > Hole Wizard/Toolbox > Configure.
While this may not be an exhaustive list, these are the most common approaches to fixing this issue. Hopefully, one of these methods will work for you and help you spend less time worrying about your hardware and more time working on your assemblies. Remember, if you are seeing this behavior consistently, contact your Technical Support team!
For more information, request a SOLIDWORKS 3D CAD quote or contact us at Hawk Ridge Systems today. Thanks for reading!