
Getting optimal performance in SOLIDWORKS is a must for those of us who use it day to day. When SOLIDWORKS runs more smoothly, so do the rest of our CAD-related design processes.
While there are specific technical options, settings, and considerations for improving SOLIDWORKS performance, this blog post will expand on benchmarking SOLIDWORKS performance.
Benchmarking gives us a way to evaluate performance gains and insight into which settings, changes, and best practices have the biggest impact on performance in SOLIDWORKS.
So, let’s dive in!
1. Exploring Benchmark Tools for SOLIDWORKS
Benchmarking allows us to measure the performance of a system. For computers, this is typically done with software specifically designed to stress the limits of its hardware.
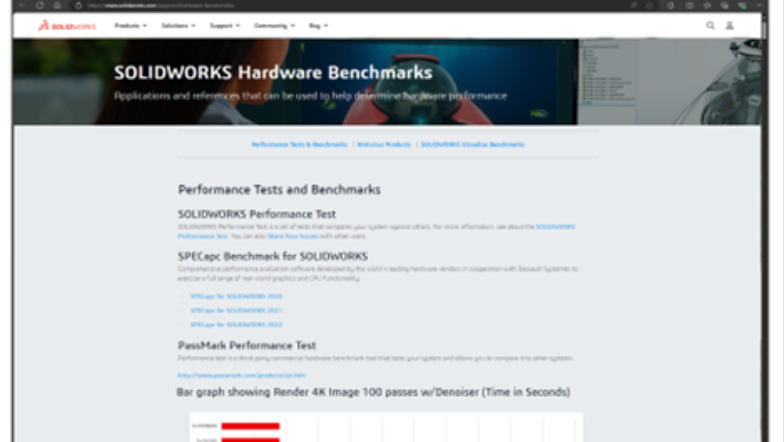
Common third-party computer benchmarking tools include Cinebench and PassMark. PassMark is even included as a good hardware benchmark tool on the SOLIDWORKS support page.
A Robust Built-In Option: SOLIDWORKS Rx
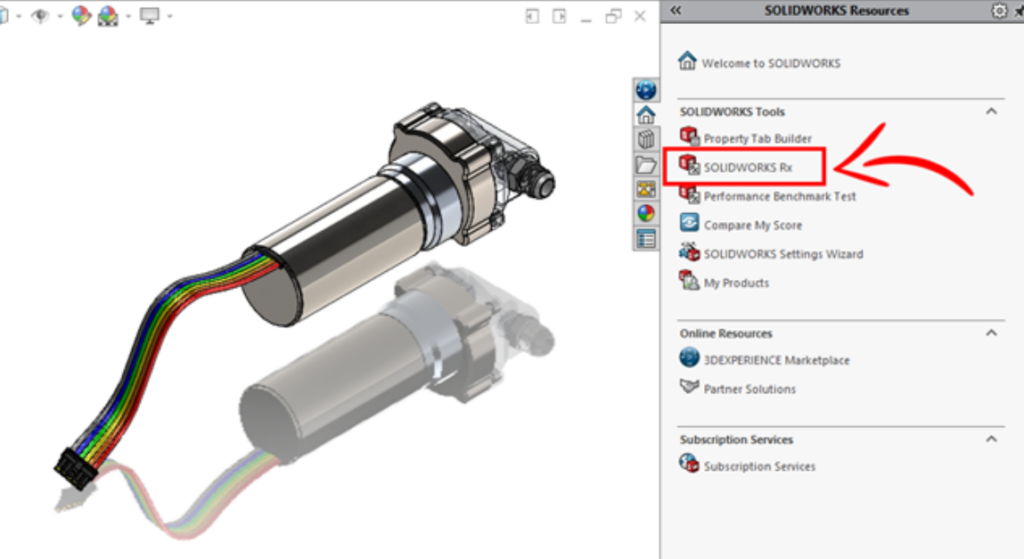
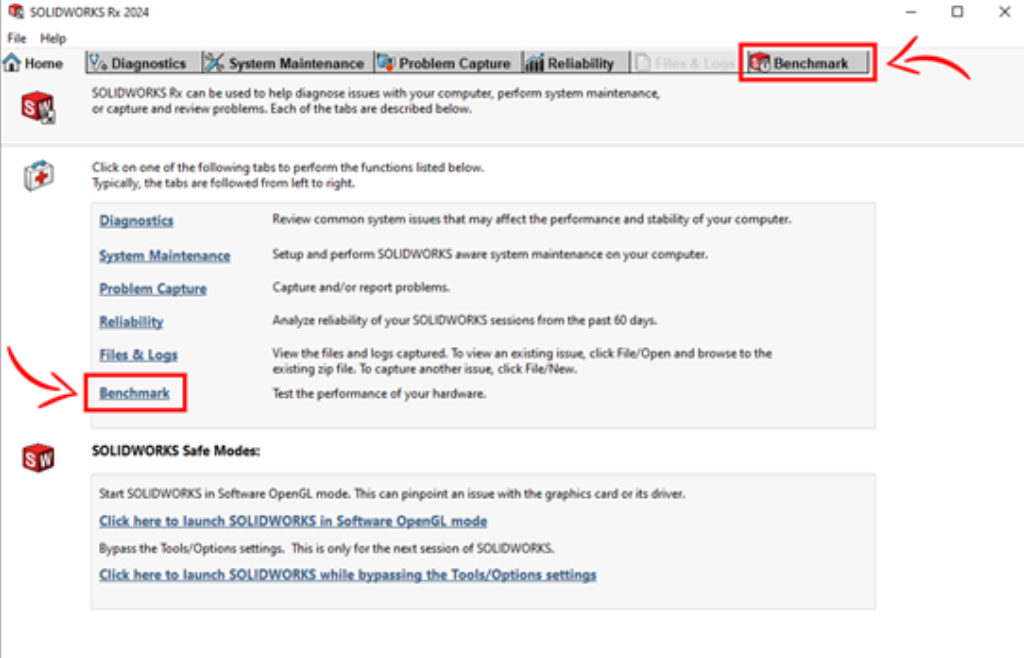
While we can certainly use those same third-party tools to test our hardware, SOLIDWORKS thankfully also gives us a built-in option — a diagnostic tool called SOLIDWORKS Rx.
Within SOLIDWORKS Rx, we can assess system diagnostics, perform system maintenance, and even capture information related to SOLIDWORKS issues for our technical support team to evaluate.
SOLIDWORKS Rx also gives us access to a benchmarking tool. This benchmarking tool is specifically designed to test the performance of our systems for CAD modeling and other SOLIDWORKS operations.
This can be a huge benefit when we are diagnosing, evaluating, or upgrading the systems we use to run SOLIDWORKS.
2. Preparing & Running a Benchmark in SOLIDWORKS Rx
SOLIDWORKS Rx is accessible from the Task Pane within the SOLIDWORKS interface, but it can also be accessed without the need to open SOLIDWORKS. It’s typically accessible directly from your “Start” menu in Windows — simply hit the “Start” button on your Windows taskbar and type “Rx” to search.
If you don’t have a “Start” menu shortcut, the default install location for the SOLIDWORKS Rx tool is in the “Program Files” directory.
Replace “XXXX” with your SOLIDWORKS version year:
“C:\Program Files\Common Files\SOLIDWORKS Shared\XXXX\sldrx\sldrx.exe”
5 Key Preparation Steps for Benchmarking
We recommend starting with a clean slate prior to benchmarking. To do this, we can take the following steps (also listed in the SOLIDWORKS Rx tool itself):
- Perform a “System Maintenance” in the SOLIDWORKS Rx tool to clean out temporary files.
- Reboot your computer prior to starting the test.
- Close any active applications that wouldn’t typically be running when using SOLIDWORKS.
- Allot 30-40 minutes to run the test
- Avoid using your computer during the test. Oftentimes, we recommend running the test over lunch or at the end of the day, so it doesn’t take up valuable working time.
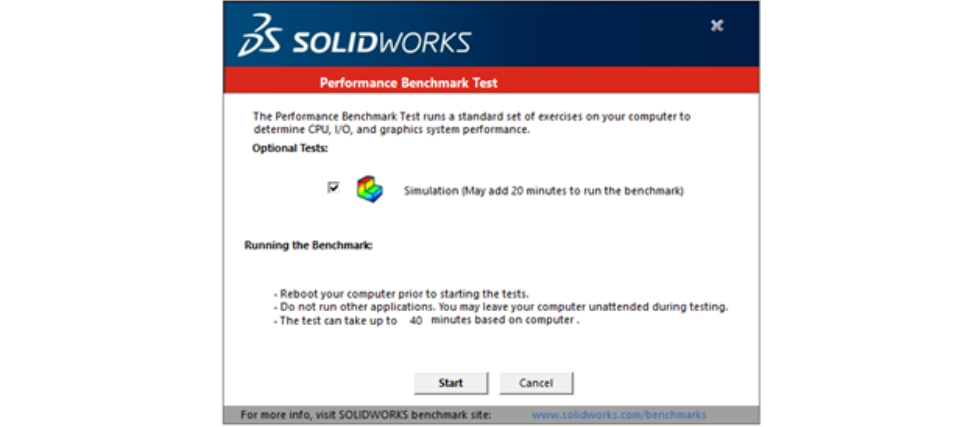
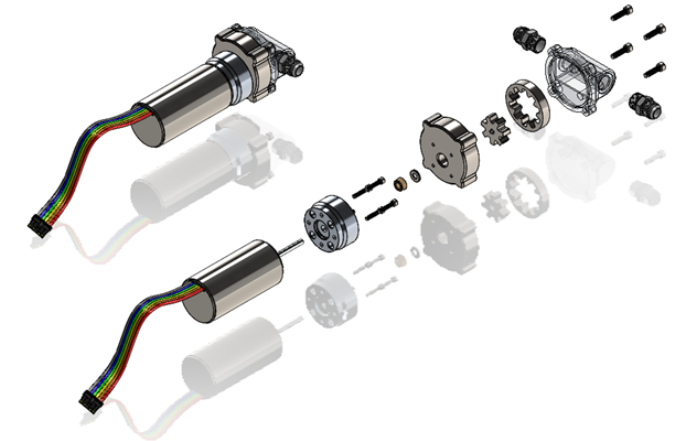
While the benchmarking tool is running, it will open various test files, including parts, assemblies, and drawings, and then it will perform various functions to test the speed of our system.
When complete, we will get a dialog showing the results of the test is shown. The reported results are given as time taken to complete pre-defined tasks (in seconds) — lower is better.
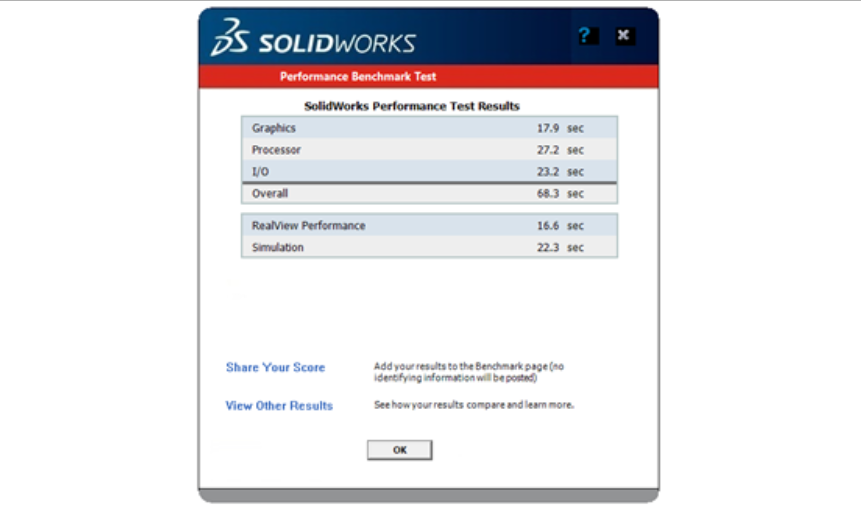
3. Understanding Benchmark Test Results
To better understand the results from the SOLIDWORKS performance benchmark test, below is a breakdown of each item and what is measuring:
Graphics
- Quantifies the performance rotating, zooming, panning, and other graphical manipulation of a model in SOLIDWORKS.
- Affected by GPU performance and CPU speed.
Processor
- Measures the performance of CPU-based activities, such as rebuilding features and creating drawing views.
- Affected by CPU speed.
I/O
- Measures the performance of local read or write speeds of SOLIDWORKS files to your hard drive.
- Affected by hard drive read or write and CPU speeds.
Overall
- The sum of Graphics, Processor, and I/O result times.
Rendering
- Depreciated. Previously used to classify PhotoView 360 performance.
RealView Graphics
- Measures the graphical performance when using RealView graphics (only available for supported GPUs).
- Affected by GPU performance, with lesser dependence on CPU speed.
Performance Simulation
- Quantifies the time required to run linear static finite element analysis (FEA) studies in a design study.
- Affected by CPU speed, number of cores, and hard drive read or write speeds.
4. Optimizing Your Computer Hardware
So, now that we know how to benchmark our systems and metrics for measuring SOLIDWORKS’ performance, what now?
It’s no surprise that our specific computer hardware has a significant impact on SOLIDWORKS performance. In general, better hardware equals better performance.
If you are in the market for a new system, benchmarking can help us determine what system upgrades will give us the best bang for our buck.
On the SOLIDWORKS site, we can compare our own performance results with those shared by other users. This gives us extra insight into how different systems perform and can be a big help when shopping for a new system.
As you may have guessed, CPU speed, the amount of RAM, and the performance and architecture of our graphics cards (i.e., workstation versus gaming GPUs) all have an impact on overall system performance.
CPU speed generally has the greatest impact on overall performance as it affects nearly all processes in SOLIDWORKS.
Check out our other resources for in-depth details on recommended hardware for SOLIDWORKS:
- Best Hardware for SOLIDWORKS
- Get the Best SOLIDWORKS Performance From Your Hardware
- Improve Performance with Optimal Hardware and Settings
- SOLIDWORKS Recommended Hardware Guide
- SOLIDWORKS Comprehensive Hardware Guide
5. Optimizing Your System Settings
On the other hand, we also have options if we simply want to work more efficiently with our current system. By optimizing our settings in SOLIDWORKS we can improve overall performance. And with the SOLIDWORKS Rx benchmarking tool, we have metrics by which to measure those improvements.
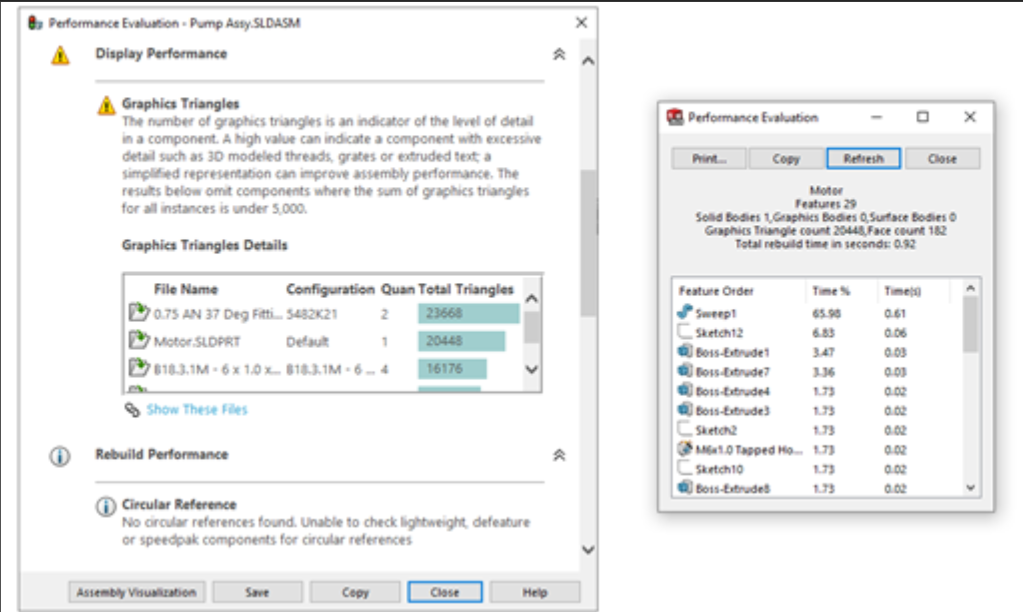
Performance Evaluation Tool
The Performance Evaluation tool in SOLIDWORKS is also useful for improving the performance of specific models. This tool allows us to evaluate things like rebuild times, open times, and other performance data for specific parts and assemblies.
We now can even evaluate graphics triangles (a measure graphical of complexity) in parts, following the 2025 release of new SOLIDWORKS enhancements.
Additional Performance Optimization Resources
We highly recommend reading our blog post on 8 Ways to Optimize SOLIDWORKS for Fast Performance. In that article, we list virtually all SOLIDWORKS settings (both “System Settings” and “Document Properties”) that we can adjust to improve performance. We also go over the specific system settings, software, add-ins, and Windows parameters that improve your performance.
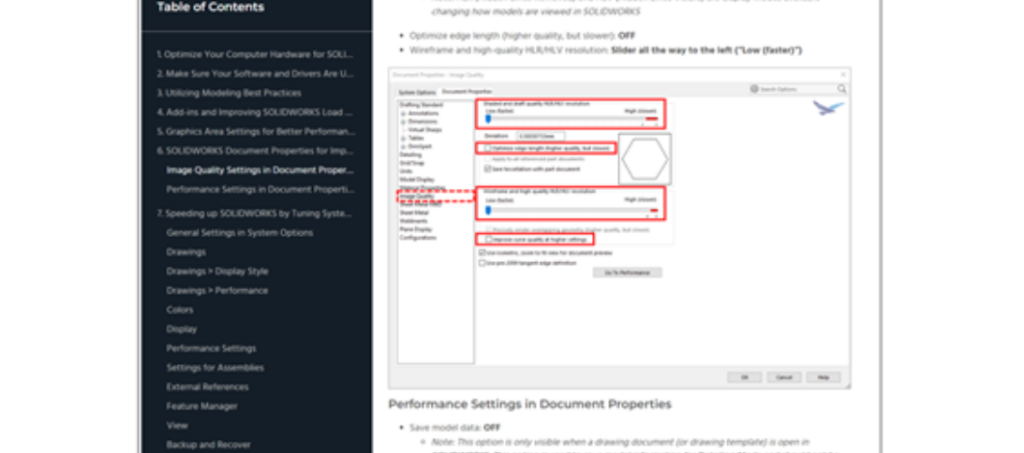
Before changing the settings discussed in our optimization blog, consider starting with an initial benchmark, so you can see how performance is improved as you make changes.
It’s also a good idea to learn about what each of the settings does before changing them. Certain settings can affect various workflows adversely.
Here are a few more great resources to help us better understand and improve performance in SOLIDWORKS:
- Increase Your Assembly Performance in SOLIDWORKS
- Improve Performance with Optimal Hardware and Settings
- SOLIDWORKS: Improving Assembly Performance with Simplified Components
- Improving SOLIDWORKS Drawing Performance with Settings
Real System Test: How Changing Our Existing Systems Affects Performance
Now, we’ll take a look at a case study using a real system to test the outcomes of optimizing our settings.
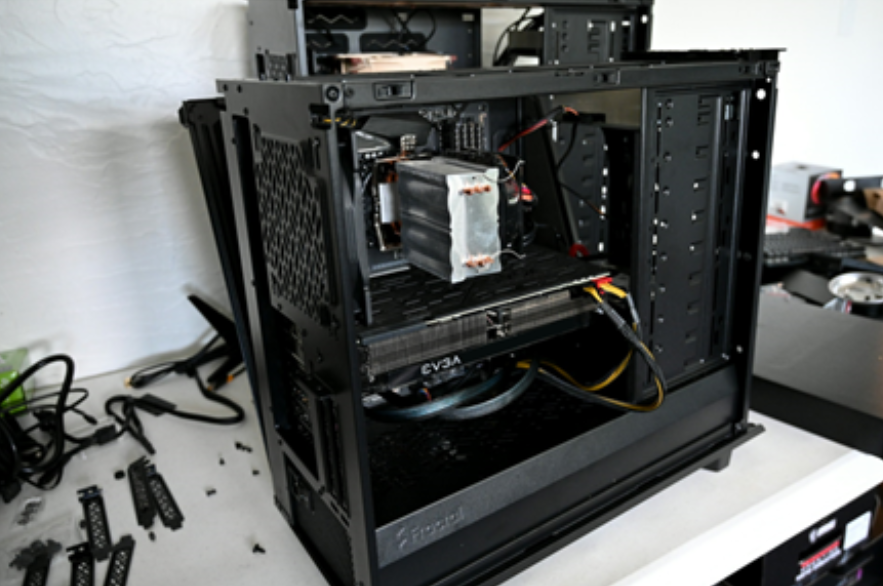
For our case study, we took a brand new, fresh out of the box computer with a new installation of SOLIDWORKS 2024. This gave us a clean slate to work with and allowed us to fully capture how changing settings can impact SOLIDWORKS performance.

The system we tested is a workstation laptop, specifically procured to run SOLIDWORKS and related software.
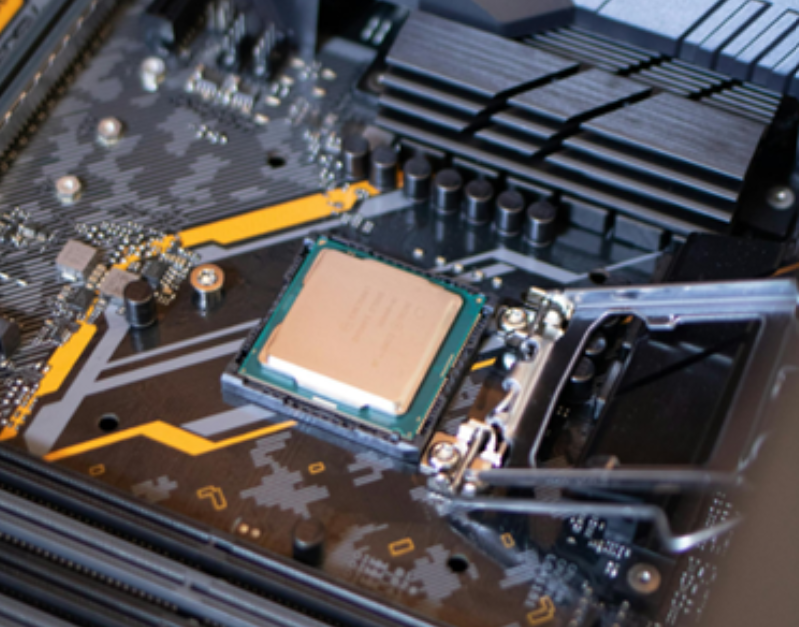
The test computer had the following specs:
- Model: ThinkPad P16 Gen 2 Intel (16″) Mobile Workstation
- Processor (CPU): 13th-Gen Intel Core i9-13950HX vPro
- Memory (RAM): 32 GB DDR5 (2 X 16 GB)
- Graphics Card (GPU): NVIDIA RTX™ 4000 Ada Generation Laptop GPU 12GB GDDR6
- Storage: 1 TB SSD M.2 2280 PCIe
- Operating System (OS): Windows 11 Pro 64
- SOLIDWORKS version installed: SOLIDWORKS Premium, 2024 SP 2.0
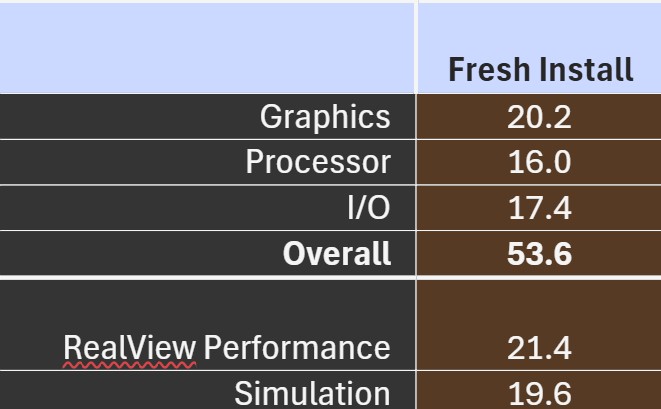
The results of the initial benchmark (with as-installed settings) are below (given in seconds — lower is better!):
Following our own advice from our performance optimization blog, we applied the necessary settings to optimize performance and improve benchmarking results. This included adjusting the default Document Properties, SOLIDWORKS System Opt, and optimizing Windows settings.
Through these settings changes alone, we were able to achieve some fairly significant improvements in performance:
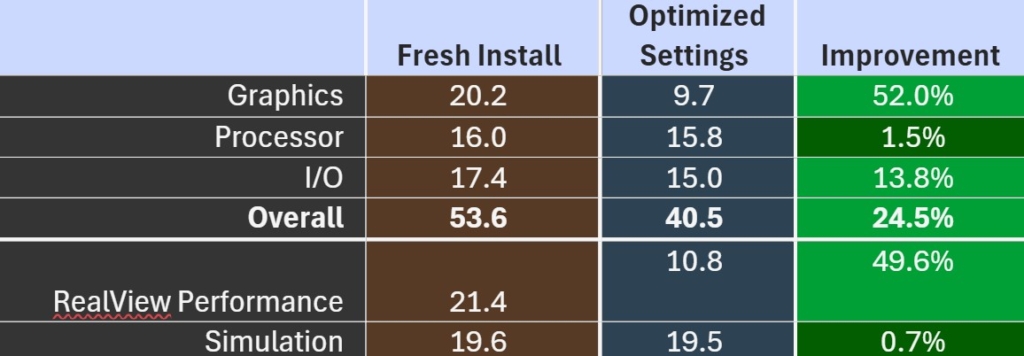
These results highlight the fact that, even with a brand-new computer built specifically for CAD like our test system, there is room to improve performance simply by adjusting our settings.
That’s a good indicator that our optimization efforts work. Just simply optimizing our settings, we can unlock better performance on our own individual machines. On an older system, the performance gains may be even greater.

Where We See the Biggest Performance Gains
Based on our findings in the case study, we saw the biggest improvements in the areas of Graphics, I/O (Input/Output), and RealView Performance, giving us a nearly 25% improvement in overall performance.
While many of the settings played a role in improving performance, the settings below are the ones that resulted in the biggest performance gains during our testing.
* Important Note: Your mileage may vary depending on your individual system — refer to our performance optimization blog for more information.
Best Performing SOLIDWORKS Settings
- System Options > Colors > Background appearance:
- Plain (Viewport Background color above): ON
- System Options > Display:
- Anti-aliasing: None
- System Options > Performance:
- Verification on rebuild (enable advanced body checking): OFF
- Automatically optimize resolved mode, hide lightweight mode: ON (2023 and later versions)
- Curvature generation: Only on demand
- Level of detail: Off
- Enhanced Graphics Performance: ON
- System Options > Assemblies:
- Use Large Assembly Settings when the number of components exceeds: ON
- Threshold: 100
- ALL Large Assembly Settings: ON
- Use Large Assembly Settings when the number of components exceeds: ON
- System Options > View:
- Transitions: OFF (set all settings in this group to OFF)

Best Performing Windows Settings
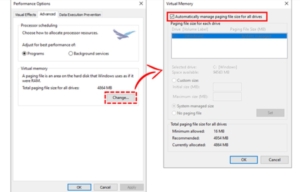
- System Properties > Performance Options > Advanced:
- Adjust for best performance of: Programs
- Virtual Memory > Change: Automatically manage paging file size for all drives
- Note: Ideally our systems should have enough RAM that paging is minimized. But in cases where paging is necessary, the paging file should be located on the fastest drive on your computer (typically C:) and should be a high-performance SDD such as a quality NVMe.
6. Establish Best Modeling Practices
The last way that we can improve performance in SOLIDWORKS is one that might seem obvious but is sometimes forgotten — and that’s by simply using best practices when we are creating our models.
How we build our models has a significant impact on our day-to-day performance in SOLIDWORKS. By doing things like establishing design intent early and modeling efficiently, we can improve model performance by leaps and bounds.
In general, if we can build our model with fewer features, fully-defined sketches, and more analytic geometry (as opposed to spline or interpolated geometry), our models will perform better.
This also applies to the assembly environment where proper assembly management with sub-assemblies, fewer mates, and less open degrees of freedom will generally improve performance.
Resources for Learning Best Modeling Practices to Improve Performance
To learn more about modeling best practices, our instructor-led training will help you get the basics and more advanced techniques down.
The training courses, such as SOLIDWORKS Essentials, Assembly Modeling, and Advanced Part Modeling, among others, are taught by our CAD-expert engineers with decades of experience in SOLIDWORKS. They have the know-how to provide the most efficient modeling practices that make your life easier.

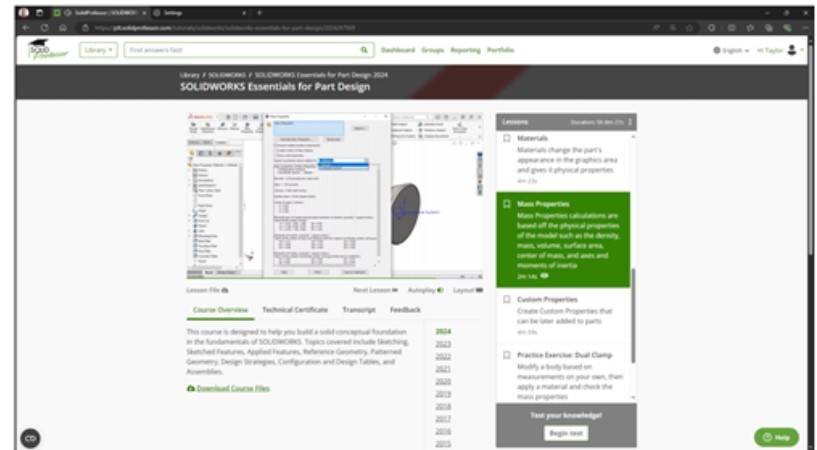
And if self-paced learning is more your style, we partner with SolidProfessor to bring you thousands of engineer-designed courses on CAD, CAM, drafting, engineering theory, and more.
SolidProfessor is a great resource to learn new topics and refresh our current knowledge with new updates and approaches — in fact, we often recommend SolidProfessor in tandem with our instructor-led courses.
If you’re already a Hawk Ridge Systems customer, you likely have access to SolidProfessor already. You just need to simply login. If you’re unsure, get in touch with us, and we’ll get you up and running!
The Final Note
SOLIDWORKS Rx benchmarking tool can be a great way to assess the performance of our computers for our everyday SOLIDWORKS tasks. The benchmark results give us a metric to evaluate and improve our performance.
Whether that be through new hardware, optimized settings, or simply through using best practices, optimizing SOLIDWORKS performance can significantly improve our design workflows by allowing us to model more efficiently.
If you have any questions on SOLIDWORKS performance or simply to see how SOLIDWORKS can be part of the solution to your design challenges, contact us today to discuss your design and CAD processes with our engineers. We are here to help you get on track with the right tools and efficient workflows.