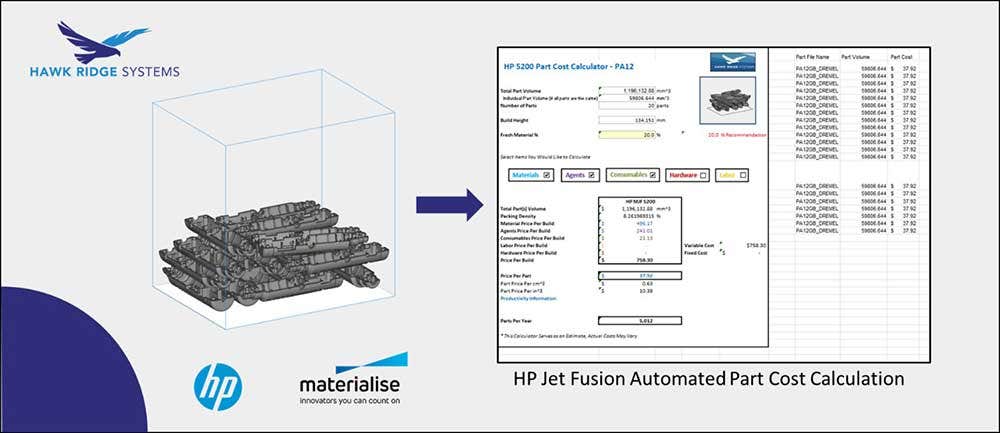
When diving into the world of part cost calculations for your 3D builds, a lot of time can be wasted with pure manual data entry. Materialise Magics, which is a primary nesting software for HP Jet Fusion 3D printers, has integrated tools to automate part cost calculations and report generation. Now with the click of a button, you can understand the true cost of your nested build and even break up that cost into individual part costs if multiple geometries are in a single build. In order to accomplish this task, you will need to polish up your Excel skills. The good news is that we are here to walk you through every step. Let’s get started!
What Features Are Possible?
Let’s take a look at the Hawk Ridge calculator we created for calculating part cost on anHP 5200 3D printer running PA12 material. With Materialise Magics, it is possible to automatically include the following features along with many more:
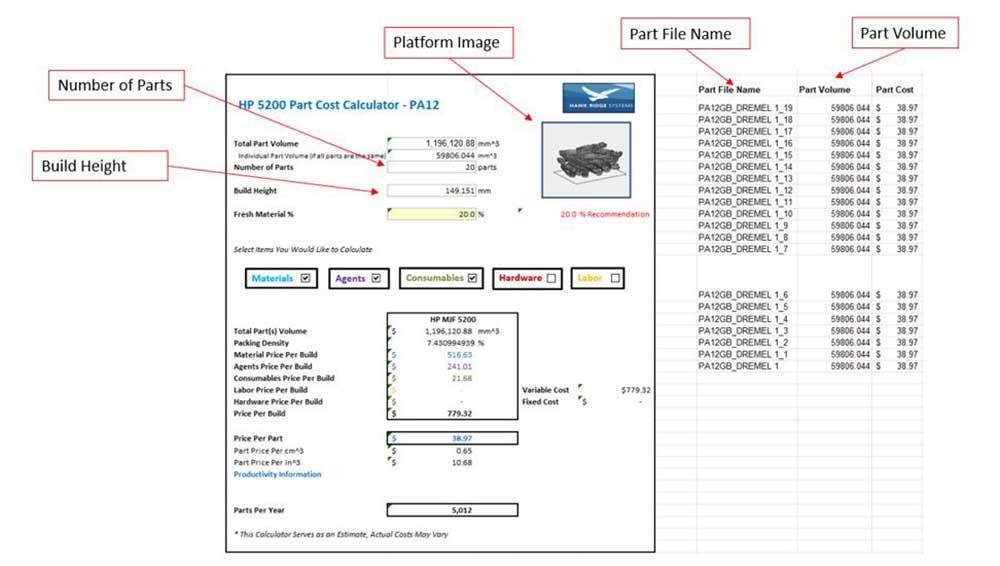
This is all possible using Macro-Enabled Template (.xltm) file formats within Excel to access Materialise Magics macros. Materialise has its own unique set of functions that can be utilized once you download their main template file and build your calculator from that file.
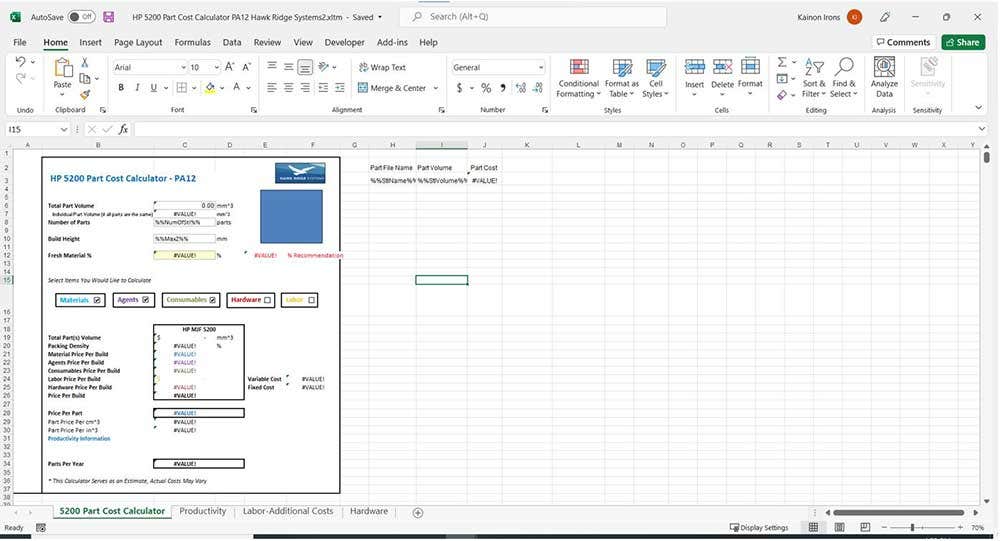
Here is what the same spreadsheet looks like in template form before generating the report from Magics:
How to Integrate and Build a Report Template
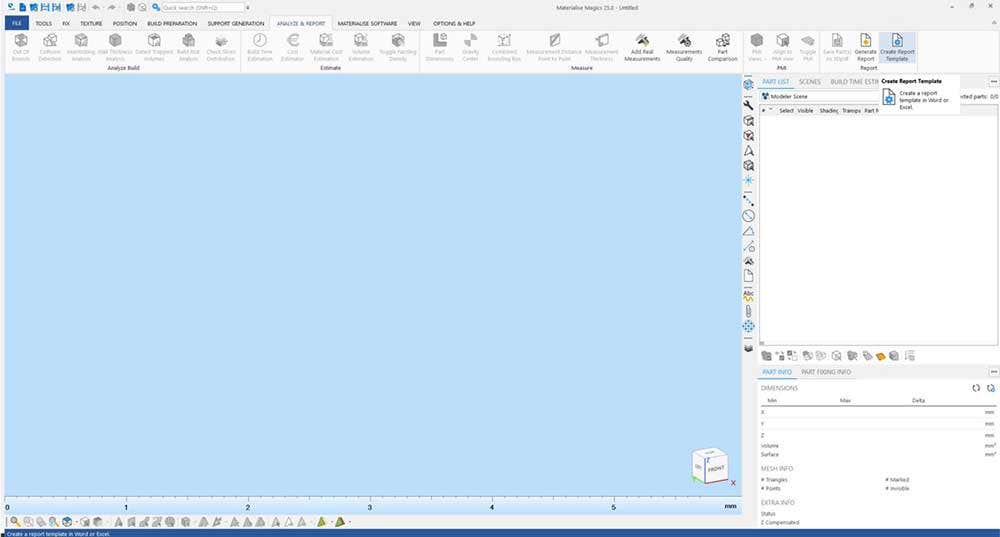
Begin by opening up Magics and clicking on the “ANALYZE & REPORT” tab and then select “Create Report Template.”
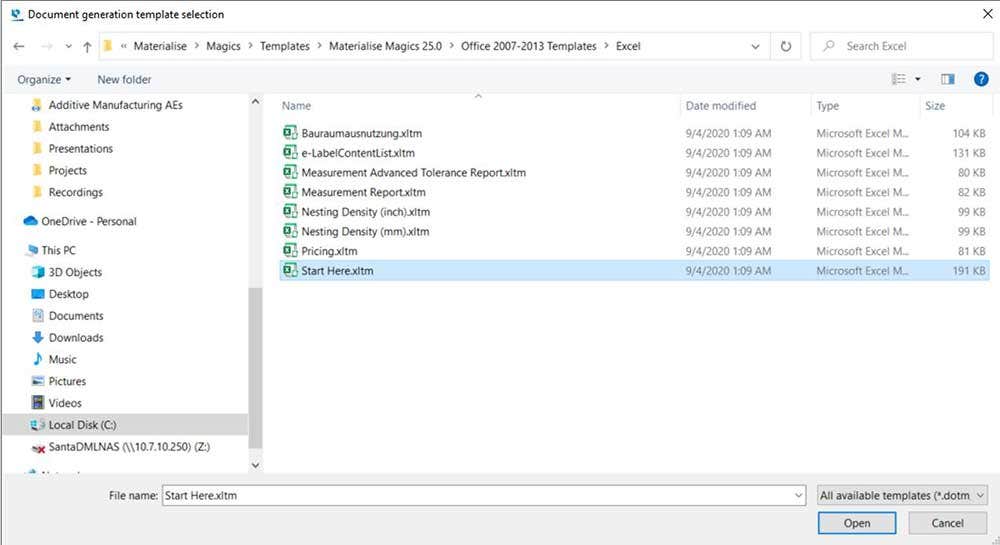
Navigate through the file structure within templates to the latest version of Magics (Magics 25.0 in this case) and then select the Excel templates from the list of Office Templates. Open up the .xltm file titled “Start Here.”
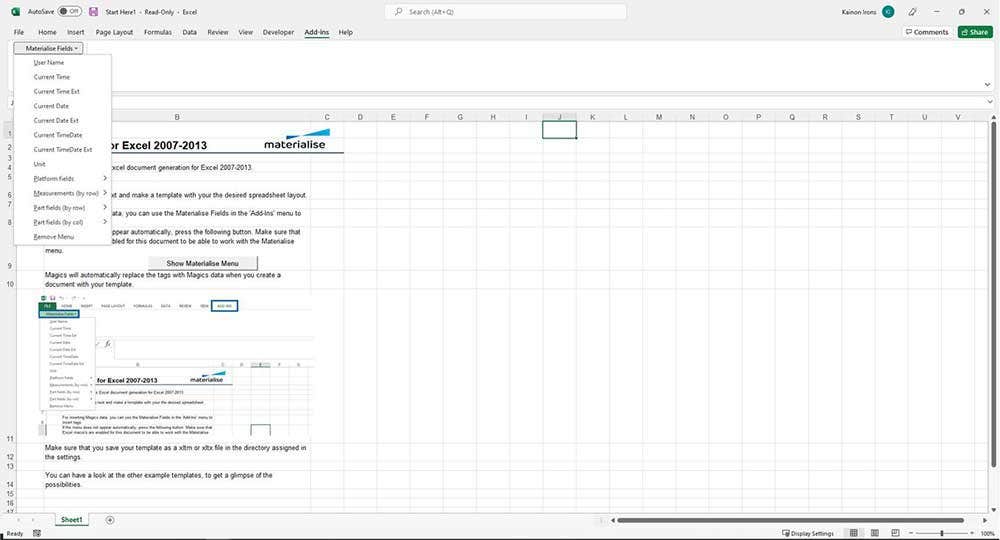
Now that the template is open, you will be able to create or copy and paste your calculator excel into this spreadsheet. To access the Materialise functions, click on the Add-ins tab to view the library of Materialise Fields.
Now save this file as a separate .xltm spreadsheet template and then copy and paste your existing calculator or build a calculator using your desired formulas and structure.
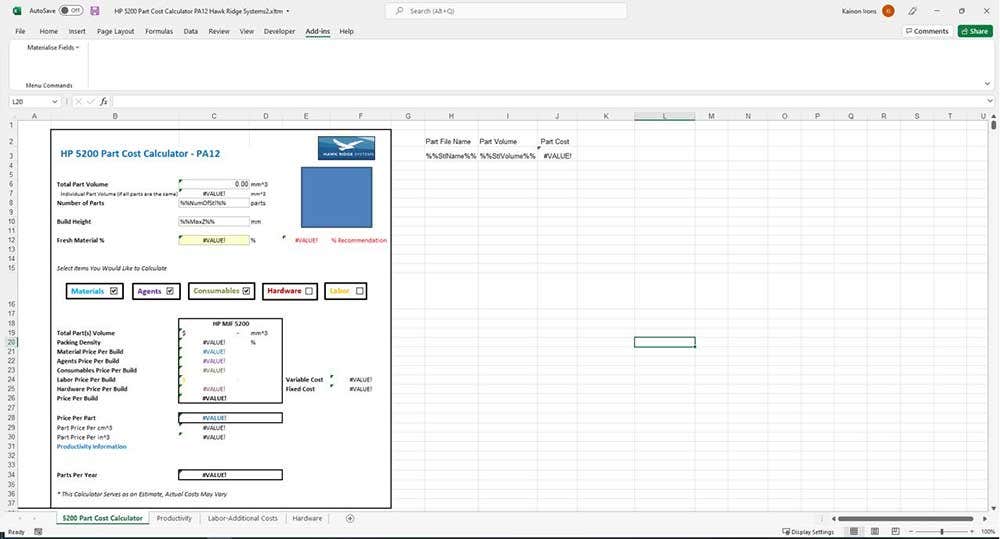
Here are the function codes we used in the creation of our calculator:
Part Volume: “%%StlVolume%%”
Number of Parts: “%%NumOfStl%%”
Build Height: “%%MaxZ%%”
Part File Name: “%%StlName%%”
Platform Image: Select “Platform Image” under “Platform Fields” in the “Materialise Fields” from the “Add-ins” tab.
Next, move your saved template into the Materialise Magics template folder. This can be tricky if your PC has security restrictions. The best way I have found to accomplish this is to drag and drop the file once the template folder pops up when clicking “Generate Report” within Materialise Magics.
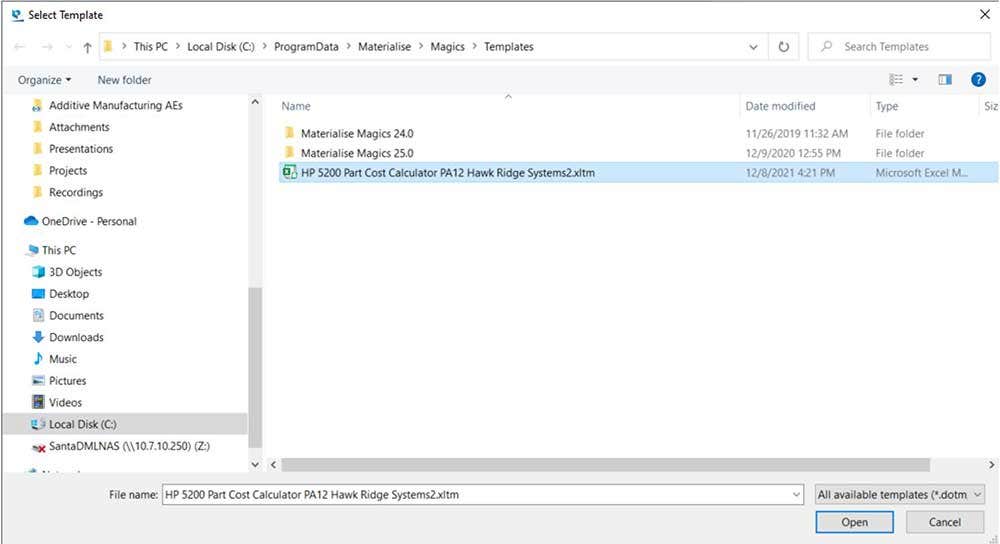
Now you are ready to begin testing the report generation with nested builds.
How to Generate Reports in Materialise Magics
To generate a report, begin by nesting a build for your machine. In this case, we are using the HP Jet Fusion 5200 machine.
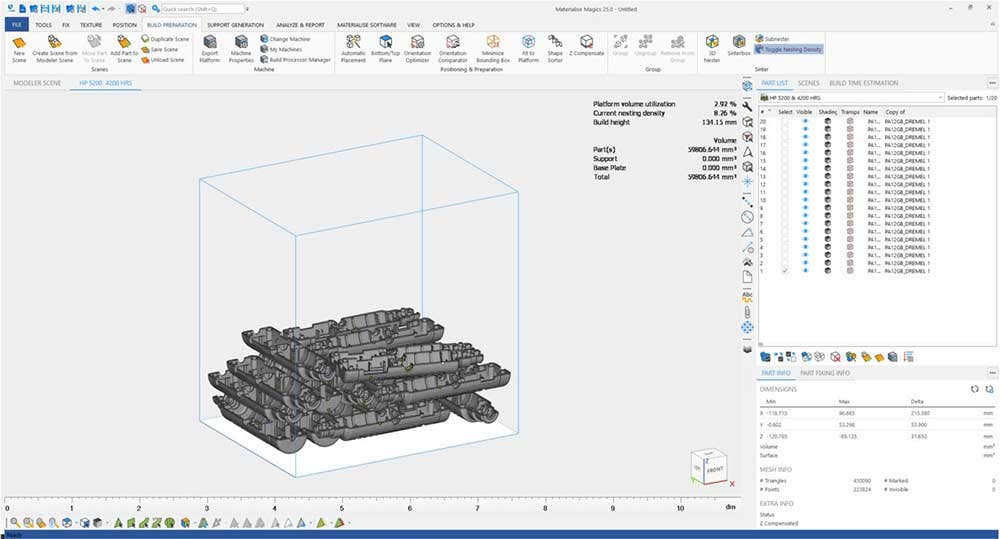
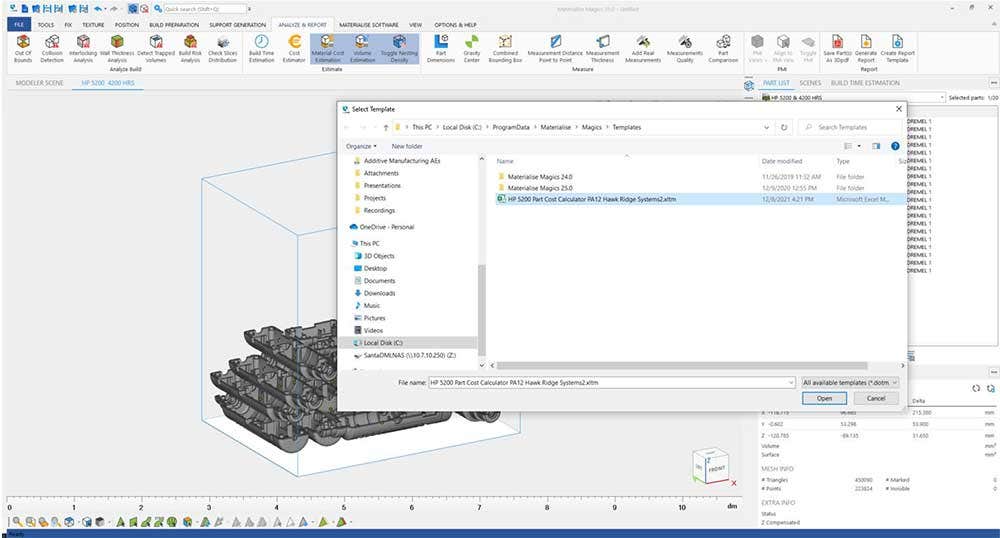
Once the build is nested, click on the “Generate Report” button from the “ANALYZE & REPORT” tab and then select the .xltm template that you have created.
Now you have your automated part cost calculation for your specific build.
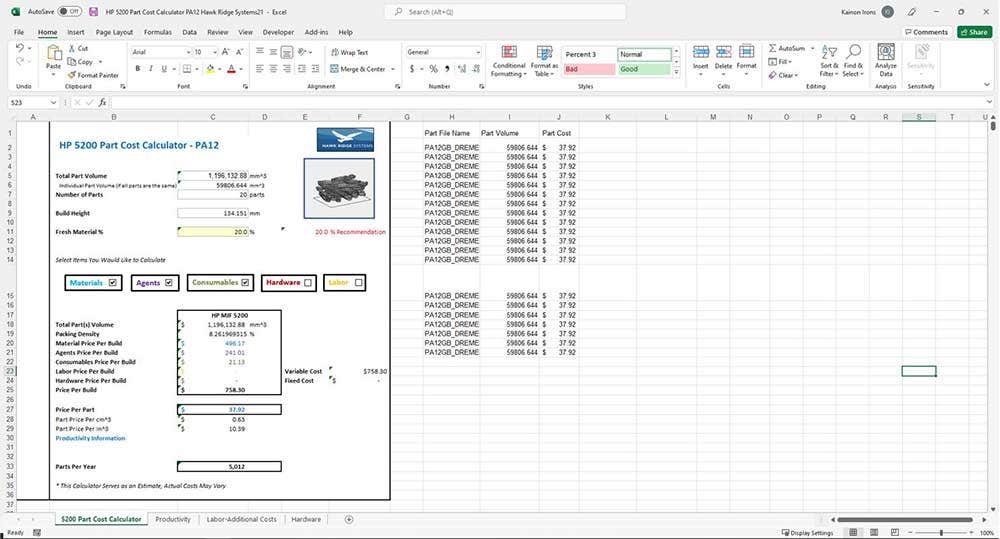
This direct calculation method is going to be the most accurate way to calculate part cost on an HP printed build. For more information regarding part cost calculations on an HP machine, check out this article “Understanding Elements of Part Cost for HP Jet Fusion 3D Printing.”
If you made it this far, this article was just right for you. By now you can consider yourself an excel wizard and you can enjoy the great time savings that you will now benefit from with automating your part cost calculations for specific builds. If you would like to know more about part cost calculation with Materialise Magics or if you would like to explore HP Jet Fusion 3D printing for your business, feel free to contact us at Hawk Ridge Systems today!
