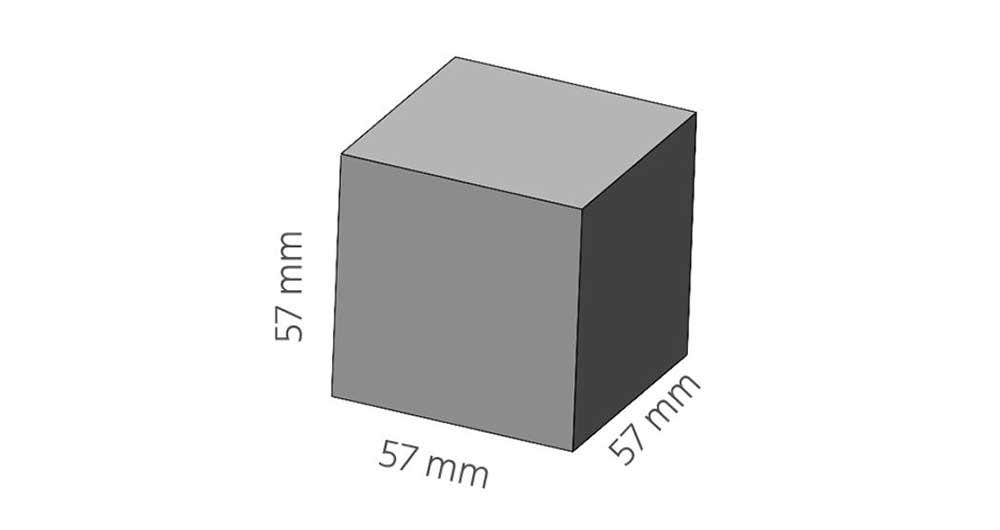
Understanding what drives part cost is key to getting the most out of your HP Jet Fusion 3D printing system. If you have found this post, you likely already know how incredible HP machines are at producing high volumes of cost-effective parts. However, operators and designers can have a major impact on what that part cost will be. What makes this question challenging is that multiple variables influence the final cost. We will cover the basic elements driving part cost so that you are fully equipped to make smart decisions in the design and nesting of your parts. We are going to answer a burning question: “What is the cost to print a 57mm cube out of PA12 on an HP 5200?”
Three Primary Elements that Makeup Part Cost
Materials – Refers to the raw powder being utilized in the machine. Material cost per part is typically calculated from cost/kg of material. Most machines out in the field are running a nylon blend called PA12 that has an 80/20 ratio of recycled to fresh material. Other materials such as polypropylene have even higher ratios of up to 90/10.
Agents – Fusing and Detailing agents are utilized to create parts on the HP 5200. Additional considerations are required for the 500 series machines including CYMK color agents, and bright fusing agents. These items are usually calculated on a cost/mL basis.
Consumables – Several items fall into this category including print heads, cleaning roll, and filters. Essentially this element makes up common wear items on the machine that will need replacement at regular usage intervals.
Other considerations are relevant for most operations such as hardware amortization, labor rates and post-processing costs. Choosing different models of HP machines such as the 5210 or 5210 Pro can also lead to major savings in part cost due to reduced costs for materials and agents.
The Variables
Build Height | Minimize Z Height
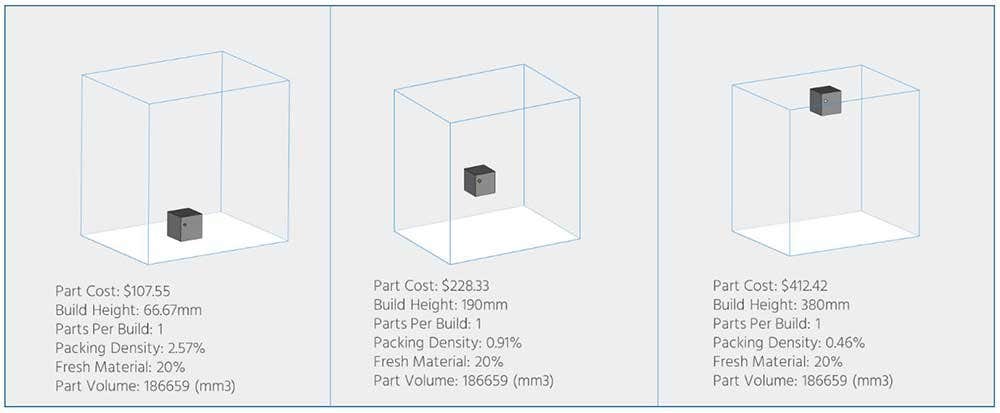
Minimizing the overall height of a build is going to be a primary strategy to reduce part cost. This strategy is effective because it will reduce the amount of overall material utilized in the build. When this height minimization occurs, less fresh material will be required to replenish the build. Part cost in the example below is reduced by 74% from simply minimizing the build height. The cube is still way too expensive for my liking, let’s see what else we can do to reduce the cost.
Parts Per Build | Maximize Parts Per Build
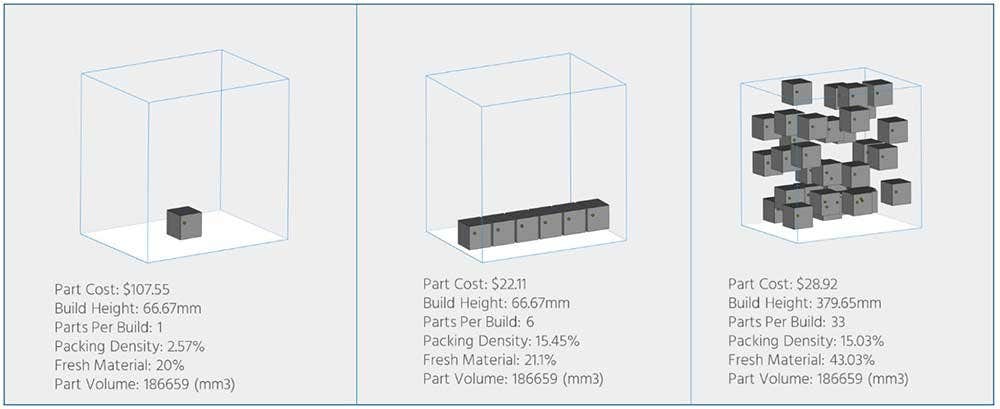
Maximizing parts per build is usually the best strategy to reduce overall part cost. Moving from one part to six parts for a single layer reduces the part cost by around 80%. In certain cases, however, high packing densities will prevent a true max build to occur. Generally, 15% is the upper end of packing densities recommended for an HP machine. In the second and third examples below, high packing density will prevent the addition of more parts. Also, notice how more fresh material is required at higher packing densities (more on this later). To get around this limitation, it is highly encouraged to reduce the volume per part (which will reduce packing density), so that more pieces can fit in a single build. Now we are in the ballpark of a reasonable part cost, but could it be even better?
Part Volume | Minimize Part Volume
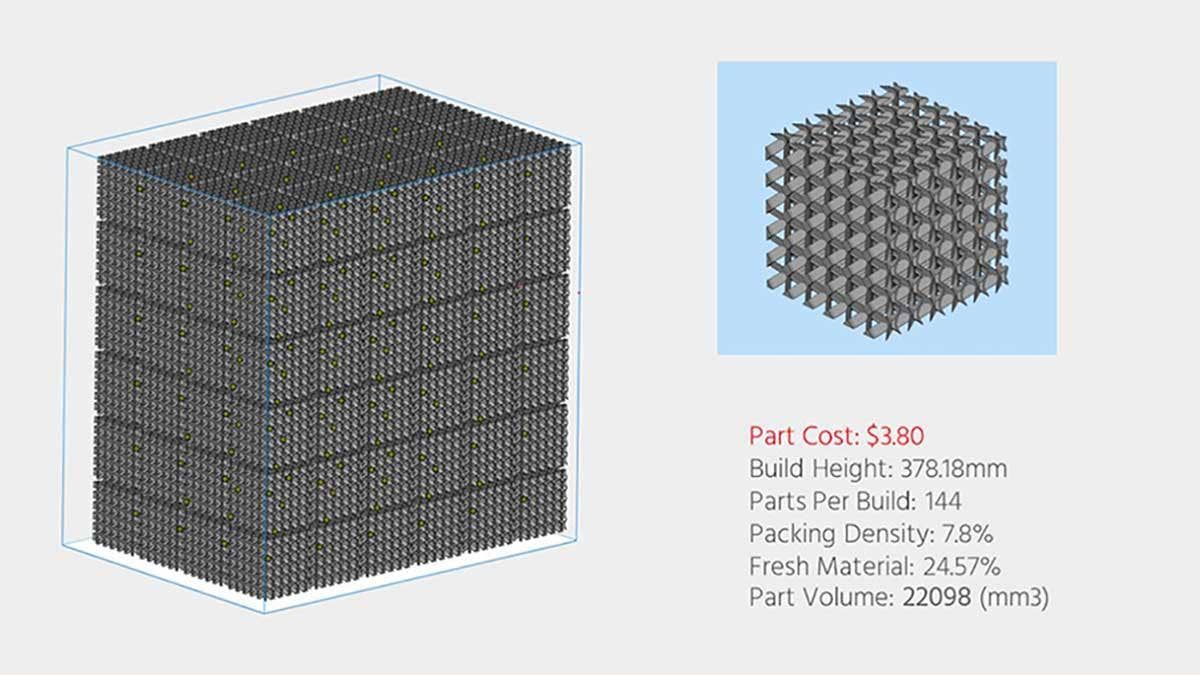
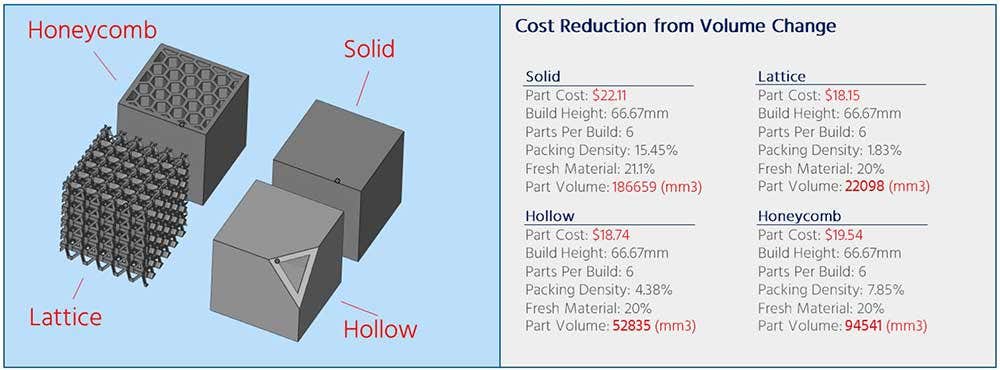
Reducing the volume of material in a part has two major advantages. The first advantage is that less fusing agent will be used in the production of the part. The second is, that reducing part volume will lead to reduced packing density. Reduced packing density allows for more parts per build and/or lower fresh material percentages. While the initial cost savings may be minimal in this case, the ability to add more lightweight parts to the build will pay off nicely. Read to the end and you will see the true power of volume reduction to reduce part cost.
Packing Density | 7-12% for Maximum Efficiency
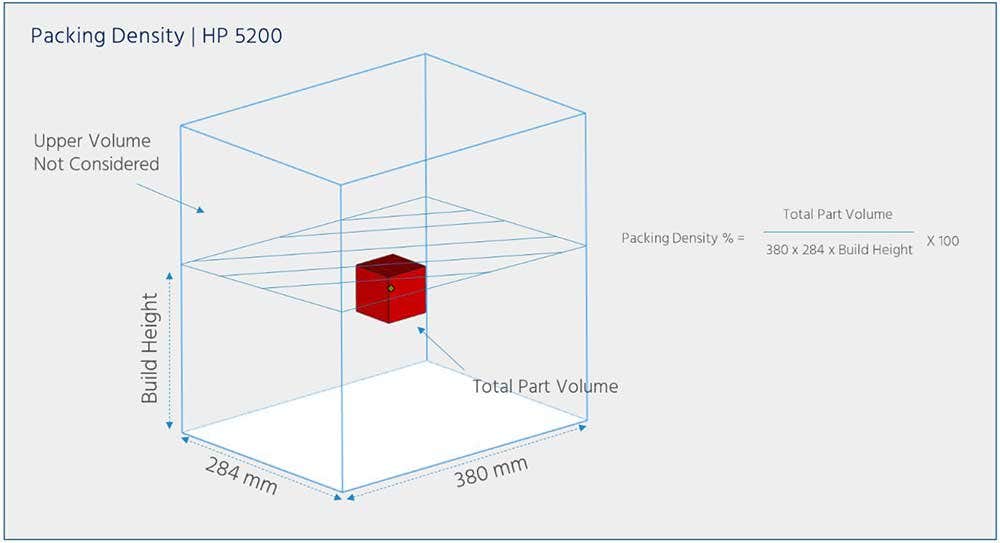
Packing density can be described as the ratio of part geometry to overall volume in a build for a given maximum height. For best efficiency, 7-12% packing density is the general recommendation for an HP system, although moving outside of these recommendations is common. Running the system at lower than 7% leaves fresh powder to waste since the system will recycle material at a set ratio even if densities are low. The lower the density, the more fresh powder will be underutilized. Going over 12% is also common with the trade-off being that higher fresh material percentages are required for long-term powder longevity. Higher densities require more applied heat, which will degrade powder at faster rates.
For most of our customers, a mixture of jobs is common; some jobs are lower than 7% and some higher than 12%. This variation tends to balance out the need to up fresh material usage in many cases. It is recommended to consider 15% as an upper limit for packing densities. 15-20% can produce a large amount of heat that could adversely affect part quality.
Fresh Material Ratios | Lower Fresh % is Best
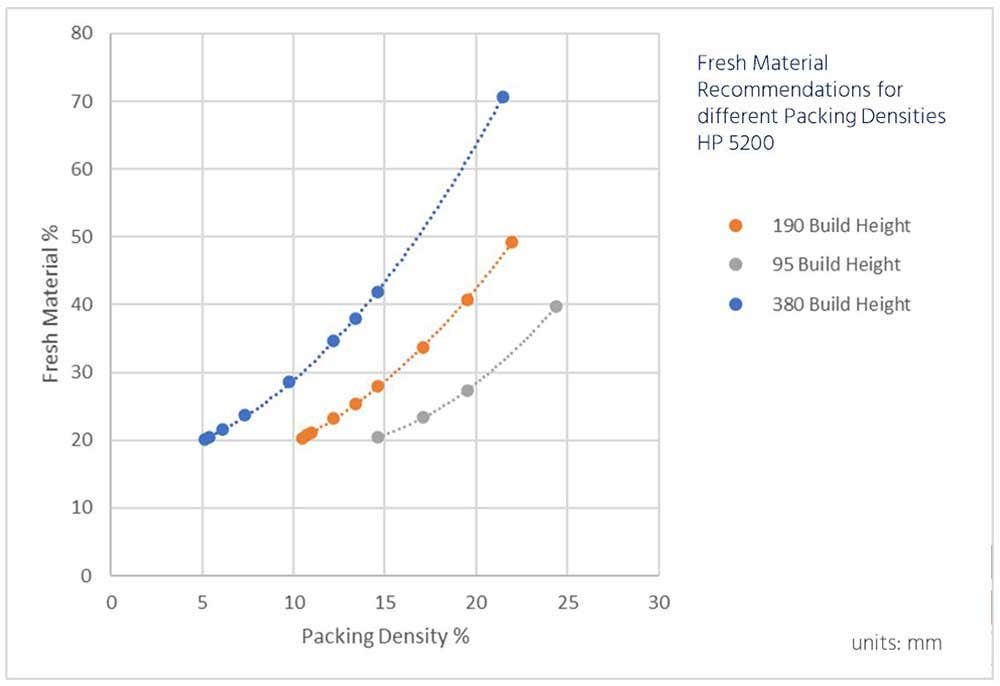
The amount of fresh material required in a build is dependent on the material type, packing density, and build height. PA12 has a base 80/20 ratio of recycled to fresh powder. However, at higher packing densities and taller build heights, it is recommended to increase the fresh material over 20% in this ratio. It is good to shoot for the lowest allowable amount of fresh material for a given material. The builds we run at Hawk Ridge Systems tend to balance out over time and 80/20 works well for us long term for PA12. For those consistently running high-density jobs, fresh material ratios should be carefully considered and raised higher than 20%.
The chart below will show the general curve of fresh material recommendations vs packing density for three different build heights.
Part Cost Calculation Methods
There are a few part cost calculation models being utilized in the field today. In future blogs, I plan on covering these in more detail including:
- Bounding Box Calculation
- Volumetric Calculation
- Packability Estimate Calculation
- Manufacturer’s Method (used in this blog)
- Actual Result Cost Method
The first three methods are great for quoting parts before any packing has occurred, while the last two are more accurate after parts have been nested. As demonstrated from the previous variables, the individual packing of parts can have a major effect on the part cost. However, for companies that provide instant quotes, it is necessary to utilize predictive cost methods before any packing has occurred.
How Much Does It Cost to Print a 57mm Cube?
So now we still need to answer the burning question of how much the cube costs to print. If my dollar is on the line, I am going to take the least expensive method that still will get the job done. Here is how I would print the 57mm cube:
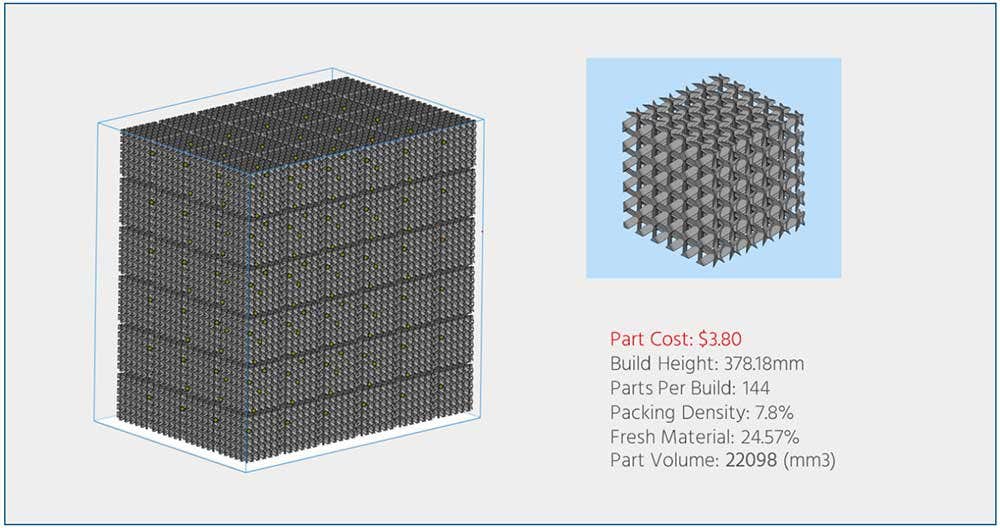
It turns out that reducing the volume of an individual cube through latticing allowed us to fit 144 parts per build compared to only 33 parts per build with the solid version. This volume reduction brought our packing density way down The price went from $28.92 down to $3.80 per part. Pretty incredible right? While latticing isn’t always an option for many applications, chances are that hollowing, honeycombing, and even topology optimization can be utilized in the same way to gain huge savings.
Now it is time to apply these cost-saving techniques to your own operation. The good news if you are just starting out is that we work with these machines day in and day out at Hawk Ridge Systems and we are happy to help. If you would like to learn more about HP Jet Fusion 3D printers, feel free to contact us at Hawk Ridge Systems today!
