One of the great things about having a scanner is running tests. My colleague and I took a trip to the Ape Caves in Washington state to test out the potential of the Artec Ray with mapping cave systems or large tunnels. The large, dark, and cold environment would be a great way to test how the Ray can handle extreme environments while also maintaining its speed and data quality.
Having to scan in dark environments is a common use for LiDAR scanners – from mapping out paths for mining equipment to scanning large spaces with dim-lighting. To confidently speak on the quality of data the Artec Ray can capture, we set out to test in an extreme environment that covers several needs to users who scan with the Artec Ray. Plus, who doesn’t want to explore 2000-year-old lava tubes out in the beautiful Washington forest?
In this blog we’ll discuss the steps we took to create a mesh from several scans within the cave and why certain options were chosen.
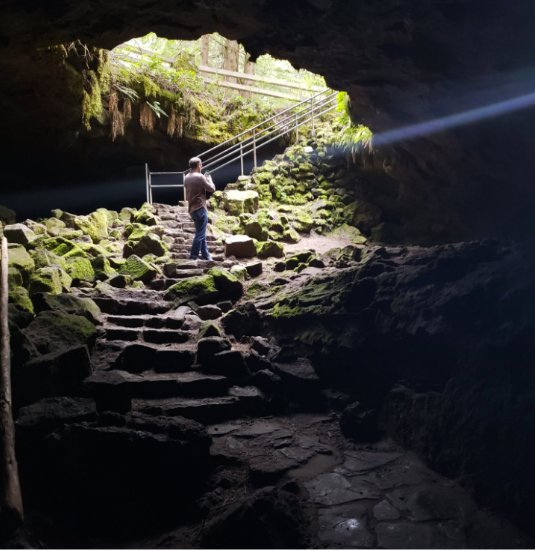
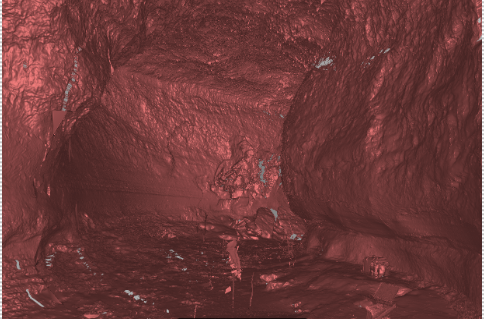
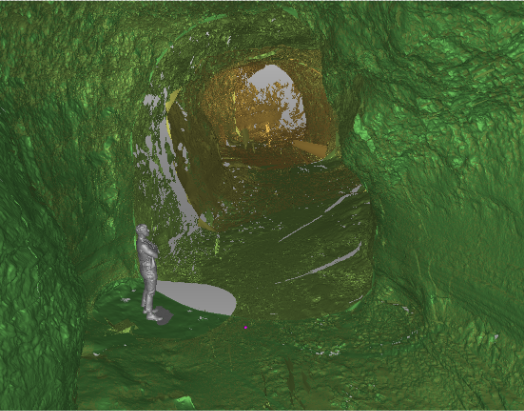
After trekking a few minutes into the two-mile-long cave, we found an ideal spot to start scanning. The lava tubes have a unique texture due to them being formed by running lava, making it seem as if the walls are melting in some spots and cracks forming in others.
Preparing to 3D Scan
Setting up the Ray was a unique challenge in the cave. Due to the uneven surface of the cave and dripping ceilings, we had to find spots where there are no marks on the ground from erosion and push some rocks together to make the tripod stand still.
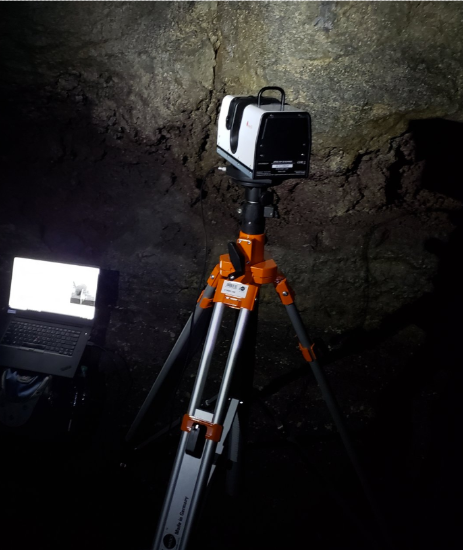
We attempted a few different ways of running a scan as well; one method using the preview option and the other jumping right into the scan. After enabling the Advance options, we turned off the sound (to not disturb the bats) and texture (because it’s a cave) and set the point cloud density to 30×30.
The preview method is first using the preview option to capture a 360-degree, three-minute scan and selecting where you want the Ray to focus on. Since we wanted the whole environment, we could select everything in the preview. You may find, however, that the scanner will start on one side and rotate the entire 360 degrees, essentially doubling the scan time. When selecting just “Scan” the total scan was seven minutes to complete since it took both sides at once and didn’t need to do any previewing.
Viewing and Meshing the Data
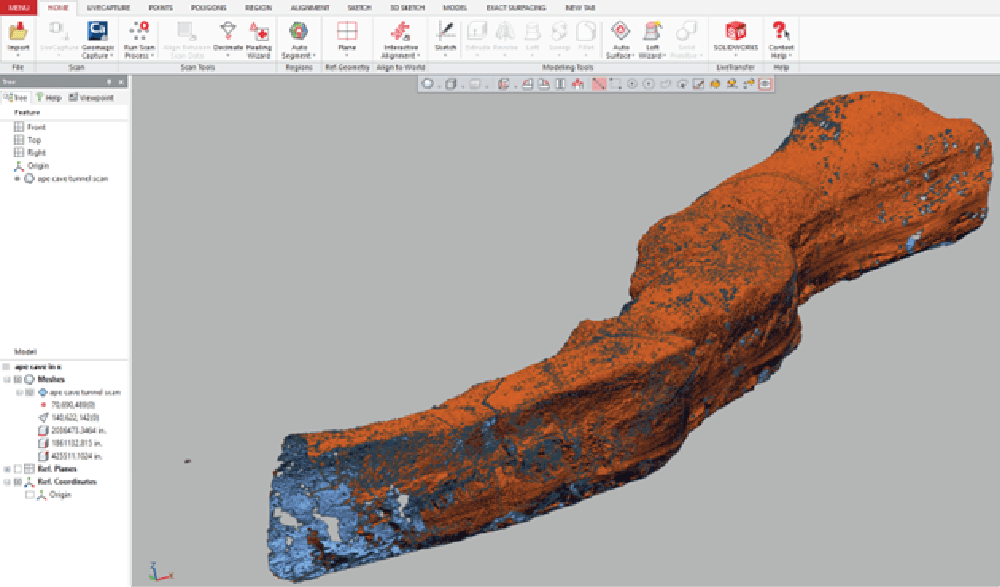
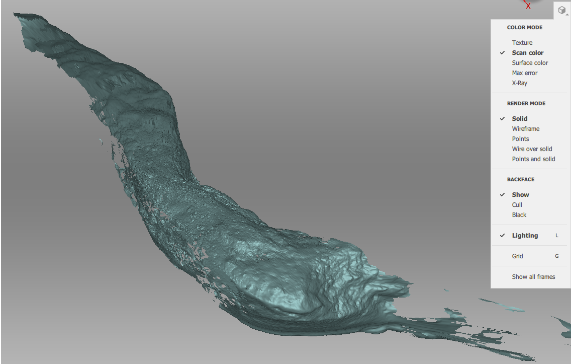
We uploaded the data directly into our laptop to test and see how the data looks right away. The Artec Ray will automatically piece the two sides together (another four-minute process) and convert the data into a pointcloud, giving us our first section of the cave!
As you can see, the further from the scanner, the data will start to lose quality since the rocks were so smooth and damp and the laser had difficulties reflecting off of them. We still can use these for alignments though. Each scan captured about 150 feet in total length, stopped mainly due to the curvature of the cave.
We took five scans at different spots down the tunnel and kept two things in mind when looking for a spot:
- Can we see our previous spot to match the data?
- Are there any major obstructions around the scanner?
Being able to see the previous spot will ensure we can align the data with the other scans. Since the quality of data is reduced at far distances due to the wet walls, we also wanted the previous spot to be within the “high quality” zone (about 100 feet).
Although we only used a 30×30 point density settings, we did run one scan at 50×50 for a test. We found, however, that the quality of data was fairly similar to the other amount for this situation and the scan took longer to complete and upload into Artec Studio. For the sake of time, we stayed with 30×30.
The similarities in data are due to the low number of features on the wall, if there were small textures, we wished to capture, we’d increase the point-cloud density. Lava tubes, however, have smooth surfaces so the smaller density still shows ample data to use.
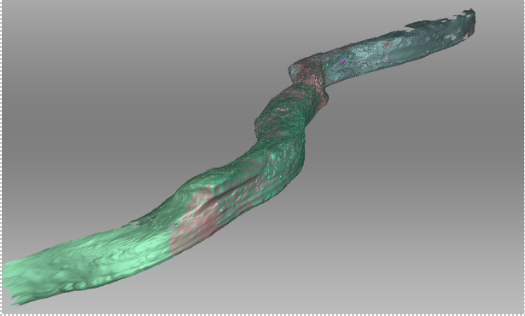
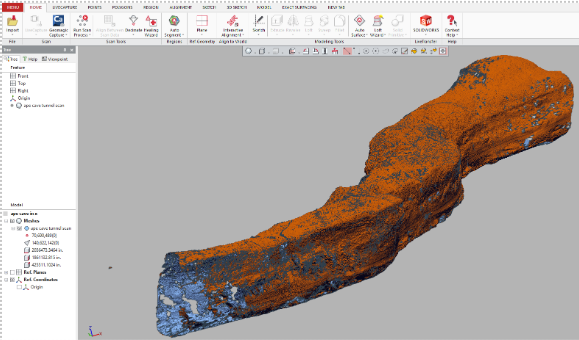
It’s hard to capture the entire scan with just a screenshot, but this total length was nearly 300 feet! Due to the lower quality data sections that were further from the scanner, we made a copy of the aligned scan, then deleted the lower-quality sections and left only the high-quality walls. With only the high-quality sections left, the triangulation tool was run with a decimation step of two to preserve the data and create a nicer mesh. In the end, we had a 250-foot section of the ape cave mapped out in detail.
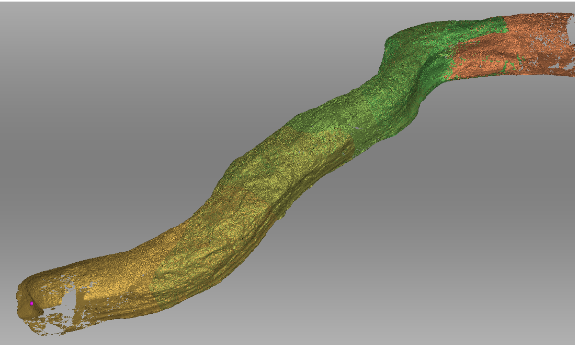

The 3D scanner was able to pick-up all the smaller stalagmites and layers of lava. The smooth section was part of the cave, believed to be made from a river of lava at the bottom of this already formed tunnel.
Exporting the Data
With the scans aligned (and in a mesh format from running the Ray Triangulation), they can be exported simply by showing all the scans in the workspace menu, file -> export and ensure that you choose to export as a single mesh. Typically, we choose to export as a .STL, especially since this mesh has no texture applied to it.
Now we can import this massive 140 million triangle, 6.5gb file into other programs like Design X to begin modeling inside or around the cave. And I did, but to help share the file, we also made a lower polygon version (five million, 250mb) which was much easier to send. You can often reduce high-polygon meshes by a significant percent of their polygon count without noticing a difference in mesh quality.
Not only was this a fun adventure exploring the cave, but the Ray exceeded expectations for the speed and quality of data taken for an unideal environment. Given more time, we could have continued to model this cave and possibly create an entire scan of the lower sections by using the phone app and an SD card to capture more scans.
Want to learn more about Artec 3D Scanners or ask our scanning experts questions? Contact us at Hawk Ridge Systems today. Thanks for reading!