In 3DEXPERIENCE, there is out-of-the-box lifecycle management to allow you to have more options to control your data. Maturity states allow you to control who can find data or make changes to it.
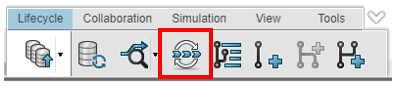
It also allows you to have control over when revisions are created for a product during its lifecycle. This Maturity can be found using the Lifecycle and Collaboration App in the browser or in the Action Bar of the 3DEXPERIENCE Add-in for SOLIDWORKS or SOLIDWORKS Connected.
Note: We are starting this process after we have modeled the assembly and saved it to the platform.
If you are not familiar with the process of saving to the platform, you can find a video on that topic “3DEXPERIENCE Data Management: How Does it Actually Work?” We also have a good tutorial on how to better manage your data with Collaborative Designer for SOLIDWORKS which may be of interest.
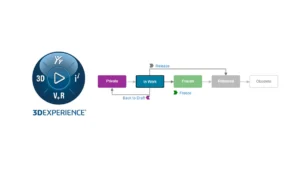
The 5 Maturity States in SOLIDWORKS Cloud Services

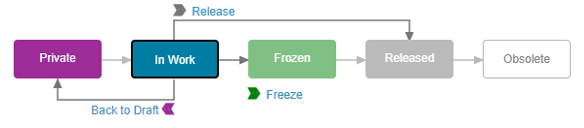
The five Maturity States seen above are the standard states included with SOLIDWORKS Cloud Services. The arrows between each state are known as “transitions” and change based on which state the data is in.
We’ll go over all the various maturity states one by one:
- Private: Documents, when in the Private state, are only accessible to the owner and are not shared with other users in the collaborative space.
- In Work: Documents are initially saved to the In Work state and are accessible in the collaborative space.
- Frozen: Documents are typically set Frozen while in review to prevent change.
- Released: Documents are typically set to Released when in production. Released documents cannot be modified.
- Obsolete: Documents are typically set to Obsolete when no longer used.
1. Maturity State: Private

Documents can be put into the private maturity state so they are only accessible to the owner of those files, and other users cannot interact with that file in a collaborative space. This state is typically used when you are working on designs before needing to share or be viewed by others. You can then give more users access by transitioning to the “In Work” state.
2. Maturity State: In Work
In Work is the default Lifecycle state after you have saved the model to the 3DEXPERIENCE platform. When in this state, users can lock the file (if given permission) to take control and block other users from making changes while that file is locked.
The In Work state allows the user to know that the file they are working on is the latest version and is used while making changes to your file or working on that file. Important things to know:
- You can move more than one file through to a different maturity state at a time.
- You can also choose to include structural objects.
- You can even implement rules such that all the children would have to be moved before the parent. For example, making it such that an assembly can’t be RELEASED without all the children (structural objects) being RELEASED first.
3. Maturity State: Frozen

Once design work is complete, you may choose to freeze the file and place it in the frozen maturity state. This state is used when you are done making changes to the part and can be used during a design review for example. The frozen state also provides the ability to prevent anyone from making changes to this file, so you have the up-to-date version of your design. You can transition the part back to In Work if more changes are needed or if the changes are rejected. If accepted, you can transition to the released maturity state.
4. Maturity State: Released

Once the design has been approved or is ready for production, the file can be moved to the released maturity state. This state prevents any other changes from being made to this file and is the typical end of the lifecycle for that specific revision of the file. If changes need to be made to this file, a revision can be made or even branched into its own new revision.
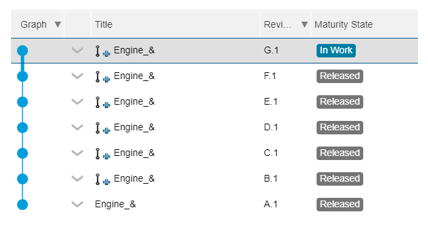
Note: Different revisions can be at different maturity states.
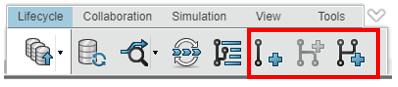
You may create a new revision, create a new revision from, or create a new branch (see below).
- New Revision: Creates a new revision of the selected object. You can also select the content of a different object.
- New Revision From: Creates a revision of the selected structure using the content of another structure. In the dialog box, select the source, which can be a revision, a duplicate or a branch. Choose the appropriate option for each child node and click Revise.
- New Branch: Creates a new branch from the selected object. In the dialog box, select the credentials to assign to the new branches. If you select one object, you can enter a title for the new branch. If you select several objects, you can enter a prefix for the new branches. You can enter a comment for the new branches in the Revision Comment box.
5. Maturity State: Obsolete

Lastly on the lifecycle is the Obsolete state. Files are typically sent to this state when no longer in use, but they need to be kept for historical reference purposes.
Once a file is released, if given permission, the user can make that file obsolete so it will no longer go through a lifecycle and it will also be clear to other users that it should not be used. You can also hide it from them entirely.
Understanding Maturity States in 3DEXPERIENCE
That’s it – your quick guide to maturity states in 3DEXPERIENCE. 3DEXPERIENCE gives you the tools you need to start managing your data and make sure you are always working on the latest design.
For more information on 3DXEXPERIENCE, check out our YouTube channel or contact us at Hawk Ridge Systems today.