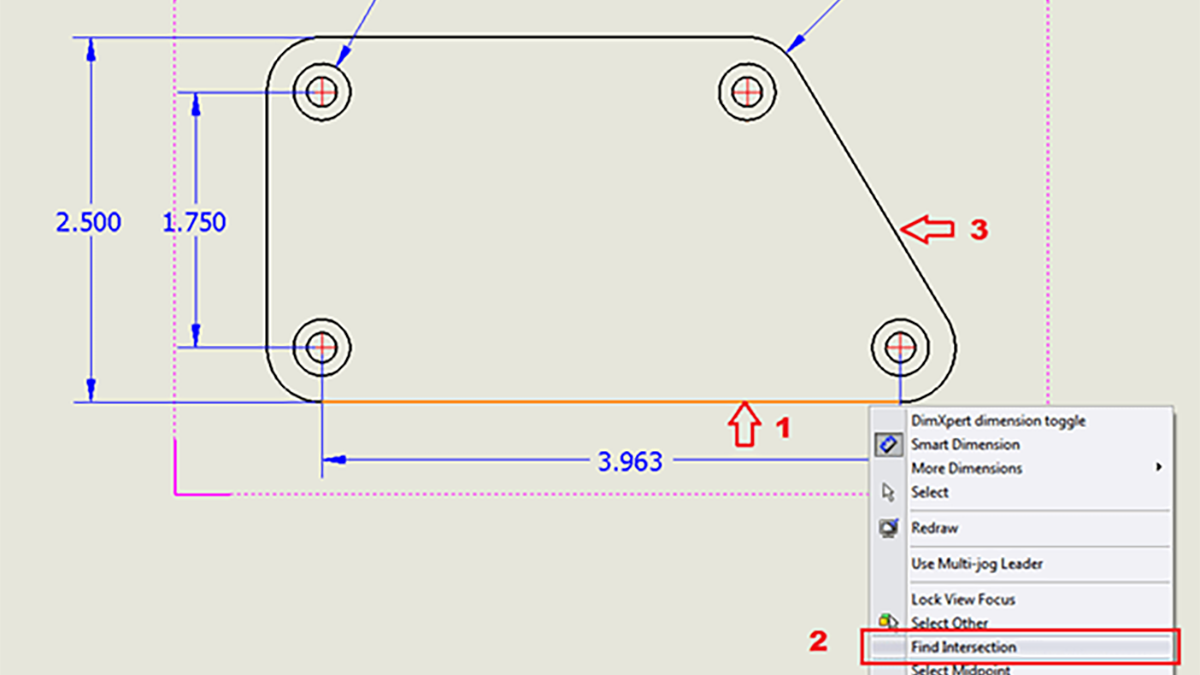
A common task for us is dimensioning to a point that exists where two edges, lines, arcs, and/or curves would intersect if those entities were extended.
This is called a “virtual sharp” in SOLIDWORKS and is a useful reference in drawings and sketches.
What Is a Virtual Sharp? And How Does It Work?
Virtual sharps are the intersection of two sketch entities, such as curves and lines. In previous versions,the way to create these points was perhaps a bit hidden to the user unless you had attended an in-depth SOLIDWORKS training course. The workflow is as follows:
- Select two entities (non-parallel, or they’ll never intersect!)
- Select the Point command from your Sketch Toolbar
- The point is placed at, and fully defined by, the virtual intersection of those two entities.
A problem (or at the very least an annoyance) could arise where you are dimensioning a sketch or drawing view and you come to a situation where a virtual sharp is needed. You’d have to turn off the dimension tool, create the virtual sharp using the above steps, and then turn the dimension tool back on and create the dimension. Not exactly the most streamlined workflow!
Creating Virtual Sharps on the Fly
Fast-forward to 2014, SOLIDWORKS has listened to us engineer and designer types and has given us a clever way to create these virtual sharps “on the fly.”
Here’s how it works:
- With the Smart Dimension tool already active, you right-click on one of the desired entities.
- Select “Find Intersection” from the menu.
- Then click the other entity that creates the intersection. The first dimension line is now attached to that virtual sharp.
- Now select the second entity of the dimension, or right-click on it to start the creation of a second virtual sharp.
- Finally, place the dimension.
Did you notice that I didn’t have to interrupt what I was doing in order to get that reference point? Virtual sharps can just be part of the dimensioning operation now, while it still works the old way too!
If you have any questions about how to use virtual sharps or have any questions, contact us at Hawk Ridge Systems. Thanks for reading!


