
If you’ve ever watched a large assembly take several minutes to open, waited endlessly for a rebuild, or struggled with sluggish drawings, you’re not alone.
Large assembly performance is one of the most common challenges SOLIDWORKS users face. The problem is that many engineers start looking for solutions only after performance has already become an issue.
The reality is that there is no magic setting that instantly fixes large assembly performance. Instead, performance is the result of hundreds of small decisions made throughout the design process. The good news is that a handful of proven best practices can dramatically improve how your assemblies perform.
Here are 10 practical tips to help you work more efficiently with large assemblies in SOLIDWORKS.
1. Use the Right Opening Mode for the Task
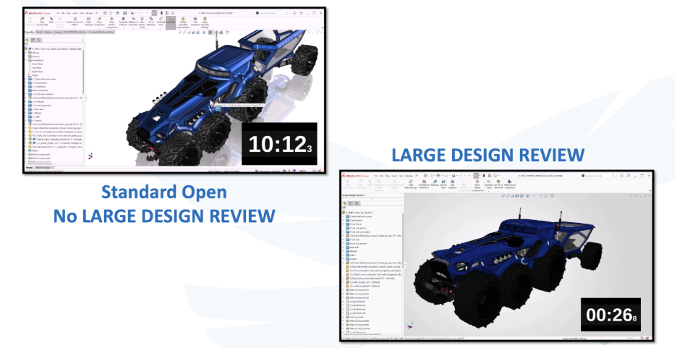
Not every assembly needs to be opened fully resolved. If you’re only reviewing a design, taking measurements, or creating screenshots, you’re often asking SOLIDWORKS to do more work than necessary.
SOLIDWORKS provides several opening modes to match the task:
- Large Design Review loads only the graphical representation of the assembly, making it ideal for viewing and basic investigation.
- Lightweight Mode loads component geometry while deferring much of the underlying model data until it’s needed, providing a good balance between performance and functionality.
- Fully Resolved Mode loads the complete model, including geometry and feature history, and should be used when actively editing parts or mate relationships.
The same concept applies to drawings. Detailing Mode allows you to add dimensions, annotations, and make documentation changes without fully loading the underlying model.
The key is simple: match the amount of data being loaded to the work you’re actually doing.
2. Let SOLIDWORKS Tell You What’s Wrong
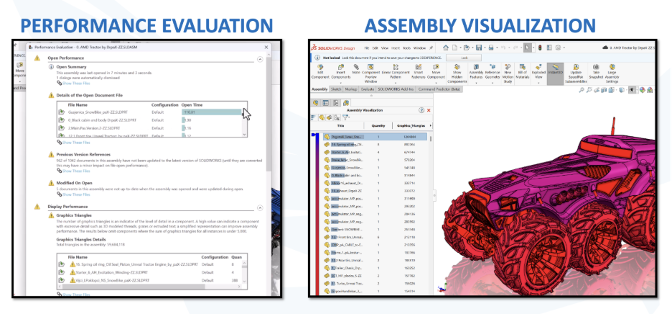
Before you start changing settings or simplifying models, let SOLIDWORKS show you where there are bottlenecks.
The built-in Performance Evaluation tool analyzes your assembly and highlights:
- Opening time
- Rebuild time
- Graphics triangles
- Mate count
- Component count
Once you understand where the time is being spent, use Assembly Visualization to quickly identify the biggest offenders by sorting components based on:
- Graphics triangles
- Rebuild time
- Opening time
- File size
- Custom properties
Instead of hunting through thousands of components, these tools quickly highlight the parts consuming the most resources. In many cases, a handful of components are responsible for the majority of the slowdown.
3. Use the Right Mates
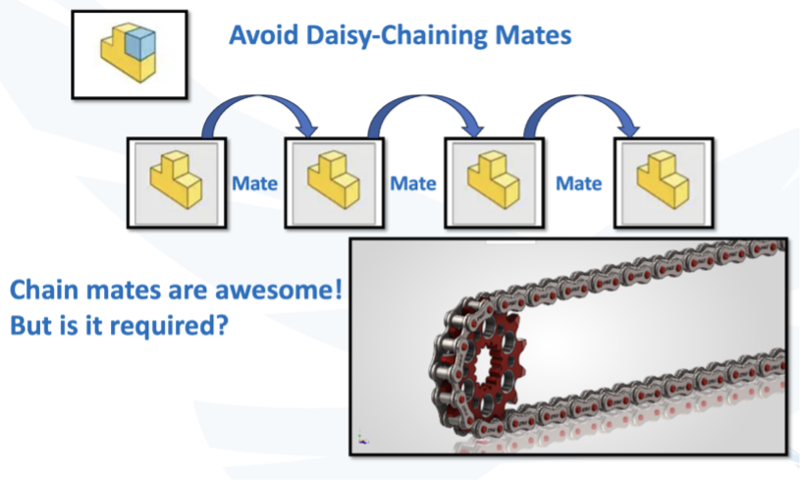
Not all mates are created equal.
Every mate you add creates another relationship that SOLIDWORKS has to solve, and in large assemblies those calculations add up quickly. Whenever possible, choose mates that allow a single mate to do the work of several.
A few simple guidelines can make a big difference:
- Use mates that eliminate multiple degrees of freedom.
- Eliminate redundant or overlapping mates.
- Use Lock Rotation instead of adding an additional mate when appropriate.
- Aim for 50 or fewer mates at the top level of the assembly.
- Avoid Flexible Sub-Assemblies unless they are absolutely necessary, as they promote their mates back into the top-level solve.
A simpler, more intentional mate strategy not only improves rebuild performance, but also creates assemblies that are easier to maintain and troubleshoot.
4. The Master Sketch Method
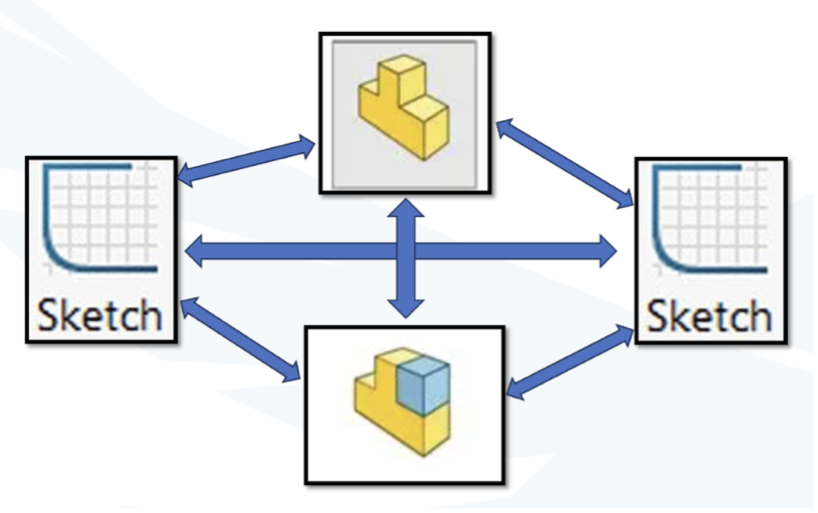
A master sketch provides a single source of truth for your design, allowing multiple features and even multiple parts to be driven from the same underlying geometry.
A well-planned master sketch can:
- Simplify design changes.
- Maintain consistent geometry.
- Reduce duplicated sketching effort.
Master sketches can be used entirely within a single part, or as part of a top-down design approach where a layout part drives the geometry of other components in the assembly.
The key is moderation. A few well-structured references help maintain design intent, but too many dependencies can become difficult to manage and troubleshoot.
5. Control External References
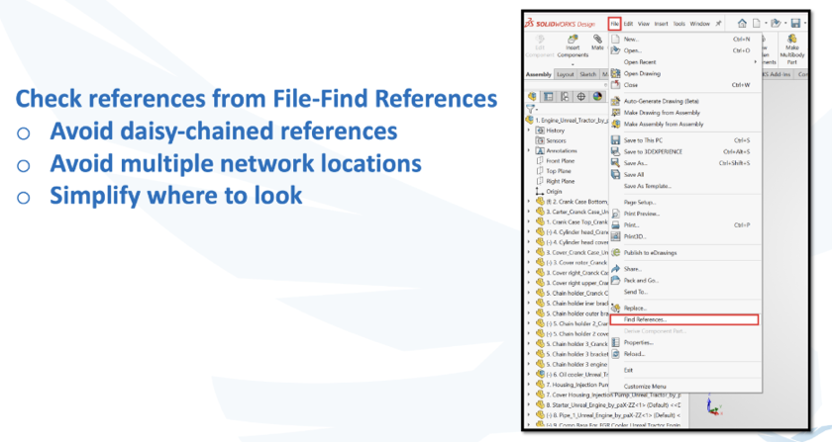
An external reference is created whenever a part or assembly uses geometry from another file to drive its own design. This could be as simple as converting edges from a neighboring component, building parts from a shared layout sketch, or importing a model with 3D Interconnect, which maintains a live link back to the original CAD file.
External references are a powerful way to maintain design intent, but they should be managed carefully as a project matures.
As components become stable, consider:
- Locking references that are no longer changing.
- Breaking references when the design is finalized.
- Removing unnecessary dependencies between files.
Every external reference creates another relationship that SOLIDWORKS has to evaluate during rebuilds. Keeping those relationships intentional can improve performance while making assemblies easier to manage and troubleshoot.
6. Make a Simple Configuration
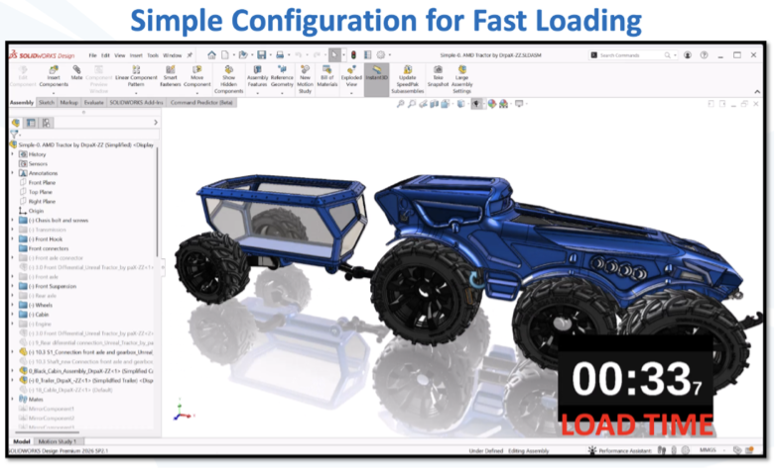
A simplified configuration should be built around the intended use of the assembly. Ask yourself: What is this assembly being used for? If a component doesn’t contribute to that task, it probably doesn’t need to be loaded.
Consider suppressing:
- Internal components
- Hardware and fasteners
- Cosmetic features
- Detailed geometry that won’t be seen
For design reviews, layouts, and documentation, a simplified configuration often provides everything you need while significantly reducing the amount of geometry SOLIDWORKS has to load and rebuild.
The goal is simple: only load the components that need to be visible for the job at hand.
7. Use Appropriate Part Detail
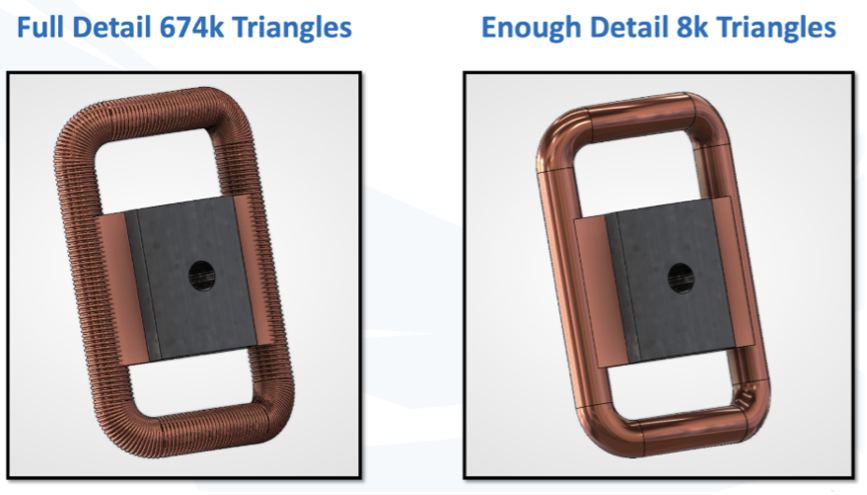
One of the biggest factors affecting large assembly performance is simply how much detail SOLIDWORKS has to process. Every edge, face, feature, and graphics triangle adds to the amount of work required to open, display, and rebuild an assembly.
The key is to build your models around their intended use. If a detail doesn’t provide value at the assembly level, consider simplifying or removing it.
A few simple guidelines can make a big difference:
- Use Display States when you only need to change visibility or appearance. Reserve Configurations for actual geometry changes.
- Remove unnecessary detail such as cosmetic threads, embossed logos, small fillets, and decorative features that add little value to the overall assembly.
- Reduce Image Quality on components that don’t require highly-detailed graphics. Lower tessellation means fewer graphics triangles for SOLIDWORKS to display.
- Simplify vendor models before adding them to your library. Remove internal geometry, suppress unnecessary features, and save a clean version for future projects.
A good rule of thumb is to ask yourself: Will this detail ever be used for a mate, manufacturing operation, or drawing? If the answer is no, it may not belong in the assembly model.
This same philosophy applies to visibility. If the only thing changing is what the user sees, use a Display State instead of creating another Configuration. Display States provide visual flexibility without adding significant model overhead.
Spending a few minutes simplifying a component can save hours of waiting over the life of a large assembly, especially when that component is reused hundreds of times.
8. Drawing Workflow Matters
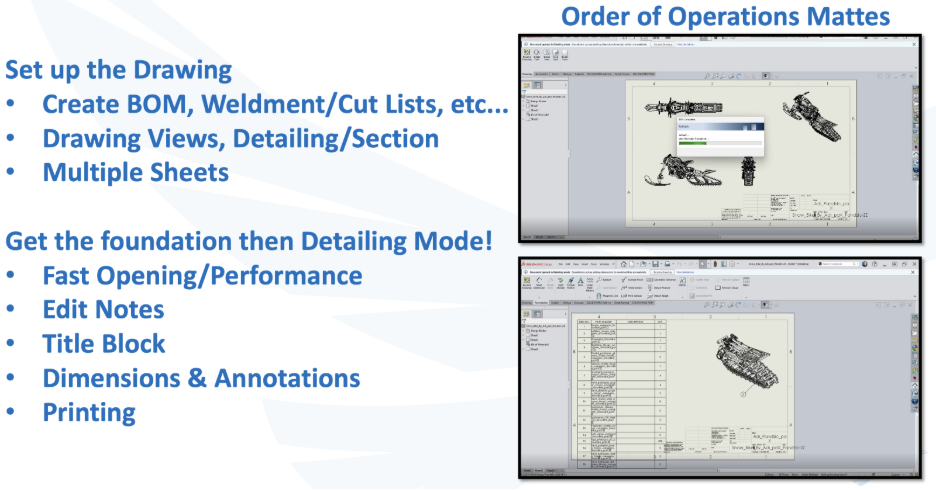
Detailing Mode is called Detailing Mode for a reason. It was designed to let you finish your drawings without the overhead of loading the entire model.
A good workflow for large drawings is:
- Create and position drawing views while the model is fully resolved.
- Save the drawing once the heavy lifting is complete.
- Reopen the drawing in Detailing Mode.
- Add dimensions, annotations, balloons, and other documentation details.
You can also improve performance by loading only the sheets you need instead of the entire drawing package.
By separating view creation from annotation work, you let SOLIDWORKS spend its resources where they’re needed most. Build the drawing first, then use Detailing Mode to add the details.
9. Use CATIA for Large Assembly Assist
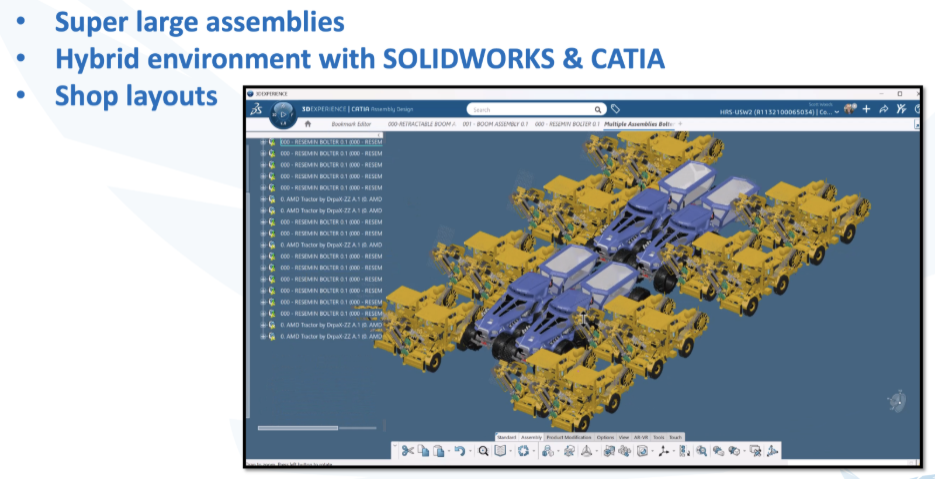
For most engineering teams, the techniques covered in this article will provide all the performance improvement they need. But there are projects that simply push beyond the practical limits of traditional assembly workflows.
This isn’t about the average machine design assembly. It’s for teams that have already optimized their models, invested in high-end hardware, and are still working with datasets that stretch the limits of what SOLIDWORKS was designed to handle.
Typical examples include:
- Entire factory and facility layouts
- Process plants and piping systems
- Large industrial equipment lines
- Shipbuilding and marine projects
- Infrastructure and construction models
- Assemblies containing tens or even hundreds of thousands of components
At that point, adding more RAM or finding one more performance setting often produces diminishing returns.
This is where tools like CATIA and xDesign can complement a SOLIDWORKS workflow. By leveraging lightweight representations and connected data management, they provide additional scalability for extremely large datasets while maintaining integration with existing engineering processes.
The goal isn’t to replace SOLIDWORKS. It’s to recognize when a project has grown large enough that extending the workflow becomes the better solution.
10. Virtual AI Companions

Large assemblies don’t just create modeling challenges, they create knowledge challenges. The bigger and more complex a project becomes, the more time engineers spend searching for commands, troubleshooting workflows, and deciding on the best approach. Virtual AI companions help remove that friction.
AURA is built specifically for the Dassault Systèmes ecosystem, with answers drawn from official documentation, knowledge bases, and the 3DSwym community. For large assembly workflows, it can help:
- Find the right tools and settings for improving assembly performance.
- Provide guidance on workflows such as Lightweight Mode, Large Design Review, and Detailing Mode.
- Reduce time spent searching documentation, leaving more time for engineering.
LEO focuses on accelerating design and problem solving by:
- Helping explore different approaches to large assembly design challenges.
- Assisting with concept development and workflow planning.
- Reducing the time between an idea and a workable solution.
Like every other tip in this article, the goal isn’t to replace engineering expertise. It’s to remove unnecessary work, allowing engineers to spend less time searching and more time designing.
The Real Secret to Large Assembly Performance
After reviewing hundreds of customer assemblies, one principle consistently stands out:
Performance is rarely improved through a single setting.
Instead, it comes from making thoughtful decisions throughout the design process.
Use only the detail you need. Create only the references you need. Add only the mates you need.
Think of it as the “Goldilocks Principle” for CAD performance: not too much, not too little, but just enough.
When applied consistently, these small optimizations compound into dramatically faster assemblies, more responsive drawings, and a far more productive engineering workflow.
If you have any questions about using SOLIDWORKS, reach out to us. We’re happy to help!
This article was based on a livestream offered in June, 2026. You can view the presention on-demand at your convenience.


