In the first article of the series, “SOLIDWORKS Electrical Title Block Tips You Should Know: Part One,” we discussed tips and tricks for title block management, drawing parameters, as well as adding borders and logos in SOLIDWORKS Electrical. The second blog in the series will be focusing on attributes along with setting up rows and columns, as well as some closing recommendations.
Attributes
Attributes from Project, Book, Folder, Drawing level as well as Location and Function associated with a Drawing can be used to populate the title block. This allows title blocks in a project to update automatically. To add them you can either use EDIT TITLE BLOCK > INSERT ATTRIBUTE in the Command Manager or double click the desired attribute from the dockable Edit Title Block panel (next to Component and Document panel). As a new user, the attribute names can be hard to understand. Fortunately, you can show the Attribute description instead of its name (EDIT TITLE BLOCK > SHOW ATTRIBUTES > DESCRIPTION) to help with the confusion. Also, Project, Book, Folder, and Drawing attributes are identified with a prefix of Project, Bundle, Folder, and Folio respectively.
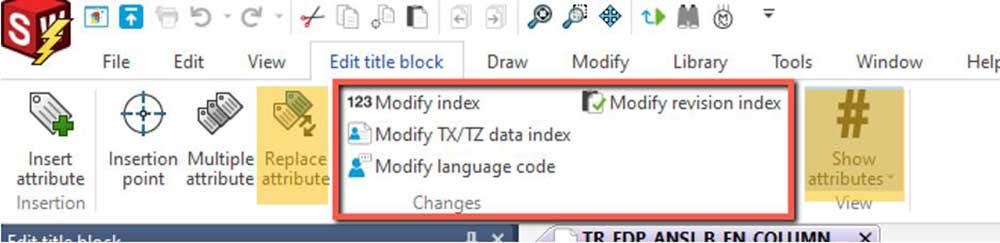
Certain attributes might have an index character (or order number) which can also be adjusted as needed. The EDIT TITLE BLOCK > MODIFY TX/TZ DATA INDEX tool is used for the 20 User Data and Translatable text fields available for each object (Drawings, Book, Folder) in SOLIDWORKS Electrical. EDIT TITLE BLOCK > MODIFY LANGUAGE CODE applies to the Translatable text attributes to instead use the information defined in the 2nd or 3rd language as defined in the Project Configuration.
Finally, the Revision attribute is available for both Book and individual Drawings and its index can be adjusted as needed (EDIT TITLE BLOCK > MODIFY REVISION INDEX). It should be noted that when modifying the Revision index, you have the option to calculate the index from the current revision or the first revision.
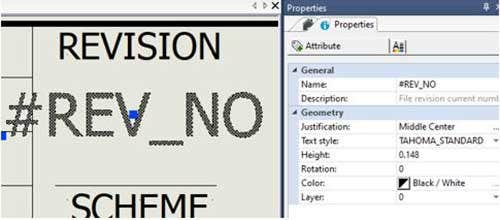
The graphical properties of an attribute such as Font, Height, Color, Justification, etc. can be set in the Properties Panel. The EDIT TITLE BLOCK > REPLACE ATTRIBUTE (or Right-Click attribute) is useful for replacing an attribute while retaining the graphical properties of the original. The RIGHT CLICK > COPY PROPERTIES and APPLY COPIED PROPERTIES can be handy when propagating graphical properties from one attribute to another. Consider using temporary sketch segments and object snaps to accurately position the attributes. Alternatively, you can adjust the X and Y position of the attributes their graphical properties (PROPERTY PANEL > TEXT ALIGNMENT ).
Rows and Columns
Row and Column numbers are attributes in SOLIDWORKS Electrical that can convey a lot of useful information in different places, but they can be a little tricky to set up. It is a three-step process. First, the order number of a row is determined from the title block properties, then the Row attributes (#ROW) are placed at appropriate heights in the drawing to display them. Once the title block is applied to a drawing, the value of the Row attribute (Row Mark or #ROW) is calculated based on the formula defined at the Project level. In this section, we will be focusing on the title block portion of the setup while the project level formula for Row Mark is discussed in the next section.
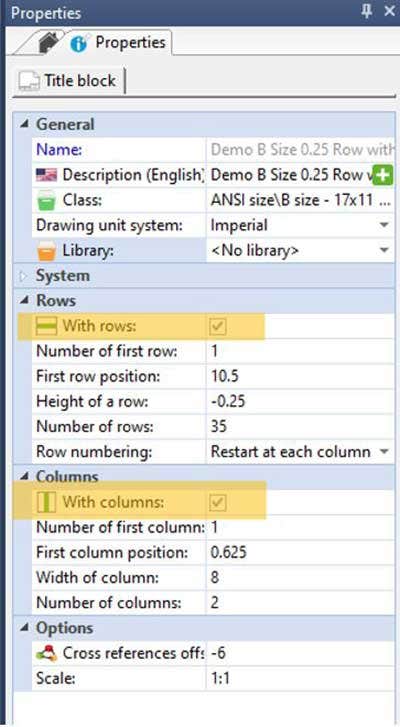
The first thing we need to do is to enable Rows and Columns in the Properties Panel (WITH ROWS and WITH COLUMN checkbox). The NUMBER OF FIRST ROW sets the Row Order Number of the first Row and the subsequent Row Order numbers are incremented based on the offset value defined in HEIGHT OF A ROW. If your Row numbers are incrementing downwards, the offset needs to be negative. In this case, I have chosen a 0.25-inch row offset which should work well with my previously discussed SNAP spacing.
The FIRST ROW POSITION dictates the Y value or height of the First Row. This value would be adjusted based on your sheet size. For example, in a B size sheet (11 X 17), the first row’s height might be around 10 inches. Finally, if you do have more than one column in your title block, you can have the Row number RESTART AT EACH COLUMN on the same drawing or continue from the last row on the previous column. The last Row number in a column is dictated by the NUMBER OF ROWS.
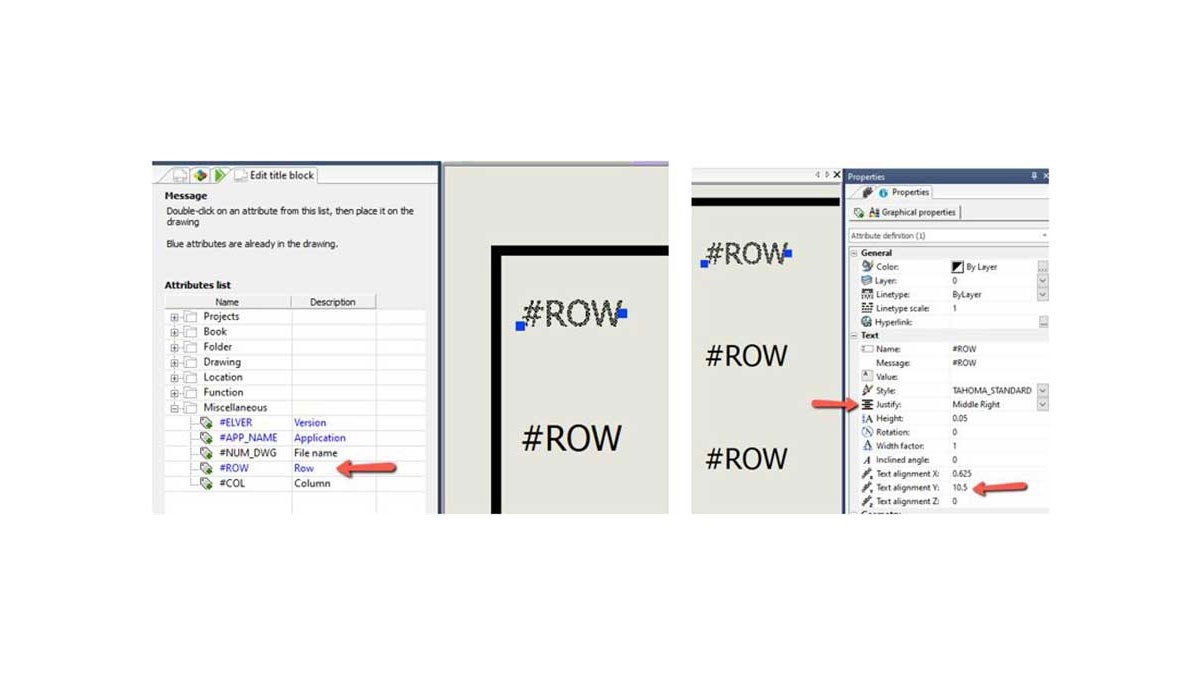
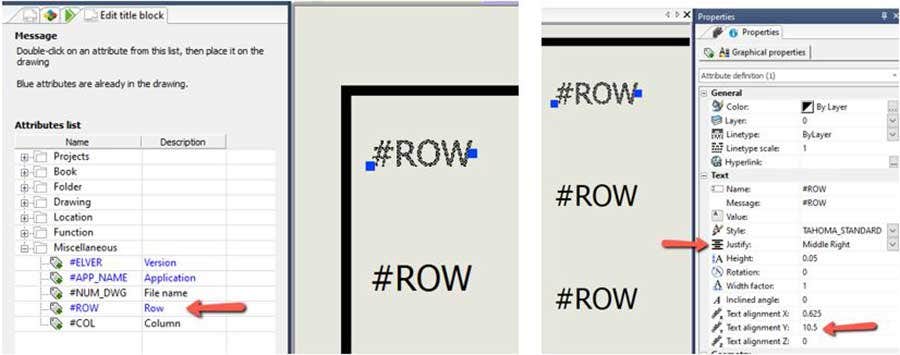
Now that we have defined how the Row Order numbers will be calculated, it’s time to display the attributes. The Row and Column attribute can be found in the Miscellaneous folder. Ideally, the first Row attribute should be inserted at a height that matches the “First Row Position” in Title Block properties. While you can rely on SNAPs and temporary sketches to accomplish it, it is easier to adjust this in the graphical properties (TEXT ALIGNMENT ) of the attribute.
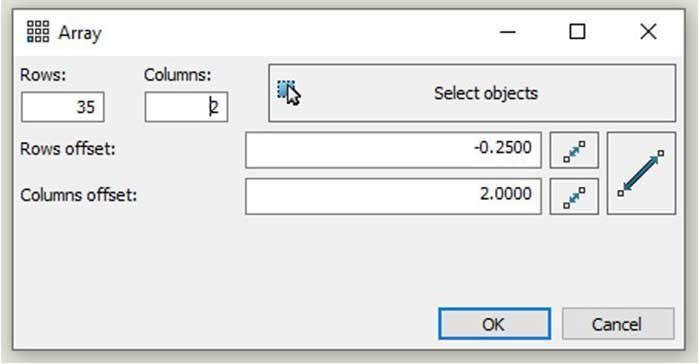
Once you are satisfied with the placement of the first Row attribute, the MODIFY > ARRAY tool can be used to create the remaining Row attributes as well additional columns. The Select Objects can be used to pick the attribute(s) you wish to copy. The offsets will need to match the Row Height and Column Width from the Title block properties.
Project Configuration and Title Block Properties
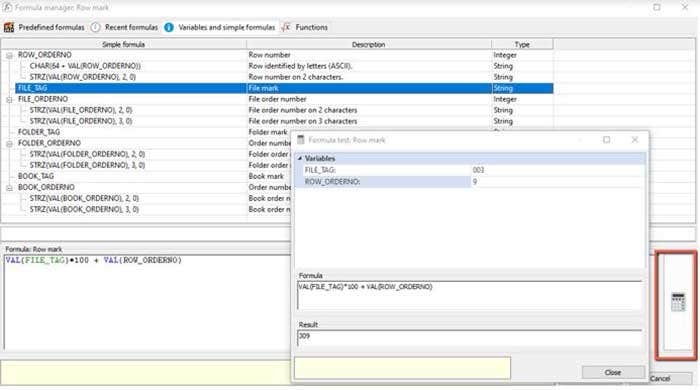
Once a title block is applied to a drawing, most of its attributes will be populated with information from the project. This includes Row and Column marks and attributes from the project, drawing, folder, and book. The formulas for calculating various marks are defined in PROJECT > CONFIGURATION > MARK and can be edited using the corresponding formula manager (fx) button. It should be noted that Row and Column marks calculated can also be referenced in the formulas for origin-destination, cross references, component mark, wire mark, etc.
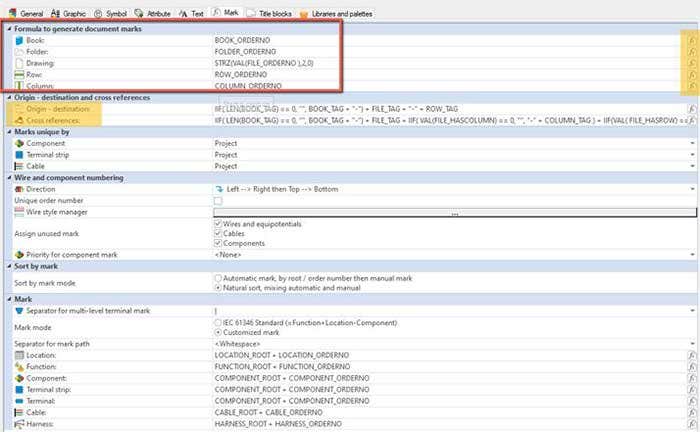
For example, the following image shows a sample formula where the File (Drawing) mark is combined with the Row Order Number (discussed in the previous section) to generate the Row mark. The Test Formula button is used to validate the formula with test values for File mark and Row order number.
The PROJECT > CONFIGURATION > TITLE BLOCKS tab can be used to set default title blocks for different drawing types (Scheme, Line Diagram, Reports, etc.). Once confirmed, you will be prompted to update existing project drawings with the new default title blocks. You can also update a title block already associated with a drawing from its contextual menu (RIGHT CLICK DRAWING > TITLE BLOCK > UPDATE) to use the latest version of the title block. It is strongly recommended that Project Configuration settings discussed in this section be applied in Project Template and can be modified for individual projects if needed.
At this point, you should be all set with your title blocks and continue with other aspects of implementing the software. This concludes our two-part blog series and hopefully, it has given you all the tools necessary to customize your title blocks. If you enjoyed this article, please subscribe for more blogs like this. As always, contact us at Hawk Ridge Systems if you have any questions. Thanks for reading!