I recently had a conference call with a 3D printing service bureau in Arizona called A3D Manufacturing to demo features in Materialise Magics that may be best suited for their operation. We ended up focusing on multi jet fusion 3D printers running high volumes of unique parts. We showed them all sorts of tools in Materialise Magics from latticing and automated labeling, to optimizing based on slice distribution.
The feature that was going to make the biggest impact happened to be Multi-Platform Nesting. This is a feature I personally had not used very often, as we typically run single jobs of partial builds on most of our machines. Yet for a service bureau, it hit me that this is a no-brainer! This feature can be game-changing for a service bureau as they are getting orders for hundreds and thousands of parts at a time that take up several builds that all need to be nested and accounted for.
How Multi-Platform Nesting Works
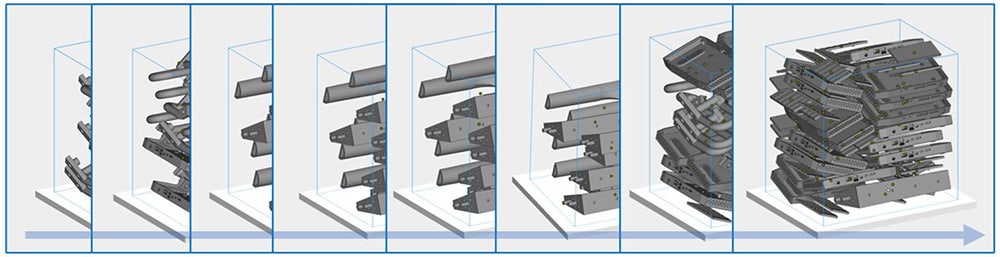
This feature will automatically nest multiple builds simultaneously by filling up a virtual printer build volume and creating subsequent virtual build volumes until all parts are completely nested. This saves a lot of time compared to manually creating each individual build and nesting them one by one. Also, keeping track of parts is much easier this way because it ensures that the complete set of parts will be nested automatically. When nesting multiple builds manually, it is always a pain to make sure that you have all the parts accounted for, especially when they are all unique and in high quantities. Now, operators can save time and reduce nesting errors with Materialise Magics.
Nesting Process Step By Step
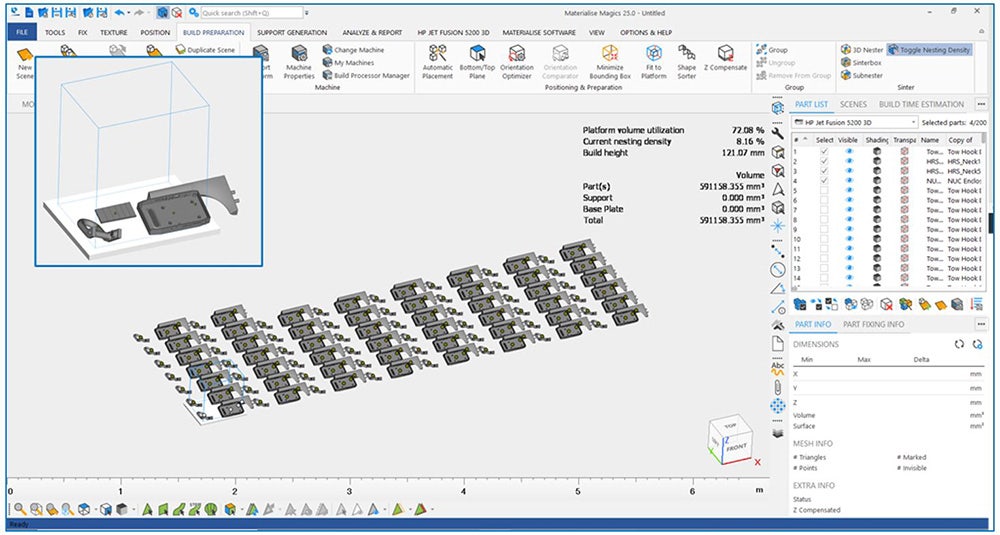
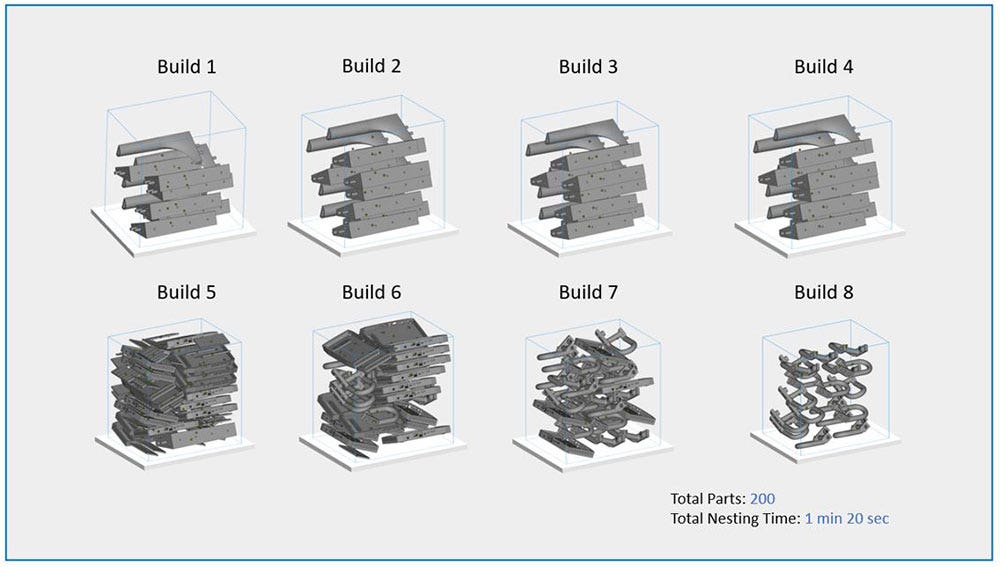
1. Open up a build scene with your machine with all of the parts you want to run in optimized print orientations. In this example, we have four part files with 50 copies each.
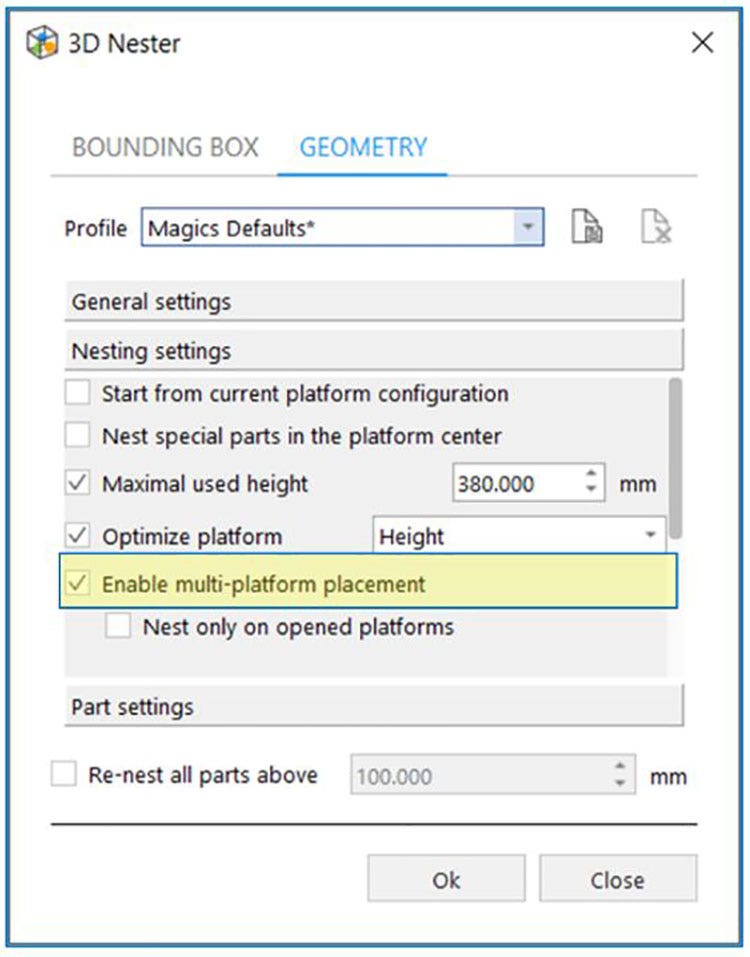
2. Open up the 3D Nester under “Geometry,” then click the “Nesting Settings” tab and select the check box for “Enable multi-platform placement.”
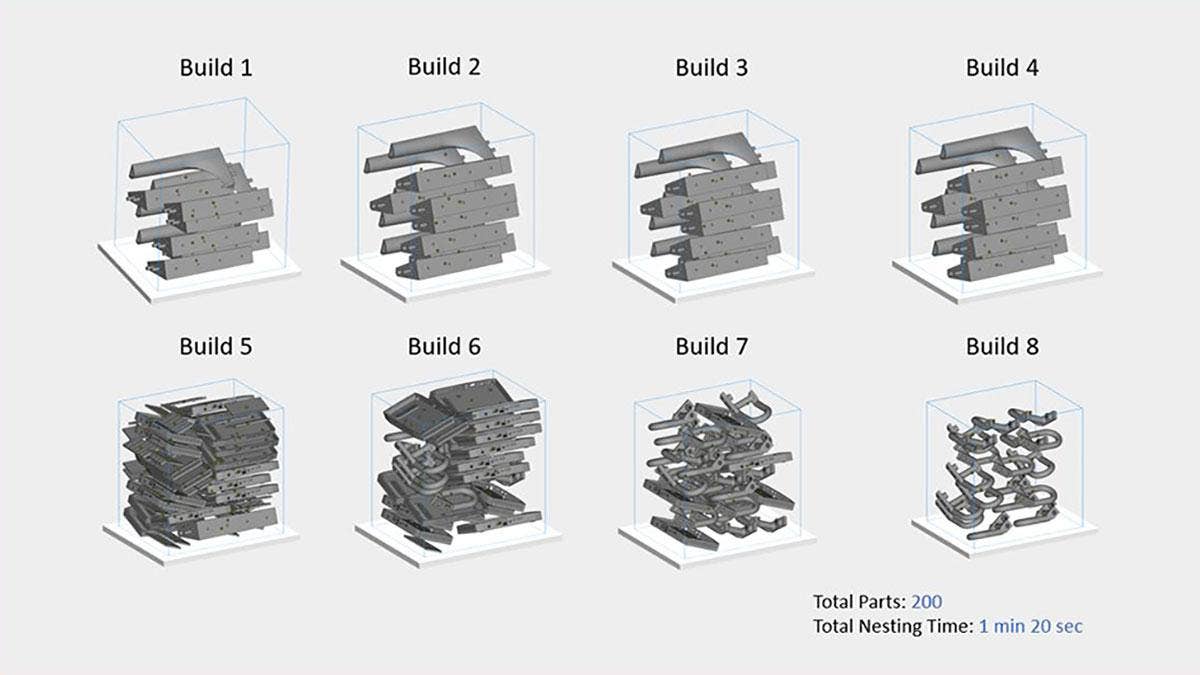
3. Run the nester and wait for the magic to happen. In this scenario, Magics created eight complete build platforms for a total of 200 parts all ready to run in a little over a minute!
Recommended Settings
To ensure that you have a fine-tuned nesting experience, here are a few settings that I use when working with this feature:
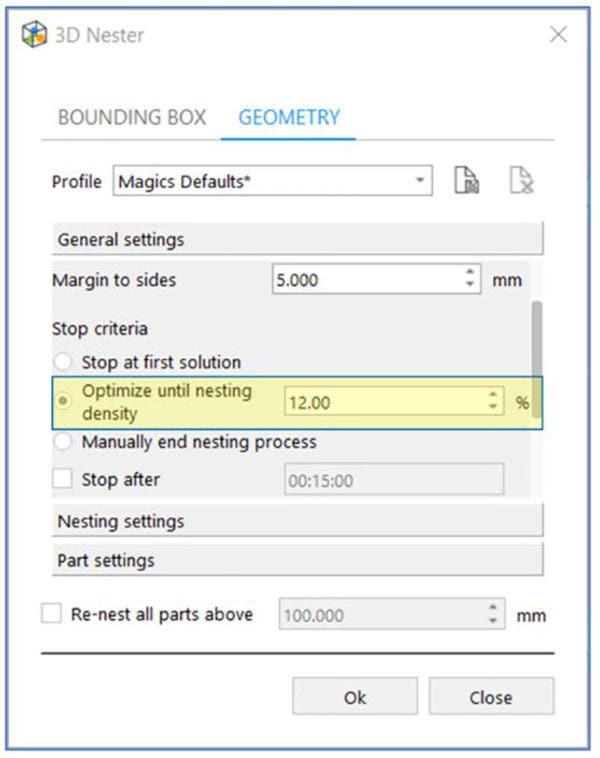
1. Nesting Density Threshold – Stop Criteria
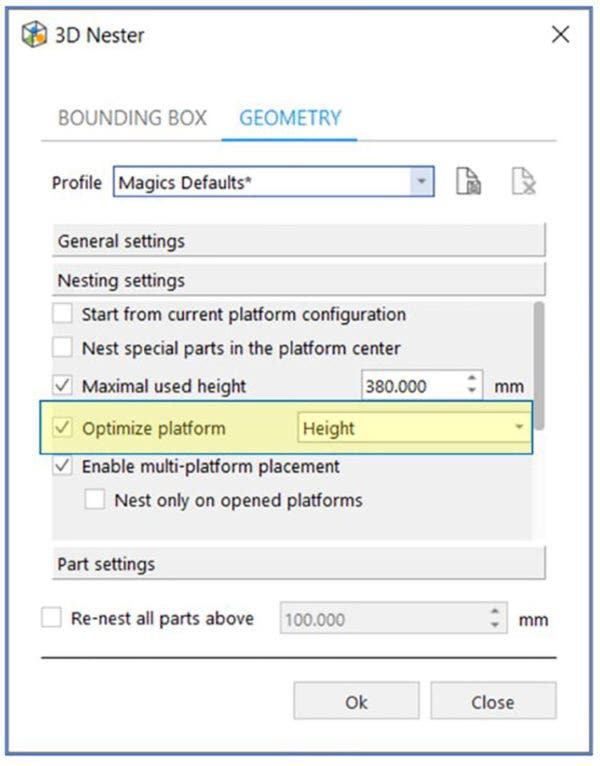
2. Optimize Platform – Height or Height and Slice Volume
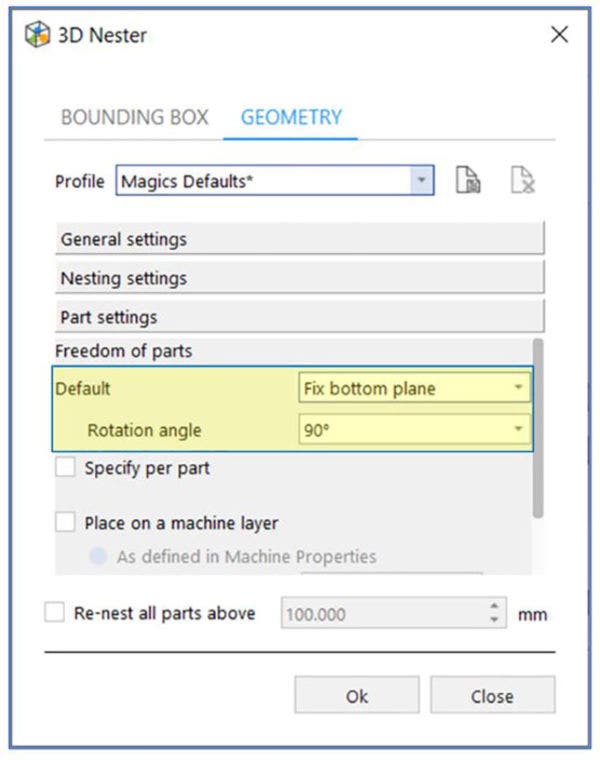
3. Freedom of Parts – Fix Bottom Plane
By following these simple recommendations, you are sure to become much more efficient when nesting multiple builds at a time!
If you would like to know more about optimizing your workflow with Materialise Magics or if you would like to start a free trial run of the software, please contact us at Hawk Ridge Systems today. Thanks for reading!