Photo-realistic renderings and professional animations of designs can provide significant value prior to manufacturing or helping to win over a quote. We will review a few tricks in SOLIDWORKS Visualize Professional that let you repurpose SOLIDWORKS motion studies to create realistic imagery, animations and virtual reality content.
Using SOLIDWORKS Visualize Add-In
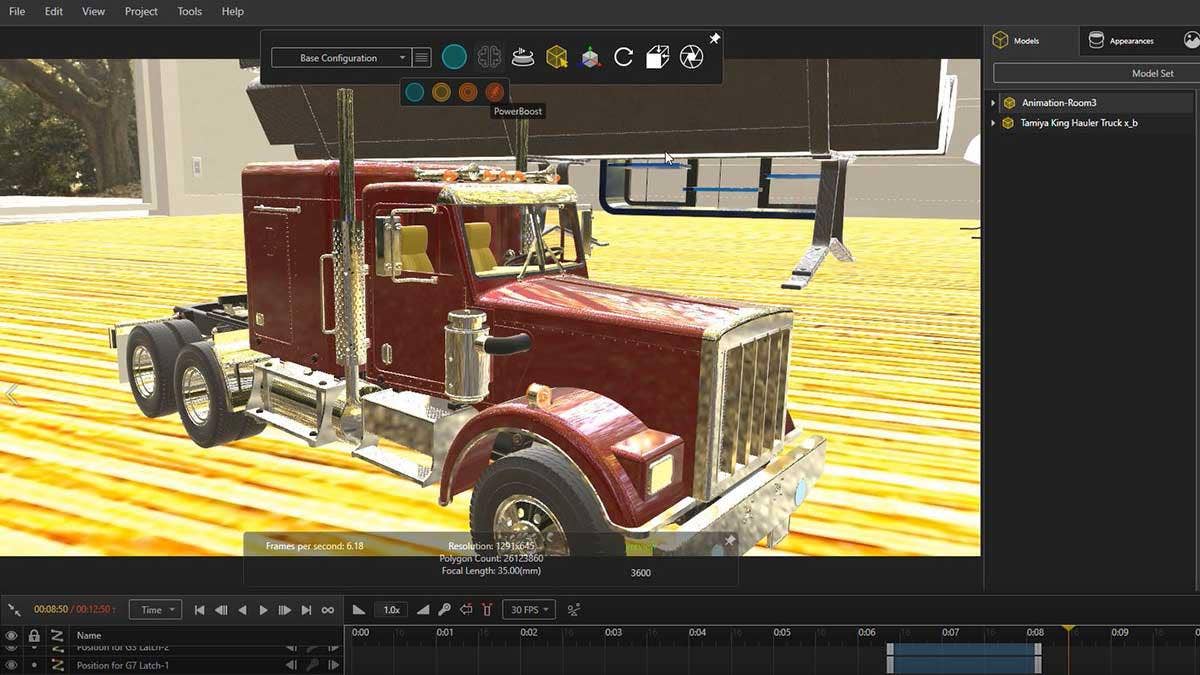
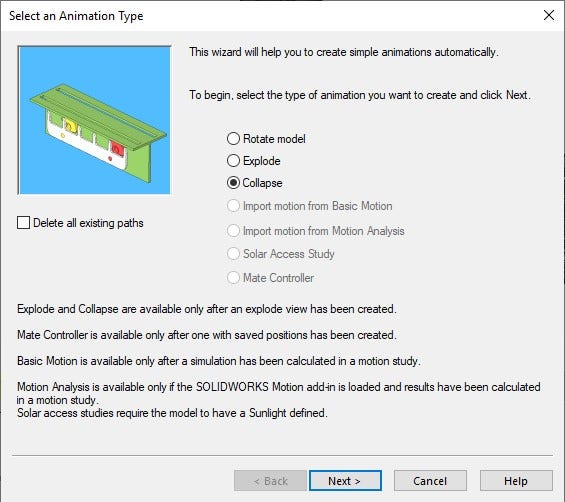
The first trick is to use the SOLIDWORKS Visualize add-in to export a motion study directly into Visualize Professional. This will save time since motion studies can be generated directly from exploded views by right-clicking in the motion study timeline and selecting the Animation Wizard.
This creates a seamless workflow from an exploded view to the Motion Study, then to Visualize for the photo-realism animation rendering. Importing the motion study from SOLIDWORKS is simple – go to the SOLIDWORKS Visualize tab on the Command Manager and select Export Advanced.

Pick which motion study you want to bring into SOLIDWORKS Visualize and press OK. The motion study will begin to process and once finished SOLIDWORKS Visualize will automatically open with the embedded motion study.
All appearances import from SOLIDWORKS to Visualize so at this point the animation can be rendered to a video, however, applying additional appearances and some camera motions can drastically improve the final video.
Adding Emotion to Publications
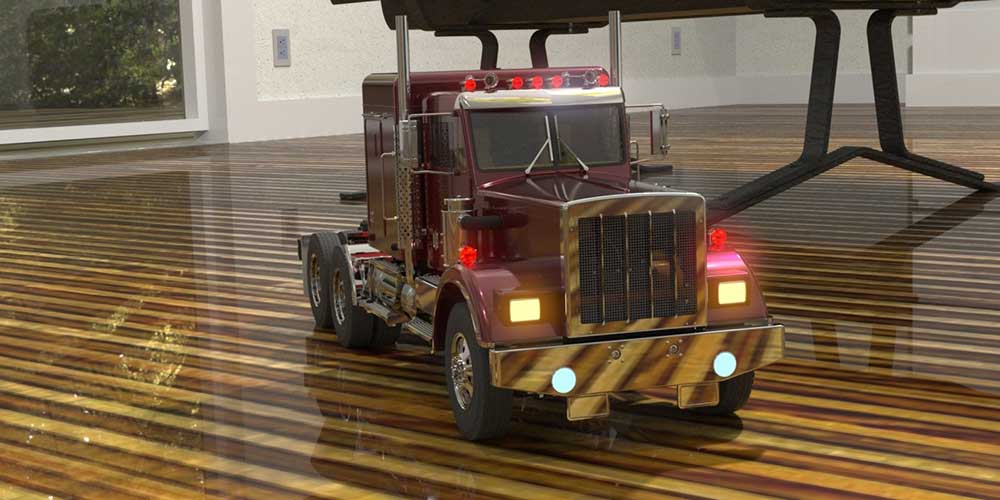
Another SOLIDWORKS Visualize trick is adding some emissive materials to bring life into the scene.
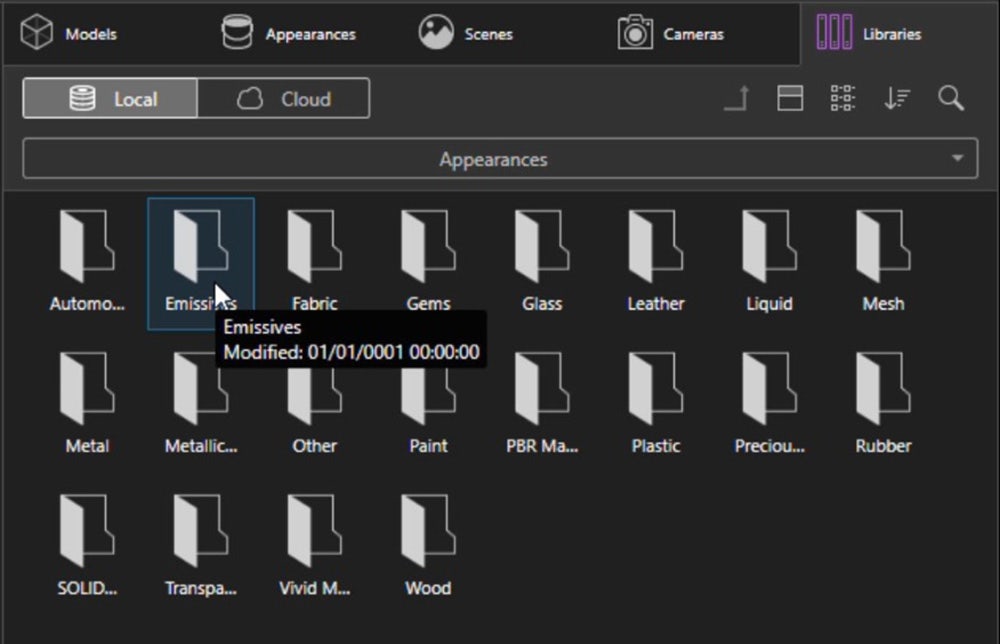
By going to the Library Tab, located in Pallet, there are several options for different assets. Choose Appearances and navigate to Emissives.
Emissive appearances are applied just like any appearance with a drag and drop onto the model. After applying the appearances, navigate to the Appearances tab and select the applied emissive material. The color and brightness can be adjusted here to give the desired effect.
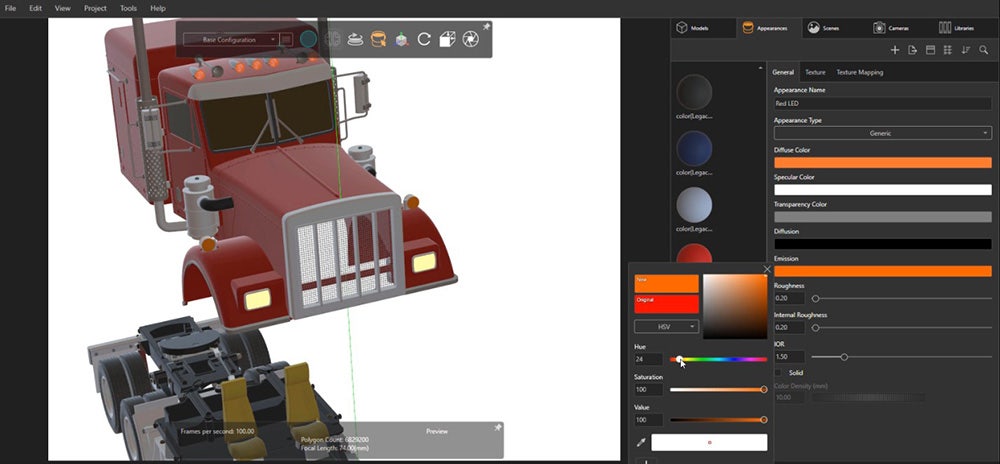
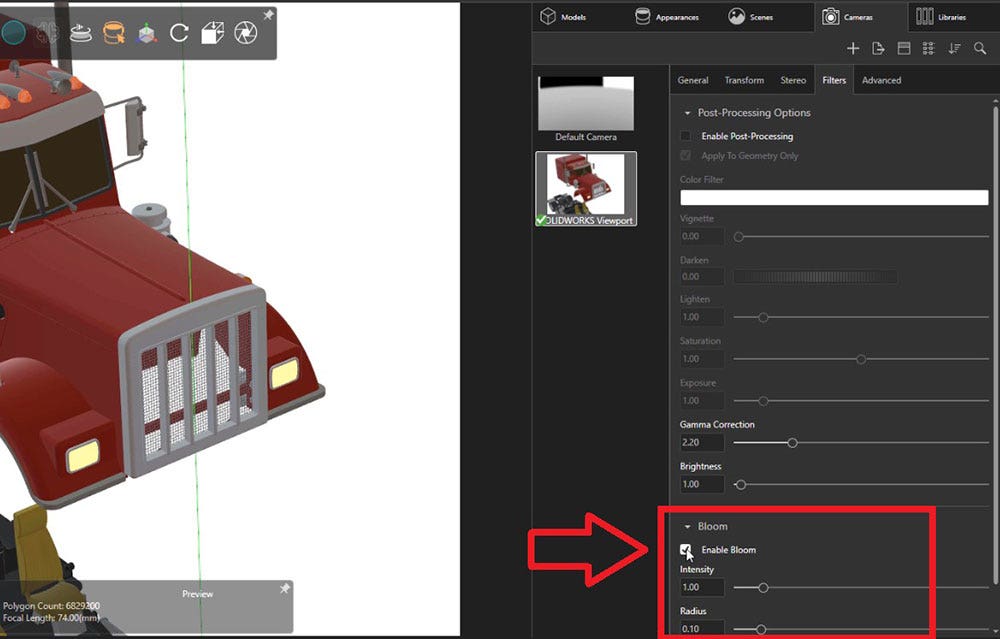
To really make the emissive material pop, go to the Camera tab, make sure the current camera is selected and in the Filter tab of the camera settings is an effect called Bloom. Enable Bloom and adjust the sliders as needed so the image looks the way you want it.
Using emissive materials is a great way to add realism and make renderings really stand out. Emissives do not project light as much as a custom light, but can add subtle luminosity, casting color onto model surfaces.
Producing Interactive Virtual Reality Videos
The last tip is to take everything we have done so far and use a 360-degree camera to render out an interactive video. To simplify this process, all that is needed for a 360 video is to set the camera type to 360 in the camera settings.
A 360 video is created the exact same way as any other video – it’s just the camera that is used that makes the difference. When creating 360 videos, animate them just like you would any other animation with the exception of switching the camera type to 360 right before rendering.
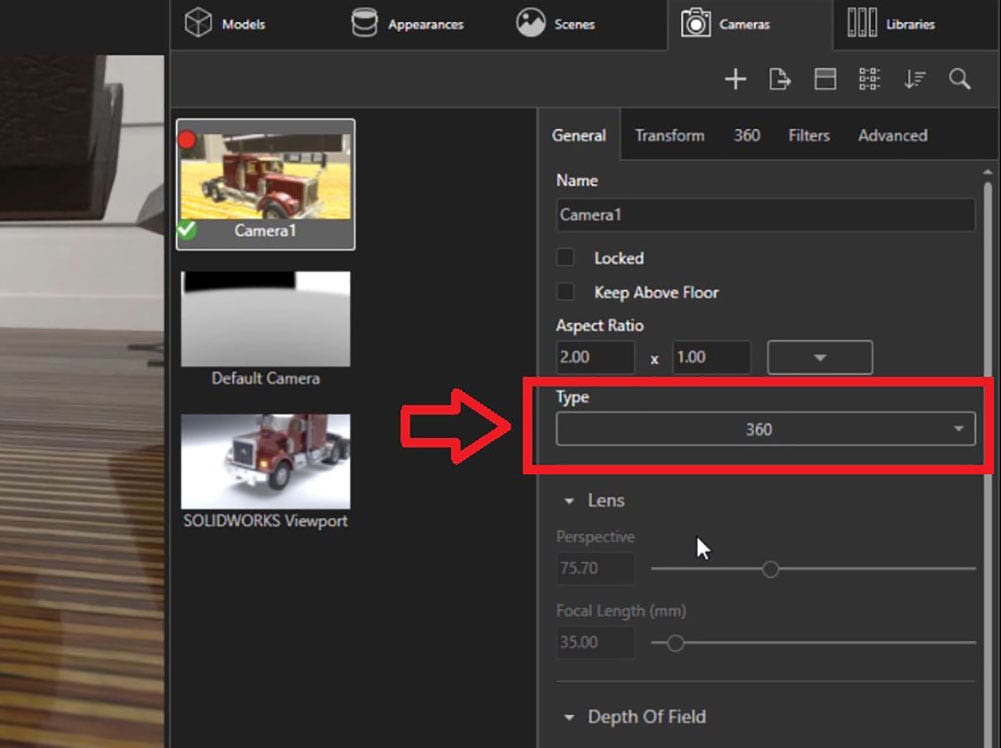
To do this, go to the Camera tab, make sure the correct camera is selected, and under the General tab change the Type to 360. In the Viewport, the camera perspective will appear to change – this is intended.
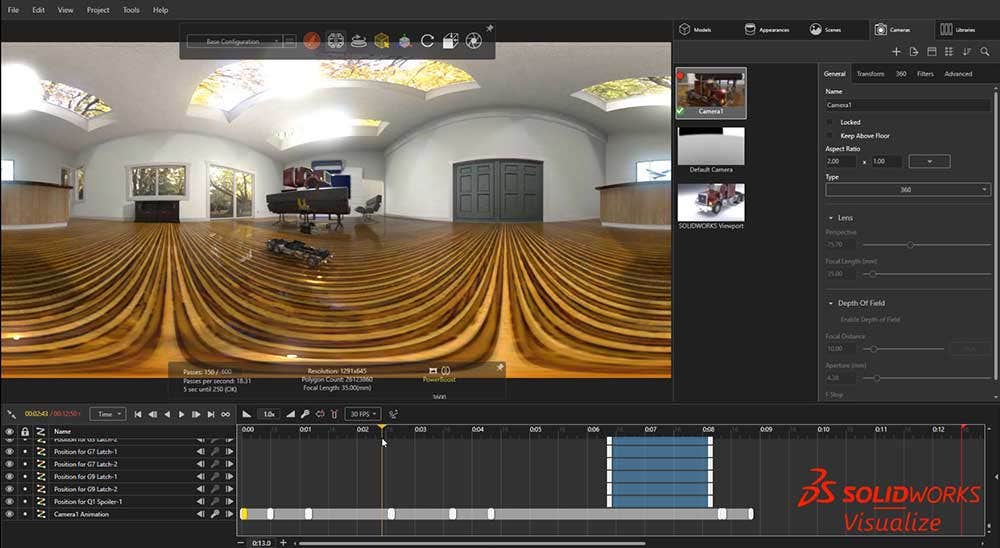
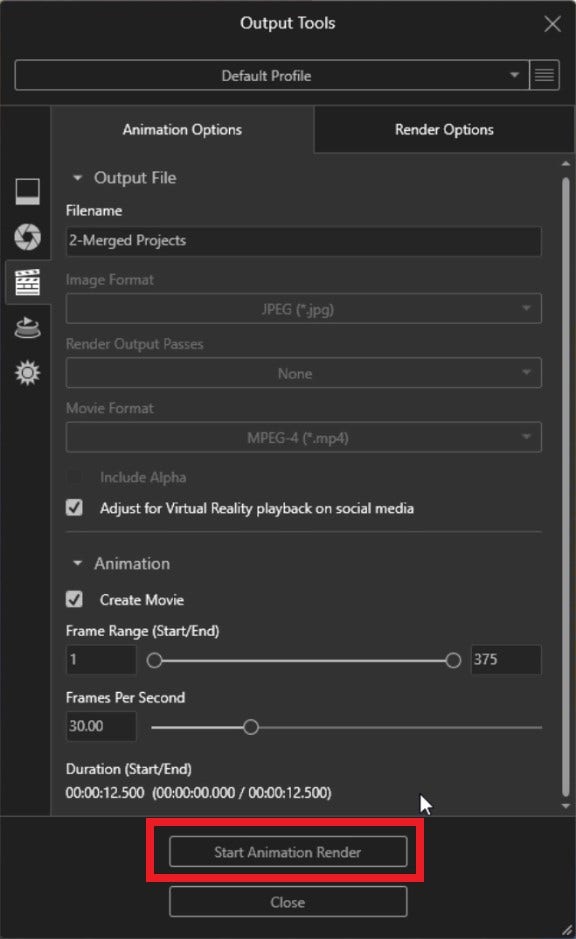
Next, click on Tools and select Render. The render tab will control the quality of the output, these settings will affect the rendering times dramatically. Since this is a 360 video, we want to click the checkbox for Adjust for Virtual Reality playback on social media. This will automatically adjust the size so this video can be supported on various platforms such as YouTube.
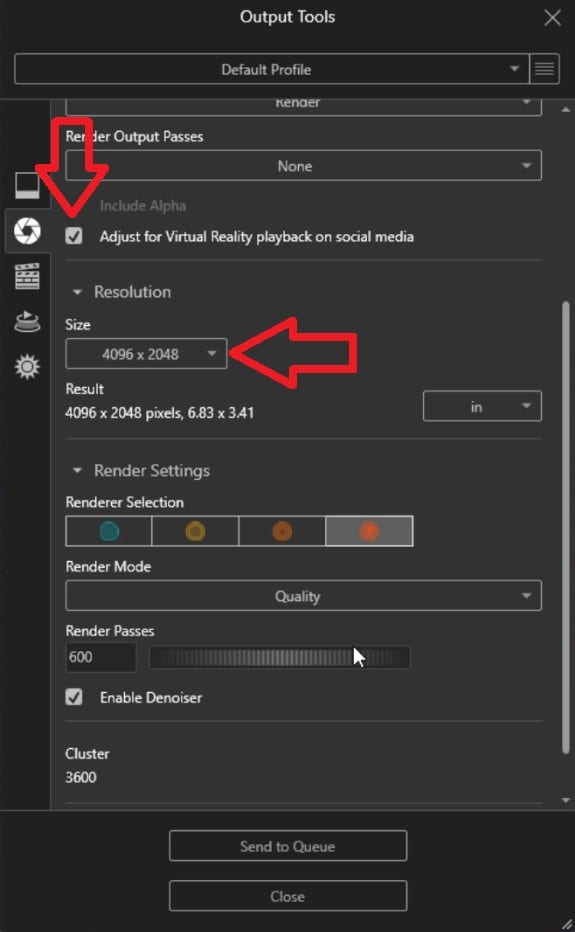
I typically suggest a minimum of 600 passes for video. I’m going to use Boost for this rendering so I can continue to use my local computer for other tasks during the rendering. For video, select the Animation tab (using this section to start the render will produce a video, opposed to an image when using the Render tab).
By implementing these three tricks you can take existing SOLIDWORKS motion studies, bring them into SOLIDWORKS Visualize, add appearances and render out the videos. The professional photo-realism quality you will achieve is similar to what you can experience with a virtual reality headset and it can really set your publications apart from others.
SOLIDWORKS Visualize Tutorial
For more information on SOLIDWORKS Visualize or if you have any questions, be sure to contact us at Hawk Ridge Systems today. Thanks for reading!


