
Every year, SOLIDWORKS rolls out a new version of its software and provides service pack updates throughout the year for continuous improvement. A lot of these upgrades originate from customer feedback, so be sure to enter Enhancement Requests through the Customer Portal!
Thankfully, SOLIDWORKS lets you maintain multiple versions concurrently under one serial number and on one machine. This can be especially handy for version compatibility when transferring files between companies since SOLIDWORKS files aren’t backwards compatible. Additionally, maintaining the older version can soften the transition of company-wide version upgrades, where older version files need to be retained or where certain feature upgrades aren’t immediately desired.
Managing these different versions can be tricky, so we’ll walk you through the steps for successful installation and implementation while avoiding some common pitfalls.
INSTALLATION
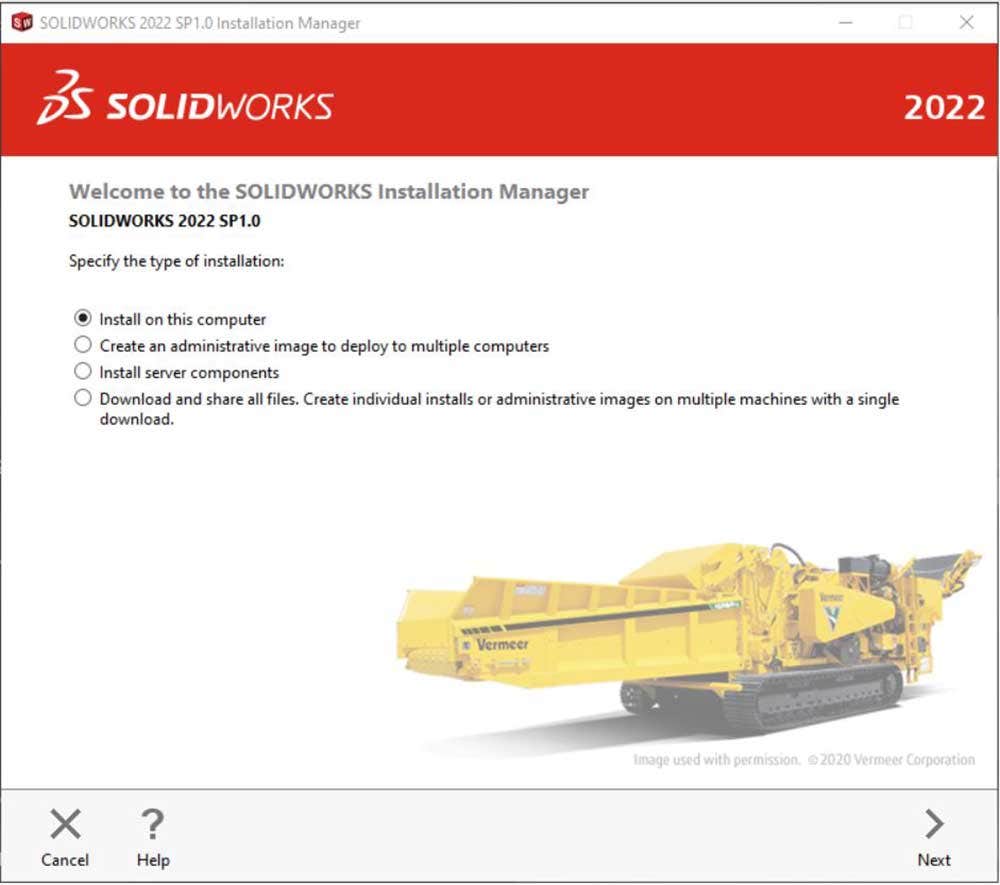
Installing a concurrent version of SOLIDWORKS is done using mostly the same process as upgrading. Begin by installing the new version as normal – download the files through the Customer Portal and launch the Installation Manager.
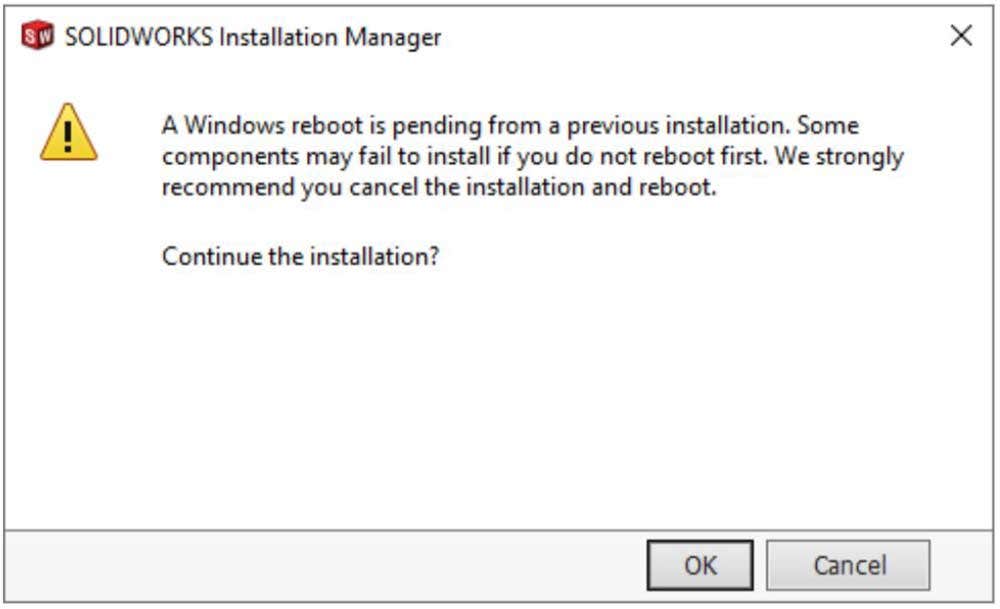
The following warning may pop up – feel free to reboot your machine, but oftentimes this can be bypassed without worry.
Select “Install on this computer.”
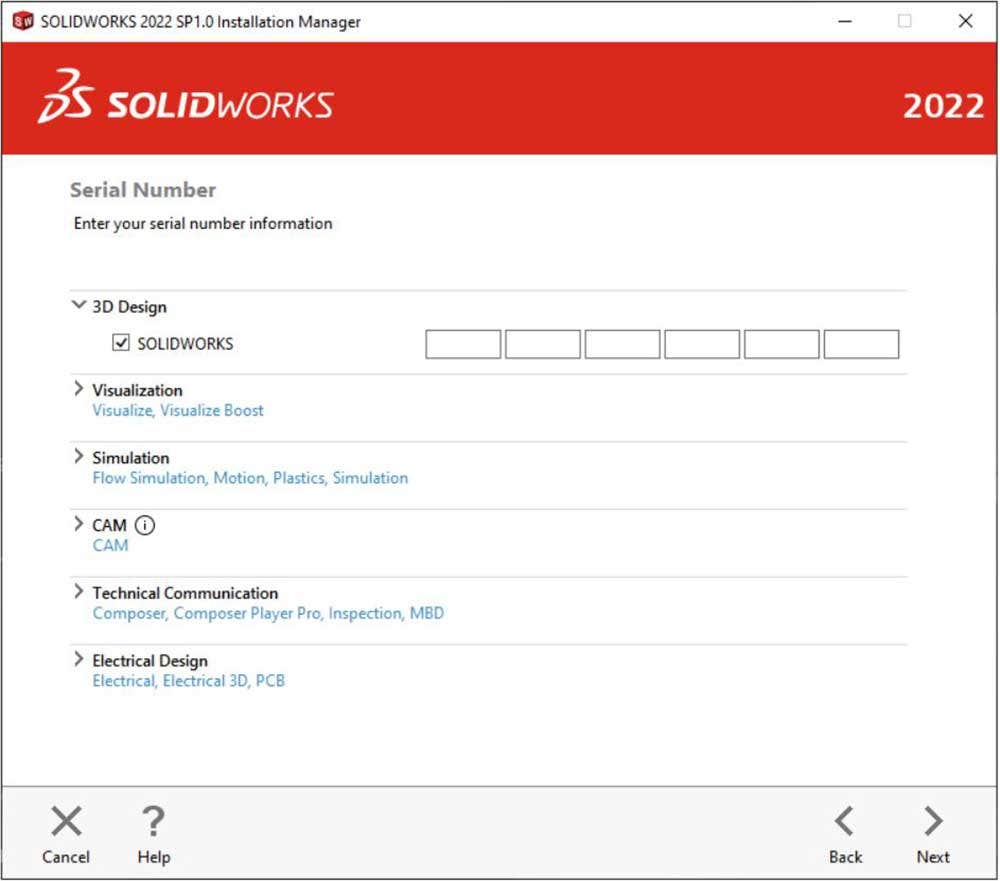
Verify the serial number.
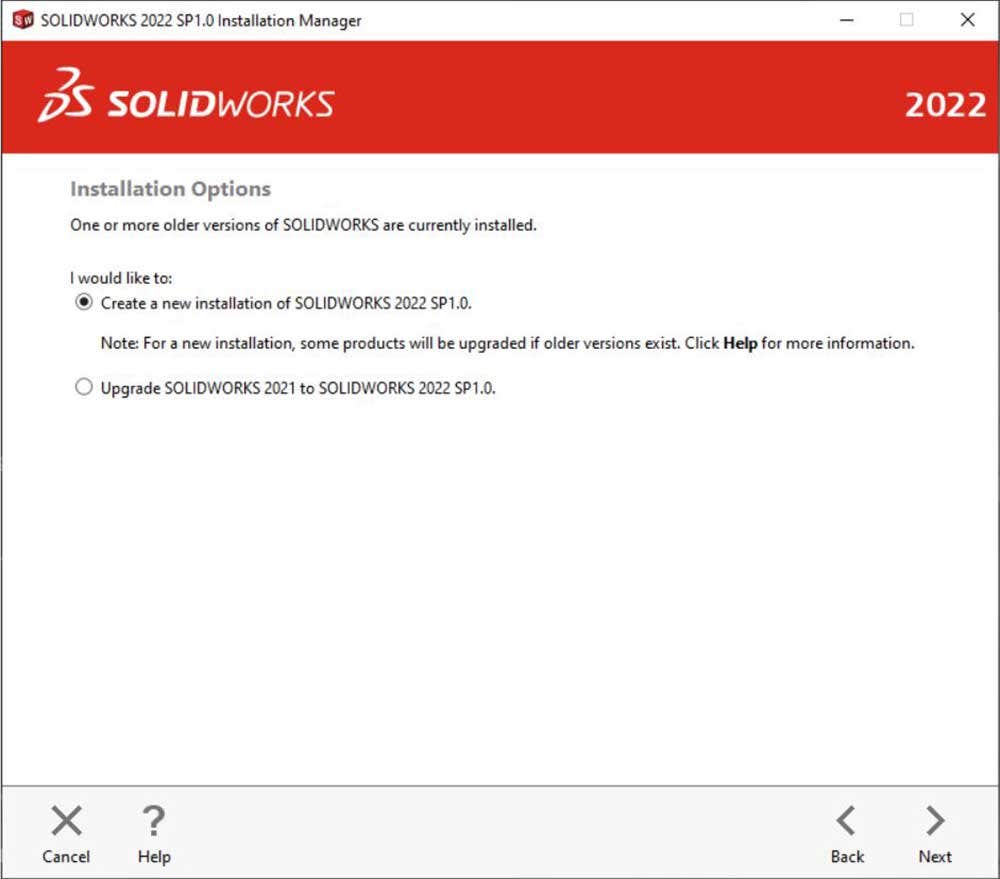
Here is the first deviation from the typical upgrade process. The Installation Manager has found an existing version of SOLIDWORKS and is asking whether to upgrade that version or install the new version alongside the old one. Select “Create a new installation…” and proceed.
At the Summary page, a few items require attention. First, as usual, ensure the products selected are desired – no special considerations here.
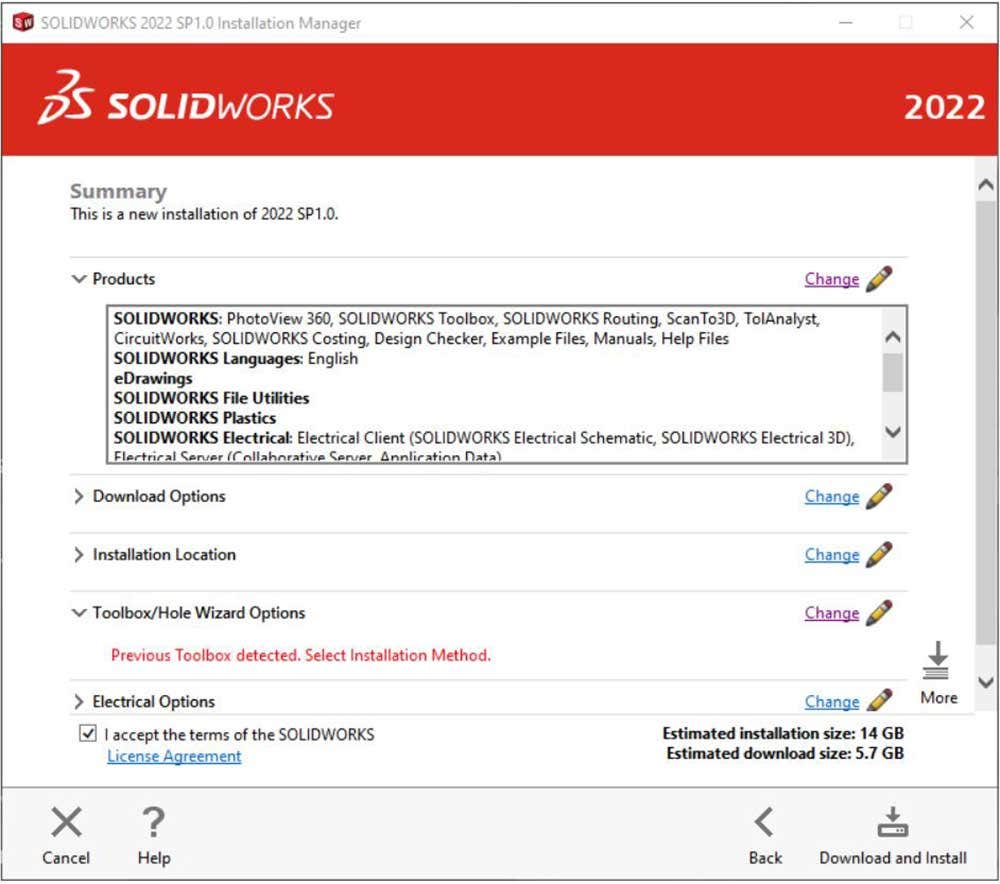
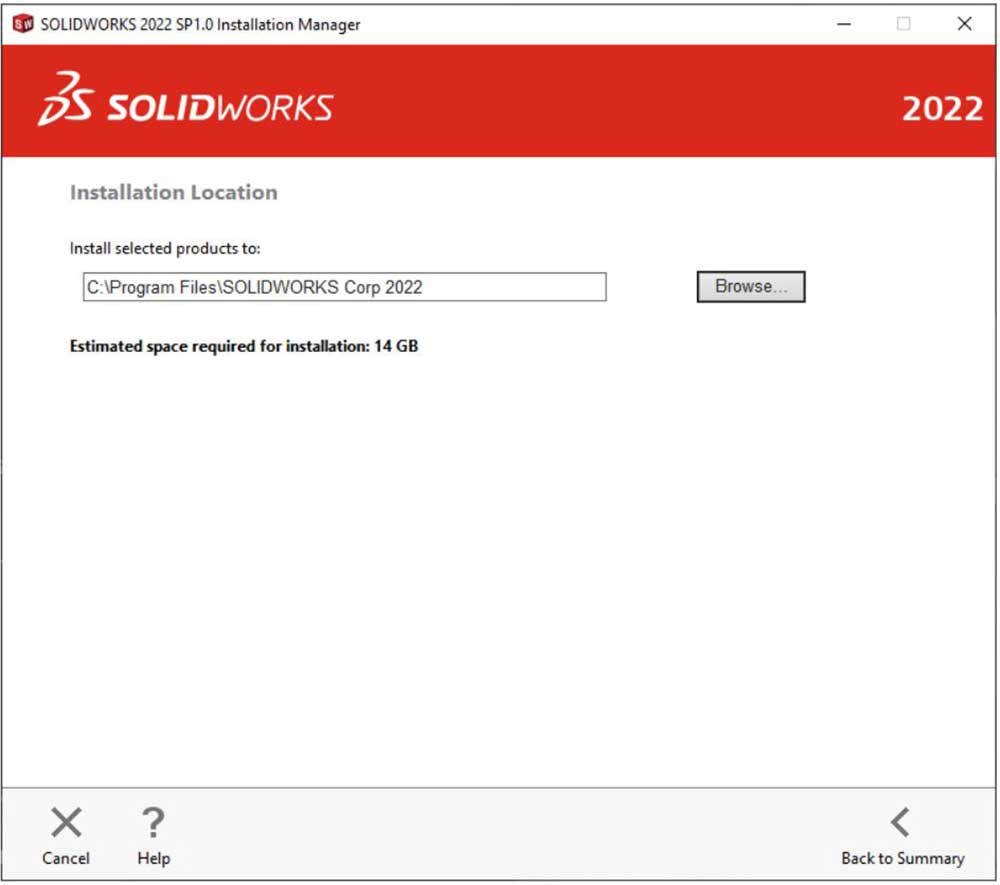
Second, open the Installation Location. SOLIDWORKS defaults to “C:Program FilesSOLIDWORKS Corp” which is the location of the existing installation. Create a special folder for the new version. This can be called “SOLIDWORKS Corp XXXX” where it is appended with the version year.
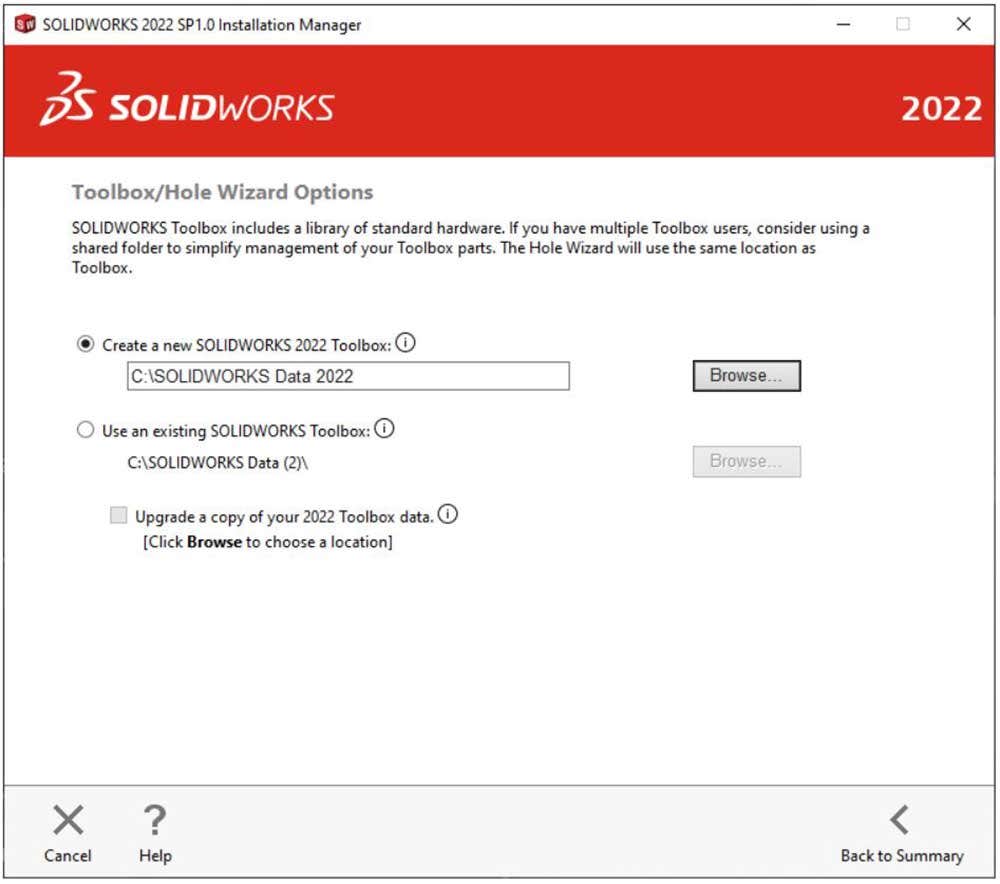
Similarly, the Toolbox/Hole Wizard requires a special folder as well. This allows the Installation Manager to avoid overwriting the existing files, and instead create an upgraded copy in the new location. SOLIDWORKS defaults to “C:SolidWorks Data”; create a folder called “C:SolidWorks Data XXXX” where it is appended with the version year.
It is now ready to install.
CONSIDERATIONS
Checking and using the correct installation:
Once the installation is complete, there are a few steps that can be taken to avoid confusion. First, open the newest version of SOLIDWORKS and check that it can be run alongside the previous version (reference the year displayed in the empty SOLIDWORKS window). Pin the new version to the taskbar or on your desktop – somewhere it will be easily accessed and distinguished from any other versions. REMEMBER: saving files in the new version will make them unopenable in older SOLIDWORKS installations.
Checking and using the correct file paths:
Next, you’ll want to check that all file paths were configured properly. To do this, navigate to the gear icon at the top of the SOLIDWORKS window to open the System Options dialog box and select “File Locations” from the left-side menu. Review the file paths for templates and other categories to ensure they are pointing to the correct version folder.
If any file locations are incorrect, add the correct file path using the “Add” button, and delete the incorrect file path by highlighting it and using the “Delete” button.
Quick tip: if multiple file locations need updating, use the “Edit All” button to view a comprehensive list of file locations and use “Find/Replace” to mass update the file paths. For example, you may need to replace “C:Program FilesSOLIDWORKS Corp” with “C:Program FilesSOLIDWORKS Corp 2022.”
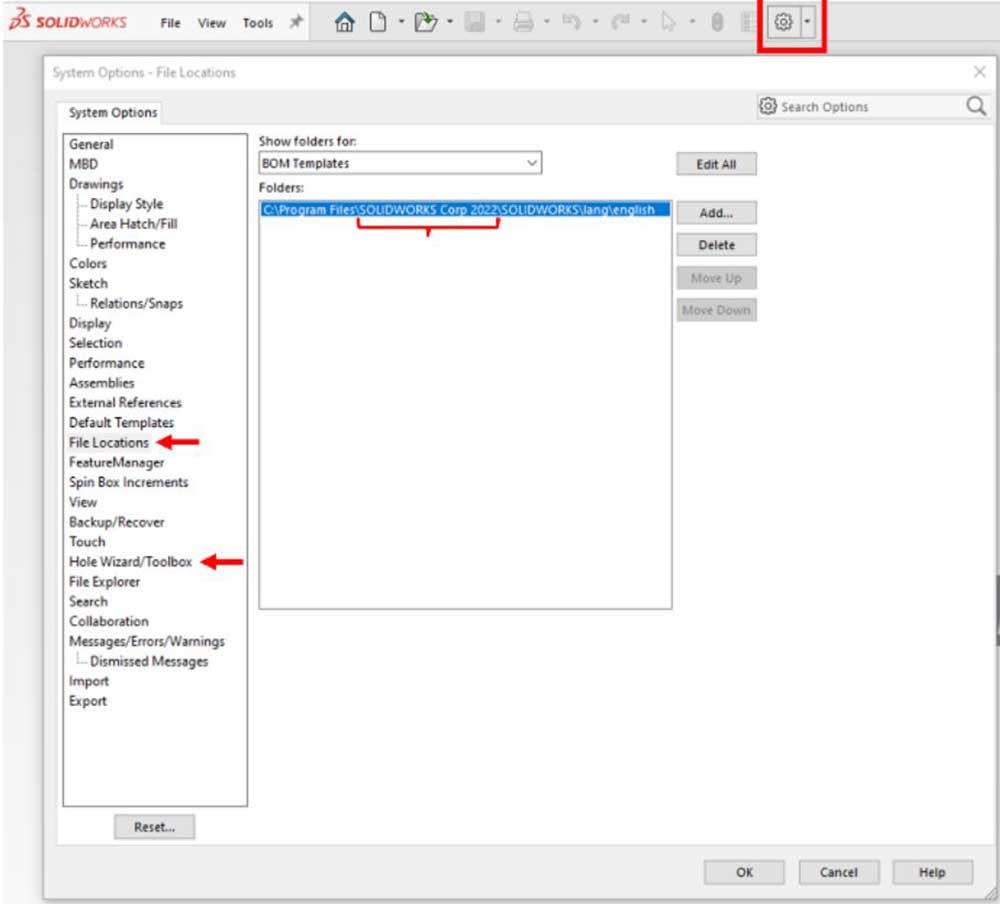
Do this again for the Hole Wizard/Toolbox category. If it is incorrect, simply use the ellipsis button to change the location. Again, this should be the “SOLIDWORKS Data XXXX” folder that was created earlier in the installation process.
Service Packs:
Service packs can be downloaded and installed as normal; they will only be released for the latest version.
SOLIDWORKS PDM:
As always, the running version of PDM must be the same or newer than the version of SOLIDWORKS. This is a crucial consideration before creating a new installation. Additionally, if the Toolbox being utilized resides in the PDM vault, there is a different process to follow for updating it. Check out our Knowledge Base article, “Updating the SOLIDWORKS Toolbox” to learn more.
For more information on SOLIDWORKS installations or if you have any questions, please contact us at Hawk Ridge Systems and our dedicated team of engineering professionals will be happy to help. Thanks for reading!


