Experience the next level of innovation first hand with 3DEXPERIENCE! With it’s easy-to-use, collaborative, and interactive environment makes it one of the most customizable PLM tools for your product development team. Check out Part 6 of our 3DEXPERIENCE Explain Series and see for yourself!
Reach the Next Level of Innovation with 3DEXPERIENCE PLM Tools

Video Transcript
Introduction
Welcome to another episode of the 3DEXPERIENCE Platform Explain Series. Today we’ll be taking a quick look at the 3DEXPERIENCE Platform and taking a very close look at the SOLIDWORKS 3DEXPERIENCE PLM Services. When we look at the platform, we can set up these tabs. I’ve set up a couple of tabs here, there is different information on the different tabs. It is totally customizable. Add in as much information as you want. Different widgets and different tabs do different things. And then over here, we have the Compass and the Compass contains a lot of different apps.
Marketplace
Here we’ve got the Marketplace. Here we’ve got roles. I’ve got a lot of roles here and the roles come with some apps which provide functionality to the role. The Compass is divided into four quadrants. Here we’ve got all our 3D programs, our virtual programs such as SIMULIA, DELMIA, and so on. And here information, NETVIBES, EXALEAD, Analytics and so on. And this is the ENOVIA, the data management side of things. All these apps are related to ENOVIA.
Product Structure Editor
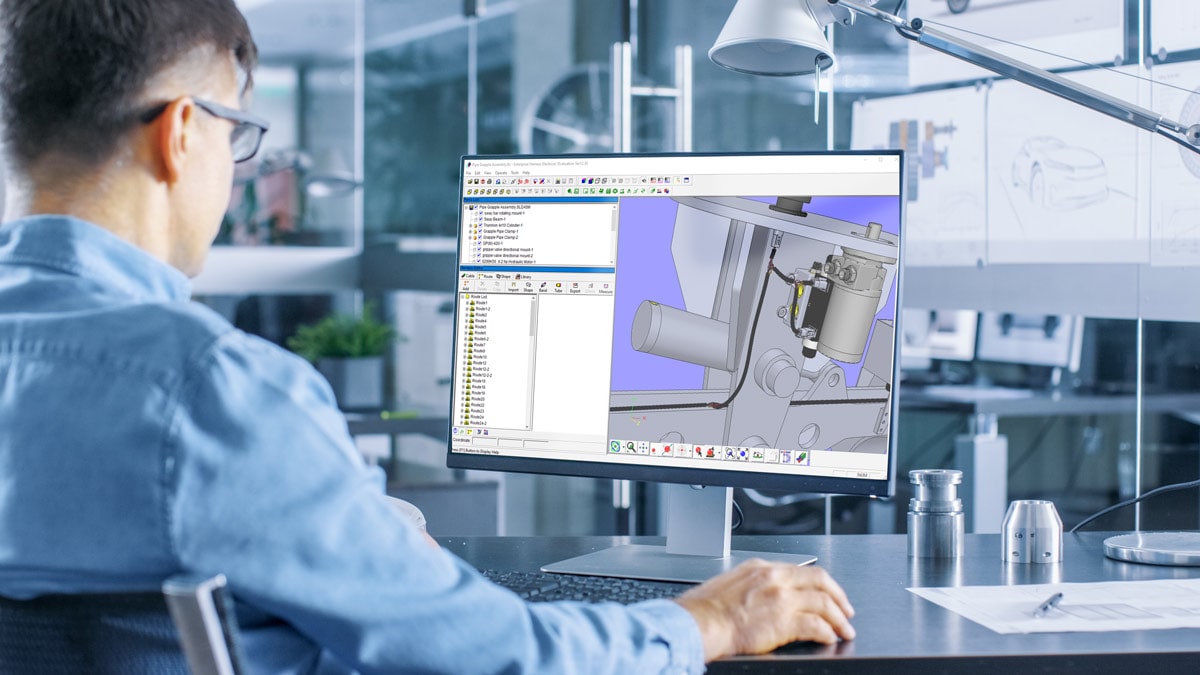
We can very easily add a new tab here. I’m just going to add a tab and name it Product Engineering. It’ll have apps related to that. And we’ll take one of those apps. I’ve added into my favorites here, the Product Structure Editor. It’s two widgets that come along together. On the left, we’re going to have the product structure and, on the right, we’re going to have the graphics and they both interact with each other. It’s one of the only widgets that comes with two parts to it and is very useful. We’re going use this a lot to illustrate what’s going on here on the platform.
Let’s do a search. Just a vague, quick, easy Google-type search. We get some results. We can filter them with the 6W Tags over here. And I’m just going to take this and drag and drop it into my Product Explorer, Product Structure Editor in this case. Now, this is an assembly I put together previously. It’s got this structure here. We can see here the sprinkler with some bushings that have been added in and so on. And there’s an interaction between the two sides of this widget. So, I select in the graphics. I can filter and start selecting parts. We can swap assemblies all the way up and so on. It can also select from the left side of the tree.
CAD Sources
And then, of course, vice versa. I can come here, I can select something, and I can say, “Show me what I selected in the graphics or zoom in on it,” and so on. The two widgets are interacting with each other here. Let’s take a quick look at the 6W Tags. We’ve got all the attributes here that came along with these and what we’re looking at here is where the Source CAD was. And we can see here there are three CADs that were involved in this assembly. There’s CATIA V 5, CATIA Solid, there’s some SOLIDWORK CATIA 3D Experience, and there’s actually some, other information here that came from xDesign (it just shows up as 3DEXPERIENCE here).
We can see that this is an assembly made up of parts and sub-assemblies from different types of CAD and the system doesn’t care where it was created. It’ll bring it into here and once it’s in here, it can be manipulated. Let’s open this assembly in CATIA 3DEXPERIENCE. As we can see here, the assembly gets loaded very quickly. This is a bushing. This bushing was created in CATIA 3DEXPERIENCE and so we have the whole product part definition here and we can now dig into it and make changes to it.
As we saw before, this one came from SOLIDWORKS and we have the full definition here, but we can’t edit it here because it needs to be edited in SOLIDWORKS. It’s here for reference, we can see that it comes from SOLIDWORKS. It’s in a release state, we can’t really do anything with it. Here’s another bushing we see that little red mark next to it. That little red mark means that we can’t edit it and the reason is that it was created in CATIA V5.
Design Review
So, even though this is In Work, it’s here just for reference. You’ll see, but we get the whole assembly, we can design in context. There’s a lot of things we can do. Whether I’m loading it in CATIA 3DEXPERIENCE or SOLIDWORKS, it doesn’t really matter. Coming back to the platform let’s just clear the view here and I’m going to take a design review here. I created this one earlier. I’m just going to drag a version of the sprinkler in here and this generally would happen design teams, they’d create design reviews, a very nice tool for doing that. Then they come here to the review tab and I’m going to open a markup. I’ve got one I saved here.
We can see that we have these different views. These different slides being created highlight a problem. We can turn parts on and off change their colors, the add call-outs different texts, different graphics so a very nice, easy way to create a design review session and then share it with other people. Coming back to our product engineering tab let’s just pull this out, resize it, and make it a little nicer. We can do another search here, we’ll go search for the orbital sprinkling.
Multi-part assembly
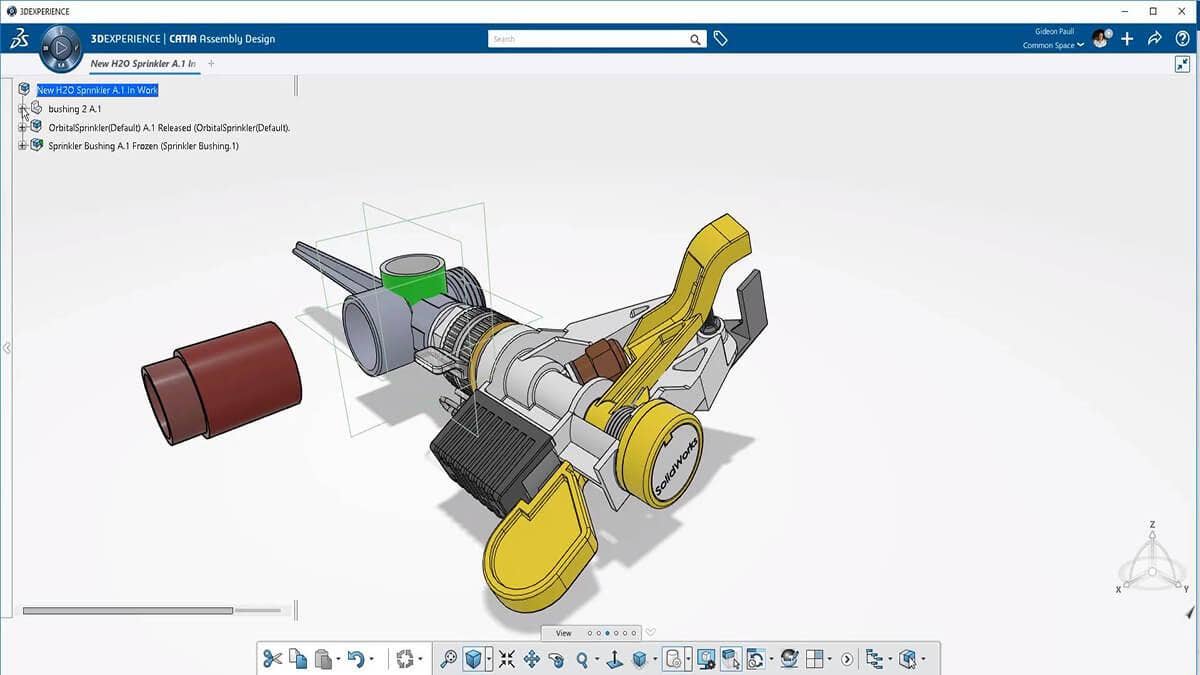
I’m going to take a new version I just created of this and I’m going to drag and drop it in over here. And really, we’re going to have a look now at how we create the multi-part assembly from different sources. Looking at the 6W Tags, we can very quickly see the state of the completion. This is done by looking at the maturity states. If I click here I can graph it. There’s a bar graph, pie chart, etc., and we can color it based upon the release date. And if I select up here and expand the assembly, I’m going to get more information.
So, I can see there are some release parts here. There is the base of the sprinkler is released. So, quite a bit In Work and there are some, frozen parts here also. We can get a clear idea of how complete this assembly is from an engineering perspective. So, I want to do some work here on the base. We can see that the assembly of the base is In Work and the children are released and that’s a normal type of situation. I’m going to select the base here and create a new revision of it because I need to make some changes based upon my design review.
Revisions
So, we have this option here to give it a new name even as we create the new revision. I’m just going to change this, say, “updated” so we can easily see what this is. We can take out the defaults configuration because we don’t really need that. And we click OK and it creates a new revision, but it doesn’t put it in our assembly yet.
But what it does do, if I refresh here, is it shows us that the current version is not the newest, there’s a newer version of this, so it’s not the last version.
New Base Version
If I want to put the new version of the base in my assembly here, all I must do is come here and say replace by latest revision and it will do it for me very nicely, very quick, and very efficiently. There we go. We got D.1 and I bet you that D.1 now is In Work. Yep, there it is, In Work and it’s the last revision. As a product engineer or as an engineer, I’ve prepared this assembly for some changes, traits to new revisions and later the designer will look at it. Let’s go and bring in those bushings to show you how we did this. It’s very easy actually. First, we do a search.
Let’s let’s take this one and this one. It originally came in CATIA V5 if I’m not mistaken. Just drag and drop it into context. And in fact, I can create my own virtual assemblies here and drag in and build the assemblies out of parts – no matter where they came from, Autodesk, NX, it doesn’t matter. We don’t really care where it comes from. All right, let’s zoom in. There are some nice tools here for positioning as well, and the positioning is maintained when we go over to the CAD. So, if we load this into any CAD system it is going to remember the positioning of where I put those parts.
It’s a very powerful digital markup tool. Strap this little widget over here. We can rotate the part and we can pull it out. It’s accurate enough but we might want to open it in CAD to really position it and mate it and so on. We can do that. So, you see here the different sources – CATIA V5, CATIA 3DEXPERIENCE, xDesign, whatever it is. It doesn’t matter where it came from.
Updated Tasks
Once again, we can see the different CADs now superimposed on the assembly and can tell us maybe supplier parts came from that came from a certain supplier and so on. Now I just want to take a quick look here at this collaborative task. I’ll go into this a little bit later, but I’ve got a task assigned to me here which I need to complete, and it’s updated for the sprinkler. And I just wanted to show you it here on the platform.
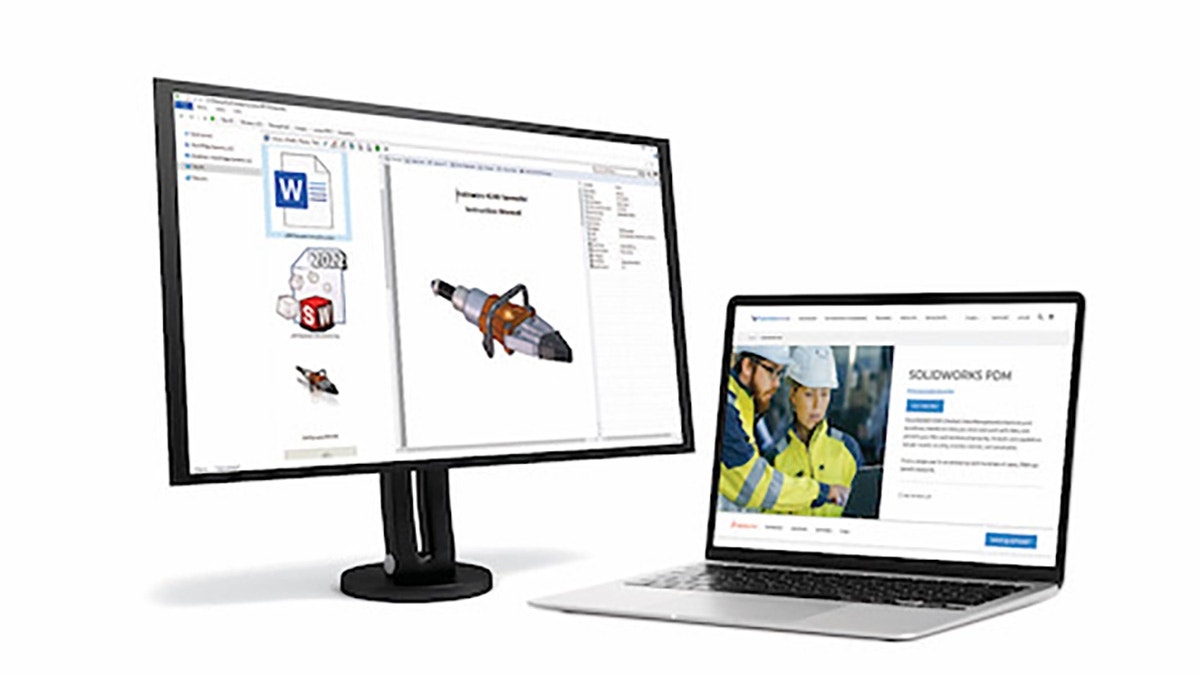
I’m going over to SOLIDWORKS now. Inside SOLIDWORKS I’ve got the same platform. So, if I’m a designer, I work in SOLIDWORKS and here’s my task. And I’ll have a various number of tasks I need to perform. I can filter them and do all sorts of things with them. I can open it and see exactly what’s the work that I need to do. I don’t need to leave SOLIDWORKS to see this information. It’s the same information that we saw on the platform.
And here they’ve added the attachment of the sprinkler. I’m just going to open it straight from the task. I got this list of things that I need to do today, or this week, or whenever. And inside SOLIDWORKS, I can access all the information I really need, to do that work. So, it’s loading the tree here. This is already saved in the platform. I want to just nip back over to my collaborative tasks here. I got a big list here so let’s filter it and view by. It says it was just assigned to me. And I’m just going to drag and drop this into the In Progress.
And this will tell anybody else who’s looking at the task or part of a project, that I’m working on this task now. It’s in progress. We can see here that even here we can see this isn’t the latest revision, there’s that little plus there. So, I’m going to switch this to the latest revision which was just created. I’m going to get the revision, and here are all the available revisions of this part. I’m going to select this one which is currently In Work and load it into my assembly. Now, I have the top-level assembly, the sub-assembly, and the part currently In Work.
I’m going to select all three, and I’m going to put a lock on it so no one else changes them while I’m working on this. I could leave the assemblies unlocked and then lock them later when I want to make the actual change the assembly. But, really, I’m just going to make a change here to the part. And notice the tree as I make those changes. So, the tree on the right, do you notice that it’s changing? As changes happen here it recognizes that. And it says wait, hang on. I’m not up to date with what’s going on in the platform. Some things changed so we need to update those.
I’ve just made a very simple change. I’m going save this up to the platform. And SOLIDWORKS kind of understands what I’m doing, and it tells me, “This has changed, this has changed, do you want to create a new revision.” All the information about what’s going on here is available. It looks good. Let’s save it. It does that and it should refresh the tree once this is saved. And, we’ll see an updated status.
And there it is. Everything is updated on the platform now and saved. And now, for all intents and purposes, I don’t need these locked anymore. I can unlock them, make them available to other people who want to make changes to the assembly. The last thing I want to do here is changing the status of my task. Because I’ve completed it. I’ll just drag and drop that over and say done. And then I move on to my next task. Never having to leave SOLIDWORKS.
Let’s go back to the platform. And we can instantly see here that the platform gets updated automatically. So, it’s always up to date. Anyone looking at this will see that or tracking these tasks will see that. Once again, if I go back to the product engineering, this should’ve been refreshed as well. And, we can see that the part is In Work. This is D.1. So, I can come here as a product engineer or chief engineer, whatever, and I can say, “Fine, I’m ready to release that now.” Okay. Maybe, it needs to go through some other approval but, that gets updated very quickly and this assembly now has that release part in, that new updated part.
Stay Up-to-Date
If we look at the properties of this, we can see that everything’s up to date. We can see where this came from – the configuration in SOLIDWORKS. With the CAD as the origin. You know that doesn’t really matter. We can even edit the attributes here and update them. Let’s look at the history of this part since it’s got several different revisions now. And we can see the revisions here, we can dig into them. There’s a lot of things we can do from here. We can see exactly what happened between revisions, how they were changed and so on. And directly from here, I’ve got a lot of capabilities that I can perform on the part.
One of the things here, collaboration, I can change the owner of the part, lock it, and so on. I want to look at the Relational Explorer. This is a very powerful tool which is available from almost anywhere on the platform and it really shows me the links between the assemblies and projects, parts, and projects and so on. I can navigate the assembly structure and zoom into a specific assembly, see its links to drawings, to other information on the platform. It’s a very powerful tool to see where things come from, what they’re linked to, what are the links and so on.
We can see here, we could link this and see simulations or to manufacturing, plants and so on. Let’s have a quick overview of what we can see here. There’s some different widgets I’ve set up here on the tabs. Here we’ve got the project Gantt Chart. And this isn’t just a view of the Gantt Chart, you can edit this. There’s a lot of things we can do here, we can create dependencies between tasks and so on. We can do comparisons, plan versus actuals. If you expand this, we can see where we are on the project. We can get a very accurate status out of that.
This is really for a project manager to come in here and check the status of the project, add in tasks, see who’s done their work, what deliverables have been provided, and so on. Over here, I’ve got the social aspect of the platform and this is very important actually. There’s a lot of things that I can do in here. This is unstructured data. It really fosters innovation because it’s in an unstructured manner where we’re making posts and people are putting comments, creating ideas.
We can see a lot of different ideas here that have been put into the system and people comment on those ideas and say, “Oh, that’s great but what about doing it this way and what about doing that?” And you can have this exchange of ideas that can’t happen in a more formal, structured manner. I know different states here for the idea and I can move an idea from state to state. These are totally customizable as well. There is no need to go with the out of the box because we have a simplistic view in here. For different people, we can provide them with different authorizations on the platform.
We can take a poster like this post and we can say, “Well, that’s great, let’s transfer that to an idea. Maybe that’s something we want to work on more or collaborate around or ask for more information from our community of users or stakeholders or whoever.” Another type I’ve created here is a corporate dashboard. It’s got some news feeds here. We can drag and drop these widgets, put in our email, put in some more web pages and make that a corporate dashboard for the whole team.
Then we come back to the product engineering tab. Let’s have a look here. Let’s just take another widget and just drag and drop it in. I’m going to take the 3D space one, that’s a nice one. We just take that drag, drop it onto the canvas. It doesn’t matter really where we drag it and drop it. It’s resizable and we can move things around. This one really shows me my collaborative spaces that I have access to in the content of those spaces. And really, I can use this to drag and drop information into my 3D Compose or Product Structure Editor or any other widget here.
This has been a very short overview of the platform with some focus on SOLIDWORKS. Thank you for listening. If you’re interested in learning more about 3DEXPERIENCE, please CONTACT US Today!