As a PDM administrator, the most time-intensive task you’ll be faced with as you set up your vault is cleaning up your existing data so you can start with a clean slate. In this article, I’ll be highlighting some of the tools and techniques available in SOLIDWORKS PDM Professional to help you clean up and make your SOLIDWORKS files more accessible.
To decide on a plan for your migration project, you’ll first want to get a solid gauge of where your data is coming from, how much data you have and how much cleanup there still is to do. If you’re coming from another PDM software, such as SOLIDWORKS Workgroup PDM, you’ll want to consider contacting our services team to get a quote so we can perform the migration for you:
https://www.hawkridgesys.com/services
One of the most common questions we get when customers are migrating their data is, “Why don’t we just move all of our data into the vault first, and clean up later?” We don’t recommend doing this because when you copy a file into the vault that has references to other files, PDM is reading the locations of all the references from inside the file. It then saves these locations to the database so you can easily locate them later. If you have a lot of broken references going in, you’re probably making more work for yourself by trying to fix these once that information has already been saved into the database. Rather than starting with broken references, you want to have a clean slate going in to give yourself the best chance at a successful implementation.
If you’ve decided you’d like to try migrating the files yourself, getting the total file size of everything you’re migrating is a good start. But you’ll also want to consider how diligent you’ve been when creating and saving your models to make sure the reference information is correct. Any file that has incorrect or missing reference information should be cleaned up prior to migration.
If you think this might be too much work to be worth migrating everything, you might consider a partial migration – leaving the rest of the files outside the vault. Below are some of the possible migration scenarios – color coded from quickest to longest migration time:
Migrate nothing – Leave existing files as they are and start fresh in PDM.
Migrate as needed – Leave files where they are, and leave it to engineers to move files into the vault when they need to use them.
Migrate important/current projects only – Hybrid of leaving legacy files outside of the vault and migrating all files.
Full Migration – Migrating all files into the vault.
It’s recommended to migrate all files into the vault if possible to take full advantage of PDM permissions, searchability and revision management. Once you’ve decided on a strategy, it’s time to start the (sometimes) lengthy process of cleaning up your references.
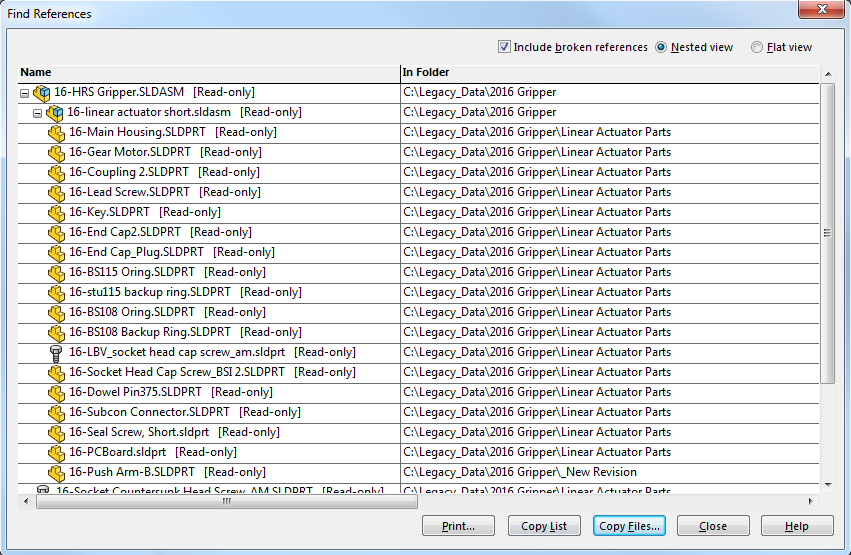
If you’ve moved or otherwise broken the link to some of your referenced parts used in multiple assemblies, it may be worth taking a look at “Tools” > “Options” > “File Locations” > “Referenced Documents.”

This dialog will tell SOLIDWORKS where to look if it’s not able to locate a reference. Keep in mind this does not automatically search any subfolders of the folder you specify; you’ll need to explicitly add any subfolders you’d like SOLIDWORKS to search. You may want to use the SOLIDWORKS Task Scheduler as well to automate opening and saving your files with the correct paths.
Once all your files have been saved with the correct references, it’s time to copy them into the vault using a Copy > Paste, or drag and drop. Keep in mind that all files should be checked in after they’ve been copied so other users can work with them.
Once your files are in the vault, there are several handy tools that can help save you some time organizing your files to make them easier to work with:
Set Revision
Synchronizes the back-end PDM revision counter with existing Revision custom property value in files.
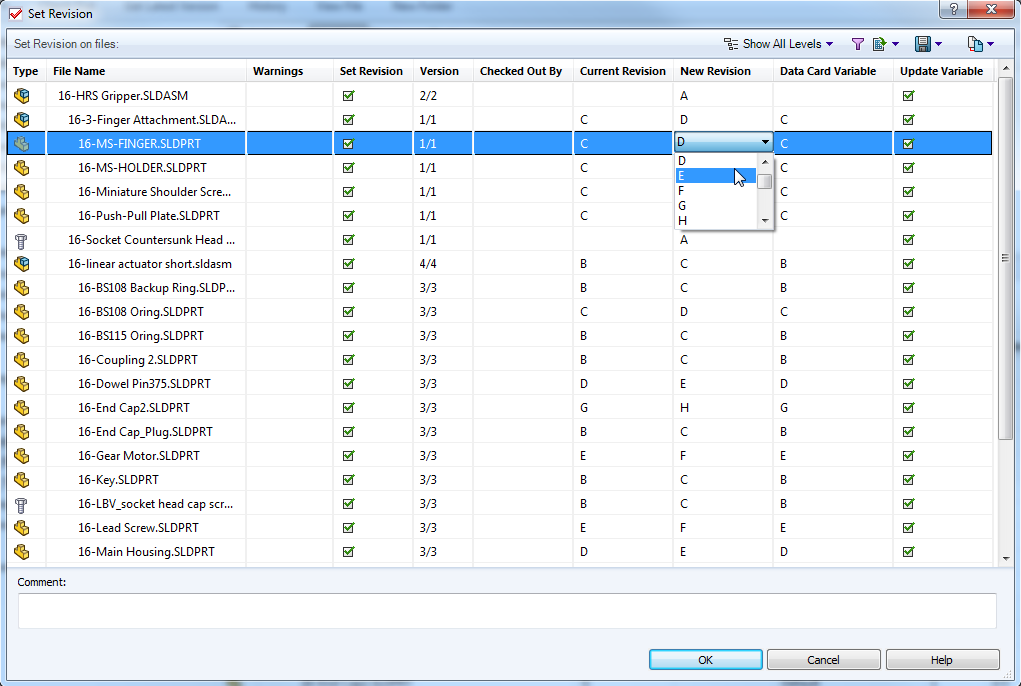
If your files already have a Revision property before you bring them in, this tool can help PDM line that revision value up with a matching PDM revision number counter value. This ensures that the next revision the file gets in PDM will be correct. You can use this tool on folders and/or checked in files by selecting them in your vault view, and going to Modify > Set Revision. Right clicking anywhere in this tool will give you options for updating the revisions for multiple files. You can also optionally check the “Update Variable” box if you would like to update the PDM Revision variable to be in sync with what PDM thinks is the current revision.
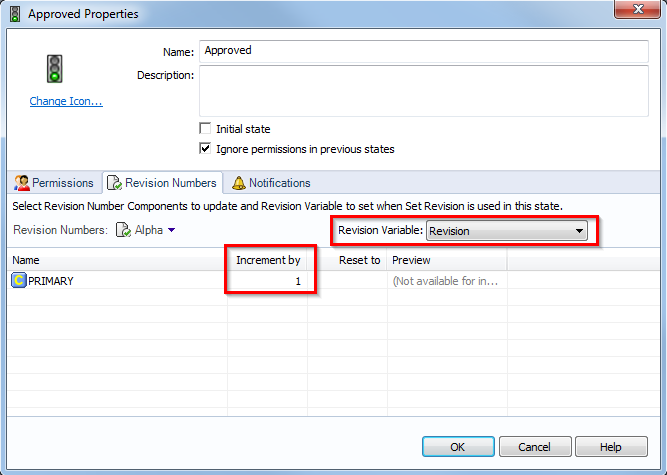
In order to select a “New Revision” value, files must be in a workflow state with a value in its “Increment By” section under the “Revision Numbers” tab. You’ll also want to make sure you’ve selected your revision variable in the upper-right dropdown of the “Revision Numbers” tab in the state properties.
Move Tree
Moves and renames files in batch.
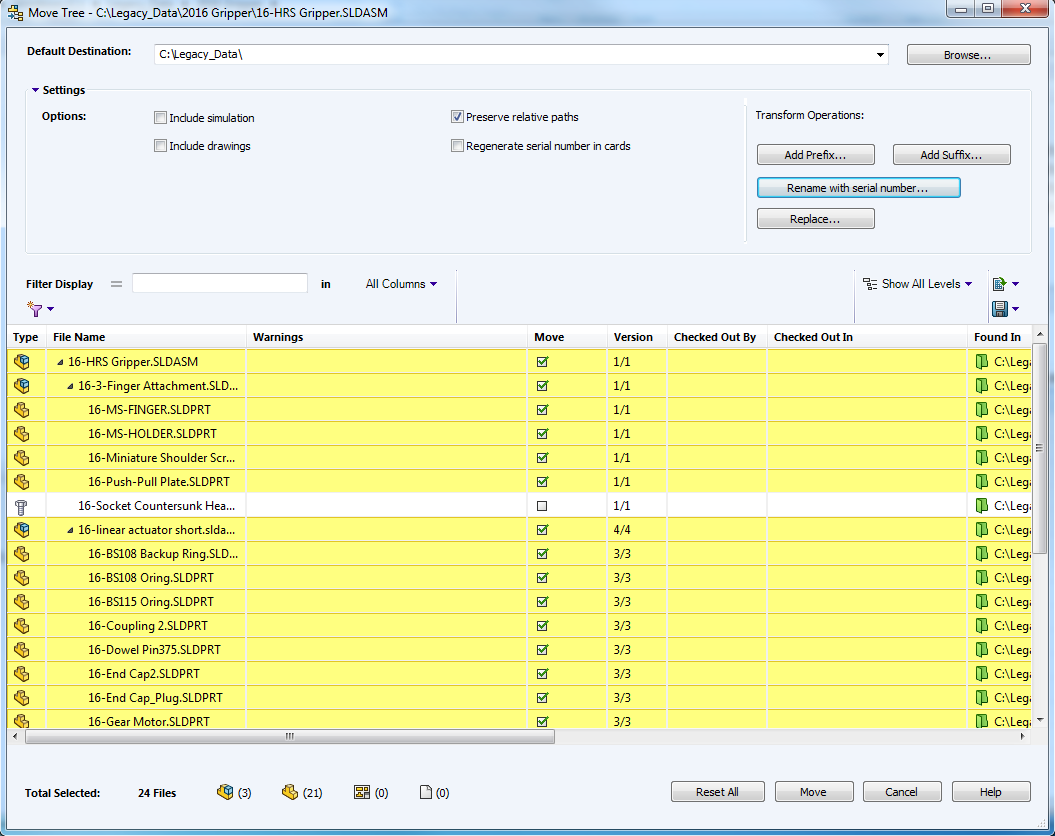
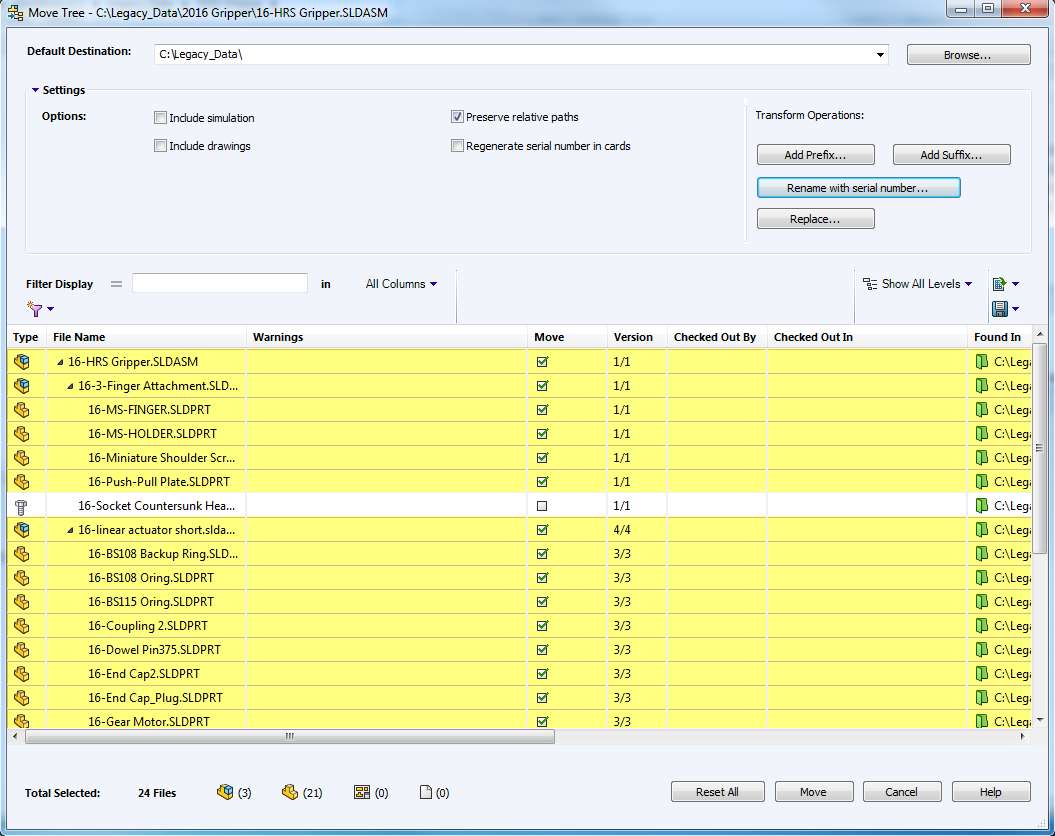
This tool is a more powerful version of SOLIDWORKS “Pack and Go” for files in the vault. It allows you to grab all a file’s references then move and rename them. One helpful option with this tool is “Preserve Relative Paths”. This adds the relative path of the file to the destination path, so you can duplicate whole folder structures along with the files being moved. If you select “Preserve Relative Paths” and change the “Default Path” to the vault root folder, you can rename all files in place without moving them – even if they’re in different folders. This can be helpful when combined with the “Rename with Serial Number” option to turn your existing inconsistent “smart” part names into more consistent “dumb” part names that don’t rely on manual user input.
Update References
Manually updates a PDM file reference.
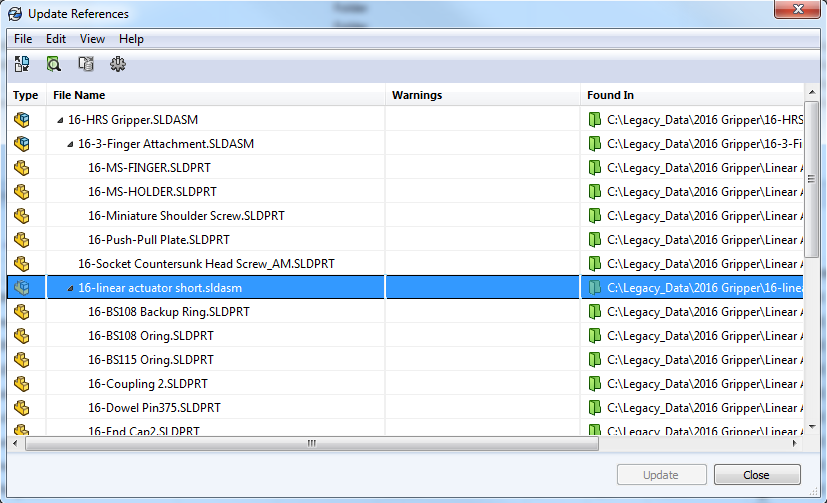
If you need to replace a file reference after a file has been added to the vault, the “Update References” tool allows you to manually point PDM to a new location. This is done on a per file basis, so it’s recommended for one-off, or occasional use, as it is more of a time intensive process to use for multiple files. You can use the “Find Files” button to help locate other instances of files in the vault and redirect the file paths to point to them, or the “Add Files to Vault” option to move new references from outside into the vault.
File Version Upgrade
Standalone tool for upgrading SOLIDWORKS files to the latest version inside the vault after migration. It can also help fix file references.
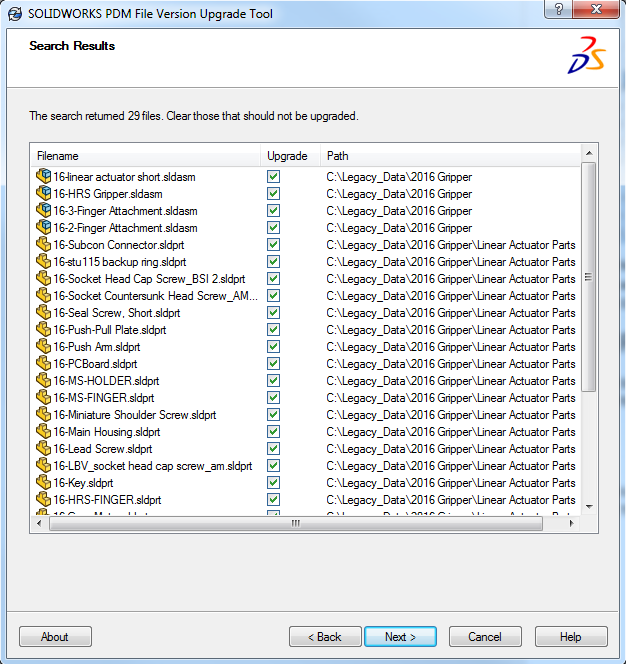
This is a standalone tool that needs to be installed separately from PDM. It also requires SOLIDWORKS to be installed on any computers running the task. This tool lets you pick files in the vault to check out, open, rebuild, save and check in. It gives you many filtering options and even lets you run the process on multiple computers at the same time to share the load. If you set up the correct “Reference Documents” locations in your SOLIDWORKS options, any missing references will automatically be repointed and saved with the file if found. The installation files for this tool can be found in the PDM Client installation files folder under the “SupportFileVersionUpgrade” subfolder. For more information on this tool, consult the SOLIDWORKS PDM web help, or the “Installation Guide” PDF file found in the PDM client installation directory.
For more information, check out our YouTube channel, get a SOLIDWORKS PDM quote or contact us at Hawk Ridge Systems today. Thanks for reading!
