Multibody design is a powerful SOLIDWORKS modeling method for creating more complex, yet convenient parts. Complex parts can be broken down into individual bodies to simplify and speed up the modeling process. This article will cover two of the commonly used commands for multibody design: Combine and Intersect.
Combine and Intersect are two incredibly useful commands for multibody design in SOLIDWORKS.
- The Combine command allows bodies to be added, subtracted, or have their common volume found. These are sometimes referred to as Constructive Solid Geometry operations.
- The Intersect command allows bodies to be divided into regions and each region included or excluded, analogous almost to the Power Trim command but for 3D bodies. It can also be used to find internal volumes and it’s useful for reverse engineering molded parts or calculating volumes of containers.
Using the Combine Multibody Part Command in SOLIDWORKS
The Combine command allows bodies to be added together, subtracted from each other, or combined to find a common volume.
Combine is the name of the SOLIDWORKS command, however, the general principle is sometimes referred to as Constructive Solid Geometry (CSG).
The Combine command is found under Insert>Features>Combine. For the examples below, the two body part shown below will be used as the starting point.
Note: A part file must have at least two solid bodies before the Combine command can be launched, but it can also work with three or more solid bodies at once.
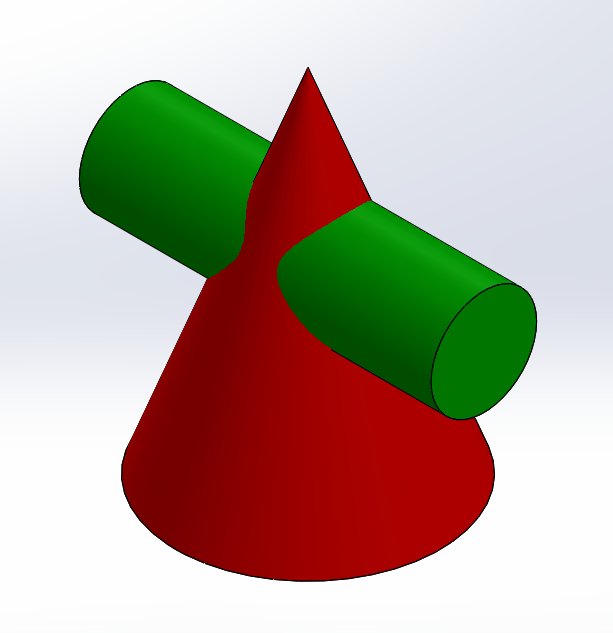 The starting multibody part contains a green cylinder and a red cone as separate bodies.
Using the Combine Command to Add Bodies Together
The simplest of the operations is to select both bodies (order does not matter) and they will be merged into a single body.
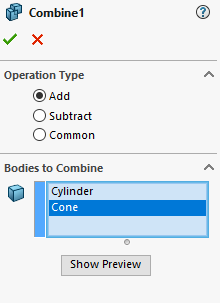 The Add operation in the Combine PropertyManager merges selected bodies into a single body.
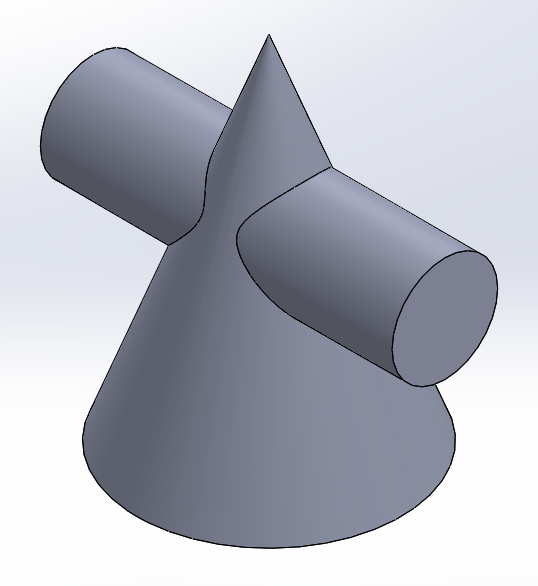 After the Add operation, the cylinder and cone bodies become a single merged body.
Using the Combine Command to Subtract Bodies from Each Other
This option makes a cut in one body using the other body as the cutting tool. Order matters here. One body will be the main body, and the other body will be the body to subtract.
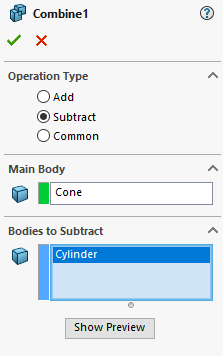 The Subtract operation in the Combine PropertyManager removes one body using the other as the cutting tool.
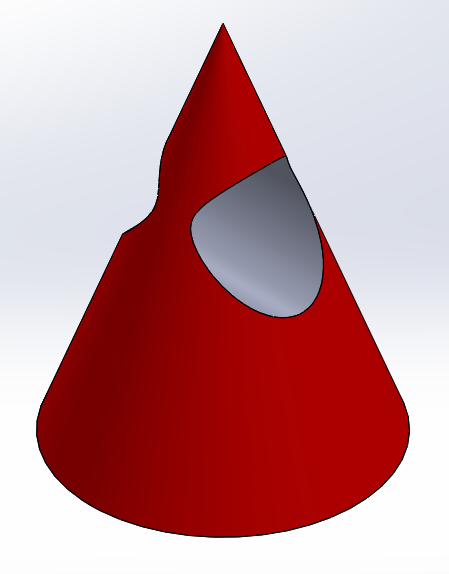 Subtracting the cylinder from the cone leaves the cone with the cylinder’s volume removed.
Using the Combine Command to Find a Common Volume
This command finds the volume that is shared by all selected bodies (order does not matter). This can be thought of as the 3D equivalent of the intersection in a Venn diagram.
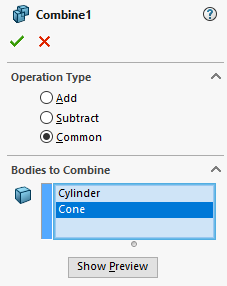 The Common operation in the Combine PropertyManager keeps only the volume shared by all selected bodies.
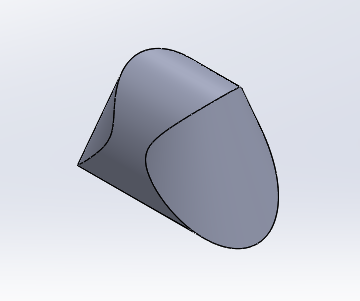 The Common operation preserves only the volume where the cylinder and cone overlap.
Using the Intersect Multibody Part Command in SOLIDWORKS
The Intersect command forms solid bodies as an output from an input of solids, surfaces, and/or planes. In the multibody modeling context of this article, we’ll consider the inputs to be only solid bodies. This is the most common setup when working with basic multibody parts.
The Intersect command can be a little difficult to explain simply through text. Let’s first look at a simplified 2D diagram.
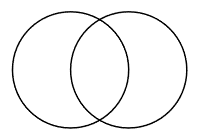 Two overlapping circles illustrate how the Intersect command divides geometry into separate regions.
With this input of two overlapping circles, we can choose to include or exclude any of the regions formed by their intersections. There are three regions, and each region can be in one of two states (included or excluded) giving us eight unique combinations. Note, that some of the combinations may be impractical.
Some examples:
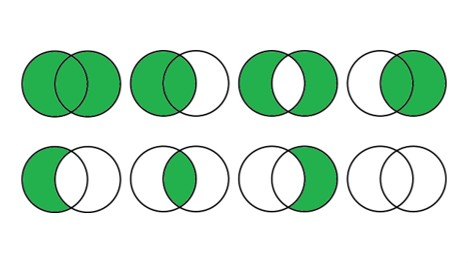 Each of the three regions formed by the circles can be included or excluded, giving eight possible outcomes.
From this 2D example, you may notice that most of the combinations could be achieved using a Combine feature. This is due to the relative simplicity of the circle intersection, however, the concept will apply to more complex intersections just the same. Now, let’s try looking at a real 3D example in SOLIDWORKS. The starting model will be the same two body part as before.
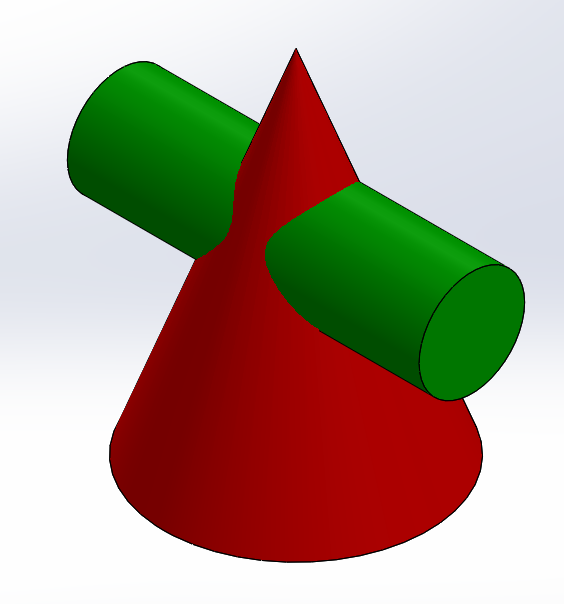 The Intersect command starts from the same two-body part used in the earlier Combine examples.
Run the Intersect command. It is located under Insert>Features>Intersect. Select the two bodies and click intersect. Use the option “Create both” for the most versatility.
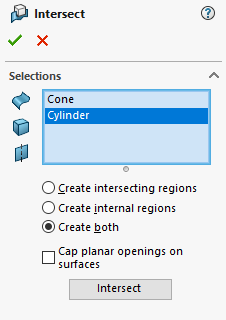 The Intersect PropertyManager lets you click each of the four resulting regions to include or exclude it.
The resulting intersection will have four regions, click on them either from the graphics area or the PropertyManager to include or exclude them.
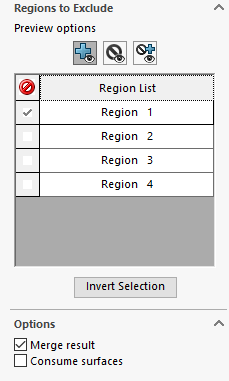 Excluding region 1 while keeping regions 2 through 4 merges them into the final intersected body.
Once the regions have been included or excluded, as desired, click on the green check to complete the command.
Take note of the “Merge result” checkbox. This determines whether the included regions will be output as a single body or as separate bodies. Make sure there are no zero-thickness areas if you use this option.
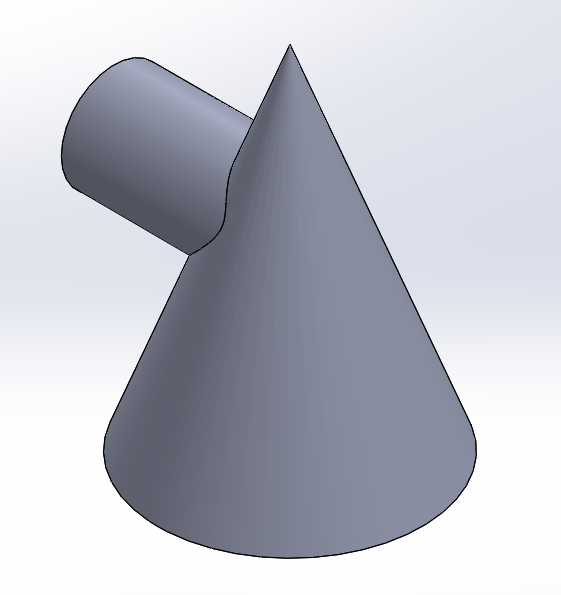 Selecting the right regions with Intersect merges the two bodies into a single combined body.
Let’s look at one more example of the Intersect command. This time the two bodies represent the two halves of a mold, with an empty cavity between them representing the part to be manufactured.
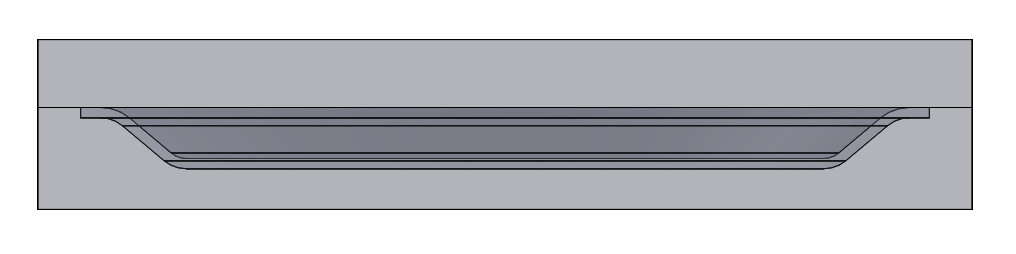 These two mold halves have no direct overlap, but Intersect still finds an internal cavity region between them.
Run the Intersect command just like before. Notice how there are three regions generated even though the two bodies have no intersection with each other. This third region is formed by the internal volume.
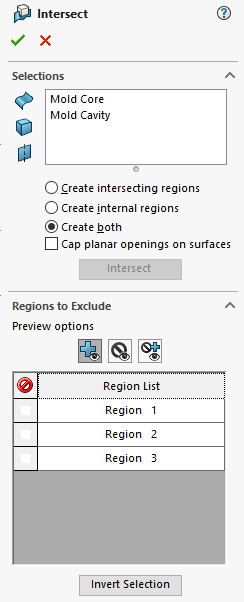 Excluding the two mold-half regions and keeping the cavity region generates the molded part geometry.
Exclude the two mold regions and include the internal region to generate the molded part.
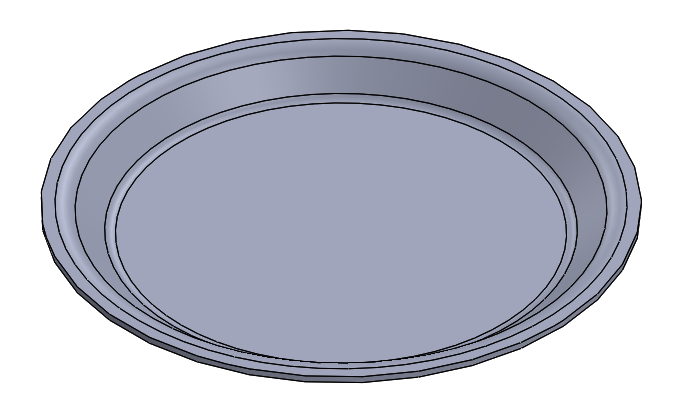 Intersect recognizes the internal cavity as its own region, producing the molded plate from the tooling.
This is a more advanced use case for the Intersect command. One of its most immediate uses is to generate molded parts from the existing tooling bodies. It can also be used to calculate internal volumes by generating a body representing the internal volume, and then using Mass Properties on that body.
Learn More about Multibody Part Commands in SOLIDWORKS
Do you already have a Hawk Ridge Systems Elite or Essentials Subscription? If so, the SolidProfessor course “Multibody Part Design” is included if you’d like to learn even more about multibody part commands in SOLIDWORKS.
Have questions? Get in touch with us today.