Markforged 3D printed parts are known for looking great and being incredibly strong but are they watertight and airtight? We ended up doing a little experiment to find out the answer to this question using a series of printed pressure vessels out of Onyx material on the Markforged X7 3D printer. Each pressure vessel had different wall thicknesses ranging from 5mm down to 2mm thick. I have to admit, the results were surprising!
Part Design for Testing
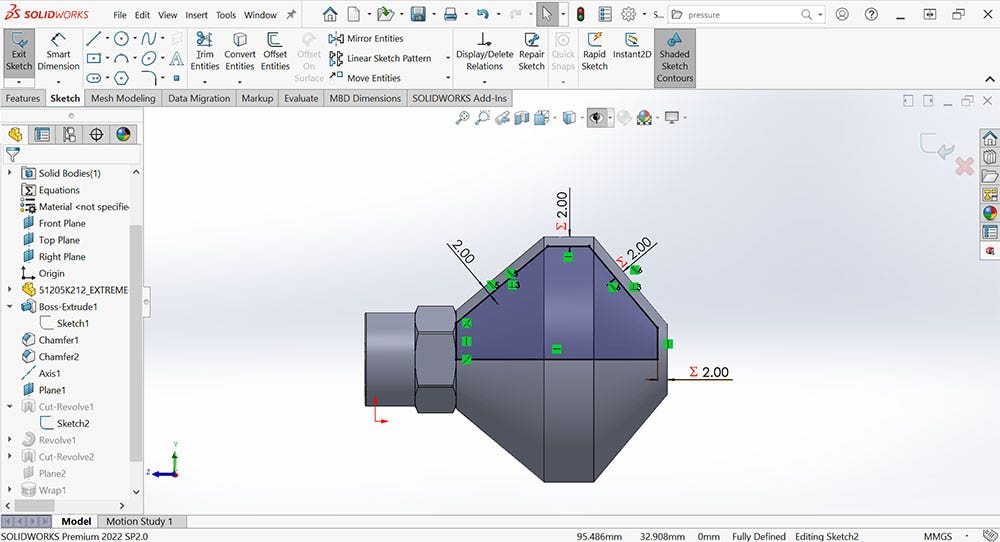
The part was designed using SOLIDWORKS with special consideration to optimize the part for additive manufacturing. The shape and structure of the part are specially designed to eliminate the need for support structure throughout the complete design. This no-support strategy ensures that the inner chamber is completely hollow. The printed threads also benefit from eliminating support as they will turn out cleaner when printed this way.
Printed Part Eiger Settings
Eiger is the build prep software utilized for Markforged 3D printers. I used this software to customize the prints for pressure applications. Here were the print settings for the test samples:
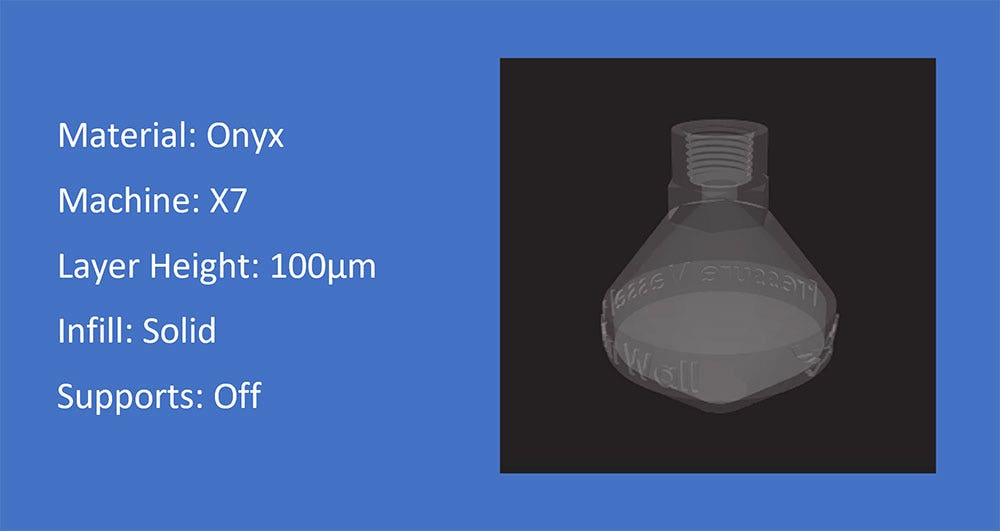
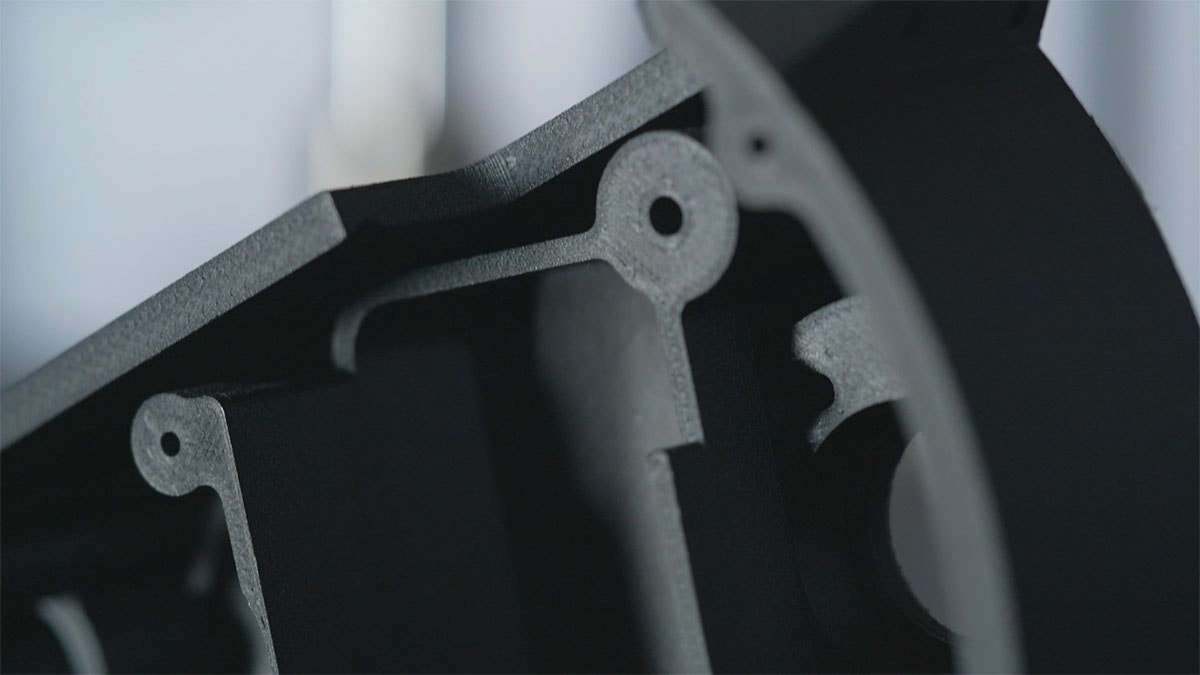
Onyx is the most commonly used Markforged material being a blend of nylon and chopped carbon fiber. The material has a very desirable black matte finish but more importantly, it is a strong engineering grade material perfect for these types of projects. The machine I am using is the X7 from the industrial line of Markforged machines having a good size build volume and the ability to print with good accuracy. Layer heights of 100microns are typical of Markforged prints so I stuck with the default in this case. When it comes to infill, the default infill setting is triangular. However, I wanted to ensure that the parts could handle as much pressure as possible so I switched over to a solid print. And finally, I was able to completely turn off the supports due to the unique design of the pressure vessel.
Air Pressure Leak Test
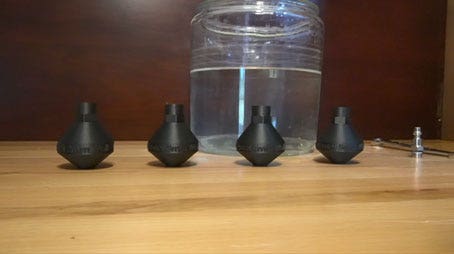
The goal of the first air pressure leak test was to place four different pressure vessels of varying wall thicknesses under increasing amounts of air pressure to determine when they will leak. The wall thicknesses printed were 5mm, 4mm, 3mm, and 2mm. The air pressure test involved threading an air fitting into the printed part to enable quick connection for the air compressor and then ramping up pressure until a leak was spotted with soapy water. No postprocessing of any kind was done to the printed part. I simply took printed parts right off the machine and screwed on a standard quick connect air fitting with teflon tape. The air compressor I was using had a max pressure of 100psi.
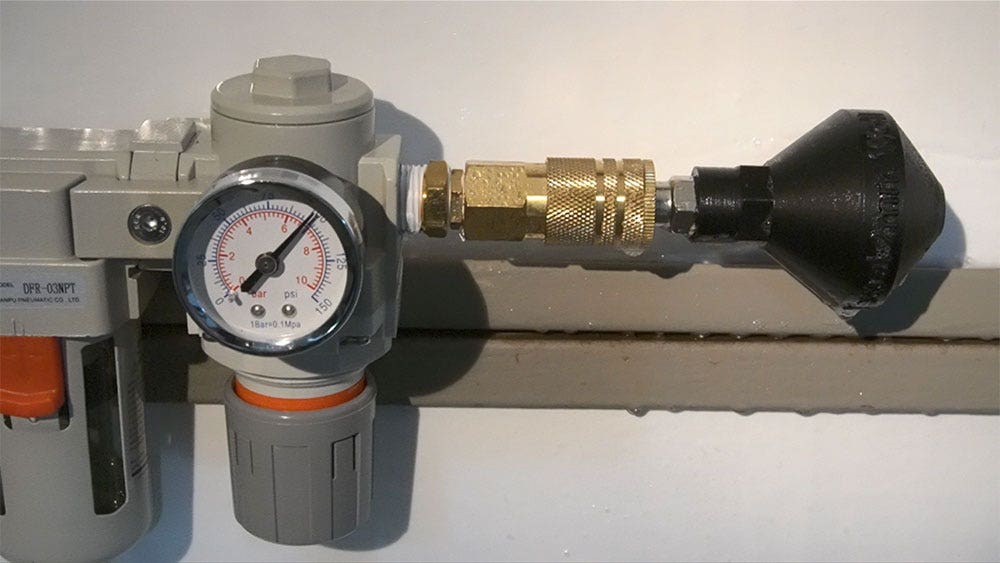
I started with the 5mm wall thickness pressure test and slowly amped up pressure to 25psi, 50psi, 75psi, and then 100psi until my air compressor maxed out. Once the pressure reached 100psi I would spray soapy water on the part to then check for bubbles/leaks. I would also hold pressure at 100psi to see if any changes occurred over the course of roughly 5 minutes. Incredibly the 5mm wall thickness sample held up! In fact, every sample I tested (even the 2mm wall thickness sample) held up to 100psi with no signs of leaks! This was totally unexpected, I was expecting each sample to leak at a certain point leading up to 100psi, but that was not the case.
Submerged Leak Test
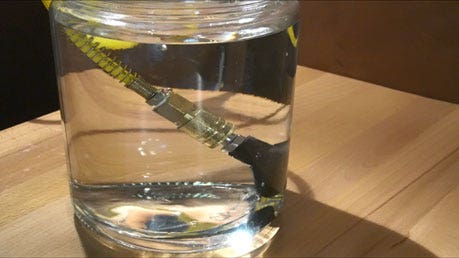
After the air pressure test, I wanted to take a different approach and completely submerge the printed part while under pressure to check for air bubbles. This would be a surefire way to detect even the smallest leaks. I decided to go with the 2mm wall thickness sample and ramp-up to 100psi once again. During the test at around 50psi, I started noticing air leaking from the hose itself but not the printed part. As I reached closer to 100psi I started to see a very small bubble leak out of the printed part at the interface of the air fitting and printed threads. No other leaks were observed in the part. This small leak likely could have been eliminated if I would have used some sort of thread compound. Again the results were very impressive.
See the Testing Process Firsthand
Improving Performance
The performance of printed samples could be improved through post-processing the printed part. One of the best ways to do this would be through the use of vapor smoothing to increase interlayer adhesion. It is well known that fused filament fabrication samples have a weaker Z strength compared to XY strength. Vapor smoothing could strengthen those layers while smoothing over the stress concentrations that can occur between layers themselves. Another possible way to improve performance would be to apply a clear coat on the exterior of the part to seal the outer surfaces to help fill in the gaps between layer lines.
I was blown away at the performance of Markforged printed parts right off of the machine. Every sample that we printed from 5mm down to 2mm was able to handle 100psi. This type of performance can open the doors for a whole new world of applications involving fluid movement, submerged components, and much more. If you would like to know more about how Markforged can fit with your business, feel free to contact us at Hawk Ridge Systems today!