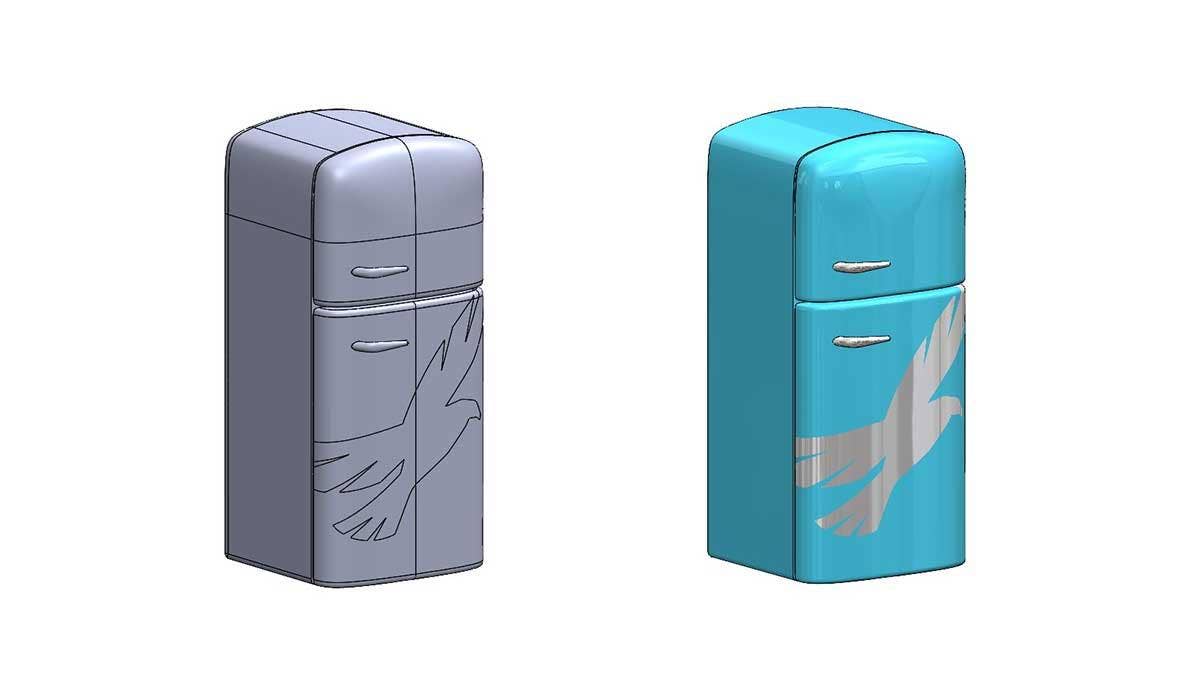
If a picture is worth a thousand words, then a CAD model is worth a million! Unless, of course, your CAD model looks like this:
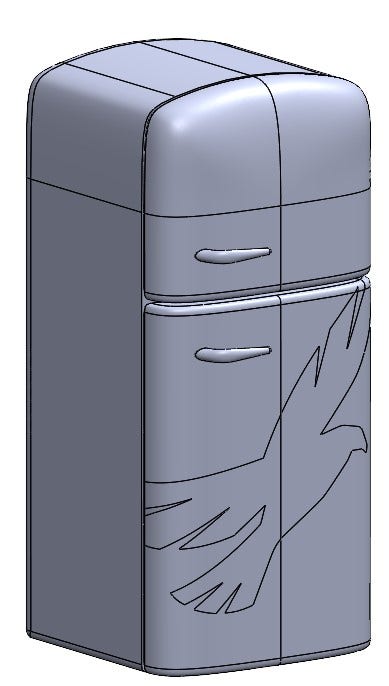
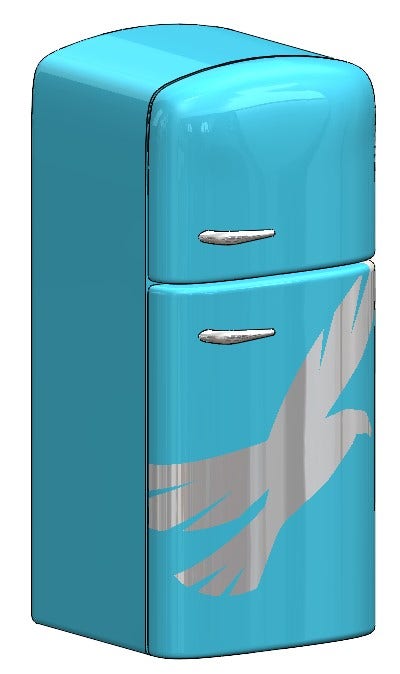
This model, while structurally sound and well-designed, appears rather anemic and certainly isn’t going to elicit any strong emotional response from your viewers. Whether you’re sending a quick screenshot to a potential customer or preparing a presentation for a crowd of 500, there’s no substitute for a good-looking model if you’re looking to impress. The first words I’d use to describe this model are bland, boring and generally unimpressive, especially when compared to its polished alter-ego:
So how did we get from bland to brilliant? Read on to learn how to bring the shine to your SOLIDWORKS models and impress your friends and coworkers in just a few simple steps!
Step One: Appearances
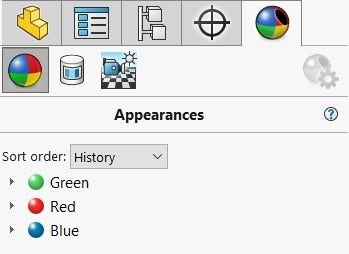
Appearances are paramount for a good-looking model, especially for consumer products. If you’re already familiar with SOLIDWORKS, you’re likely already using appearances in some capacity. If not, check out the appearances library by clicking on the Appearances icon in the Task Pane and browsing to your favorite category:
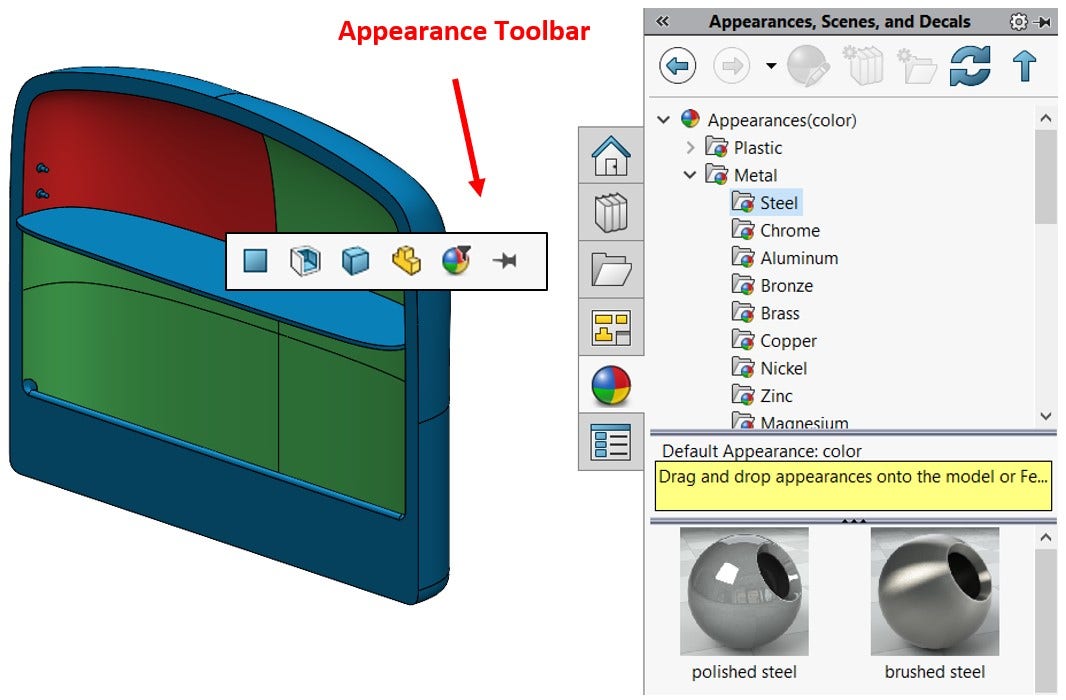
From here, drag and drop the Appearance icon onto your model to apply the appearance. Once you’ve dropped the appearance, be on the lookout for a small toolbar to appear (pictured above) that will allow you to control the level at which the appearance is applied. You can choose to apply appearances to the entire part, a specific feature, or even a specific face (additional options may be available if working with assemblies or multi-body parts).
Be warned, this toolbar will disappear if you move your cursor away without making a selection, and the appearance will be canceled! Applying appearances in this fashion allows you to add appearances in a hierarchy, as seen above. The entire door was colored blue, the shell feature was colored green, and finally, a single face was colored red, resulting in layered appearances. Alternatively, drag and drop the appearance into the background of your model to apply the appearance to the entire part automatically. Once applied, appearances can be accessed and modified through the DisplayManager (near the FeatureManager Design Tree) by right-clicking and using the Edit function:
Even just the application of appearances alone can make your models look fantastic compared to the default gray look, and the SOLIDWORKS library has over a thousand appearances installed by default. If you’d like, you can even create your own appearances! For more information, check out our video on creating custom appearances.
Step Two: RealView and Scenes
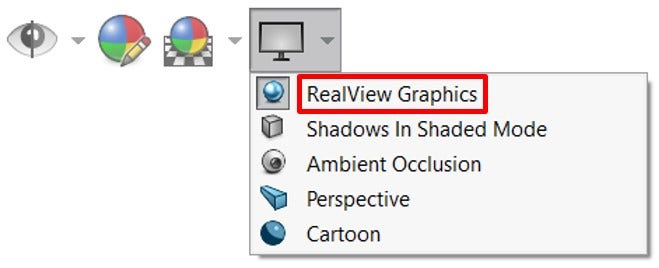
Now, colors are great, but for your model to truly shine, you’ll need to enable RealView. RealView is a display mode that provides a more realistic representation of your model with respect to shading/lighting and reflections, all without the need to spend any time rendering. RealView is officially supported by nVidia Quadro, AMD FirePro and Radeon Pro graphics cards, and simply needs to be turned on to reap its benefits. To enable RealView, click the last icon in the Heads Up View toolbar and select RealView:
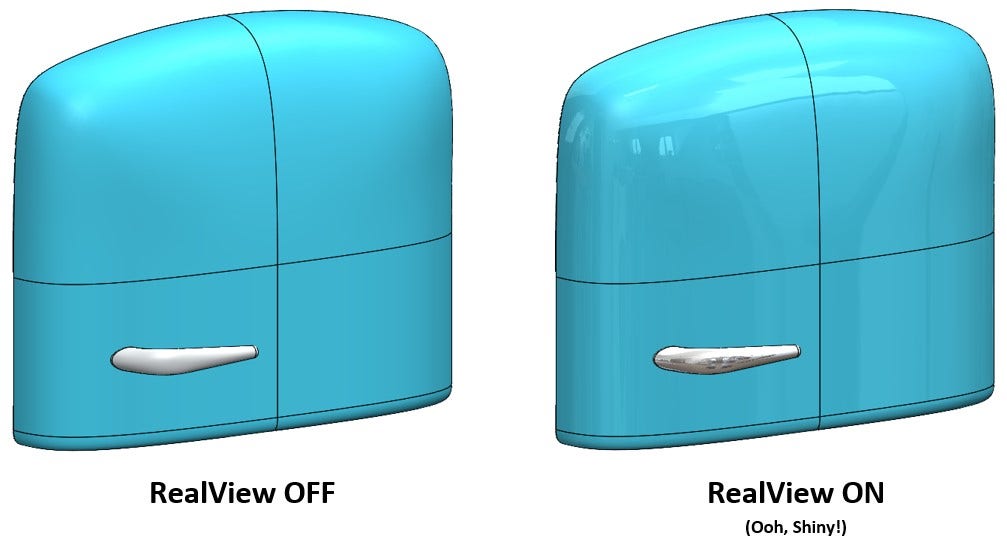
You’ll likely notice a significant difference in the appearance of your model with respect to lighting, shading, and reflections, especially if you’re using shiny appearances. Here’s a quick before and after with RealView disabled versus enabled:
While the quality of model lighting can be improved by simply enabling RealView, the position, intensity and style of lighting can be adjusted through the use of Scenes. To change the Scene of your model, click the icon right next to the one used to enable RealView, then choose your desired Scene:
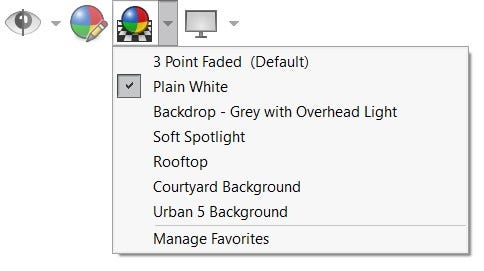
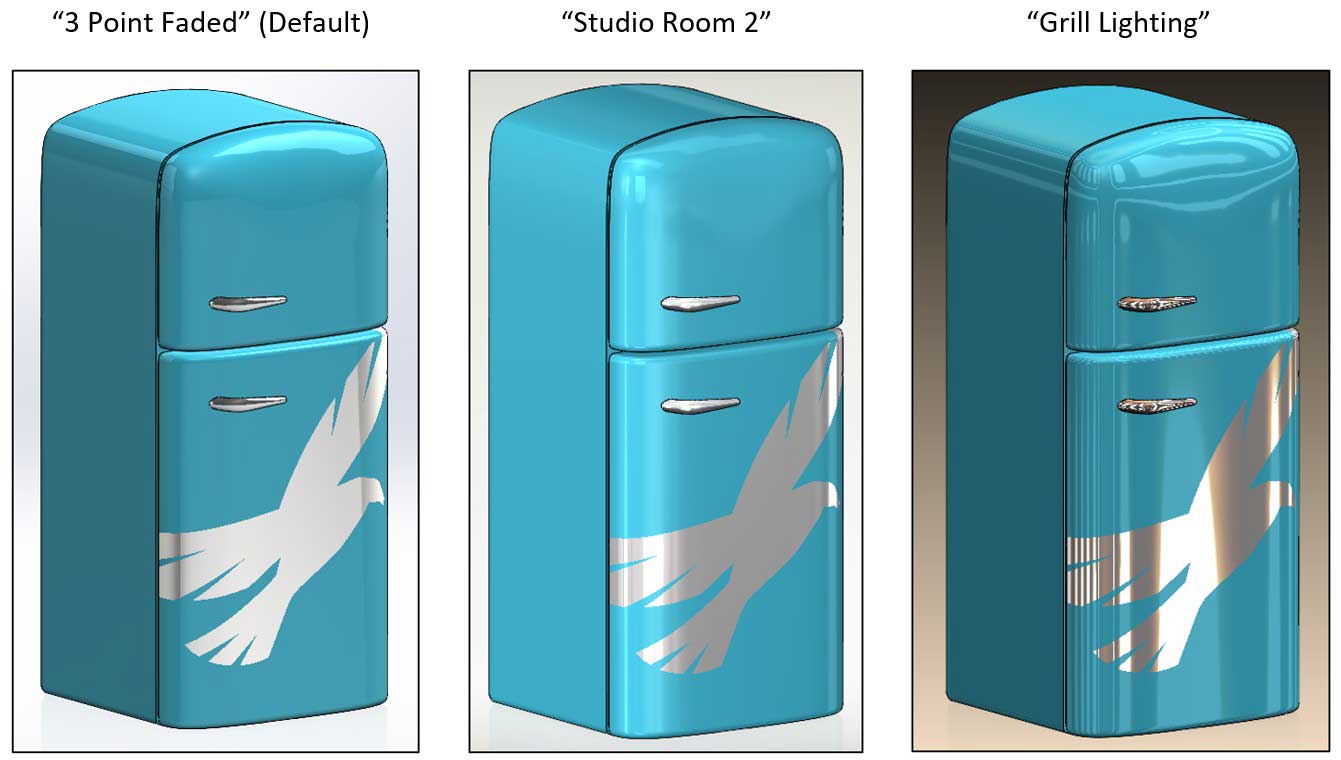
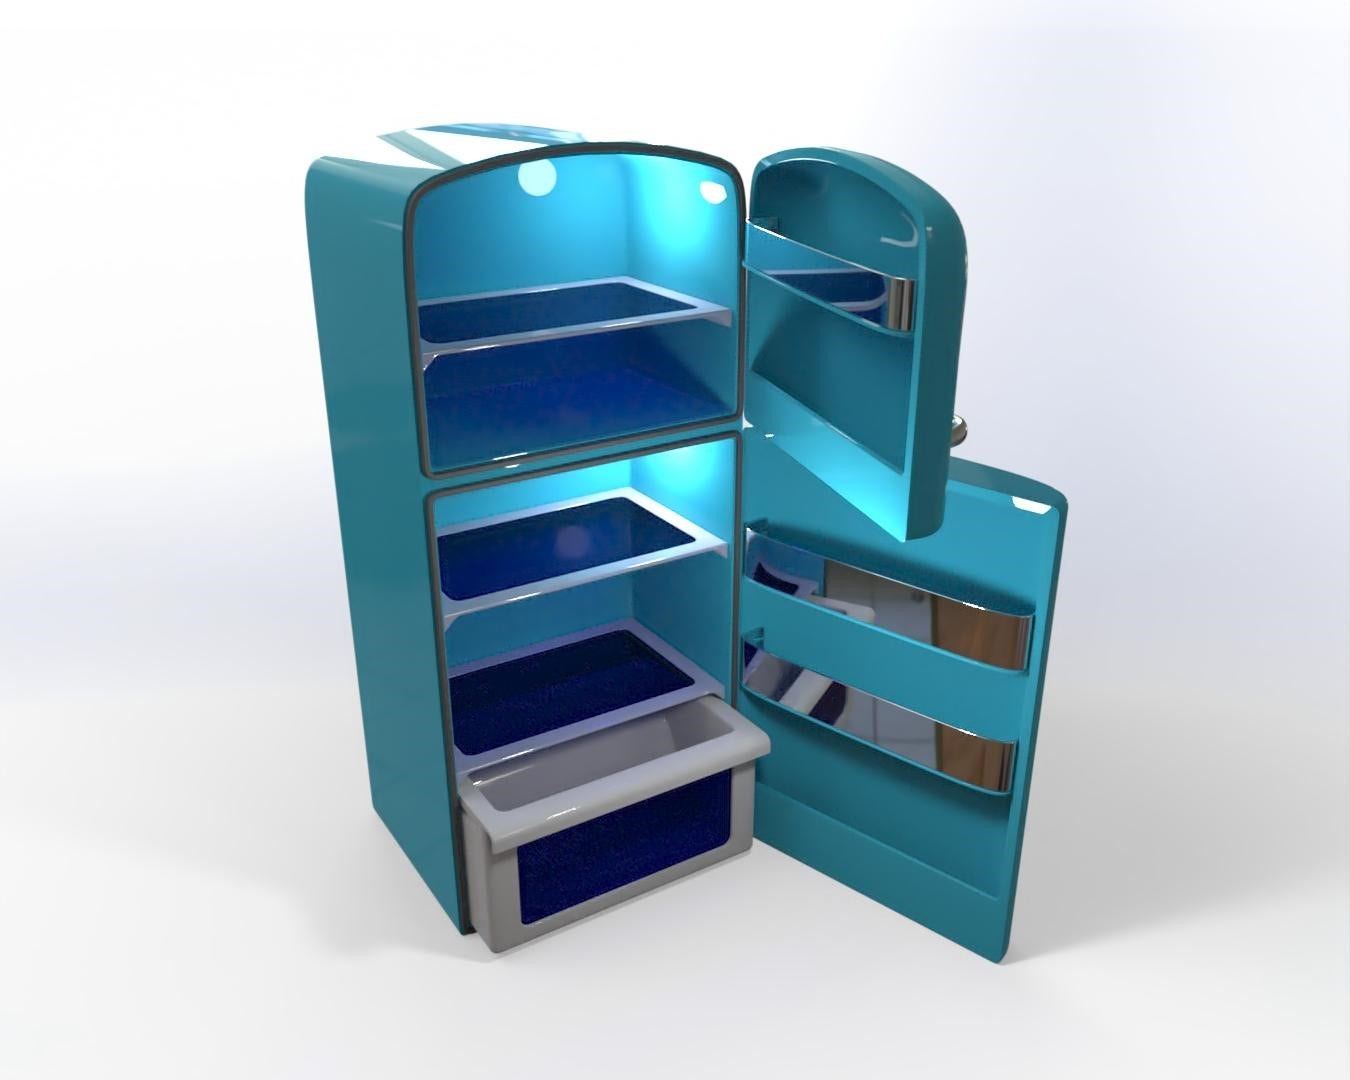
For additional Scenes, you can also use the Appearances, Scenes, and Decals tab in the Task Pane (where we applied the appearances from above), browse to the desired Scene, and drag it into the background of your model. All included Scenes are unique in their own way, offering a variety of backgrounds and lighting schemes. Test out a few and see what you think! Here’s our fridge model in a few different scenes:
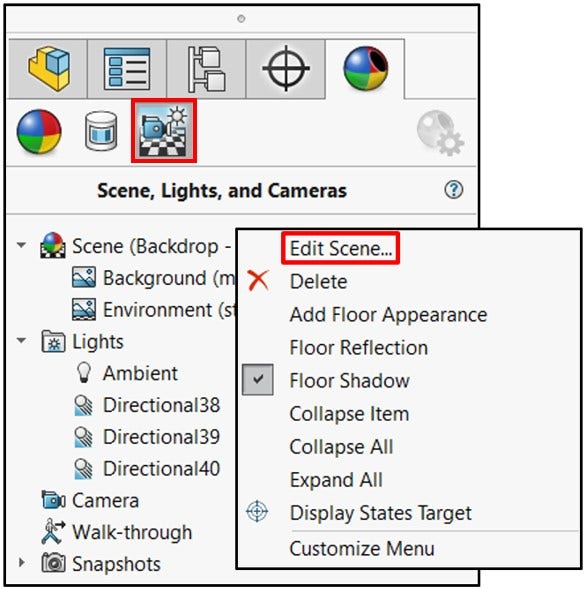
Scenes and Lights can be further modified and customized, too! To modify a Scene or add/edit a Light, access the Scene, Lights and Cameras section of the DisplayManager tab, right-click on the desired Scene/Light, and use the Edit function.
While there are way more than this article could ever reasonably cover, the Help file on Scene/Light options is a great resource to learn how to use them properly.
Step Three: Tangent Edges
Finally, we have to address the visibility of tangent edges in the model, which tends to frustrate a lot of users who are trying to make their models look as realistic as possible. Tangent edges are those edges that don’t technically exist in a manufactured product, but exist in the CAD model where faces meet tangentially (often as the result of an applied Fillet). While tangent edges don’t necessarily indicate modeling problems, they can look rather ugly, and “how do I get rid of these edges?” may be the most common question I get in our training classes. Fortunately, this is a very simple fix with a couple different solutions.
To remove all the edges from your model, click the Display Style drop down on the Heads Up View toolbar and select the “Shaded” Display Style. This prevents any and all edges from displaying, and provided your appearances, scenes, and lights are set up properly, the result may look pretty good. However, I’ve found that I often prefer to hide only the tangent edges in my model, leaving the “real” edges visible to provide some separation between features/components. This results in something closer to a technical illustration, but also prevents components and features from blending together too much, or into the background if they are of a similar color.
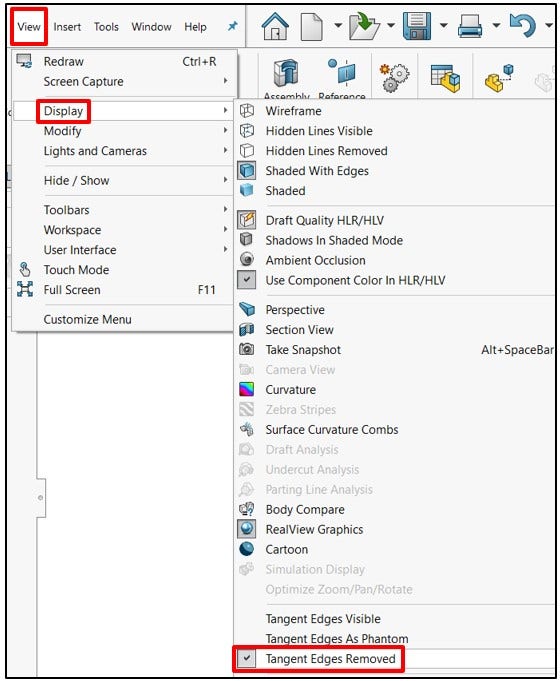
To disable tangent edges only, first ensure you are using a Display Style that shows tangent edges, then click View > Display > Tangent Edges Removed:
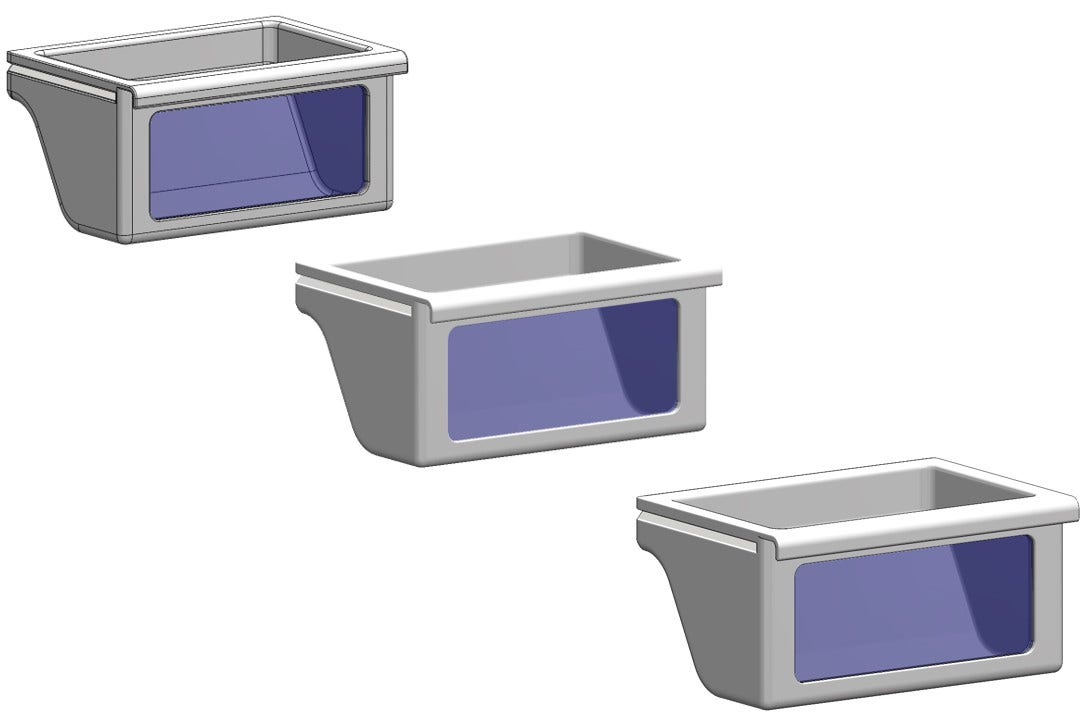
Here’s a quick comparison between these three sets of viewing options on the crisper component. From left to right, we have the default “Shaded with Edges” Display Style, the “Shaded” Display Style (no edges) and “Shaded with Edges” with tangent edges hidden:
Step Four: Visualize Rendering
While the three previous steps will certainly get your SOLIDWORKS models presentation-ready, there’s no substitute for the real thing – unless you have SOLIDWORKS Visualize! For the ultimate experience in photo realism, export your model to SOLIDWORKS Visualize, set up some appearances and lighting, and render the project. In just 10 minutes worth of setup and rendering, our retro refrigerator is looking better than ever:
This is just a very quick example of what SOLIDWORKS Visualize can do, and if you’ve got a license of SOLIDWORKS Professional or Premium, there’s a very good chance you already have access to Visualize! To learn more about accessing your license of Visualize, reach out to your Hawk Ridge Systems sales representative, and if you’d like to see some quick steps for setting up a model in Visualize, check out our video on the easiest possible photo-realistic render.
In this article, we discussed several strategies to improve the look and feel of your CAD models, from appearances and scenes to lighting and photo-realistic renderings. What other tools do you use to make your models stand out in the crowd? Let us know in the comments! For more information on SOLIDWORKS


