More and more folks are looking at HP Jet Fusion color 3D printers for end-use parts and production level cosmetic prototypes. With this demand for high quality, there is a need to understand how to effectively prep your prints for success. In today’s blog, we’ll look at ten pro tips to get the most out of your color 3D prints using SOLIDWORKS and HP Jet Fusion technology.
Export Resolution | What You See Is What You Get
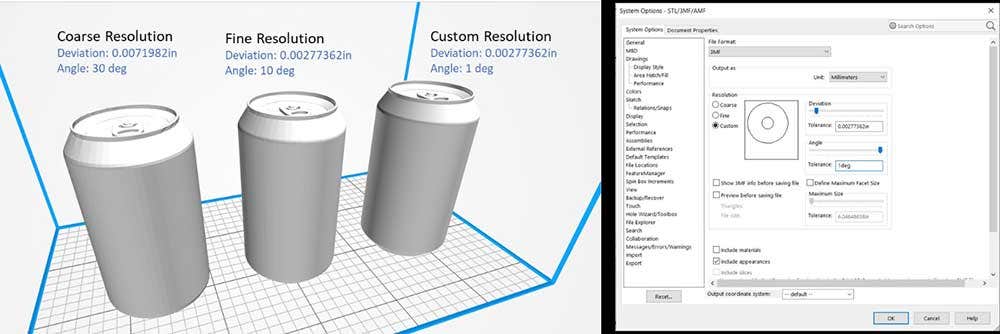
Adjusting your Export Resolution is one of the simplest ways to improve your final part quality. For the highest quality exports, we recommend using the 3MF file format. Within the 3MF format, there is a “Coarse” default resolution that is often too low for high-quality prints. The effects of low resolution are more prevalent on cylindrical or curved surfaces.
In the example below, you can see the tessellation differences between three resolution settings. The “Custom” setting specified in the image is what I use for high-quality exports. Note that finer resolution settings can slow down your machine if your part geometry is complex, so it is important to find that right balance of resolution and file size.
Logos and Graphics | Don’t Use Decals, Use Appearances
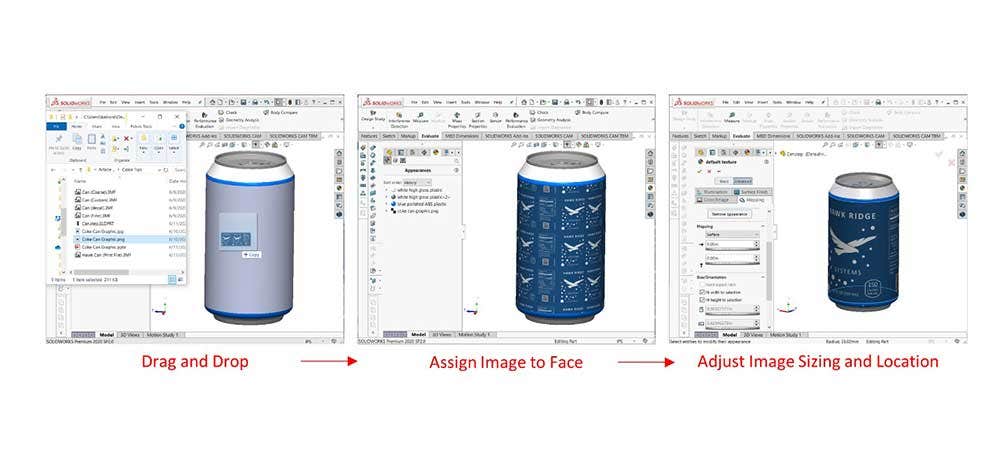
Placing your logo or graphic on a part can be a daunting task if you do not know which tools are right for the job. A common issue we see is that logos will disappear when exporting from SOLIDWORKS into the HP Build Manager. This is normally because the user selects a Decal rather than dragging the image in as an Appearance. Simply drag and drop your PNG or JPEG image onto the face that you want to place your logo.
Logos and Graphics | Use High Resolution Images
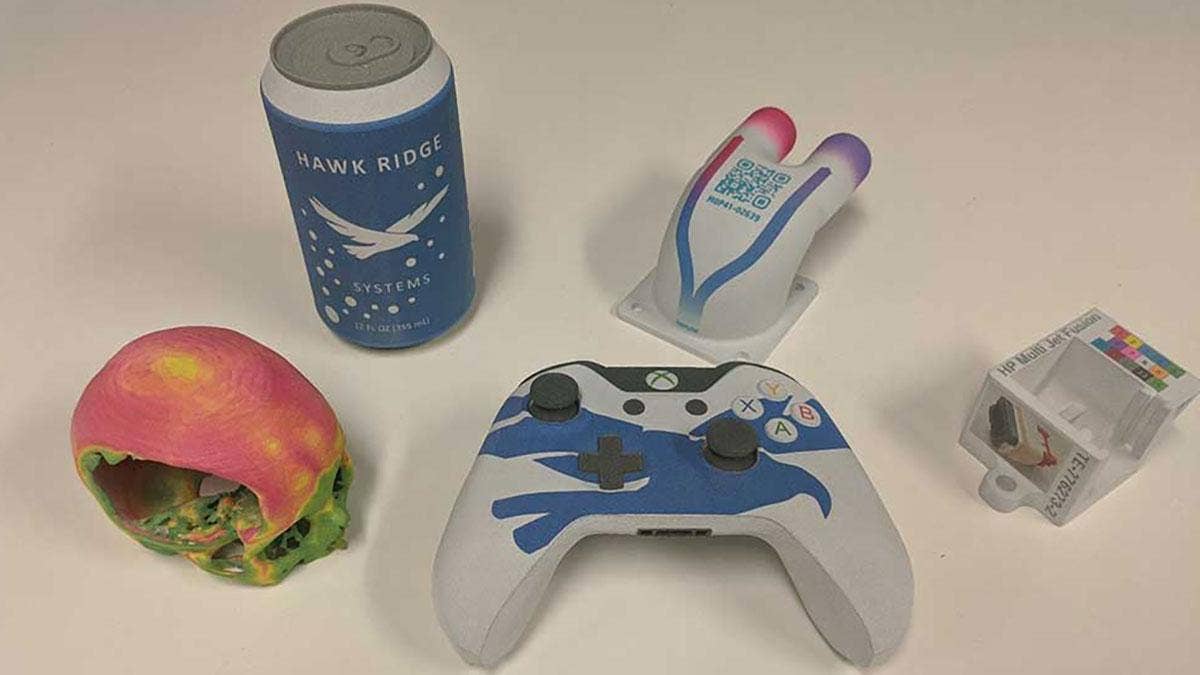
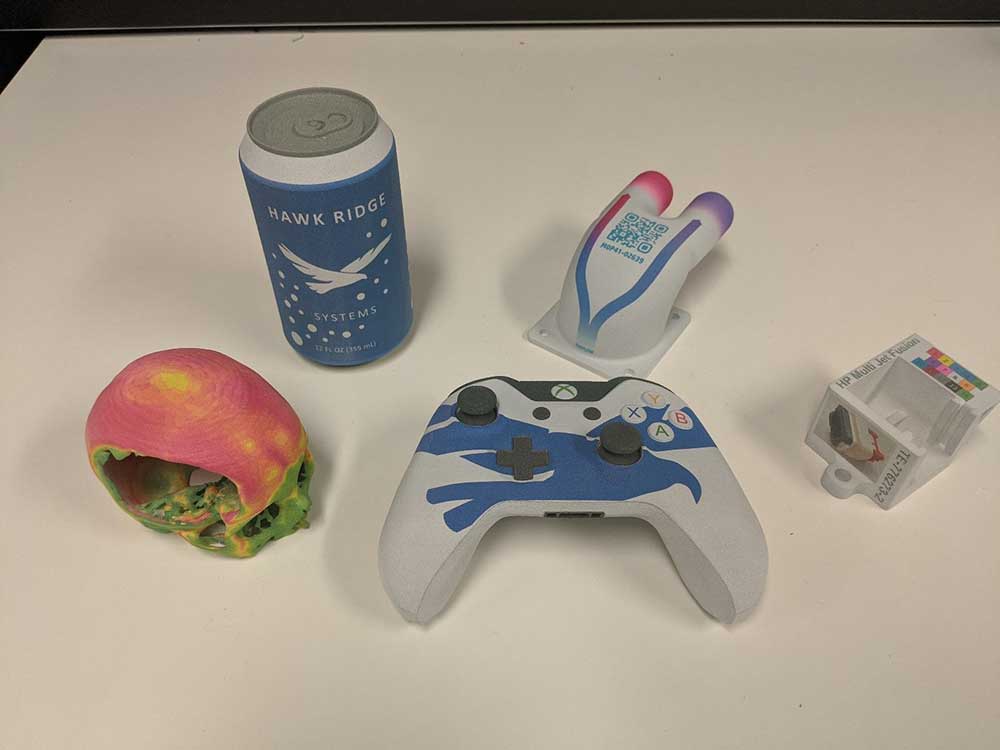
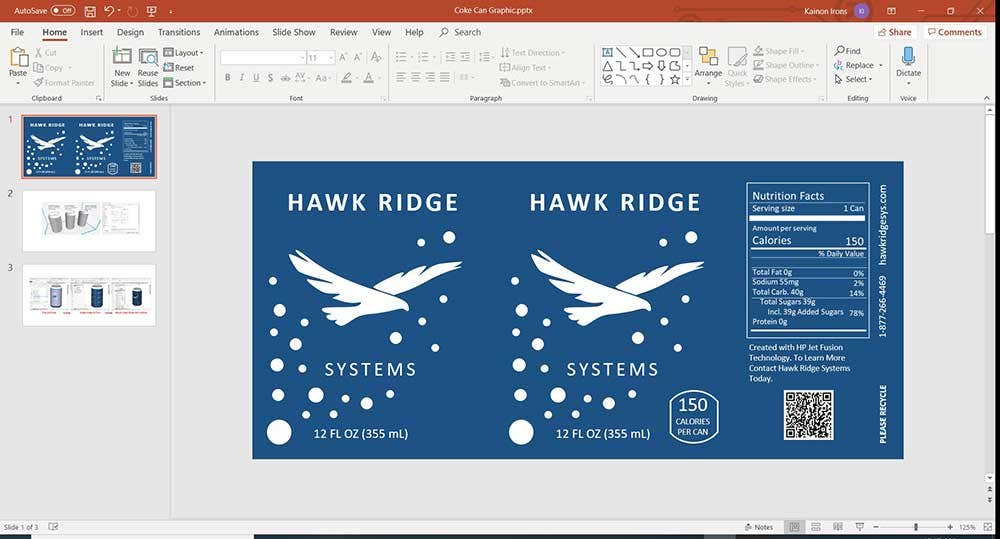
When printing a logo or graphic, using a good source image is key to achieving a high-quality color print. Just like the case with resolution on the 3MF export, what you see is what you get. Shoot for a 300dpi image if possible. Many engineers don’t have access to a program like Photoshop for producing high-quality images. With a little adjustment, it is possible to export 300dpi images from PowerPoint.
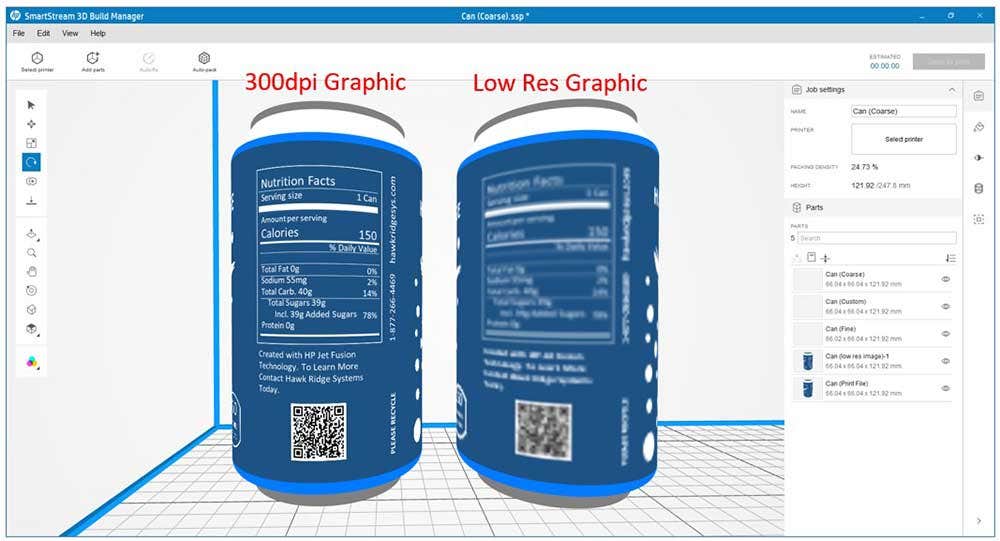
The example below exaggerates the effect of using a low-resolution image. Low-resolution images that are blurry to begin with will be just as blurry in the final part. This simple tip will make your print images crisp and easy to read.
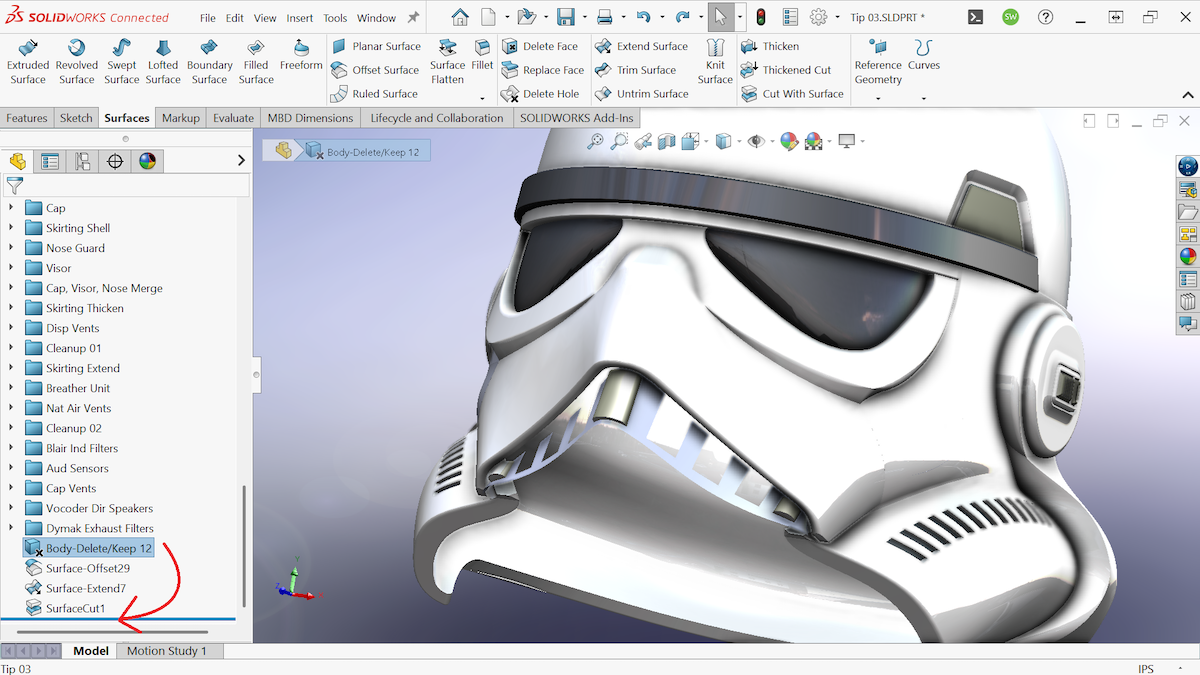
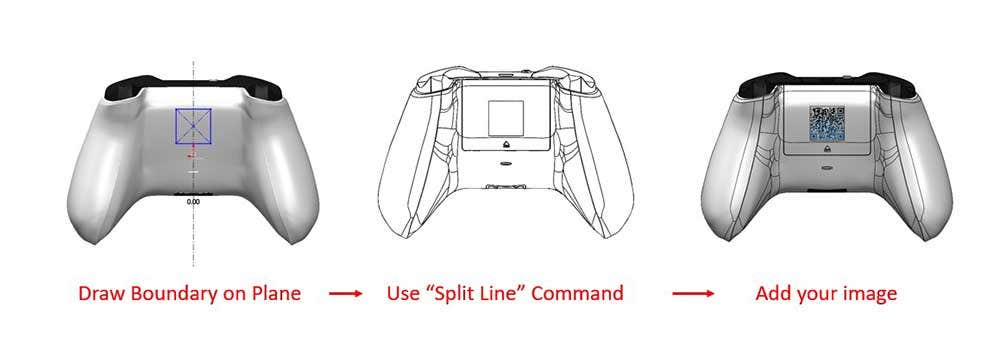
Containing an Image to a Boundary | Become a Split-Line Pro
Oftentimes it is necessary to contain an image to a localized boundary on the surface of a part. Many users attempt to do this is by extruding a square in or out of the surface. What if you want the image to remain flush with the surrounding surface? That’s where the Split Line command comes into play. Use the Split Line method to ensure that images are integrated flush on the surrounding surface.
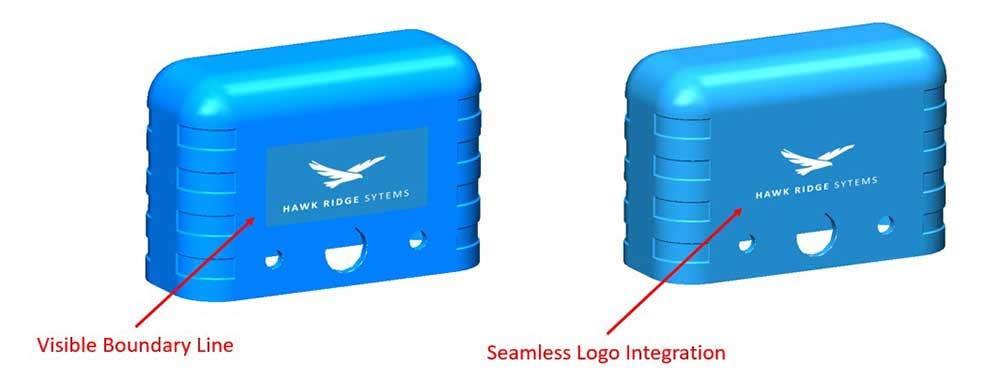
Color Matching | Seamless Logo Integration
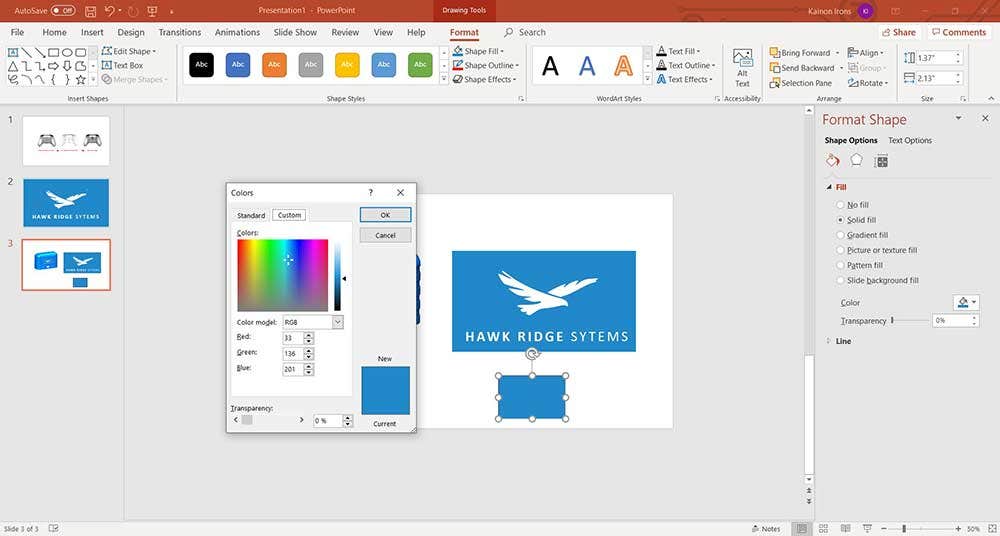
Matching the color of your logo background to surrounding areas of the part is an easy way to improve the final part appearance. The best way to make it happen is to match the RGB values of your logo background with the surrounding color or vice versa. I typically use PowerPoint to measure the RGB value of an existing logo and then match the SOLIDWORKS part color using those RGB values.
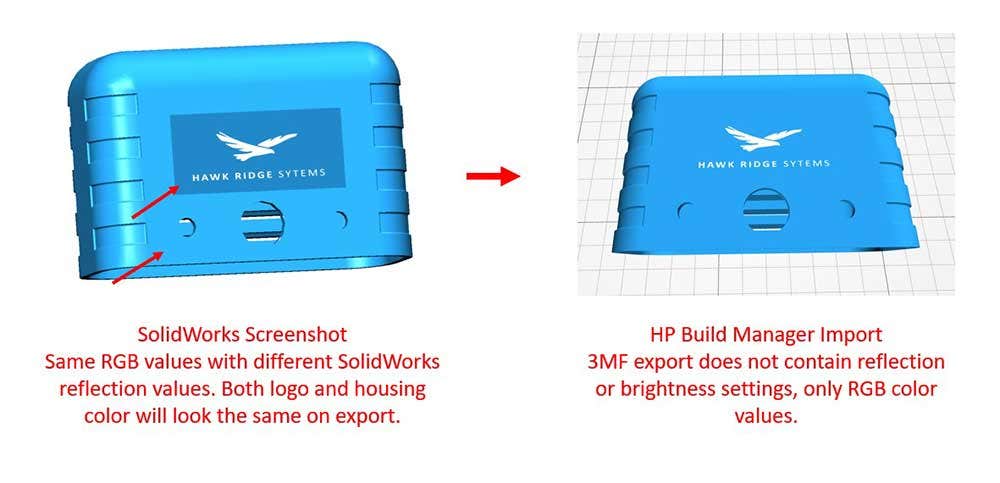
One note of caution is that SOLIDWORKS lighting and reflections can make the colors look like they do not match up even though the RGB values match. The 3MF color export does not carry “Reflection” or “Brightness” values, only RGB values. Look at the example below to see how this can happen in practice.
Color Faces and Bodies Rather than Parts
Another issue that happens quite often is that a primary color will be lost on color export. This is most likely because the color was assigned to the “part” rather than by individually selecting the body, faces, surfaces or features.
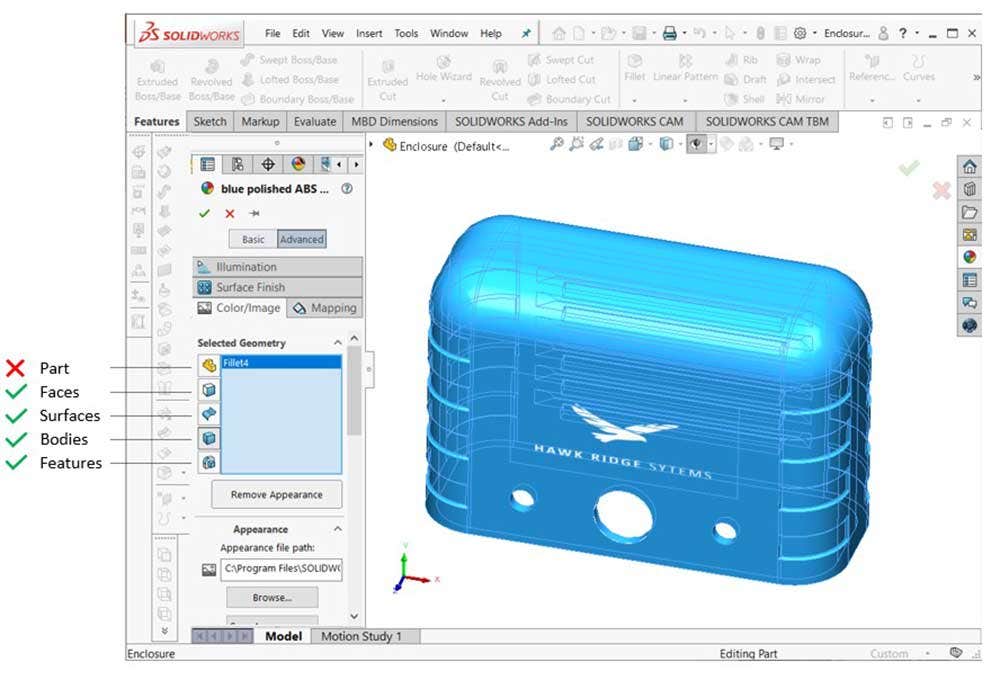
This tip is straightforward, but it will save you the headache of having color disappear on your export.
Going the Extra Mile | Smooth Surface Finish with Secondary Post Processing
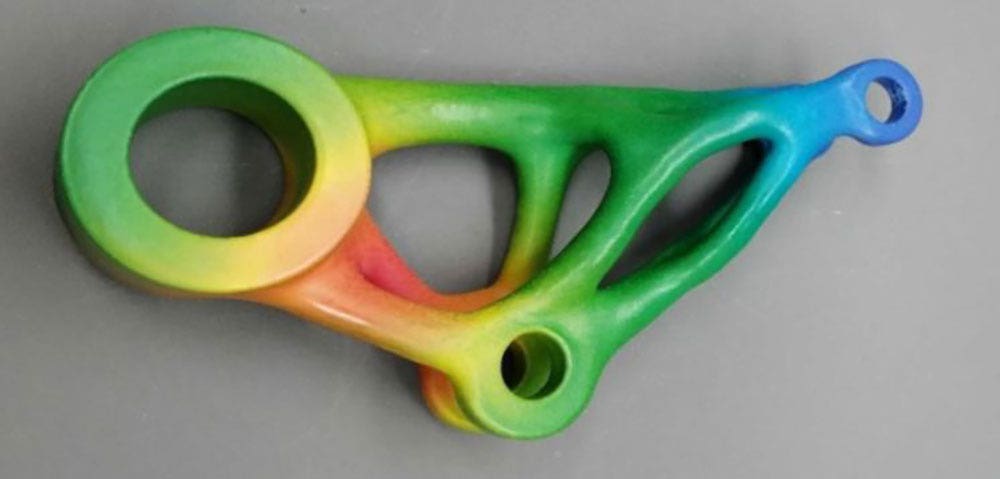
Vapor smoothed HP Jet Fusion part
This next tip will be covered in a future article, but it is necessary to mention here. There is an increasing demand for smooth HP Jet Fusion parts with a surface finish that can compete with an injection molded surface finish. To accomplish this goal, there are three secondary post-processing methods to consider: clear coating, industrial tumbling and vapor smoothing. Clear coating is going to be the most cost-effective method to improve surface finish, but only tumbled or vapor smoothed HP Jet Fusion parts can match injection molded surface finishes for smoothness or roughness average (RA). For more information on these options, contact the Hawk Ridge 3D printing team to learn more.
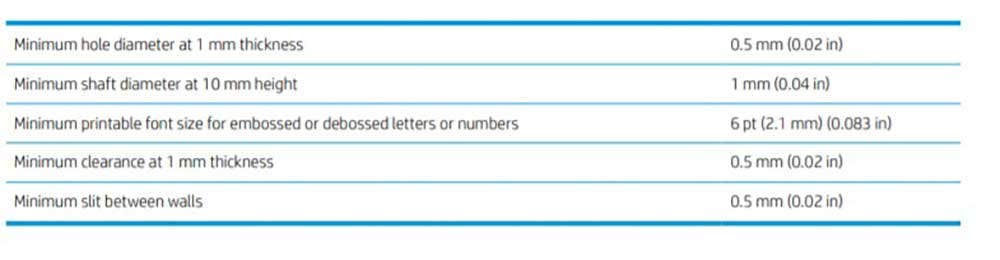
DEFAM for Success | Optimize Part Design for the MJF Process
Design your parts for the HP Jet Fusion by following the guidelines found in your User Guide. Below are a few of the recommendations found in the guide:
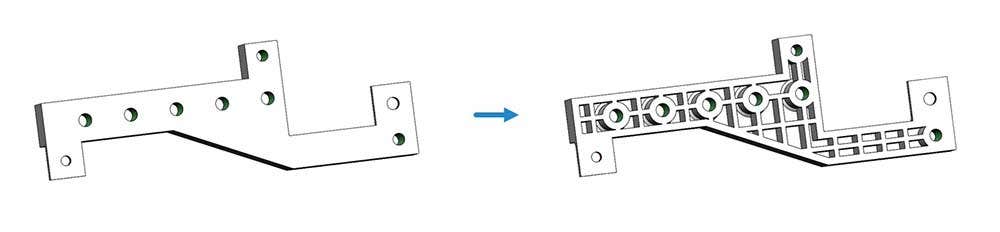
Another good rule of thumb is to avoid dense parts or dense sections in parts. Improve designs with high-density sections by doing the following: shelling out the part with ribs, hollow the part or adding lattice structures. Even if you trap powder inside the part from hollowing or internal structures, it is a good idea to reduce the density of the part. You will reduce the overall heat in the part and save money on fusing agent. This simple tip will minimize the risk of your parts warping or sinking.
Effective Print Orientation and Nesting
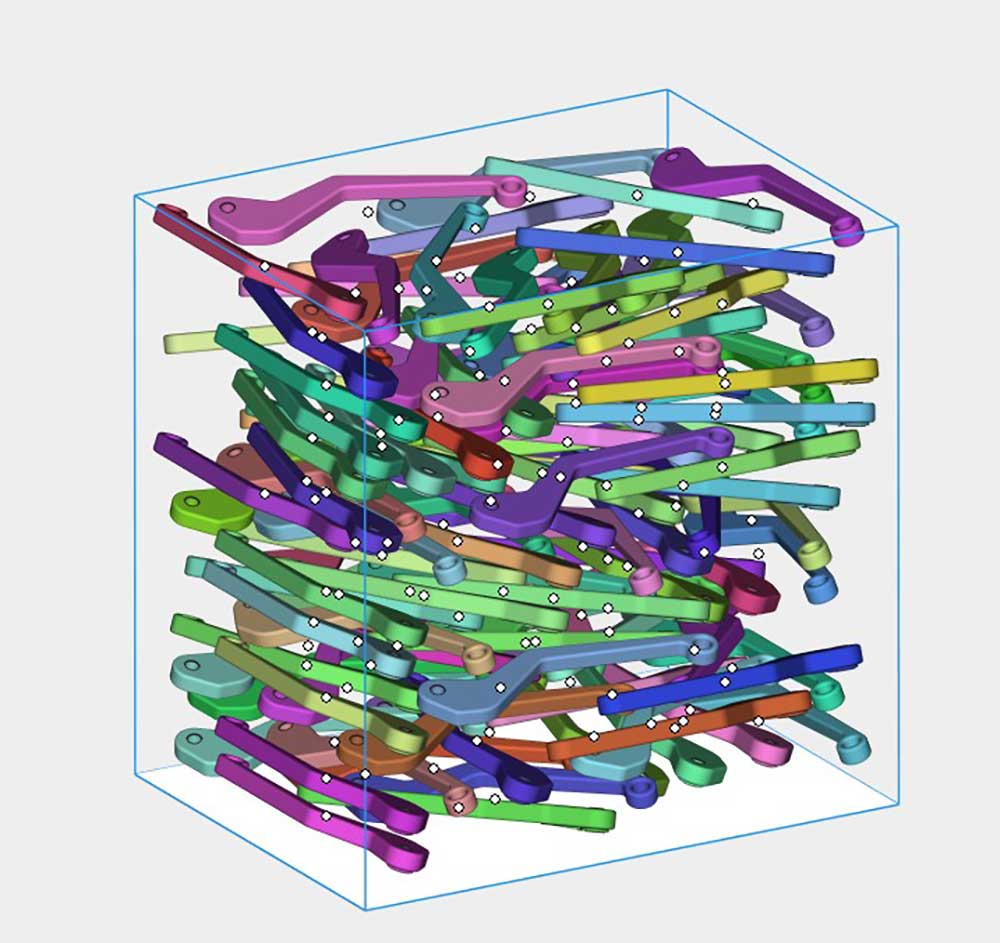
You could have followed all of the previous tips to a “T,” but you won’t be able to produce high-quality parts without understanding effective print orientation and nesting. Here is a short summary list of things to consider:
Print Orientation
- Avoid cosmetic flat surfaces facing upward in the Z direction
- Angle parts about the X and/or Y-axis a minimum of 20 degrees to minimize sinking and stepping (Free to rotate about Z-axis)
- Place fine details facing downward
Nesting Parts in a Build
- Minimum of 5mm spacing between parts
- Ensure consistent angles (about the X and Y axis) and/or print orientations with duplicated parts
- Shoot for 8-12% packing density for maximizing the system efficiency
- Space dense parts at least 10mm away from surrounding parts
- Utilize a third party nesting solution such as Materilise Magics for higher packing densities
Follow Maintenance and Cleaning Schedules for the Machine

Performing proper maintenance of your machine is key for long-lasting high-quality results. Consult your User Guide for maintenance schedules. Regular maintenance primarily involves cleaning the print area, fusing lamps and filters. Failing to keep up with maintenance will lead to print quality issues and decrease the lifespan of critical components in the system. Do yourself a favor and take good care of your machine and it will take good care of you!
By following these ten pro tips, you are sure to have excellent color prints with SOLIDWORKS and HP 3D printers. For a more detailed blog on color parts, check out my blog post “How To Print a QR Code Using SOLIDWORKS and HP Jet Fusion.” If you would like to see how you can start producing your own color parts, feel free to contact us at Hawk Ridge Systems today!