
Looking for new ways to design, iterate, and test products is an ever-evolving process. Each version we can prototype leads to stronger products and better experiences for users. But this process can be expensive and time consuming, so we are always seeking ways to reduce the number of prototypes made and create valid simulations of our parts for rapid testing.
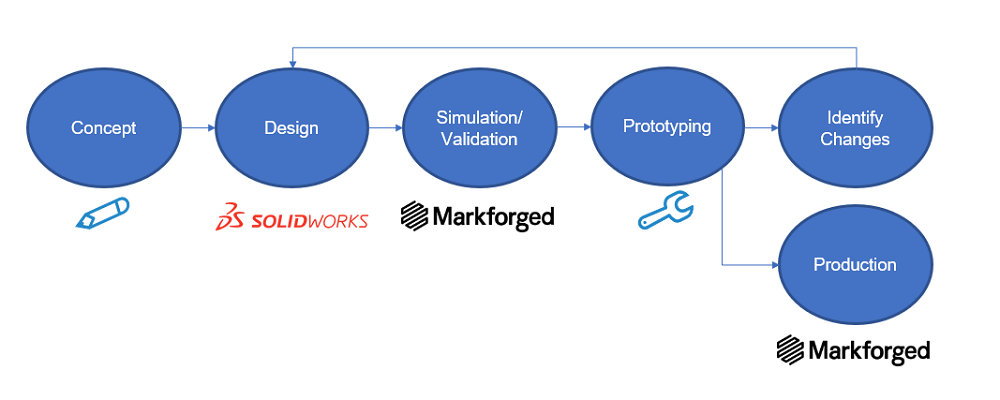
With Markforged Eiger Simulation, it has never been easier to simulate parts prior to printing on the Markforged composite printers. We not only receive feedback on the results, but the software also creates new optimized versions of the part with custom infill geometry based on the simulation. This eliminates the guesswork that comes with planning and tells us which infill geometry and reinforcement fiber layers are needed for the part to withstand the required loads applied. This streamlines a process that normally would involve creating multiple versions of the part, printing each, then testing in the real world.
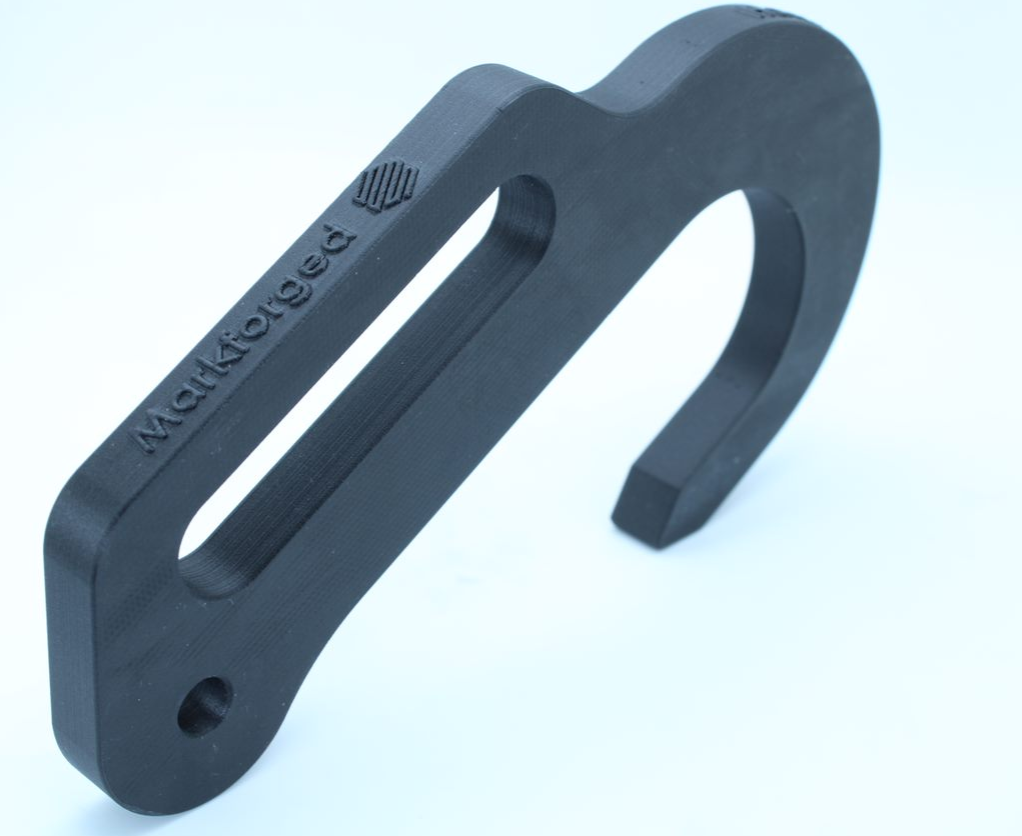
To put Eiger to the test, we designed a lightning hook within SOLIDWORKS and simulated how much weight can be held by the hook using Eiger Simulation. Our goal specifically was to design a lightning hook that can hold the full weight of a person with an extra margin of safety on top. We knew that to hold the weight of a person, it would require using Carbon Fiber reinforcement, but the amount needed and estimated weight to hold was difficult to predict without creating several versions of the hook. Thankfully, simulating the design was a quick process and the software produced strength results better than expected!
This blog will discuss the steps that went into the designing the part, preparing the simulation, and modifying the part based on the simulation results.
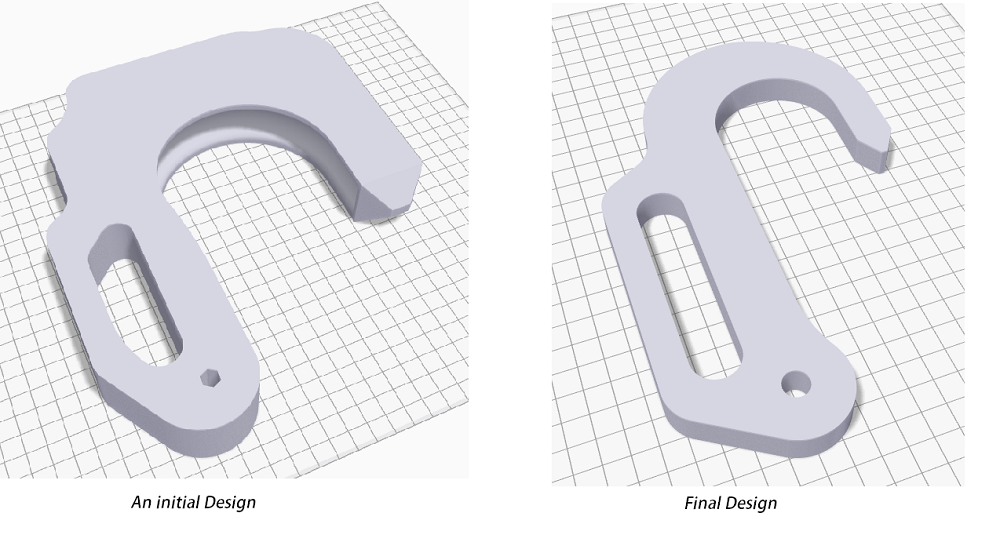
Initial Design
We found early on that lightning hooks typically need to accommodate different rope sizes and have various hook dimensions to reach a variety of holding positions. This required having a parametric feature, which provides control over these hole and hook sizes. If we need to increase a radii or move a hole location based on the simulation results, having the fully parametric feature made this easy.
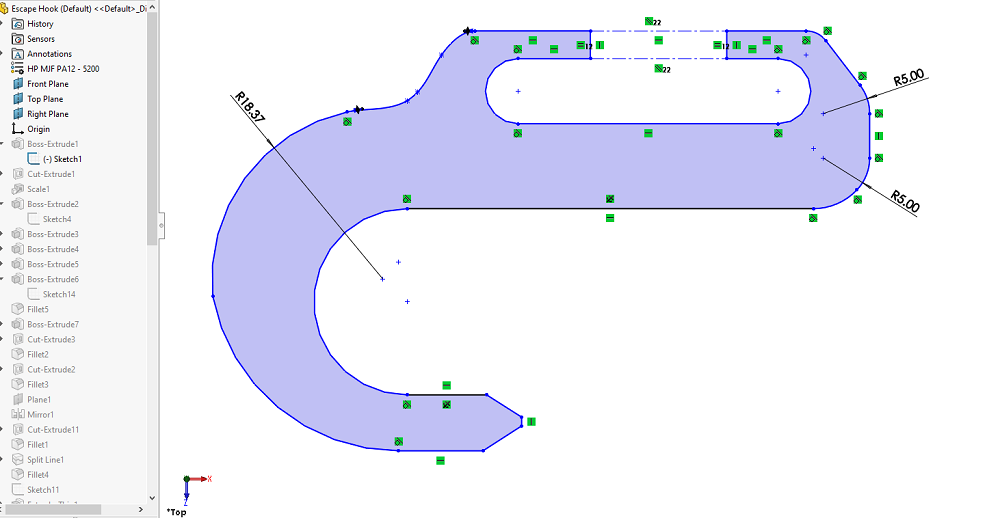
We start by creating an initial model within SOLIDWORKS with parametric features. Features such as length of the hook, thickness of the extrusion, or if there should be a side hole or oval are all things that were discussed to create our test part. Having the ability to make adjustments to the hook length, thickness, and hole locations for the attachment rope was key to working with Eiger Simulation, since we can see where areas of failure occur and then make changes. From thickening the hook or adjusting hole locations, the design could be rapidly modified by editing our sketches and then re-exported as a mesh file for importing into Eiger.
Bringing the Design Into Eiger Simulation
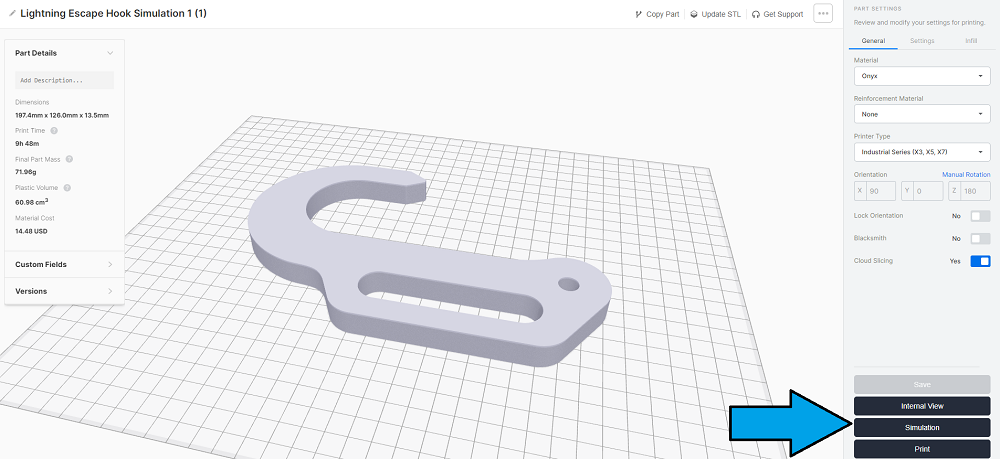
Once we had an initial model designed, it was time to import into Eiger for cost estimate and simulation. After importing the model, we began by selecting the Onyx material and then saved the part so that we could go right into the simulation window of Eiger.
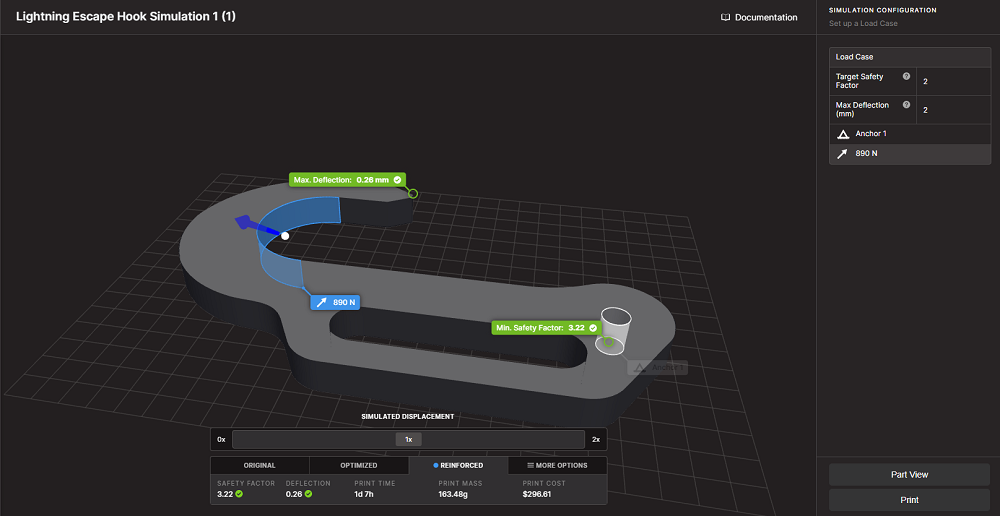
Here we are given a few options to set goals and apply a load-case to the part:
Factor of Safety and Max Deflection are goals for the study with Anchor and Load being the parameters of the load-case.
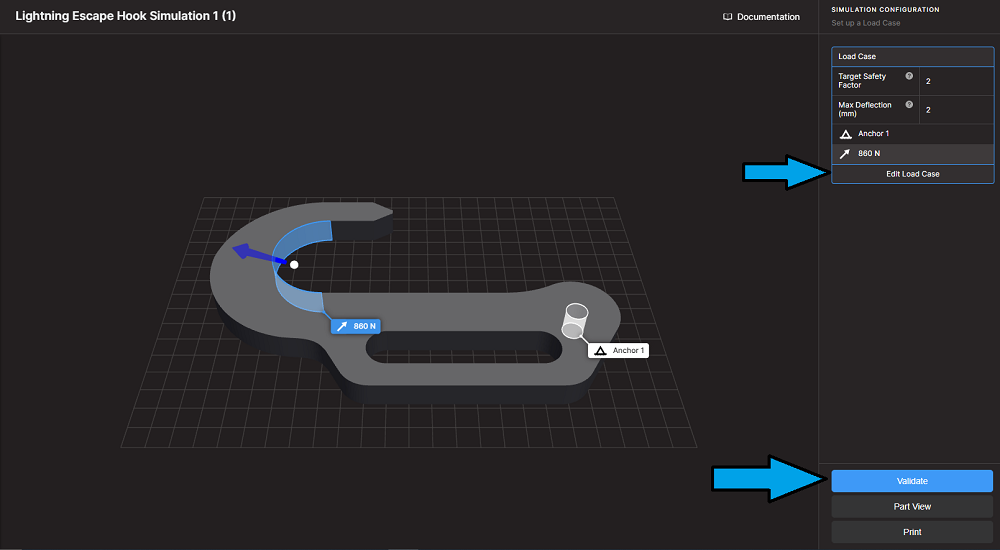
Eiger’s Simulation is similar to a static study, where a force and anchor are applied to a part to see how the part deflects. This makes it easy to set up, but still requires planning on what would produce a valid and realistic result.
For example, we applied a load in the saddle of the hook and then fixed an anchor where the rope loops into the hook to mimic what would be tested in the field. In this specific example, the failure point is in the hook itself – so it made sense to remove the anchor away from the failure mode so that our results are not skewed. Switching the location and orientations of loads and anchors is very easy, allowing for quick iterations in the simulation phase.
The lightning hook was also simplified to speed up the simulation process and give us proper faces to apply loads onto. Features like the fillets and lettering were removed as part of our simplification routine. These simplifications have a negligible impact on the simulation performance and overall part cost. Once we have a valid result from the simulation, we can go back and add these features in before printing.
As a note, the simulation process is run over the cloud. This results in no computer resources being used to validate the simulation and allows for multiple simulations to run at once from the browser!
Adjusting Our Design from the Simulation Results
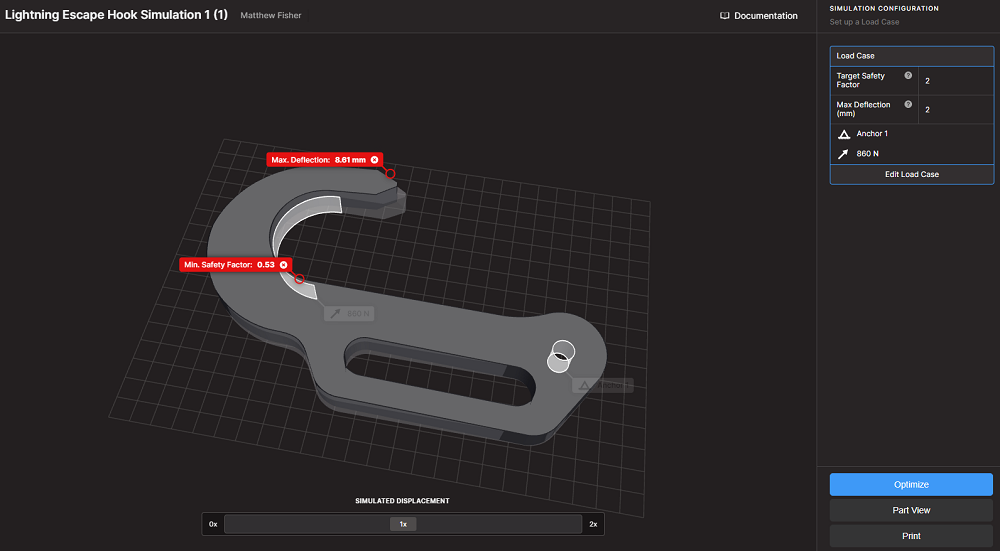
When estimating the amount of material needed to hold the required weight of this part, it was difficult to know if the limit was due to the part itself or layout of the fiber. Our first simulations with little to no fiber resulted in a very low factor of safety. Essentially, if we printed this part as is, we would have wasted time and money – getting the feedback in a matter of minutes was ideal. We could go back to the drawing board, see where our areas of failure are, and adjust the part itself by increasing the radii of the hook or adding additional length/thickness to certain features.
Adjusting the geometry is only one part of the process. To plan the amount of carbon fiber needed in the part, we used Eiger Simulation Optimization. Using the existing simulation results, Eiger will go through and run four different tests on the part based on print time, material cost, reinforcement with isotropic in-fill, and reinforcement with concentric (wall only) in-fill. From these results, we can see how the new in-fills will affect our factor of safety and cost. If one looks to match our criteria clicking Apply will save the changes and show the simulation results with it.

Now it is a matter of iteration between the simulation results, optimized settings, and the part geometry itself to create a version of the lightning hook that held the necessary weight and was within a range of how much material we wanted to use! We were able to create a design that withheld a weight of ~650 pounds, which was enough to move into the real-world testing.
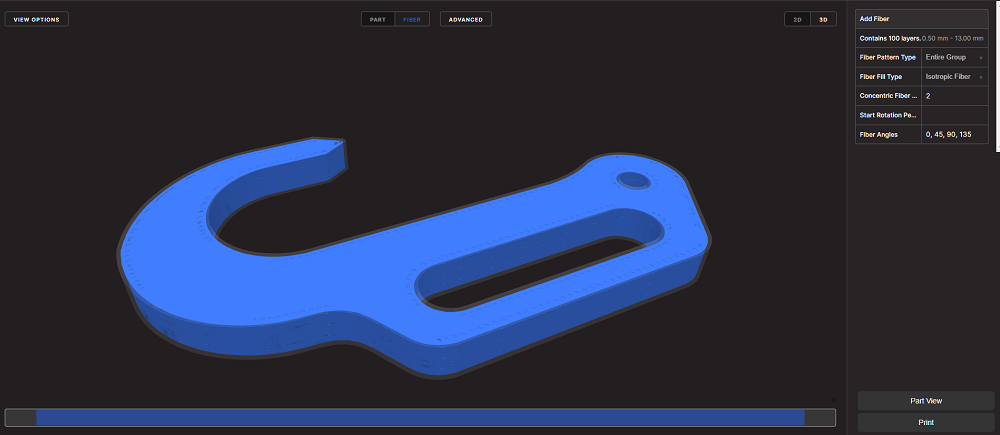
We can go back into the Part View, then Internal View to see how the carbon fiber reinforcement laid throughout the part. The optimized layout chooses the number of layers needed to reach our results with the best possible strength. We can adjust this further, however, if we want to remove some fiber reinforcement. Doing so would lower the factor of safety though, so the version printed kept the automatically in-filled geometry.
Sending the Part to Print
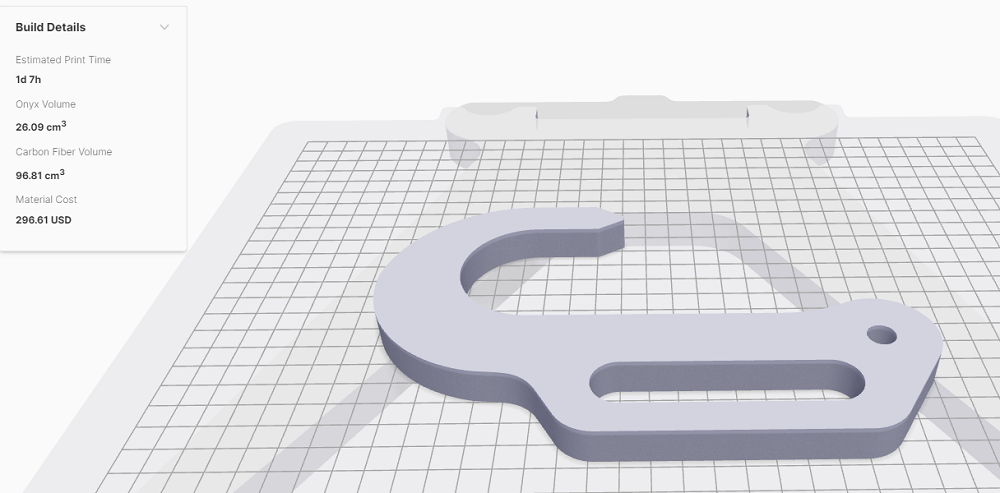
One final hurdle for printing the part was using a 3D printer with the material needed. Eiger lists the total amount of plastic and fiber needed for the print, so we had to check our printers in Eiger to see which machines were available to run the print. The lightning hook ended up being printed in another state separate from where the part would be tested, but this was not an issue at all. Eiger’s ability to link multiple printers to a single cloud makes it easy to push parts to a printer – regardless of the location.
After uploading the final version of the part, we simply had to click Print and choose the desired printer from the list.
Validating the Part in the World
At a weight of 890N and Factor of Safety of 3.22 this part could withstand about 650 pounds of force – not bad for a fully composite part! If this hook were to become a commercial product, we would look for a higher factor of safety of 5-10X for lifting under extreme circumstances. In this case, we knew the tests would be conducted in a controlled environment, so 3.22 would be sufficient for our purposes.
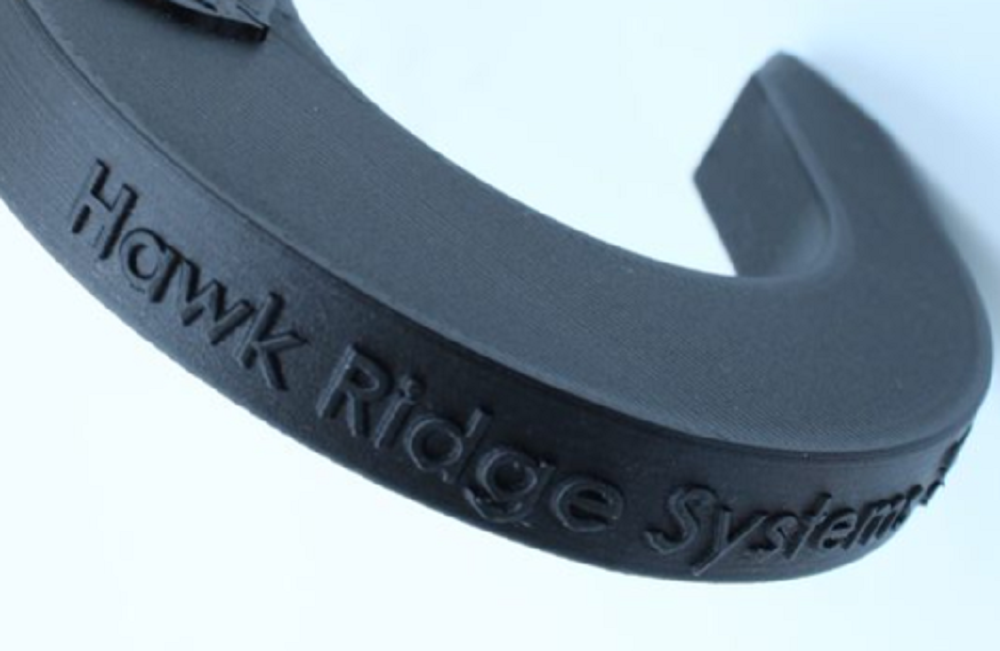
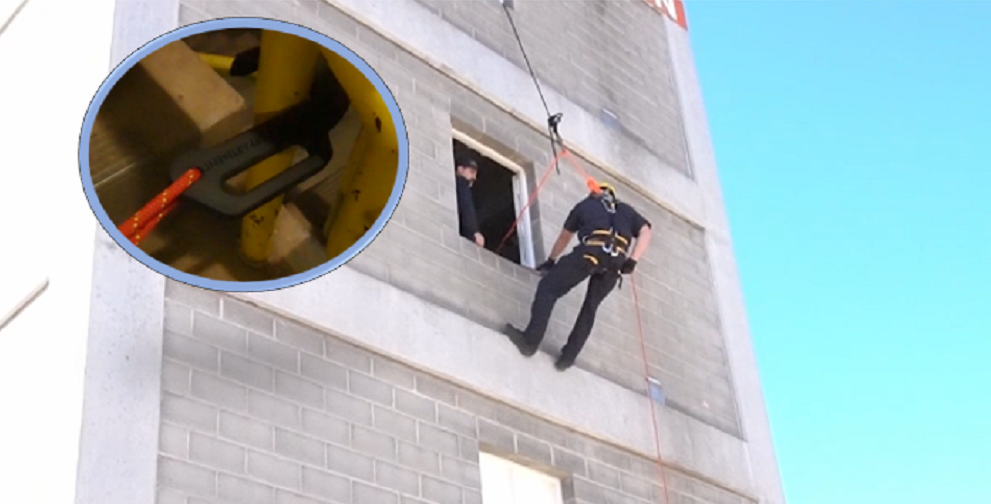
The lightning hook was then brought to a professional training facility of a local fire department to see if our simulation results were accurate. We were able to observe training exercises conducted by a professional safety and rescue crew specializing in rope rescue. The first exercise involved repelling from a third-floor window while the hook was anchored to the stairwell in an adjacent room. This test was the perfect scenario for our hook design as it closely matched our simulation conditions. During this training exercise, several people repelled using the hook and the design held up rock solid. The loads on the hook would have averaged around 200 pounds, which is well below what the hook is capable of based on our simulations.
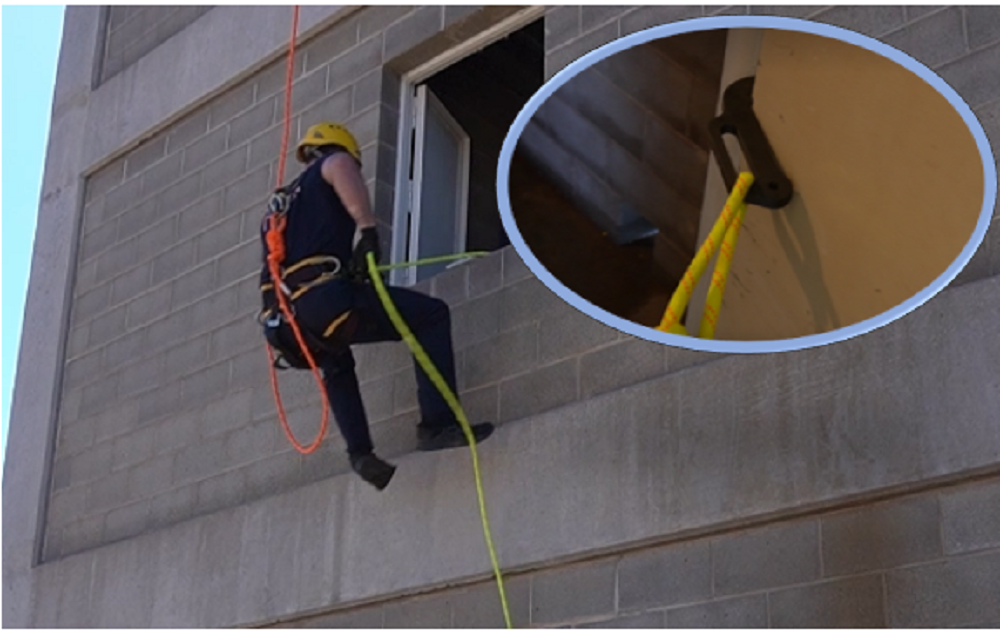
The second training exercise involved anchoring the lightning hook to an interior steel door to simulate a quick escape scenario in an emergency. To take it a step further, the team decided to also simulate a shock load in this exercise by allowing three feet of rope slack, which allowed the firefighter to fall before the hook would catch them. This scenario would truly put our hook to the test. The firefighter in this example weighed around 200 pounds and with them dropping a few feet, we certainly would be in the ballpark of our Markforged simulation.
The hook held up through the drop test and the firefighter was able to safely repel to the ground. The hook performance was truly impressive, and our test validated our simulation results!
Feedback from the Professional Safety and Rescue Crew
The safety and rescue crew did an awesome job training with the safety hook, and it truly was a joy to observe the dedication and attention to detail they placed throughout the training session. We wanted to relay some of the feedback that was provided in this last section of the blog.
Almost everyone noticed how lightweight the hook was overall. The weight of the hook did make some of them worried if the design would hold up. It was neat to see how their confidence grew with each test as the hook remained rock solid throughout. One note that came up was in the event of a fire, the hook (being a composite material) would not be able to withstand the temperatures that can be encountered. This is a great point – limiting the hook to low temperature safety and rescue applications (such as water rescue). For high temperature rescue scenarios, a metal 3D printed stainless steel version of this design printed on the Markforged Metal X would be a perfect fit.
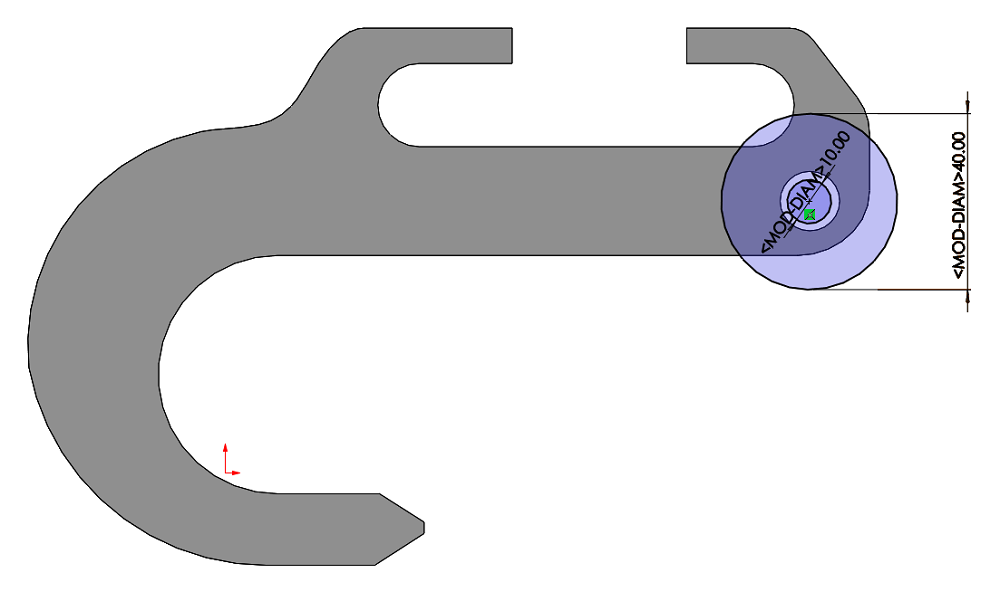
One unexpected challenge that came up was the diameter of rope being used. The hook was designed with a 10mm hole to accommodate an 8mm rope, but the safety crew was accustomed to using a bigger rope diameter. Thankfully, we had designed a side loop on the hook which could accommodate this larger rope diameter and allow us to perform the more intense shock load test.
Another piece of feedback we received was to make the hole radius dimensions larger so that the rope had less pressure overall. This was great feedback that would be ideal for a metal printed version of the part. We’ll likely go back and increase the radii of the circles to accommodate larger items and rope. This can be done through the SOLIDWORKS parametric features and then re-exported for a new print.
From concept to print, having SOLIDWORKS parametric modeling and Markforged Eiger Simulation makes the design process seamless and easy. Using these valuable tools, we can prototype our design and see results in the matter of minutes, rather than the hours it would take to print the part itself. With the optimization tools as well, Eiger makes it easy to import an initial model into the workspace and have the software make the necessary adjustments based on the strength performance goals for the part.
Interested in testing it yourself? Try out Eiger Simulation now. If you would like to more about Markforged 3D printing and Eiger simulation, contact us at Hawk Ridge Systems today. Thanks for reading!


