
The following blog is the process of how to use the Lip/Groove command on your model. This is the perfect feature for the overlapping edges in any plastic injection molded part. Why model a complex edge extrusion with draft when the Lip/Groove command can automate this process for you? The Lip/Groove command can be located in Insert > Fastening Feature > Lip/Groove.
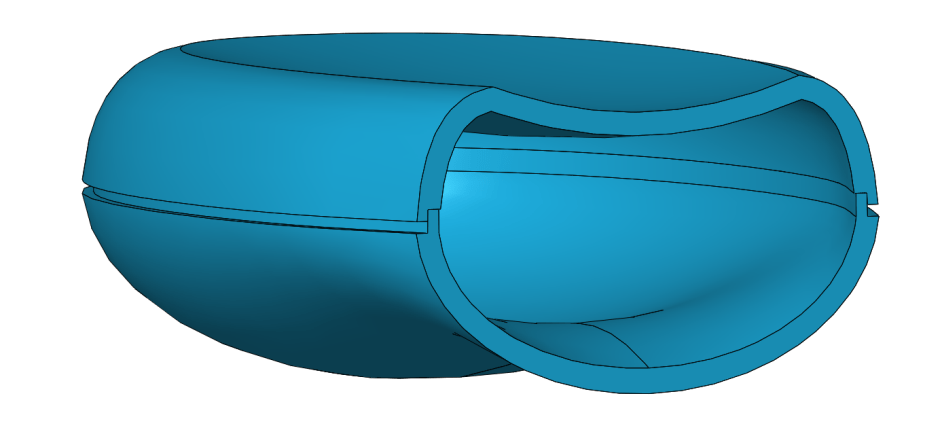
What I did to start using this feature was to create a multibody part. Users do have the option to use the Lip/Groove command by splitting the model into multiple parts. From here, you are able to do the appropriate lip and groove in the respective models, rather than using multibody parts. I used a multibody part, so you will notice in the image down below that inside my lip/groove command, I have a groove selection and a lip selection (lip selection is collapsed in this image below).

In order to use this feature with multiple solid bodies simply click on the Lip/groove feature (Insert> Fastening Feature > Lip/Groove). From here, the first section of this command is prompting the user to select which solid body the groove portion of the feature will be created on. Secondly, select the solid body in which the lip feature will be added to. After this, select the geometry to define the direction of the groove (this is where I have selected the top plane). This direction selection refers to the direction in which the feature will extend out from, or cut away from. Due to all of my previous selections, when I go to populate the face in the groove selection portion of this command, SOLIDWORKS will automatically hide the portion of the body that the lip section will be applied to. This automatically hidden body makes it easy on the user to access the geometry from the actual solid body they are working on.

For the groove selection face, I selected the face that is parallel to the top plane (the face highlighted yellow in the above picture). And, the edge that has been selected is the inside edge that I want the feature to remove material from (highlighted dark blue in the above picture).
Now for the lip section, keep your picks consistent with what you just selected in the groove portion of the feature. Pick the appropriate opposite face from the selection made before, and once again pick the inside edge of the second solid body to add material this time.

Once all of the placement conditions have been selected, it’s time to move onto the geometry of the lip and groove. In order to set the geometry of the feature about to be created, use the parameters section of the command. As you’ll notice from the image above the parameters section is very self-explanatory. It shows the user every geometric dimension they can edit, and exactly what it will do to the geometry of their part. This portion of the command even lets users design for draft (note the angular measurements). Once the geometry parameters are set, simply hit the green check mark inside the command and SOLIDWORKS will create the necessary lip and groove features on your model.

Keep an eye out for more great SOLIDWORKS content on the blog and subscribe to our YouTube channel.
To see a video on this technique, please click here.


