|
|
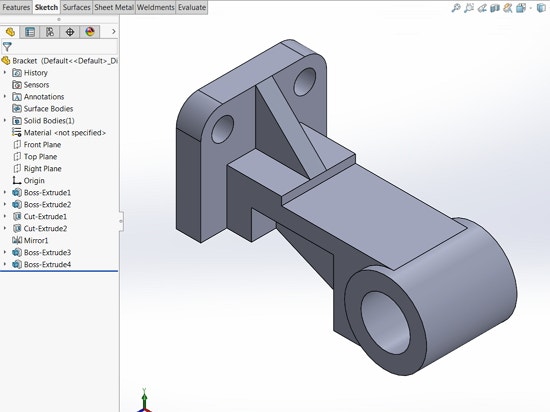
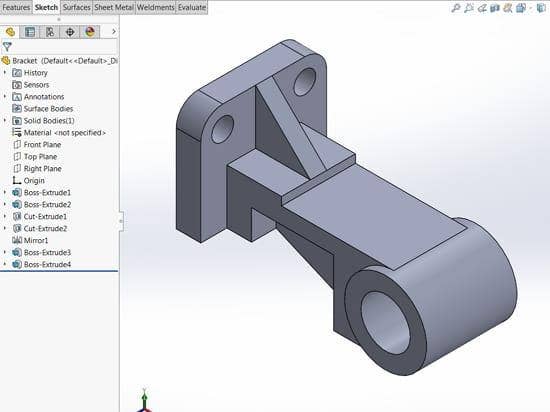
A rollback bar is a tool that is often overlooked. It has many uses, such as suppressing features, reducing rebuild time, and showing how a model was created. It also allows us to add features anywhere on our FeatureManager design tree. In this blog, we will take a look at how the rollback bar can be utilized during the design process.
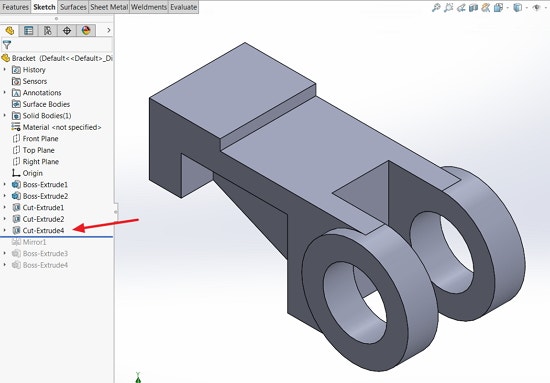
The rollback bar is the blue, horizontal line located at the bottom of the FeatureManager Design Tree. To use it, simply hover your cursor over the bar until you see a hand symbol and drag it up or down the FeatureManager design tree. There are many ways to create models within SOLIDWORKS, so it is often beneficial to understand what steps were taken to create one. An easy way to accomplish this is by using the rollback bar. By positioning it through different features of the design tree, we are able to see the steps that were used to create a model. Starting from the top of our design tree, we can see how a model was created by inspecting each feature and the absorbed sketches.
|
|
|
|
|
|
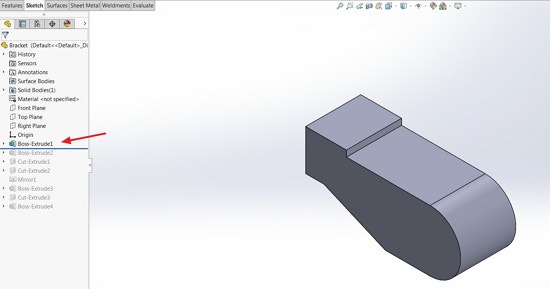
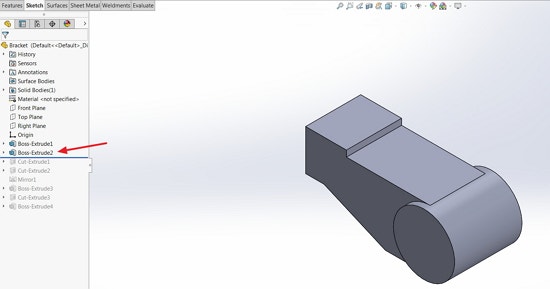
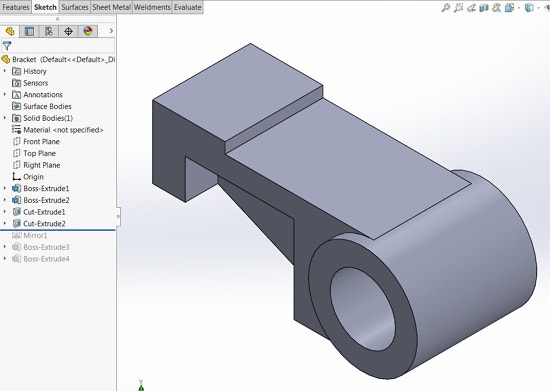
As we position our rollback bar through different areas in our design tree, the graphics area updates the geometry of our model to display the activated features. Notice that any feature that is below the rollback bar is grayed out. This is because those features have been suppressed. By suppressing those features, rebuild time is reduced, which can become extremely beneficial when working with complex models. Only the features above the bar will be rebuilt and shown in the graphics area. The suppressed features are removed from any performance or evaluation calculations, allowing for faster performance results.
Aside from walking us through the creation of models and suppressing features, the rollback bar also allows us to add additional features at specific points in our model’s design. This can be accomplished by rolling back to the position where you want to add a feature and then creating it. The new feature will be added to that specific location in the FeatureManager design tree.
|
|
|
|

By using the rollback bar, we have full control of our model’s feature history as well as its performance. Even if we missed a step in our design process, we can use the rollback bar to our advantage to add features where we desire. The rollback bar is a simple, but effective tool. So the next time you’re designing your model in SOLIDWORKS, keep in mind its capabilities. Walmart isn’t the only one capable of rolling back.
For more information or a price quote, contact Hawk Ridge Systems today! Or check out our YouTube channel for tutorial videos.


