Welcome back to another
Hawk Ridge Systems
blog! In this article, I’m going to cover something that I get a lot of
questions from both students and customers about. I’ll start by asking YOU the
question, “Do you ever run into a model that is overly complex for what you
need? Have you ever wanted to simplify it so that it doesn’t bog down your
computer?” If your answer is yes, then the Defeature tool is your new best
friend.
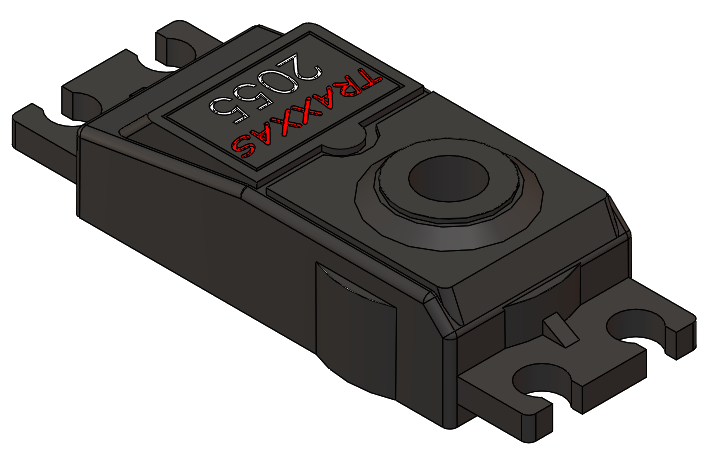
We’ve all been there. We get a model like this that has the detail that we
just don’t need for what we’re doing.
 |
In the case of this servo part, there are a lot of extraneous features, but a
couple that really stands out are the hole in the middle and the text. They
look pretty, but the only things I’m concerned about are the mounting holes
and the outside dimensions. All of the extra features can cause slow rebuild
times for the part, and cause slow down issues in the assembly that this is
used in. Let’s use the Defeature tool to simplify this. Note that I’m working
on a part, but Defeature will work on an assembly and change it into a part.
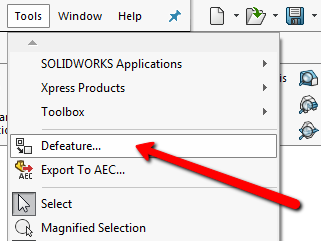
To access it, click under Tools, and it’s near the top of the
menu.
 |
This opens up a wizard in the property manager to step you through using the
tool.
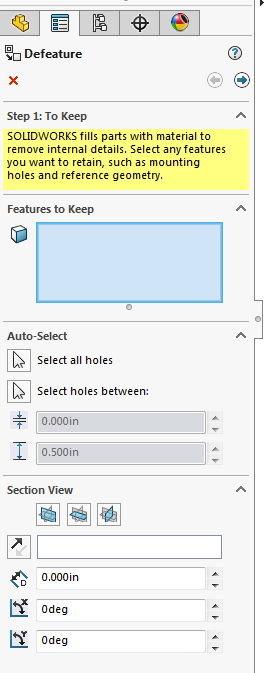 |
The first step is to select all of the features to keep. The default behavior
is to fill in all internal geometry, including holes, so select anything you
don’t want the tool to fill in with the material. You can pick your own
features in the Features to Keep box, select all holes or holes of a certain
size by toggling the arrows, and use the Section View to see inside the part
if there are any internal features to select. In this case, the hole in the
center is going to be removed since I didn’t select anything. Hit the
Next arrow to continue through the tool at the top right to
continue.
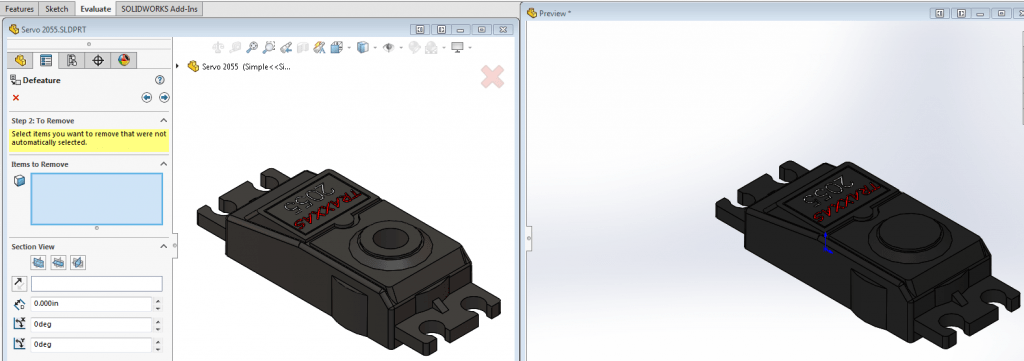
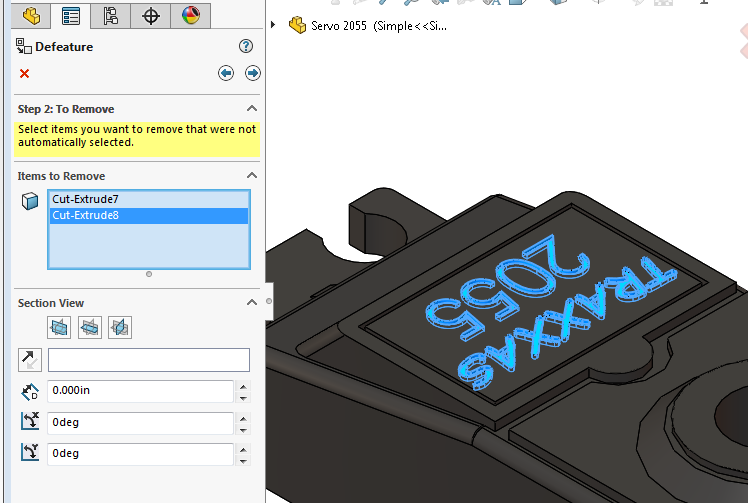
The next step is To Remove. Also, notice that there are two
windows, the original part on the left and a preview the defeatured part on
the right.
|
|
I can select anything that wasn’t removed in the first pass, like the text.
I’ll select the features of both texts and hit the
Next arrow.
 |
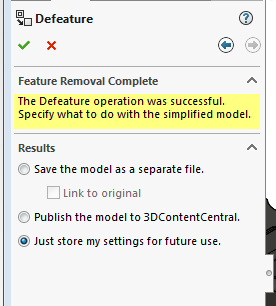
The final option is what you want to do with the defeatured file. I can save
it out as a separate file and have the option to link it to the original file.
I would recommend doing this as long as space isn’t an issue since it’s safest
to have the original somewhere. We can also publish it to 3D Content Central
for others to use, or store the settings in the part until we’re ready to do
the above options.
 |
I’ll save it out as a separate file and give it a DF at the end to distinguish
it as the defeatured part.
 |
Now that we have two versions of this part, let’s use the Performance
Evaluation Tool under the Evaluate command manager to see the difference
between the files.
 |
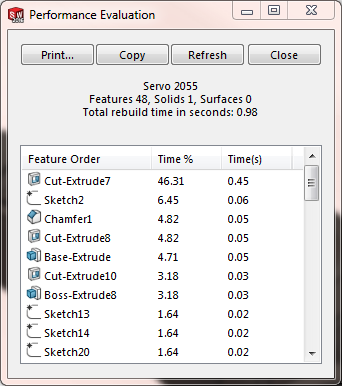 |
The first part takes about a second to rebuild, but times add up depending on
how large the assembly is. In contrast, the second part has a rebuild time of
0 and has one feature, so you can’t beat that. Secondly, let’s look at the
size of the files. The original part is over 3 times larger than the
defeatured part.
I hope you’ve enjoyed reading this blog and will use the Defeature tool with
your models. Check out our
YouTube channel
for more tutorials! If you have a comment, please enter it below, and thanks
for reading!


