
Do you have a PDF of a drawing that you would like to bring in to SOLIDWORKS? Perhaps you have legacy data or client information that you need to convert to 3D, and all you have is a PDF. If you could just bring that information into SOLIDWORKS… it would save you a lot of time, and that would be awesome! In this blog, you will learn a mind-blowing yet simple technique that will save you time going from PDF to 3D in SOLIDWORKS!

Let’s take a look at a technique I used to create a 3D model of my guitar in SOLIDWORKS, but rather than getting out my calipers and tape measure to reverse engineer it, I will start with a PDF, extract information from it as an image, and use a Sketch Picture to hold that information for reference when creating the features of the body.
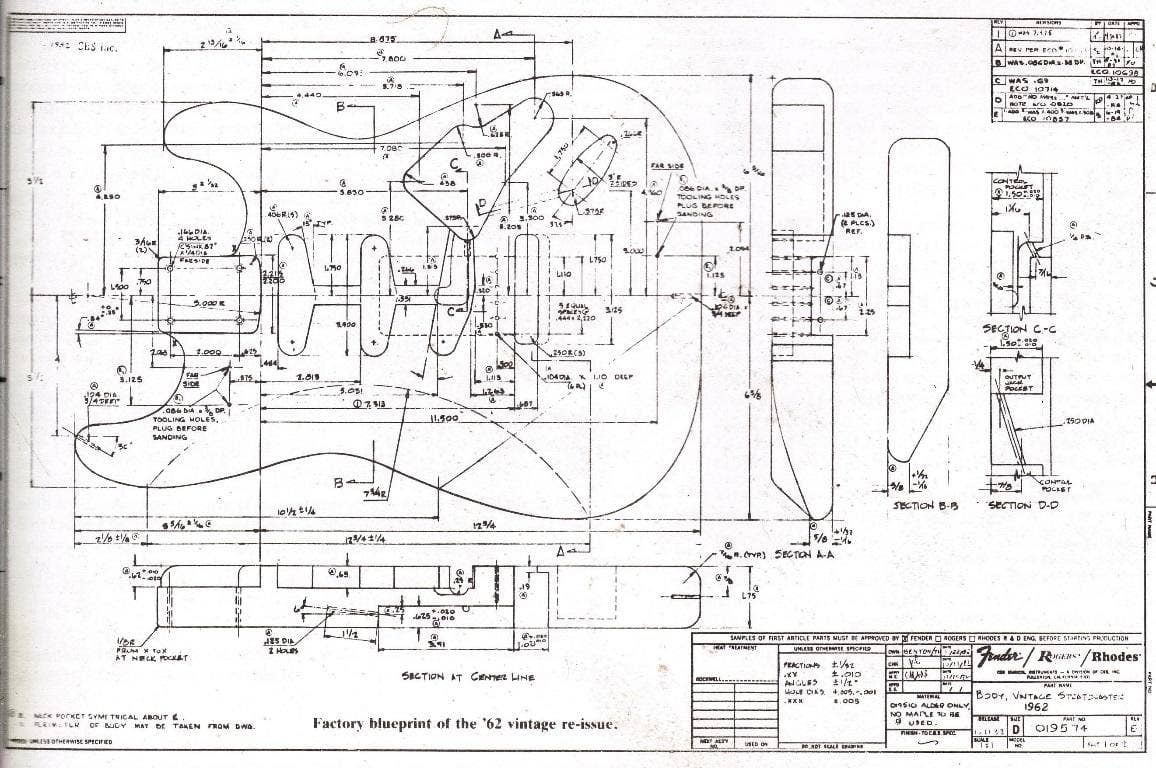
I obtained a PDF of a 1962 Vintage Fender Stratocaster. Notice that the drawing is complete with fully dimensioned standard and section views. To begin my design in SOLIDWORKS, I am only interested in the front view. The key to this technique is the fact that the drawing is fully dimensioned, so I know what the actual sizes are based on the drawing.
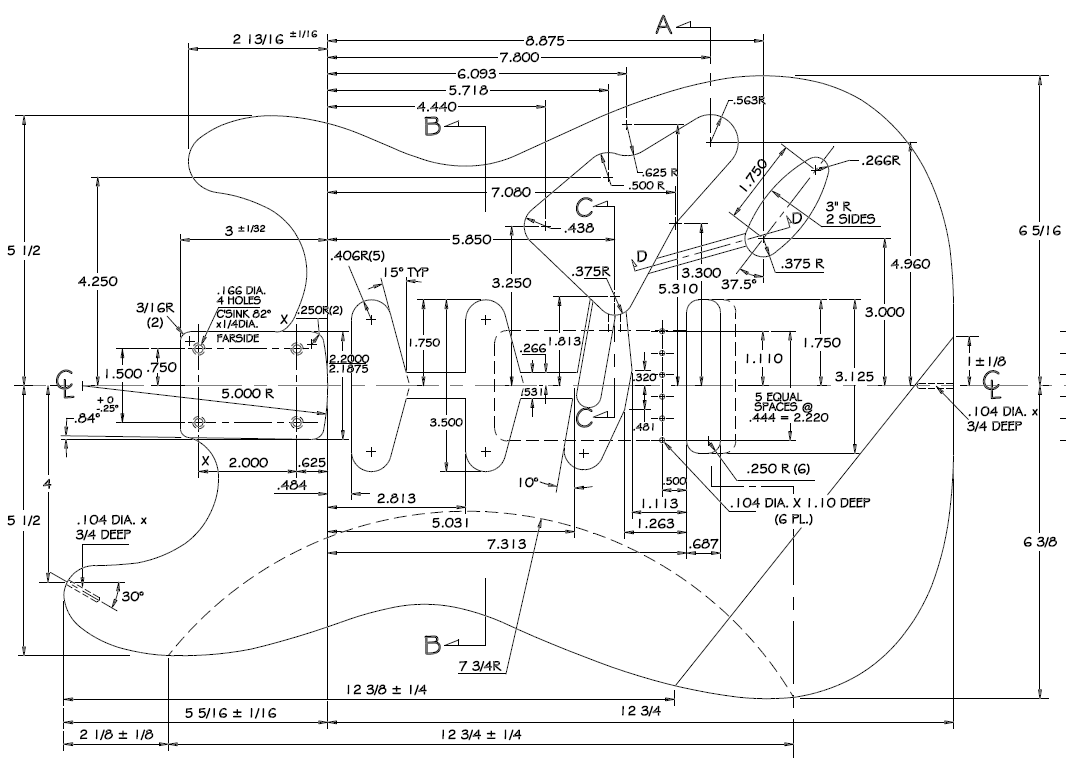
The Sketch Picture command uses image formats like JPG, PNG, or BMP files. Since I only need a portion of the drawing, the front view, I will use the Windows Snipping Tool to extract that information from the PDF and save it as a PNG file. I like to use PNG files because they lend themselves to transparency control very effectively. This functionality will allow you to see the important information from the image more clearly. The image below is the portion of the drawing that was extracted from the PDF using the Windows Snipping Tool.
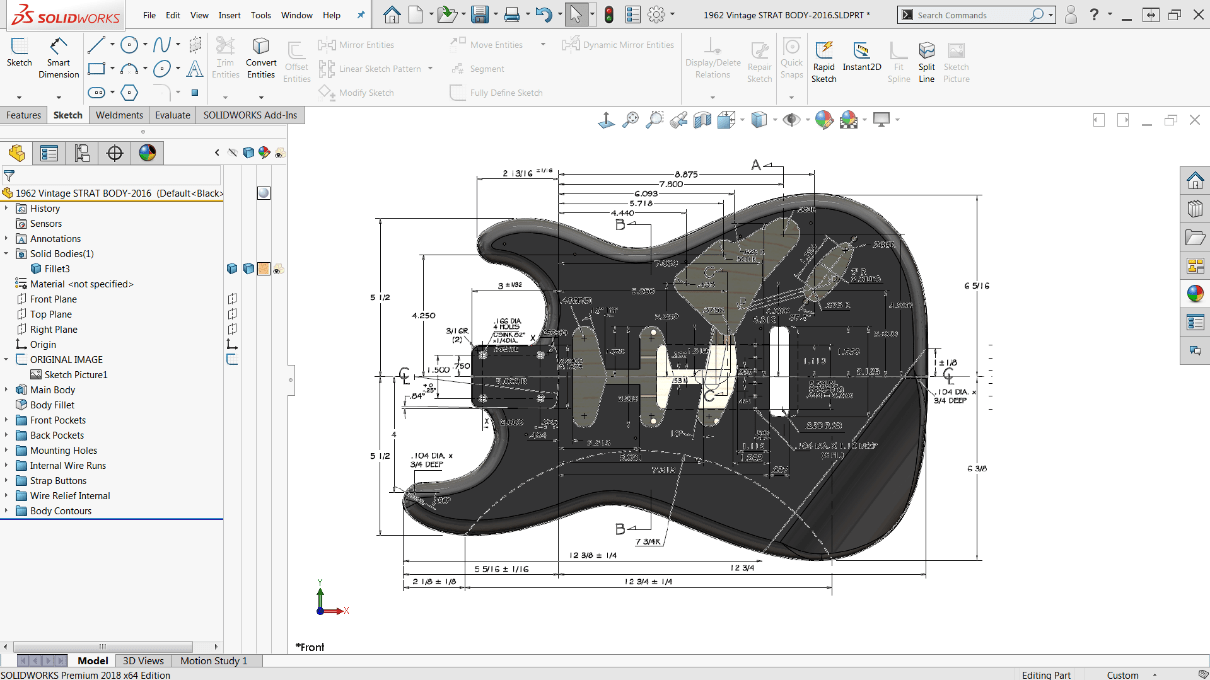
Starting with a new part in SOLIDWORKS, create a sketch on the Front plane that will hold the image ONLY, this way you can control it independently of subsequent sketches. Using the Sketch Picture command, place the PNG image with respect to the origin as appropriate. Then, use the scale tool within the sketch picture command to resize the picture, based on known dimensions. Optionally, the eyedropper tool can be used to remove the white background. Consider adding a center line with a reference dimension to assist you in orienting subsequent sketches. The sketch containing the sketch picture will become a reference for all other sketches.
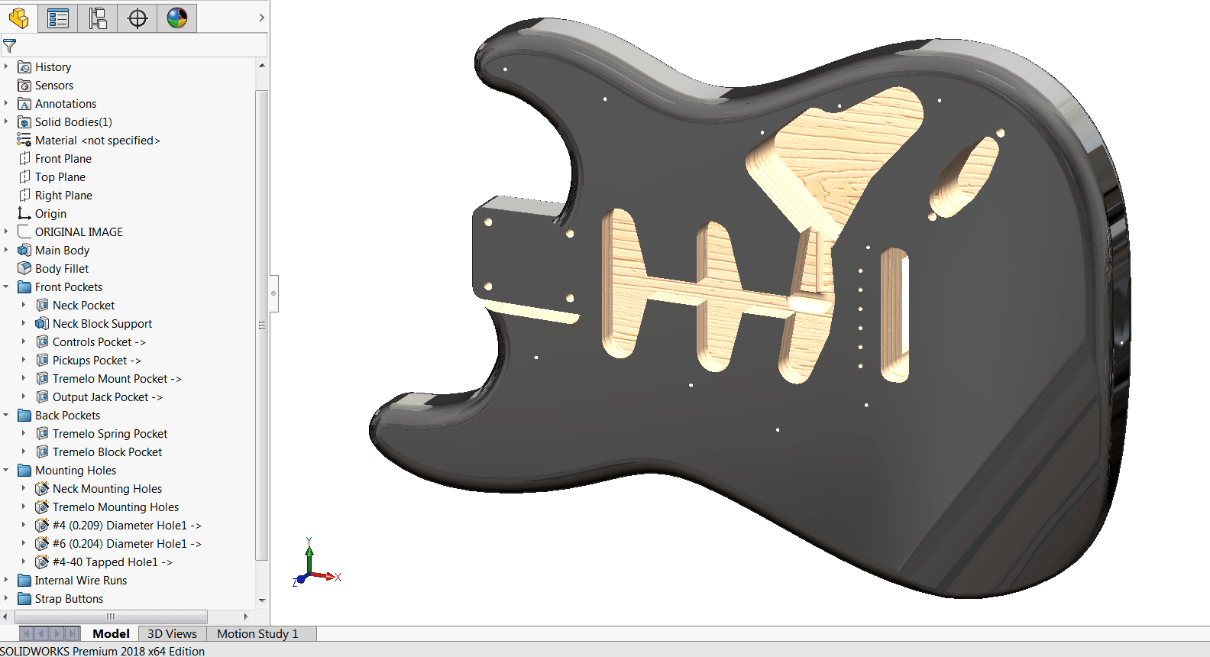
Once the reference sketch containing the Sketch Picture is in place, the sketches for the body outline and all the features representing the machining operations for the body are created by tracing over the original reference sketch in sketches of their own. Using the hide/show icons for the reference sketch come in real handy to monitor your progress. Because the reference image is fully dimensioned, it is pretty easy to capture the design. The Neck of the guitar was also created using the same technique.
Notice the way in which the FeatureManager Design Tree is organized – the features are grouped into separate folders based on the type of manufacturing operation. Front and back pockets, mounting holes, internal wire runs, and body contours all represent machining operations that need to be performed on the body and are based on information from the reference sketch containing the sketch picture. SOLIDWORKS allows you to organize and rename your features so you can easily recognize how your models are created. To rename a feature, slowly double-click it in the Design Tree. To group features together in a folder, simply select the desired features in the Design Tree, right-click, and choose Add to New Folder.
SOLIDWORKS has many great features built right into the software that makes designing in SOLIDWORKS streamlined, intuitive and a lot of fun. Once the design is completed, SOLIDWORKS Visualize has powerful capabilities that allow you to create amazing visuals of your designs, as seen below.

In this Blog, we got a little creative and leveraged the Sketch Picture command to quickly and easily create a SOLIDWORKS model with information from a PDF. This simple technique will save you a lot of time when all you to have to start with is a PDF drawing. Check out the video that accompanies this blog for a detailed demonstration of this technique. And… if you haven’t tried SOLIDWORKS Visualize yet, you are really missing out on a powerful communication tool in your SOLIDWORKS arsenal!

For more information, request a SOLIDWORKS 3D CAD quote or contact us at Hawk Ridge Systems today. Thanks for reading!


