When creating drawing views in SOLIDWORKS, it may be desirable to display assembly components or certain edges of a model using different line styles, thickness, or colors. Maybe you want to emphasize some part of the design or make the drawing easier to read. For whatever reason, here’s one way to do it.
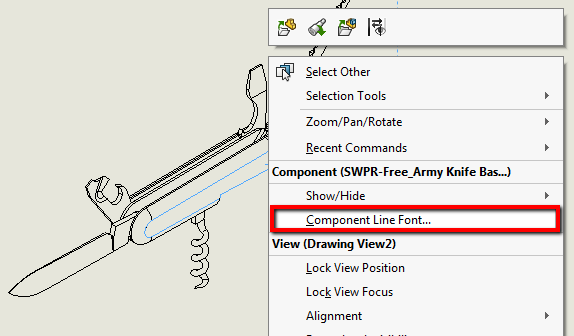
We’ll start with a component in an assembly. In the graphics area, right-click the component in the drawing view that you would like to modify (you can select multiple components by holding Ctrl and can even make your selections from the FeatureManager design tree), and select Component Line Font. In this example, I’m selecting the base component of the army knife.
|
|
This will bring up the Component Line Font dialog box. The ‘Use document defaults’ box will be checked, meaning the component display will follow the Document Properties of the template found in Tools > Options > Document Properties. Unchecking this box enables you to modify the Line style and thickness for different types of edges like visible, hidden, and tangent edges.
|
|
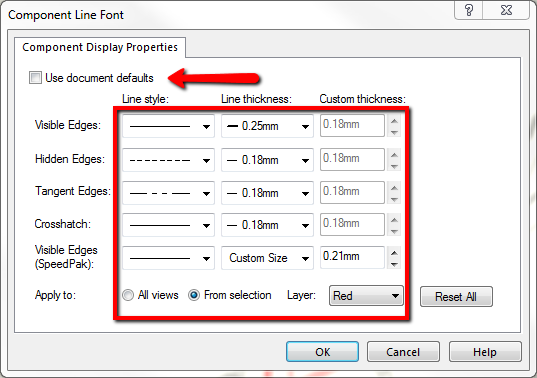
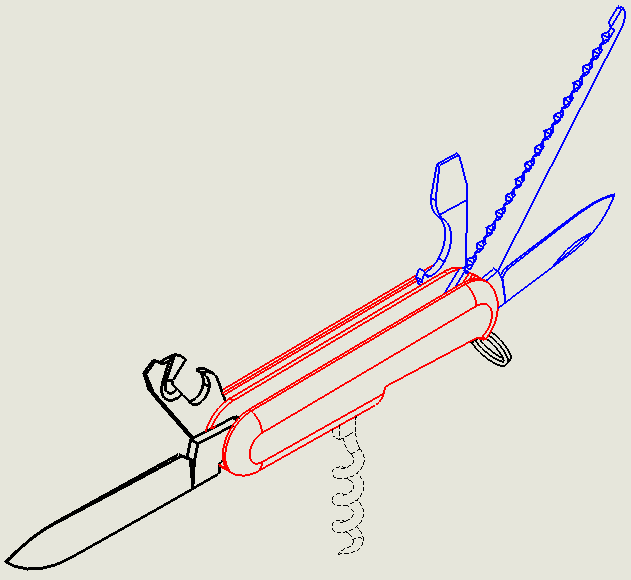
We can apply this change to all views, or just the selected view. Additionally, if you have a specific layer created, you can assign it to the layer from this dialogue as well. This can be used to change the color. I increased the thickness of the visible edges of the base in the selected view and placed in on the “Red” layer. I also made some changes for some of the tools and the result can be seen below.
|
|

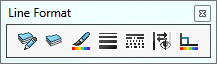
If you would like to modify specific edges or lines, select the entities you want to modify and you can access Line Color, Thickness, and Style from the Context Toolbar. If you’re going to be making a lot of changes, it may be convenient to enable the Line Format toolbar by clicking on View > Toolbars > Line Format. You’ll not only have access to the tools mentioned above but layers as well.
|
|
Be sure to stop by often for more tips and tricks and check out our YouTube channel for tutorials.


