Not long ago I had students in a SOLIDWORKS Essentials class that worked in the manufacturing department of a large shoe company. During the class, they asked for help with exporting IGES files from SOLIDWORKS to their laser cutter. What they needed to produce was a sketch path for their laser cutter to etch text onto parts for their manufacturing rigs. The problem was that they needed more than just a sketch, they needed the exact 3-dimensional location of that sketch on the part where it would be etched.
One way to do this is to export the sketches from SOLIDWORKS to an IGES file. When the file is opened, all that is left are the sketches in the exact locations they were created.
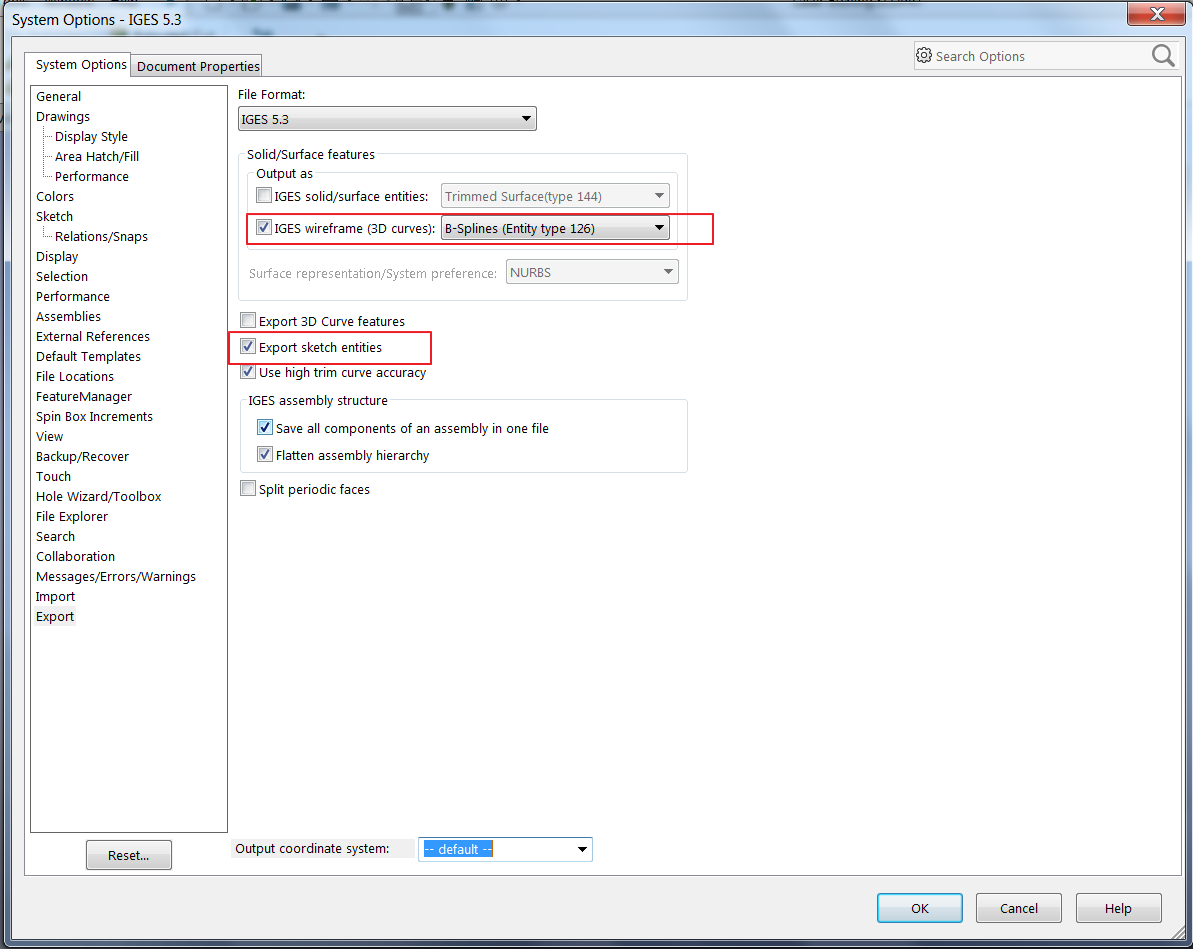
Options that allow you to do this are found in the Export Options for IGES. They will allow you to convert the solid model into a wireframe as well as save out sketches. All we are going to do is adjust these settings and clean up the IGES file that it produces, and then we will be ready to send it out to our laser technician.
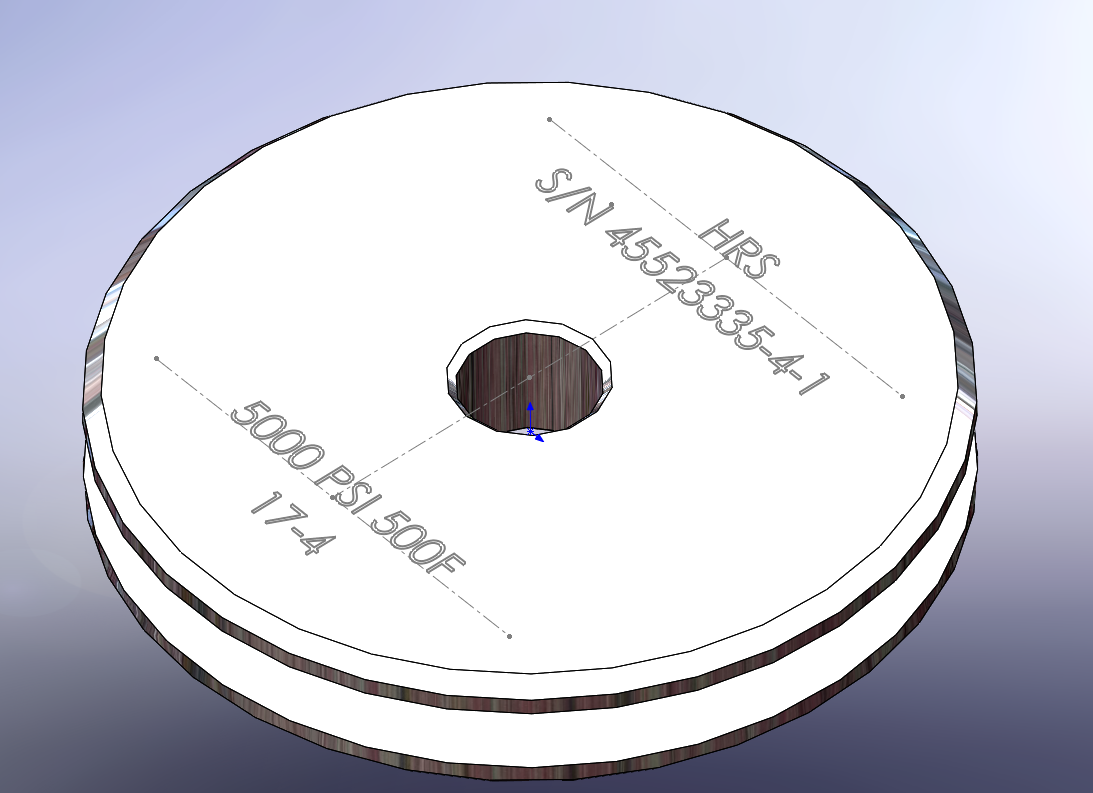
The part we have is a metal part that we want to etch the serial number and specifications onto. The initial IGES file that we create can have wireframe geometry based on the part as well as any sketches that are contained in the part.
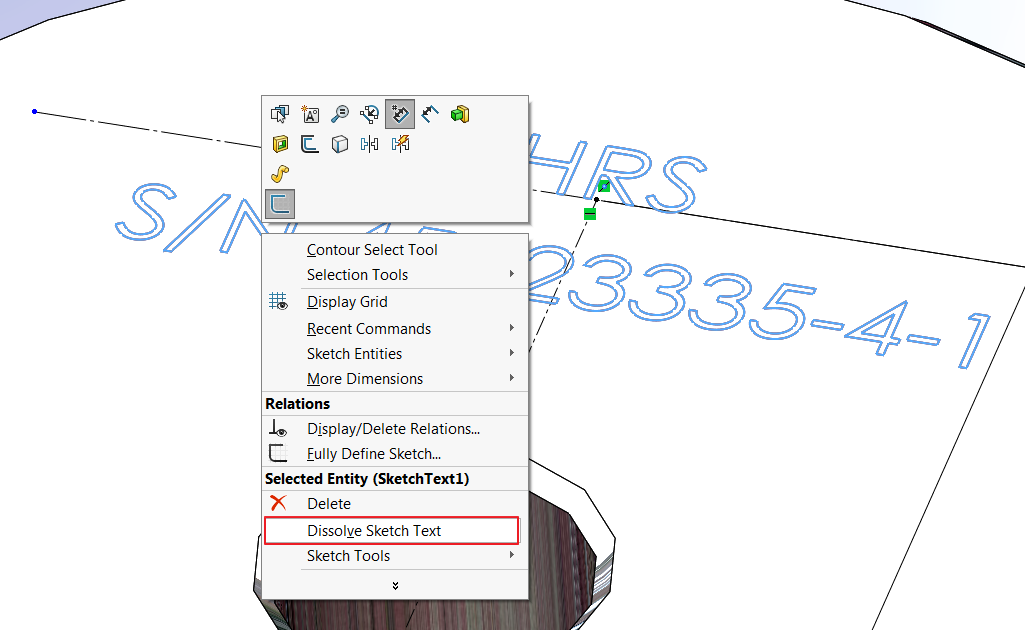
First, because we are looking to export out the text, we need to break it out into the Sketch. To do this, Edit the Sketch and then Right-click on the Sketch Text. In the Right-click menu select Dissolve Sketch Text—this will convert the text into Sketch Entities. Note that once you dissolve the Sketch Text you cannot edit it without recreating it as Sketch Text. Also, an upside to dissolving Sketch Text is that features built from it (such as bosses and cuts) will solve faster, increasing the part’s overall performance.
Now that this is done we need to do a Save As and select IGES as the file type. Once we choose IGES, the Options button will appear.
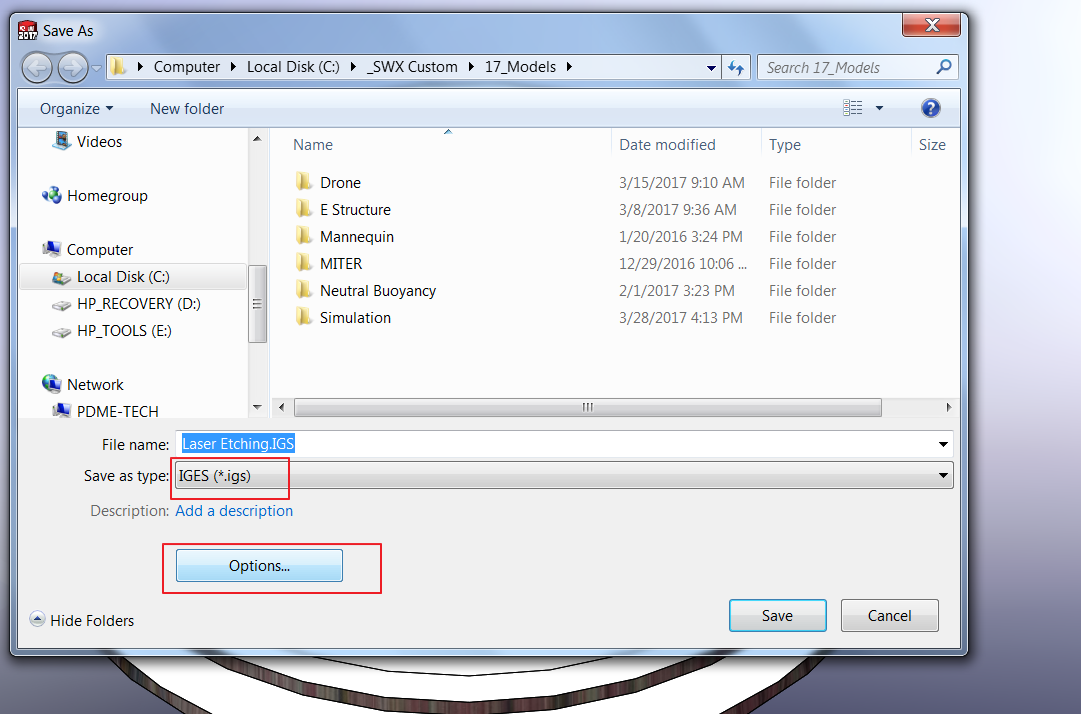
Inside the Options, we need to check the option Export sketch entities and then we can Save the file.
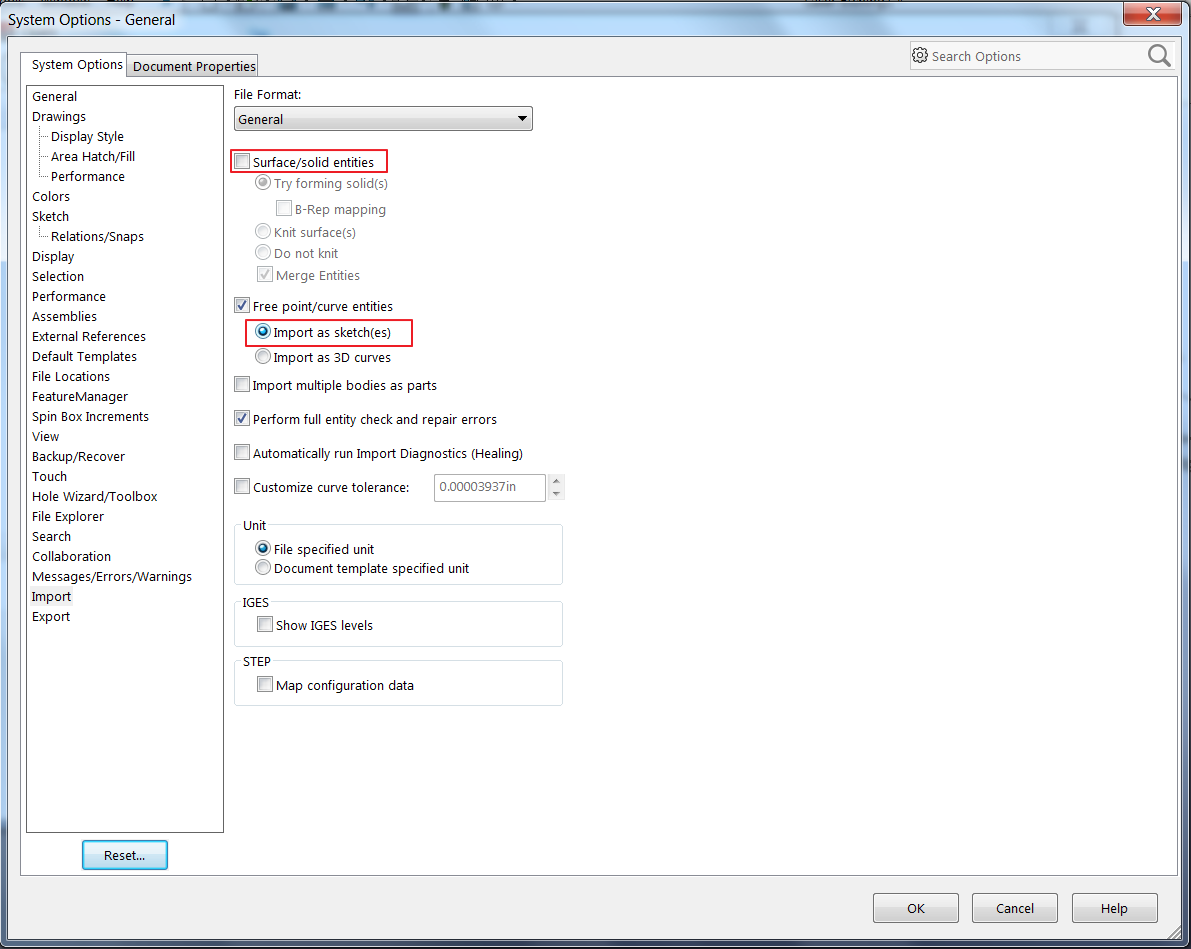
The last thing we are going to do is clean up the file so that just the sketch we are interested in is the one saved. To do this we need to Open the IGES file we just saved. First, switch the file type to IGES. Then, before opening, go to the Options again. Inside the Options, make sure to select Import as Sketches under the Free point/curve entities section. You may also want to clear the Surface/solid entities checkbox, as it will help on the last step.
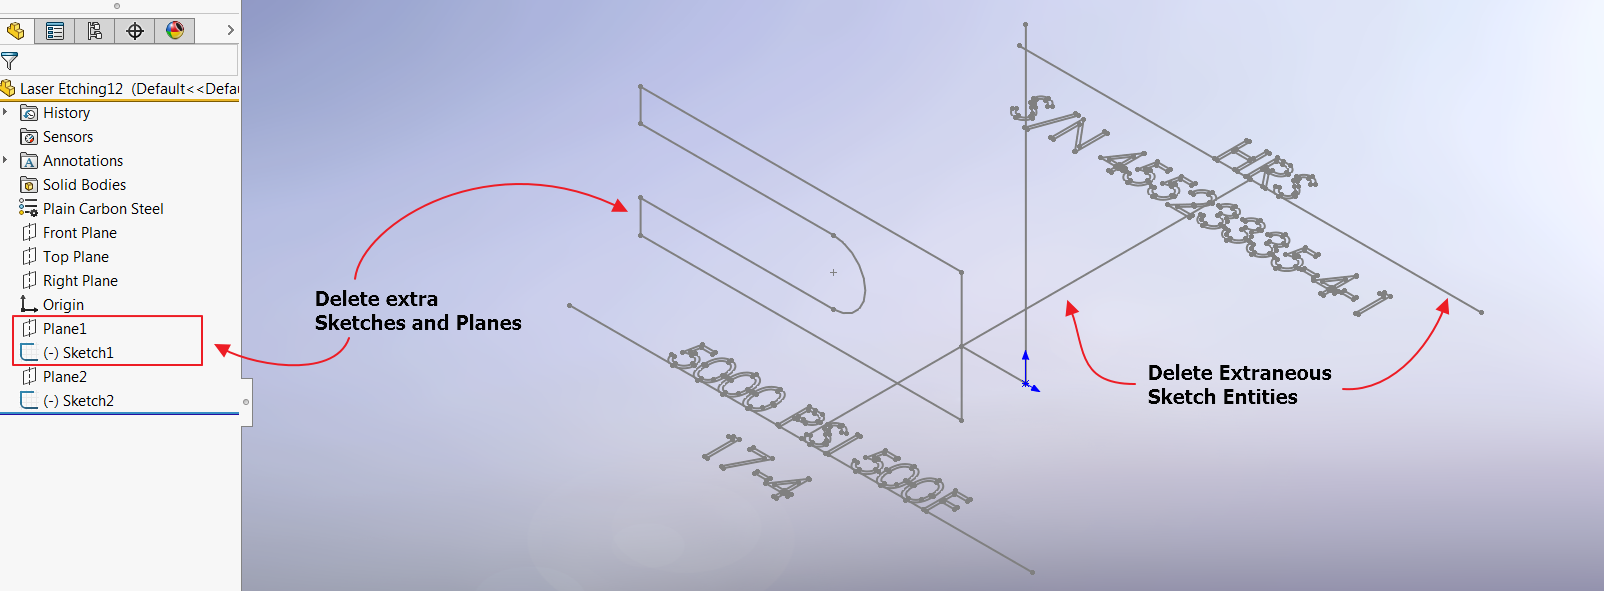
Finally, we are left with a file that has a number of sketches and possibly solid/surface bodies. Delete any extraneous data and Edit the sketch containing the text to remove any unwanted sketch geometry (construction geometry has been converted to normal sketch geometry when saved to IGES).
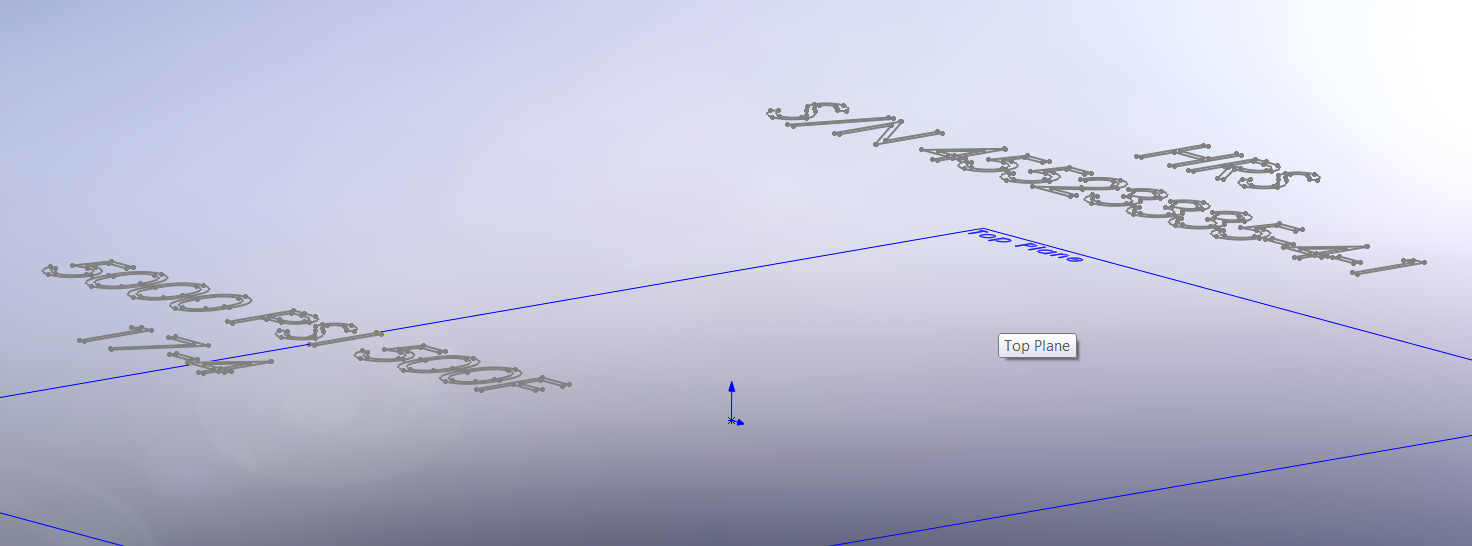
Save the file once more as an IGES and you’re done!
For more information, check out our YouTube channel, get a SOLIDWORKS quote or contact us at Hawk Ridge Systems today. Thanks for reading!