Welcome back to another one of my blogs! If you are familiar with the capabilities of SOLIDWORKS Electrical Professional and SOLIDWORKS Electrical 3D, you know that if you need wire lengths in your wire length report, they will be automatically populated after the wires are routed in 3D. The big question is, what if you don’t have access to Electrical 3D? I’m going to cover that for you today in this article.
I have a project with a lot of information in it in the form of line diagrams and schematics, but something is missing. If I open up the first page of the List of wires report, you can see some of the columns are blank in this report, but the one I’m concerned with is the Length column since it shows 0 inches all the way down.
 The List of Wires report shows a blank Length column that needs manual data entry. The List of Wires report shows a blank Length column that needs manual data entry. |
 Schematic-only projects leave the Length column blank since drawings aren’t drawn to scale. Schematic-only projects leave the Length column blank since drawings aren’t drawn to scale. |
When you use purely the schematic portion of Electrical, the length information isn’t generated automatically because the drawings aren’t drawn to scale. As I mentioned earlier in this article, if I routed this in 3D, the lengths would populate automatically. However, I also have the ability to manually enter in lengths.
By looking at the top of this report, I can see that K1: A1 is one of the first components.
 The wires report identifies K1:A1 as one of the first components needing a length. The wires report identifies K1:A1 as one of the first components needing a length. |
I’ll switch over to the Components tab and expand the K1 component. Looking through the symbols, the bottom one tells me that it refers to A1, and right clicking and selecting Go To opens up the sheet and takes me to the area of the drawing of the symbol.


Let’s put in a length of the wire on the left of the symbol. I have 2 ways to do this. The first way is to right click on the wire, select wire properties, and select the wire number. This takes you into the wire properties and there is a length field right here. Type whatever number you’d like the wire to length to be and hit okay.
 The Properties pane on the right offers a second way to edit a selected wire’s length. The Properties pane on the right offers a second way to edit a selected wire’s length. |
 Clicking the pencil icon in the Properties pane opens the wire’s length for editing. Clicking the pencil icon in the Properties pane opens the wire’s length for editing. |
The second way is to use the Properties pane to the right of the screen. With the wire selected, I get a tab that has the wire properties in it. To edit it, click the pencil.
 A green checkmark applies the new wire length, while a red X cancels the edit. A green checkmark applies the new wire length, while a red X cancels the edit. |
Change the length and hit the green check to apply the changes. Hit the red x to get out of making changes.
 Update Report Drawings refreshes the wires report to show the newly entered length. Update Report Drawings refreshes the wires report to show the newly entered length. |
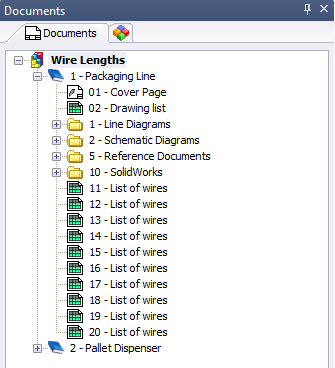
Once the wire length has been updated, right click on the report on the Documents Tab and select Update report drawings. The length of that wire has been updated!
 Manually entering lengths suits a few wires, but 3D routing scales better for a full project. Manually entering lengths suits a few wires, but 3D routing scales better for a full project. |
As you can see, this manual method can be helpful for a few wires, but if you need wires for the entire project, routing them in 3D would be the way to go.
I really hope you enjoyed this article on manually adding wire lengths to your project. For more information, check out our YouTube channel or contact us at Hawk Ridge Systems today. Please check back to our blog page periodically for new articles and thanks for reading!