Changing a tried and true — if perhaps inefficient — the process is always a risky endeavor with many potential pitfalls. One of the first things people worry about when sw itching anything from their cell phone carrier to their Electrical CAD software is, “What can I take or transfer with me?” With cell phones, it might be your actual number, cherished photos, or a funny series of texts from the holiday party you can blackmail a co-worker with. I kid!
With Electrical CAD software, you’re going to be concerned with much more serious matters like legacy drawings, manufacturer parts lists, and title blocks that you or others in your company invested a significant amount of time, and by extension money, into setting up perfectly. Thankfully, SOLIDWORKS Electrical has a built-in import wizard for salvaging your legacy title blocks and adding in the powerful database backed intelligence unique to the Schematic tool for automatically displaying your title block annotations, row and column numbers, and other dynamic features.
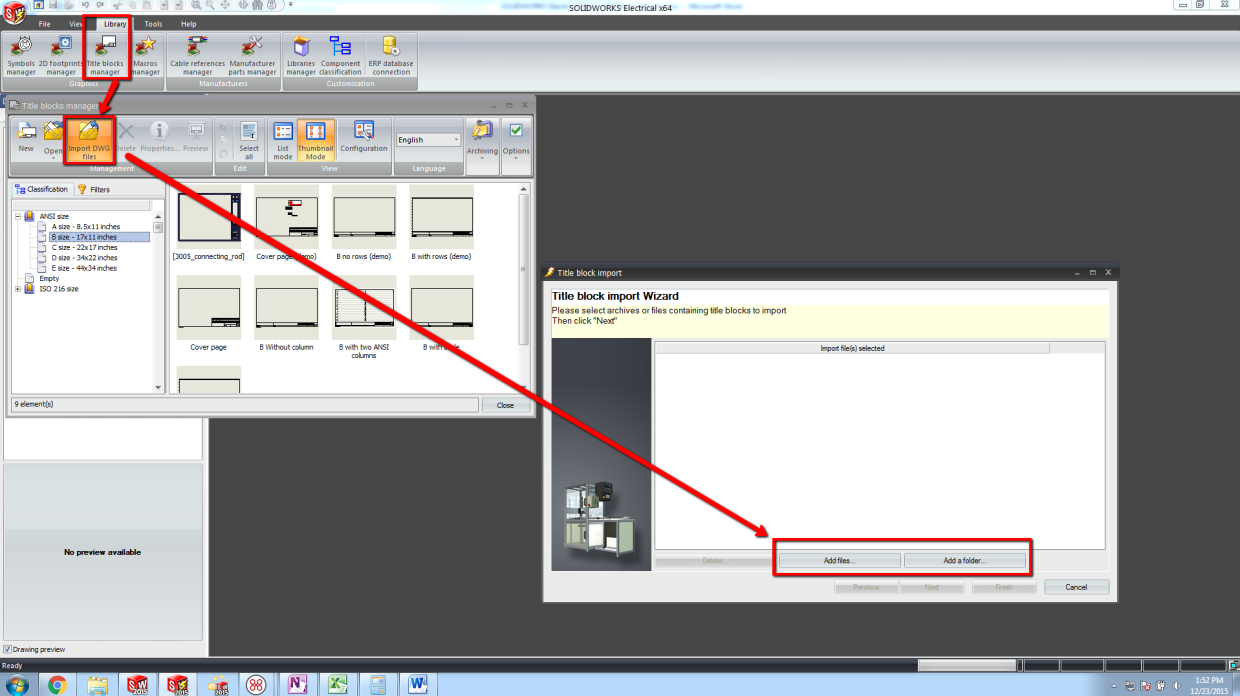
To begin, open SOLIDWORKS Electrical Schematic and close the Projects Manager to select the Library tab. Click on the Title Blocks Manager and in the pop-up window select Import DWG, as shown in the first image.
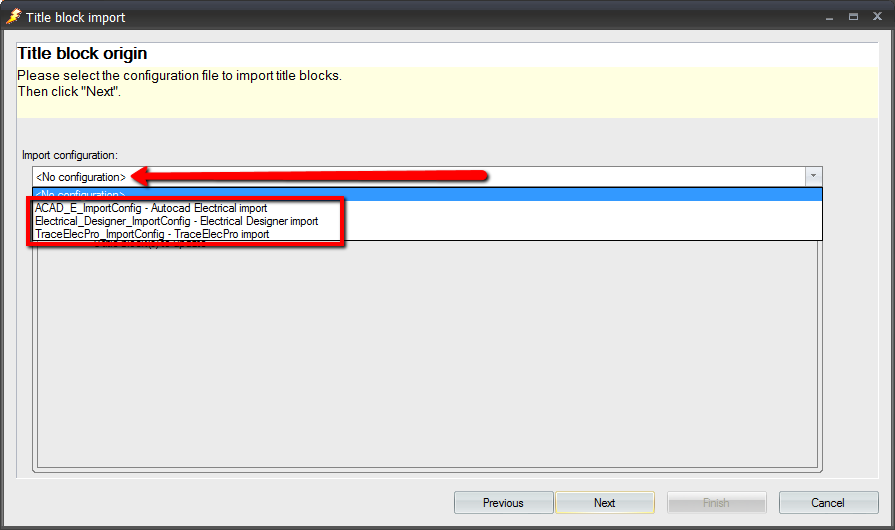
Select the DWG or DXF files whose title blocks you’d like to reuse; you can select individual files from several folders, or you can select a single folder containing all the files you wish to import. Click Add files or Add a Folder in the wizard, and choose the Import Configuration. If you wish to map your attributes according to a previously saved template or using one of the included pre-configured ones, simply choose it from the drop-down menu. Otherwise, choose No Configuration. This will allow you to manually define the mapping in a later step.
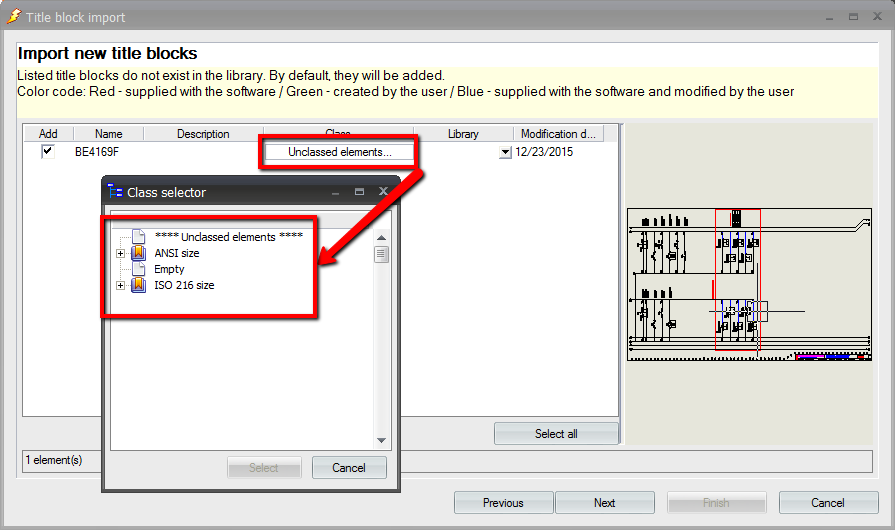
Clicking Next here will take you to the Import properties page, where you can set the Class of the Title block to put it into the right size category, along with giving it a description that will appear in your Title Block Library so you can find it later. See image 3.
 |
Clicking Next again will take you to the Attribute Conversion page. Here you can manually define the attribute map if the DWG included any defined attributes by matching it with the corresponding SOLIDWORKS Electrical Attribute. If you had chosen from one of the mapping configurations in the drop down in step 2, any “intelligent” labels, tags, etc. that are defined with their corresponding SOLIDWORKS Electrical Attributes would automatically be mapped. Of course, even in the event that nothing can be matched you could go back and map them manually, or replace them with existing SOLIDWORKS Electrical attributes by editing the title block after import.
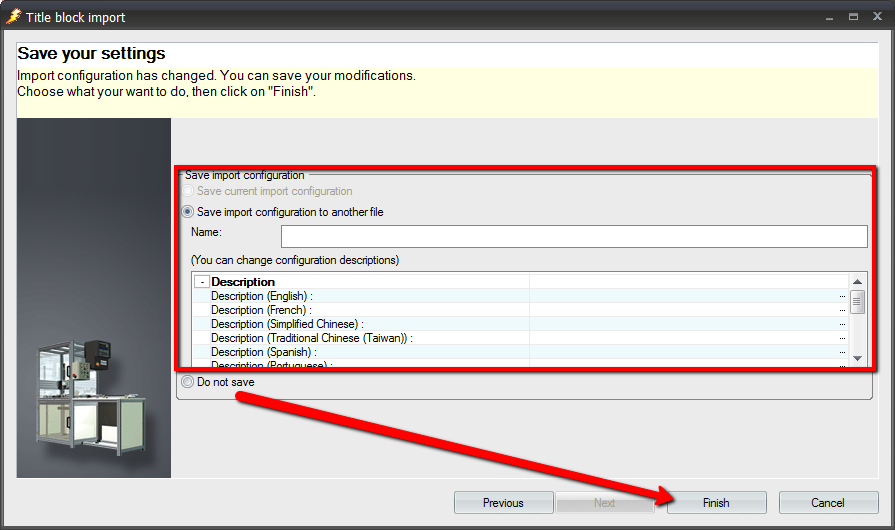
Finally, clicking Next for the last time will take you to the last page of the Import Title Blocks wizard, where you can save any mappings or settings you previously selected in the wizard as an Import Configuration, so in the event of doing another folder or batch of drawings with the same type of import settings, you can just “set and forget” in Step 2.
In this example, you can click Do Not Save as indicated in image 4 and click Finish. This will place the imported Title Block as an editable template in the Title Block Library. From here, you can edit it like any other title block, add geometry, change logos, add images, and modify static text as well as add any additional Attributes. If you forgot to set the Classification in step 3, you can always edit the Properties of the Title Block and switch it to the Class it belongs in.
For more information, check out our YouTube channel or contact Hawk Ridge Systems today. Thanks for reading!


