Using SolidWorks drawings in SolidWorks Electrical can be extremely
beneficial, and the drawing tools in
SolidWorks
are incredibly powerful. Typically, we work with our schematics in our 2D
application and our 3D assemblies in SolidWorks, while accessing the same
database. In this example, we will create a drawing of our electrical cabinet
in a SolidWorks drawing document and add that to the electrical database.
 The SolidWorks assembly combines the electrical cabinet with its routed components, wires, and cables.
  This assembly view shows the electrical cabinet along with its associated components and routed wiring.
The SolidWorks assembly contains the electrical cabinet, the components we
have associated and inserted from our project, and any wires or cables that
have been routed.

The workflow to create a 2D drawing for
Electrical
is similar to creating other drawings. On the SolidWorks Electrical 3D tab,
we’ll click the “Create 2D Drawing” button. This generates a new
drawing with the same name as the assembly (usually a 5 digit number), places
the drawing in the project folder, and associates it to the project.

It is important to choose a drawing template without a sheet format. We may
also delete an existing sheet format, if the template selected contains one.
When the drawing is sent to the electrical project, it is given the same title
block as the other drawings in the project.


We can ‘drag and drop’ the appropriate view into the drawing. At times, we may
not want to create a view of the entire assembly. In those instances, we will
Crop our view by sketching a closed profile and choose the
Crop command.

With the view smaller, we can add tables, such as the Bill of Materials (BOM).
We would just select the view, and go to our Insert menu and choose
“Tables> Bill of Materials”. It is even possible to bring in tables
generated in your electrical project. Afterwards, we’ll choose how to number
the BOM and filter it for only the routing components.

We can use the “Auto Balloon” tool to add callouts that relate to our
BOM. The placement of these balloons can be arranged using magnetic lines.

We may also create marks on the drawing that correspond to the components in
the SolidWorks electrical project. It is best to pre-select the view then
click the Create Marks button on the SolidWorks
Electrical Drawing tab. The application will then automatically
generate notes next to each component with the correct mark.
 Marks generated on the drawing correspond directly to components in the SolidWorks Electrical project.
 Each automatically generated mark links a drawing callout back to its electrical project component.
 Since all marks share one layer, changing that layer’s color makes them easier to see.
 Adjusting the marks layer’s color improves visibility against a busy drawing view.
The marks may be difficult to see depending on what else is in the view.
Conveniently, all of the marks are automatically placed on the same layer. We
can open the Layers and change the color to make it more visible.
 The Create Project Drawing button adds the finished 2D drawing to the electrical project database.
 Clicking Create Project Drawing saves this drawing into the electrical project’s database.
Lastly, we’ll click the” Create Project Drawing” button to add it to
the database.

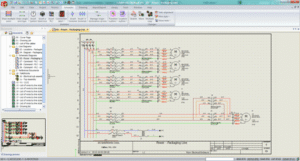
In the 2D application, we can see the drawing added to the electrical project.
If we make any changes to the SolidWorks drawing, we can click the “Create Project Drawing” button and it will replace the existing project drawing.