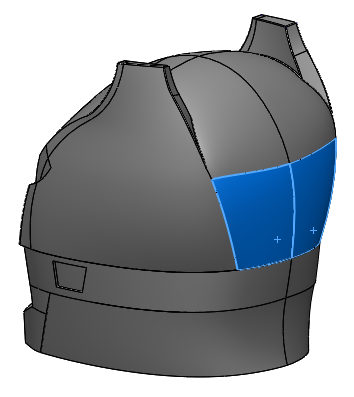
Creating 3D sketches of offset edges of complex faces or surfaces can be quite
challenging and time-consuming. Let’s say we want to create a feature on the
back of this helmet to match the contours of the highlighted faces.
|
Luckily creating these offsets are a lot easier with the Offset on a Surface
feature introduced in
SOLIDWORKS 2017. With this tool, all you have to do is select the face or surface body to
offset all the edges, or manually select the edges you need. The tool can be
found on the Sketch tab in the Command Manager, or by clicking
Tools > Sketch Tools >
Offset on Surface.This would require multiple steps that
might involve converting entities, projecting sketches onto the face, creating
3D splines on surfaces (we all know how much fun that can be), and the list
goes on. Depending on your approach, there might even be some slight deviation
between the offset you created and the actual edges of the original face or
surface, which may not suit your needs.
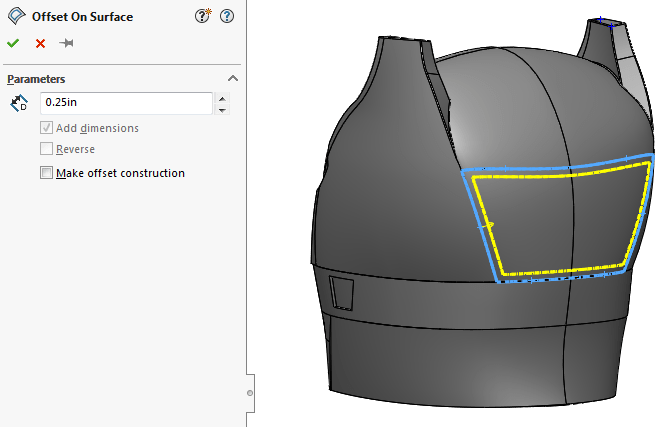
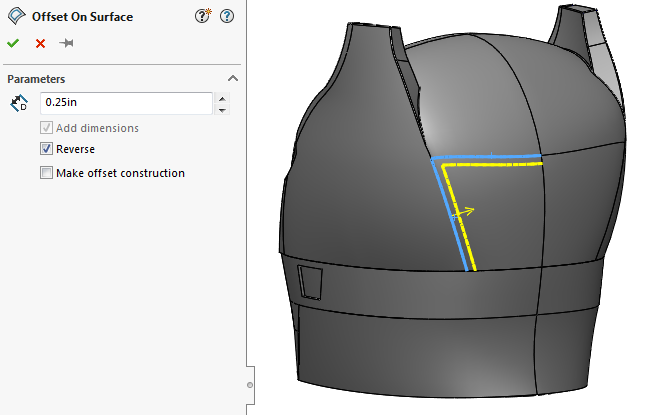
From the PropertyManager, enter a value for the
Offset Distance. You can then select an edge, group of edges,
or even entire faces. You may need to use the Reverse option to flip the
direction of the offset.
|

|
After the feature is completed, a 3D spline sketch is created where it can be
used to drive a feature. In this example, I used the sketch to create a
Filled Surface, then turned it into a solid using the
Thicken command to get the result below.

|
This new Offset on Surface feature is a great tool to make
complex geometry quicker by eliminating a lot of manual steps. I hope you’re
already thinking of ways to use this tool in your own designs. For more
information, check out our
YouTube channel, our
SOLIDWORKS 3D CAD page,
Get a Quote
for SOLIDWORKS 3D CAD or contact us at
Hawk Ridge Systems
today. Thanks for reading!


