Have you ever wondered, “How in the world do I change my SOLIDWORKS serial number?” Perhaps you have an evaluation license installed, and need to input your new permanent serial number. Maybe you were assigned a new serial number by your company that you need to swap out. How do you get up and running so that you have full access to the proper tools and features? In today’s blog, we’ll be going over how to do just that!
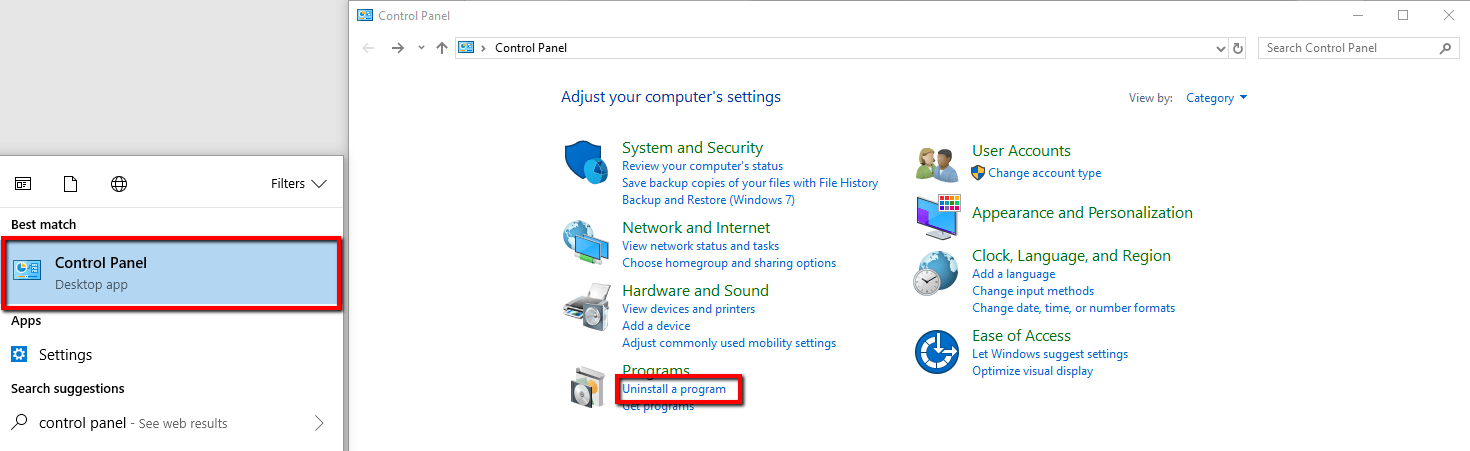
- To begin, we’ll want to access the Windows Control Panel, then click on Uninstall a Program.
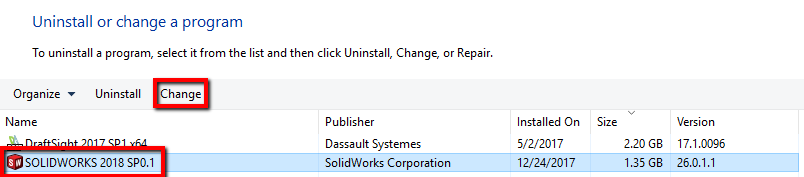
- From the Programs and Features window, select SOLIDWORKS from the list of programs, and click Change.
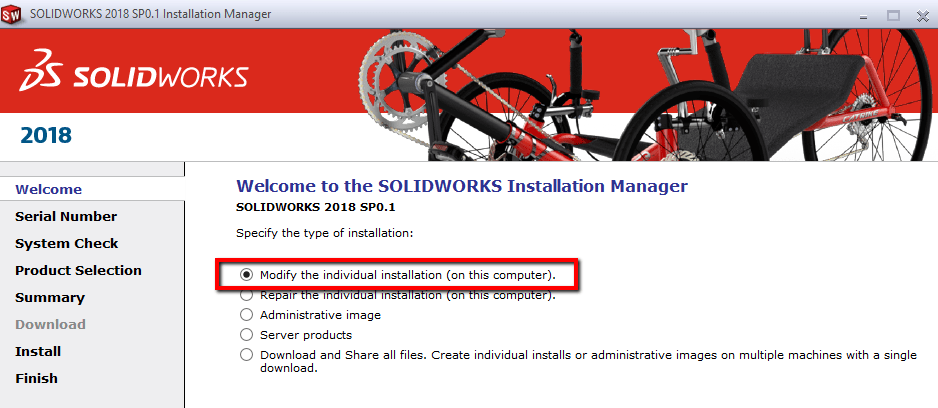
- This will launch the SOLIDWORKS Installation Manager. Select the option to Modify the individual installation (on this computer).
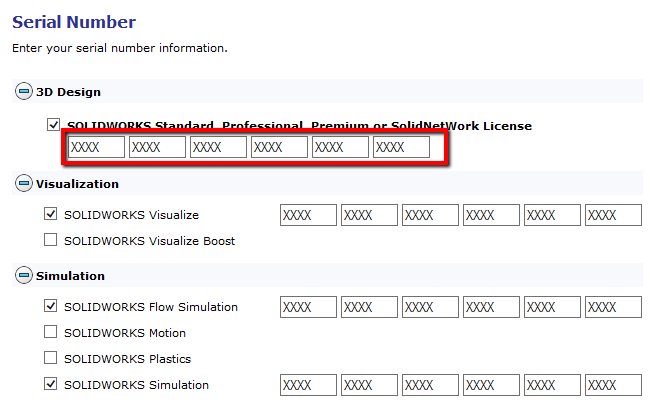
- This will bring you to the Serial Number screen, which lists the Serial numbers used when installing SOLIDWORKS. This is where you want to have your new serial number (s) handy! You can copy and paste the new 24-digit serial number into the corresponding product fields. If you have additional licenses for other products such as Simulation, Visualize, Electrical, etc, this is where you would input those serial numbers. Once done, click Next.
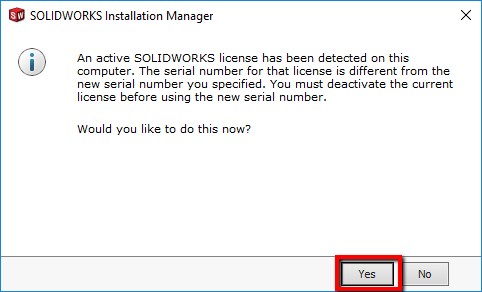
- Once we click Next, a message will appear letting us know an active SOLIDWORKS license has been detected on this computer. To continue, we’ll need to click Yes to deactivate the installed license, before activating the new serial number(s).
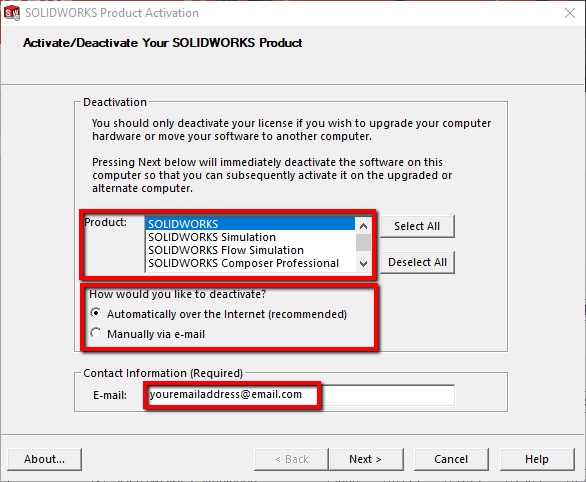
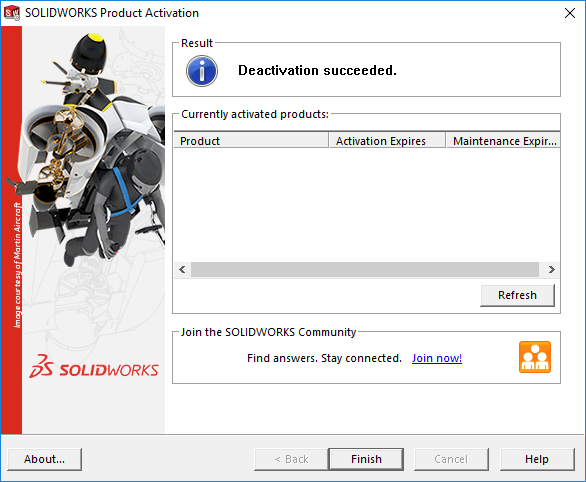
- The SOLIDWORKS Product Activation window appears, prompting us to select the Product(s) we wish to deactivate, method of deactivation (over the internet or manually via e-mail), and your email address. Once selected and filled in, we’ll click Next.


- At this point, a few things may happen depending on the situation:
- If we’re going from one permanent serial number to another, the deactivation will succeed and look like the image below.
- If we’re going from an evaluation license, we may be prompted that the transfer is going to fail, which is okay because an evaluation license cannot be transferred – we just want to ensure the evaluation license is off the computer.
- In both cases, click Finish on the Product Activation Window to exit the deactivation process.
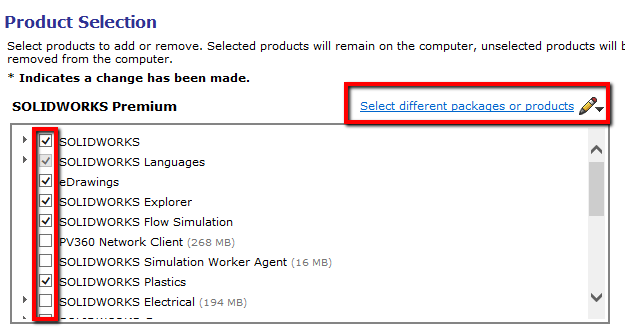
- After closing the Transfer window, we’ll arrive at the Product Selection page. If your license(s) entitles you to additional products that weren’t initially installed with your installation, we can select them from this list by checking on the boxes or going to Select different packages or products. Once completed, click Next.
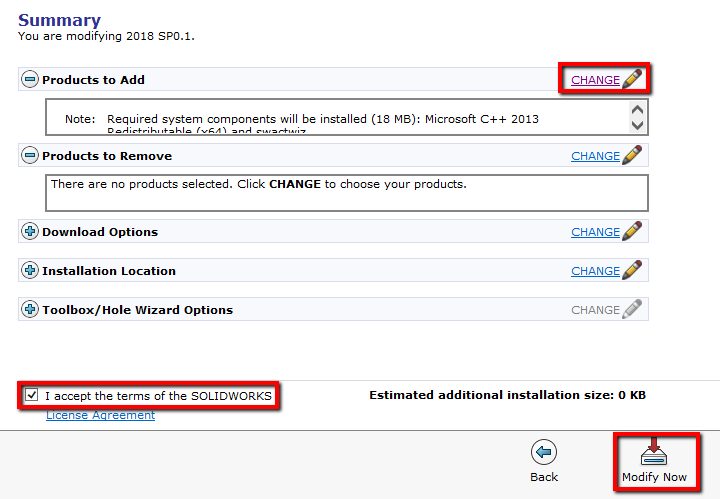
- This will bring you to the Summary page where you can verify that the proper products will be installed, along with additional options. If any changes need to be made, click the Change button by Products to Add. Next, you’ll check the box by I accept the terms of the SOLIDWORKS License Agreement, and then select Modify Now.
- Once the modification has been completed, let’s activate the new license and test it to make sure it was successful! Launch SOLIDWORKS and you should be prompted to activate all products. Repeat the process by selecting the products (Select All if activating multiple products), how we would like to activate, entering in our email address, and then clicking Next.
- We’ll be notified with a ‘Product Activation Succeeded!’, where we can click Finish.
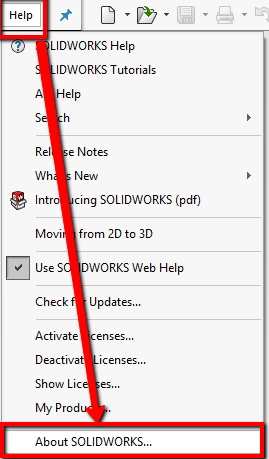
- To see if we’re using the right serial number, we can then go to Help > About SOLIDWORKS.
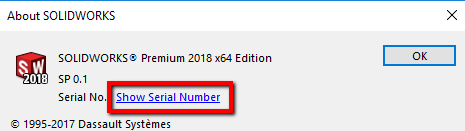
- From here, click on Show Serial Number to confirm that it is using the new serial number!
For more information, request a SOLIDWORKS 3D CAD quote or contact us at Hawk Ridge Systems today. Thanks for reading!


