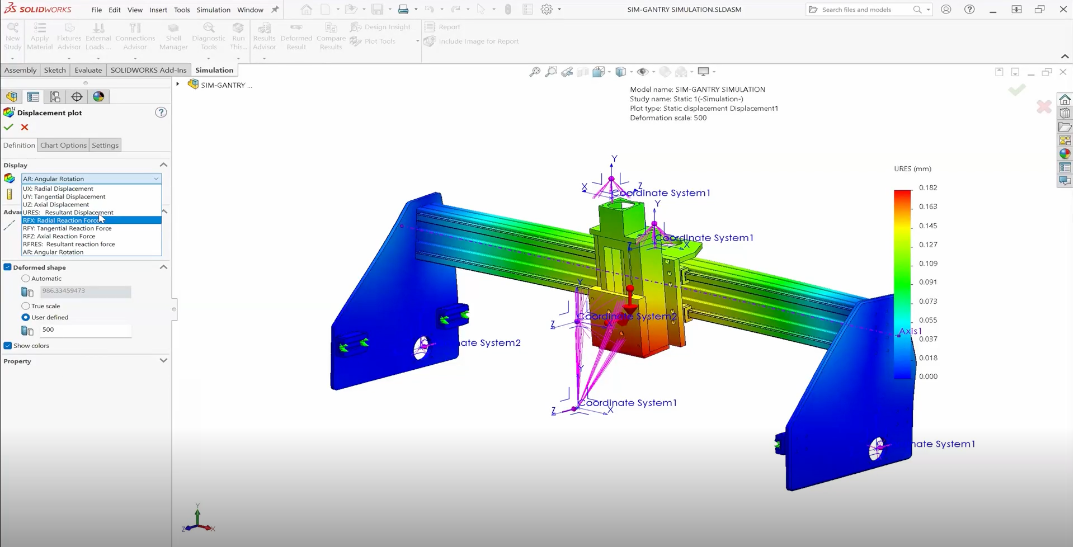
While some Simulation settings are simply preferential, some can have a great impact on how your studies run and how your results are presented. The settings in this blog are mostly ones we’ve seen customers have success with over the years, with the rest coming from our years instructing our Simulation training course.
Upon turning on the Simulation add-in and looking at the options (Simulation menu > Options), a user sees two tabs: System Options that control settings across any study you create or open, and Default Options that are applied when a study is started (essentially a study template). The Defaults have more that we’ll want to change, so let’s start there.
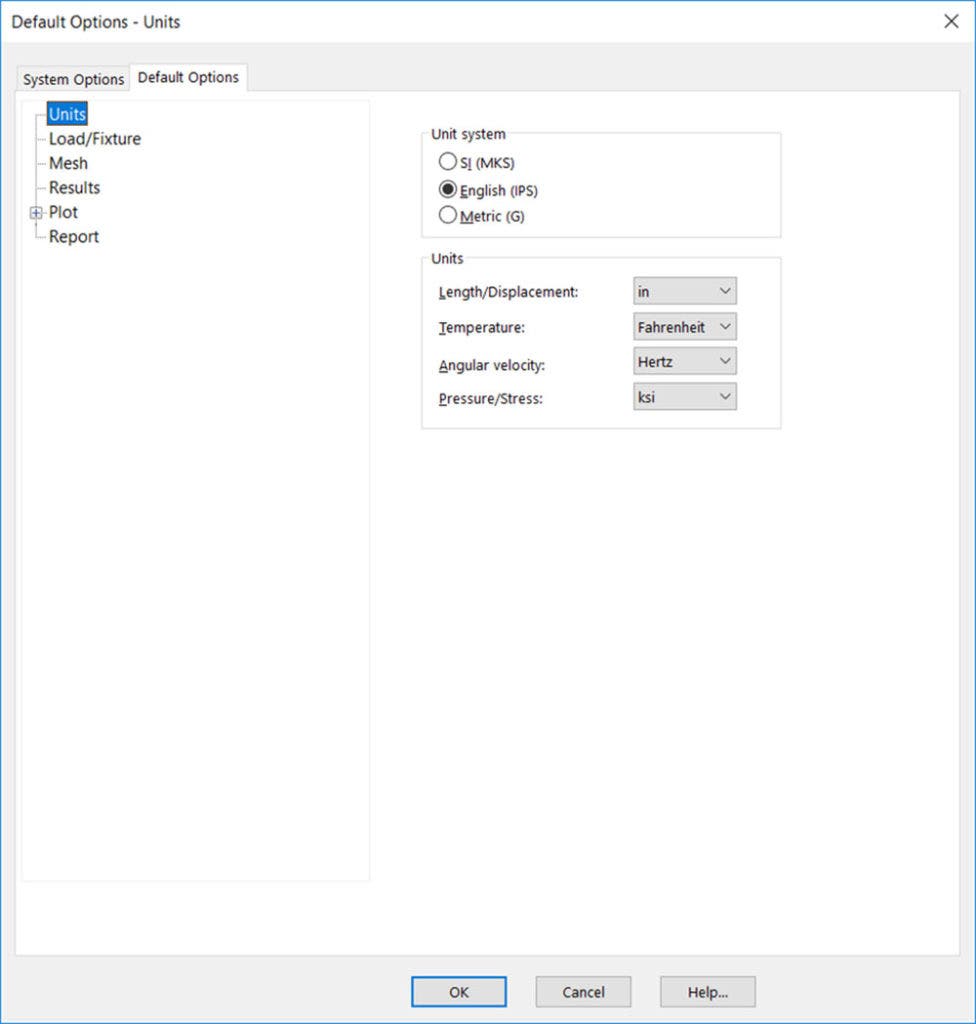
Default Options become spread out to different menus and commands within the study once it’s created, so while these options are always accessible, it’s way easier to set them up ahead of time. On the first Defaults page, beyond just choosing your unit system, consider also the specific units you prefer, for example, defaulting into ksi instead of psi.
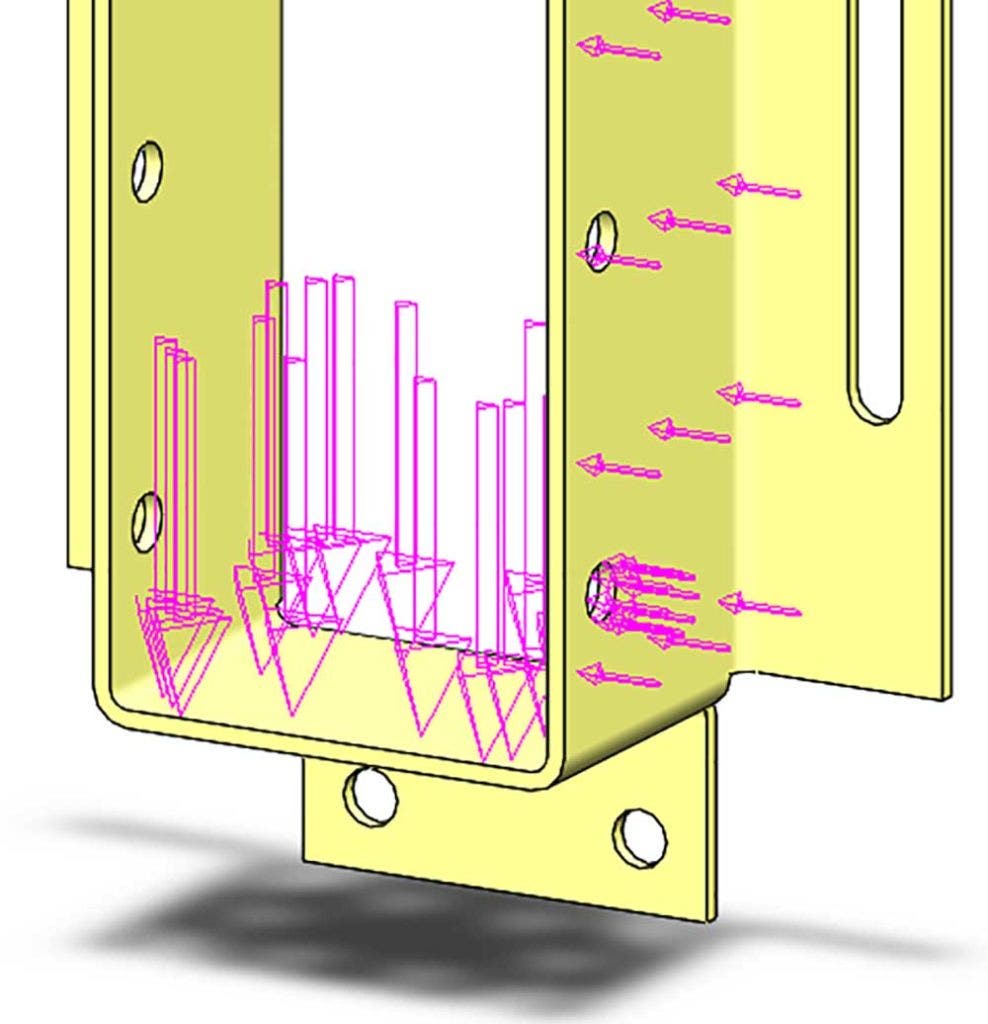
Next, Load/Fixture defaults need not be changed, but the arrow size is one option to consider when trying to call attention to loads that are larger or more important. The vertical load is much larger than the lateral load on the part below, so we used larger arrows to denote this (and also used the Sim System Option for Wireframe Load/Fixture symbols – more on that later).
Meshing Setting Suggestions
Now to the meshing options, which are important because every FEA simulation is only as good as the mesh that drives it. However, it’s often best for initial runs of a study to have a coarser mesh: more reasonable mesh (and the run) calculation times allow a user to build in study conditions gradually, making both troubleshooting and convergence easier. With that in mind, starting with Draft quality is advisable, but switch to High quality as you start to examine your results (read more on the differences between the mesh types).
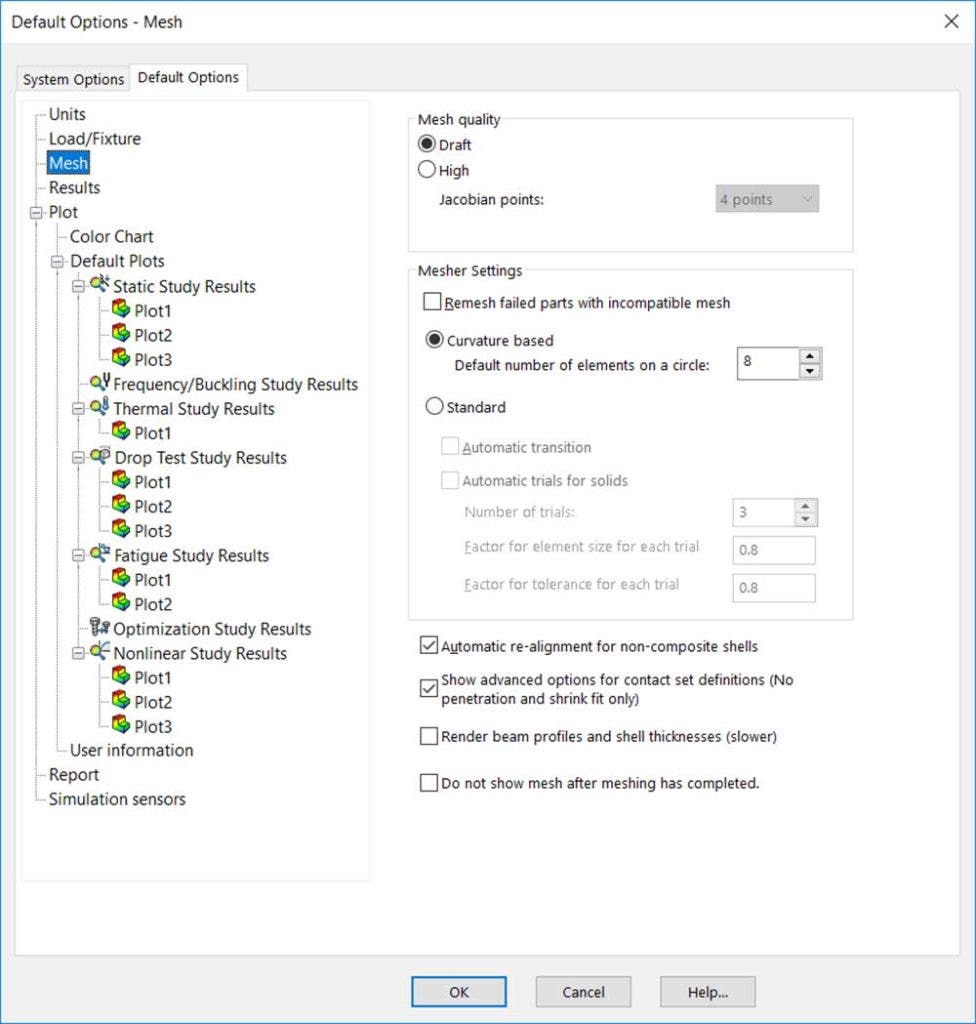
Simulation provides a few meshers, and without getting too far into the details, know that the Curvature-based mesher is generally agreed to be the most efficient and robust of the bunch. Outside of these settings, the other mesh options are preferential or can be left as is.
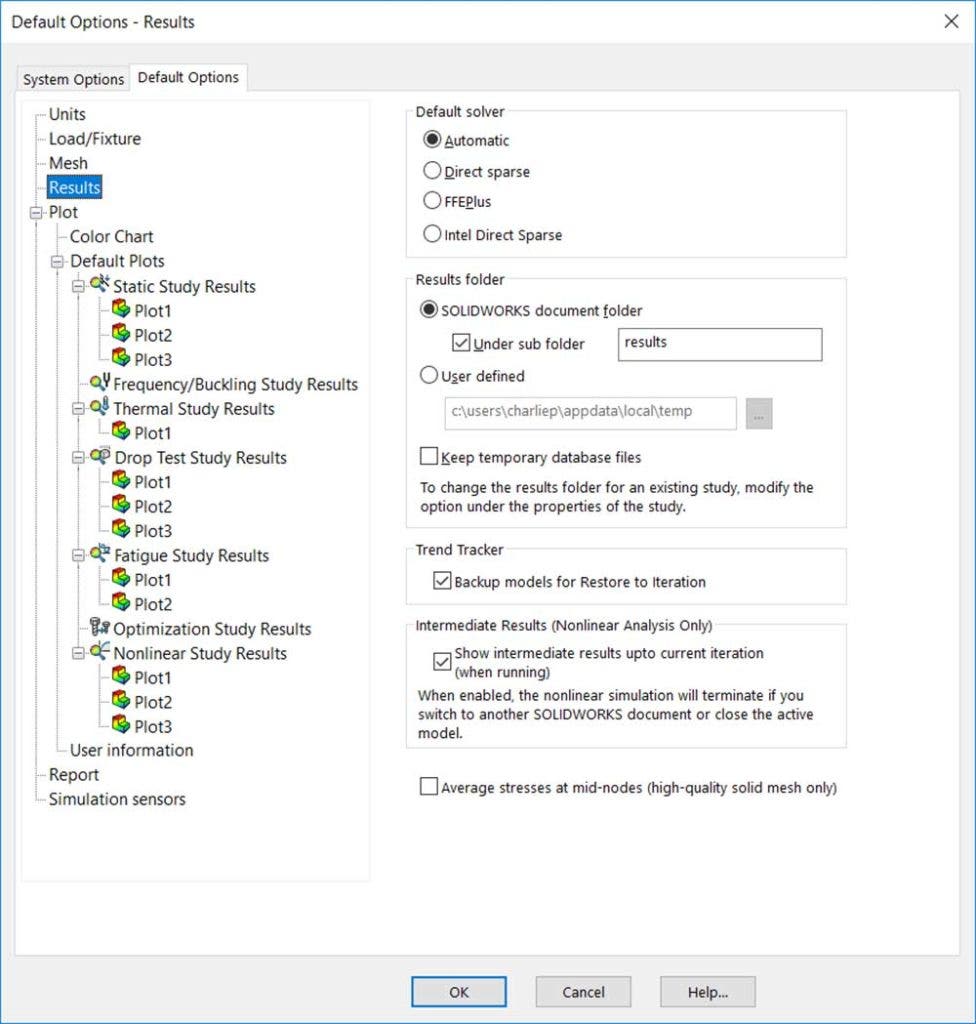
On the Results page, Simulation offers a few engines to choose from here as well, this time dictating how we solve the study. Again, a deep dive into the solver differences is a blog in its own right, but in our experience, setting this to Automatic and letting SOLIDWORKS choose it has worked well. Another setting to consider is the Results folder, just making sure that studies aren’t solved over a network connection: if you don’t have SOLIDWORKS PDM, either copy networked files to a local drive or use a User-defined local directory. Finally, using a subfolder for organization – like one labeled “results” – is usually desirable.
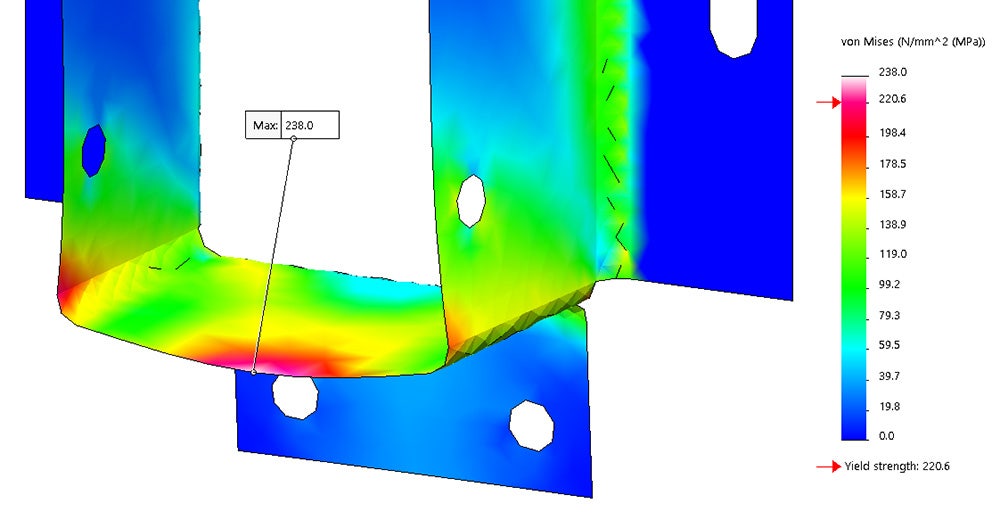
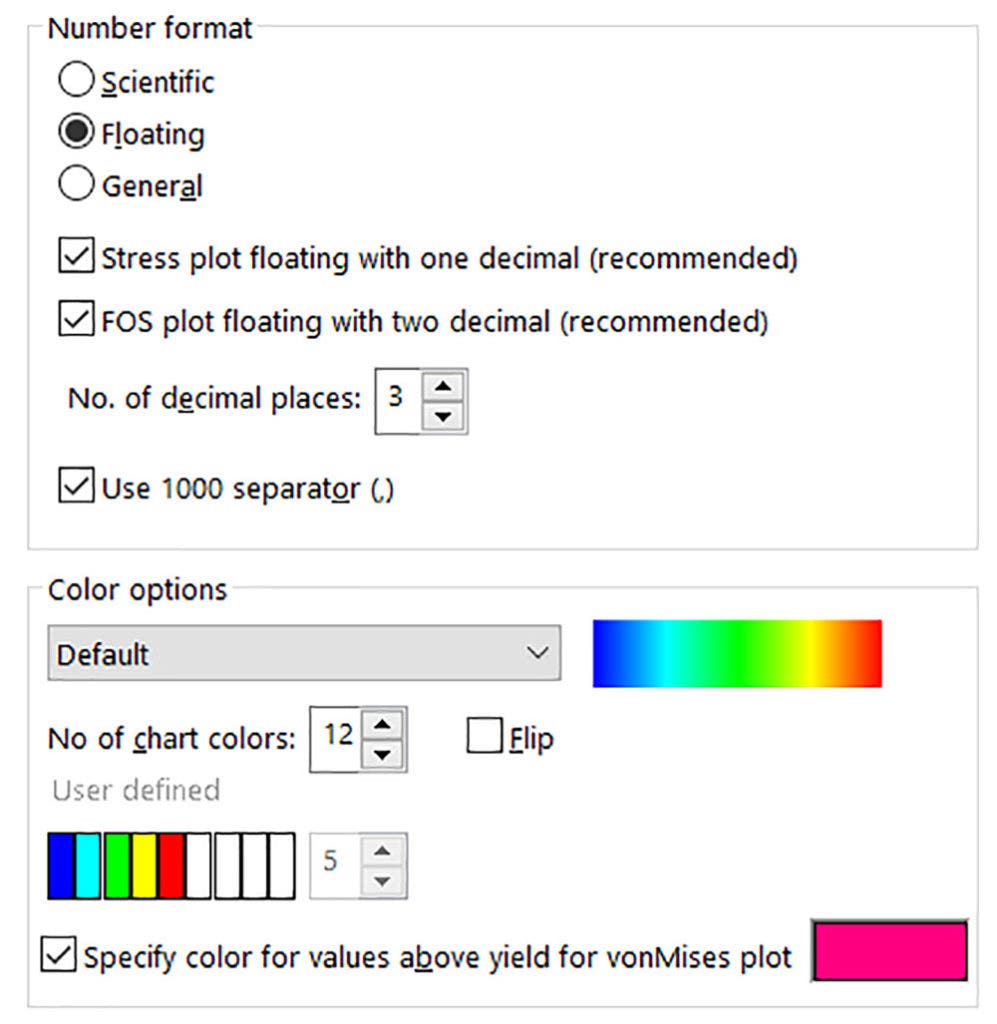
We don’t suggest changing anything on the first page of Plot options, save for turning on “Show maximum value annotation” which gives the flag call-out as shown above. The next Color Chart page we like to set up as shown below, turning off scientific notation formatting and specifying one and two decimal places for stress and FOS plots, respectively. Also, many FEA stress plots out there will use an additional above-yield plot color, which is commonly seen as gray but which we like to turn to a hot pink.
Lastly, a couple minor changes to the default plots to think about, at least for Static results: consider removing the strain result in Plot3 (a plot we rarely look at) and switching the stress and displacement order of Plot1 and Plot2 (as a best practice, interrogate your displacement results before stress).
System Options Preferences
Now we’ll shift to System Options, and while it shouldn’t be necessary for most users to change any option on the first page, for performance reasons, these highlighted areas might be beneficial:
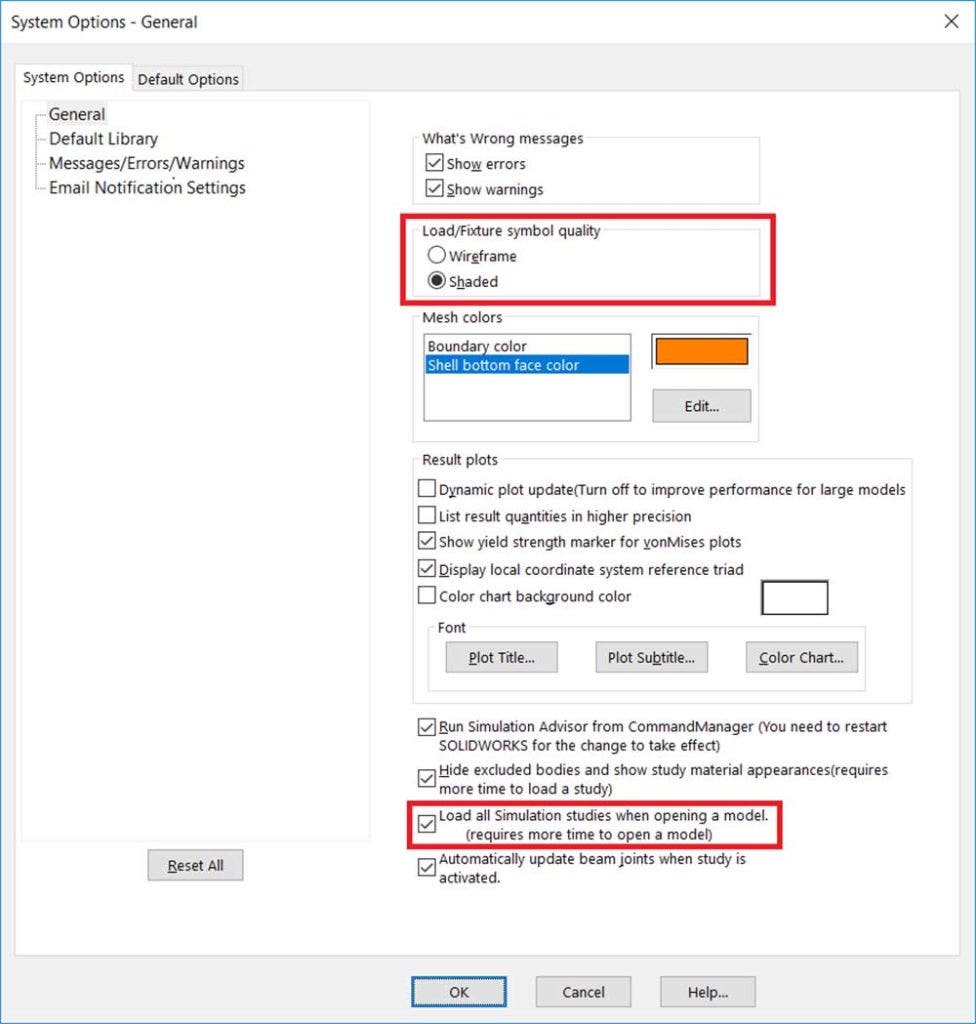
Load/Fixture symbol quality: if you see graphical lag (like when rotating a complex assembly’s result plot) try changing this to Wireframe. Load all Simulation studies when opening a model: studies load on-demand when this is disabled.
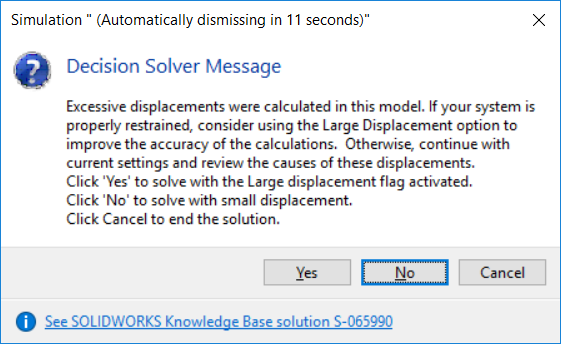
Outside of these, the only other System Option we look to turn on is the checkbox in the Messages/Errors/Warnings category. SOLIDWORKS 2017 added the ability to auto-dismiss solver messages after a duration of your liking, as many pop-ups have decisions that experienced users know they will want to choose anyway (such as everyone’s favorite message below … )
After setting these options, be sure to shutdown SOLIDWORKS to ensure they are stored in your registry. Copy Settings Wizard is great for managing and restoring SOLIDWORKS settings, but unfortunately doesn’t touch these Simulation settings. Browse to the registry key HKEY_CURRENT_USERSoftwaresraccosmos/works to copy/reset them (S-024254), of course making back-ups and taking caution with any registry edits you perform.
There you have it! Hopefully this introduced to you to some options that will save you some time going forward so you can focus on getting your results. Visit our site to learn more about what SOLIDWORKS can do for you, or contact us at Hawk Ridge Systems today! Thanks for reading!


