SolidWorks Simulation training classes, which hopefully most readers out there using Simulation have had a chance to
attend. Not only do students learn valuable information from the “where’s that
button” category, it’s a chance to have a discussion about some mechanical and
FEA theory, and what Simulation settings will give you the best results (the
latter probably being a lot more interesting). An option that anybody who has
taken this class should be familiar with is the Draft Quality Mesh option
underneath the Create Mesh property manager. Enabling this checkbox switches the
mesh element type from the default high-quality tetrahedron to a simpler
draft-quality version. The main difference between these two element types is
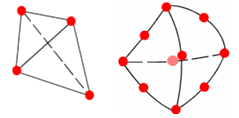
the number of nodes that are present; high quality tetrahedrons each have 10
nodes (one per corner and one in the middle of each side), whereas draft quality
has 4 nodes (at the corners only). This also means that a high-quality element
has more total degrees of freedom (DOF) than a draft version.
As expected, this means that high quality elements are more accurate, while
draft quality elements solve more quickly. However, a common misconception is
that high-quality elements are only more accurate because of these
extra nodes. In reality, the high-quality element is inherently more accurate
because the equations run inside the element are different; these equations are
known as the shape functions. As an example, let’s look at a simple 10cmx10cm
square beam of AISI 304 steel, which is 1m in length, loaded with 10,000 N at
the end.
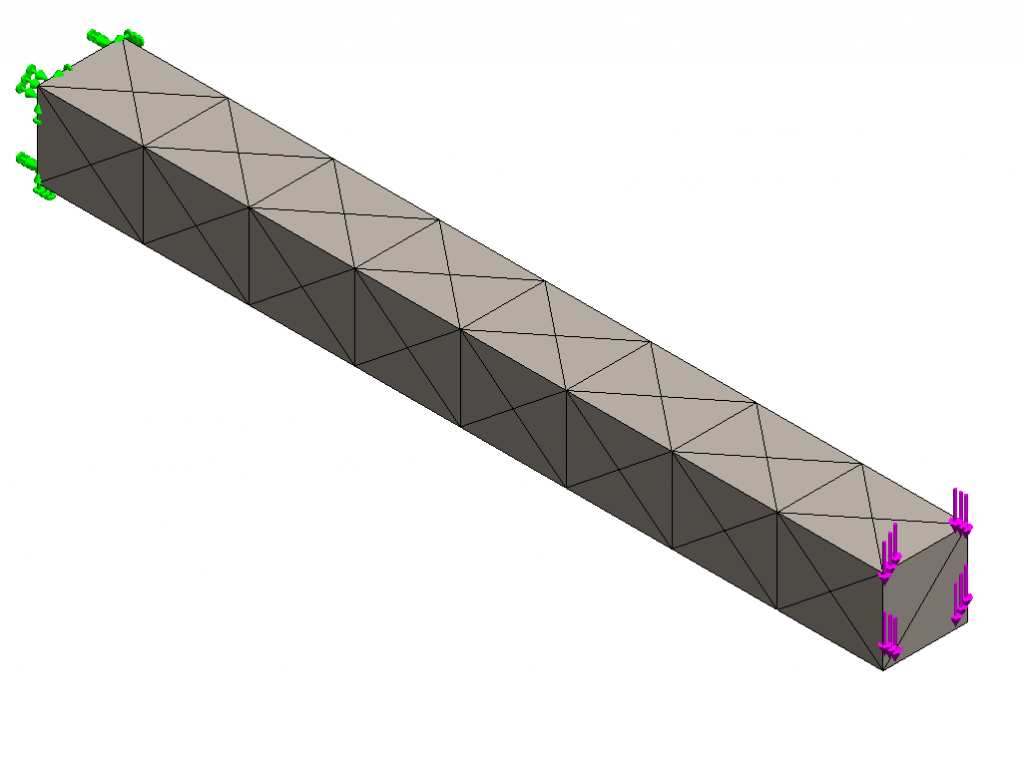
We’ll use a very coarse mesh for this model (0.1m) to highlight the differences
between running the study with the Draft Quality Mesh checkbox enabled (top) and
the default high-quality mesh (bottom).
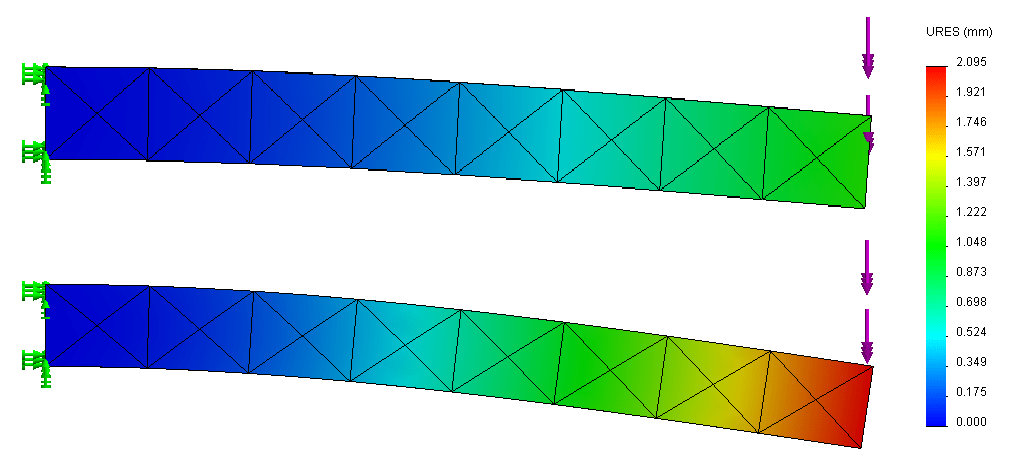
a difference in accuracy as expected. The high quality elements show a maximum
displacement of about 2.1mm, whereas the draft quality is off by 50%, (showing
a maximum of 1mm). Now, we’re all well aware that using a finer mesh will
generally yield more accurate results in simulation due to the extra nodes,
and as we’ve discussed, the high quality mesh has more nodes than draft
quality. But, is this the whole story?
To get a better idea, we can refine the mesh in the draft quality version so
that the two meshes have a similar number of nodes (and also a similar number of
DOF). If the accuracy is related to the nodes only, we should see similar
results. This time, we’ll use an element size of 0.04m for the draft quality
mesh, which results in 404 nodes and 1170 DOF (compared to 401 and 1176 for the
high quality mesh).
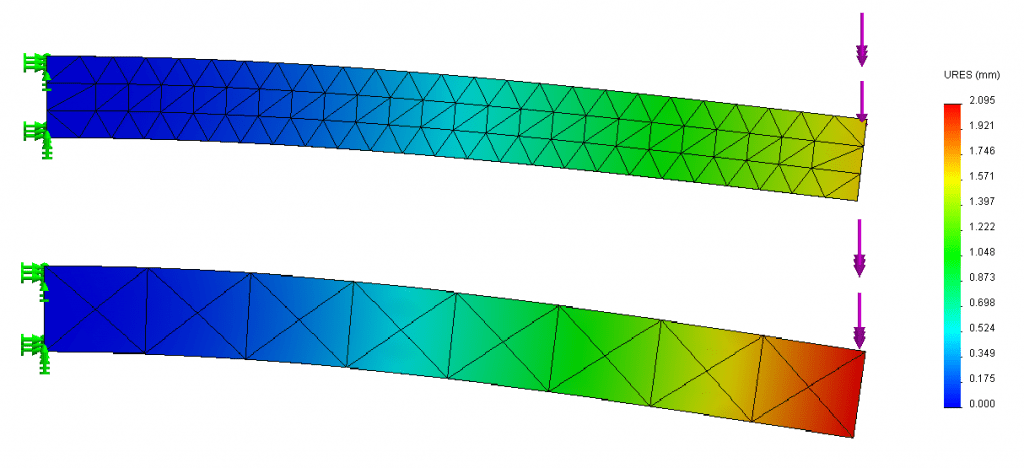
Contrary to what you might expect, even after refining the draft quality mesh so
that it has the same number of DOF as the high-quality mesh, the results still
don’t match. The high quality element is still more accurate because it uses a
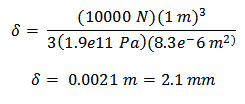
more advanced shape function than its poor simple cousin. We can confirm that
the high quality mesh is more accurate by doing a hand calculation for the
displacement using the beam equation derived from
Castigliano’s method:

… where P is the load, L is the beam’s length, E is the young’s modulus, and I
is the 2nd moment of area.
This pattern of consistently under-estimating displacements, and thus
over-estimating the stiffness of a structure, is a known drawback of a basic,
first-order tetrahedral mesh in the FEA world, and is particularly noticeable in
bending problems like this. Luckily, using the default high-quality version in
SolidWorks (also known elsewhere as a quadratic tetrahedron) does not exhibit
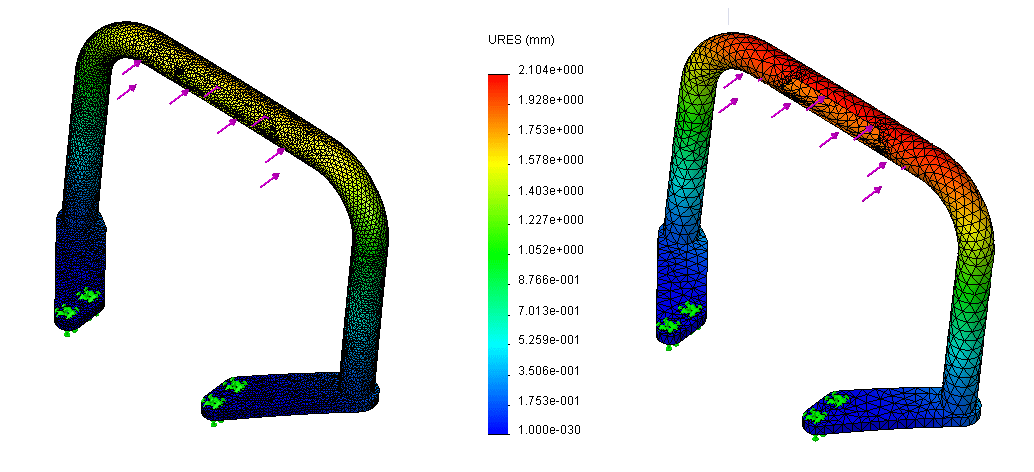
this issue. The effect can even be seen in real-world models, such as the handle
assembly below from a Holmatro Spreader rescue device. The draft quality mesh,
despite being more refined, still under-reports the displacement from this 100
lb load.
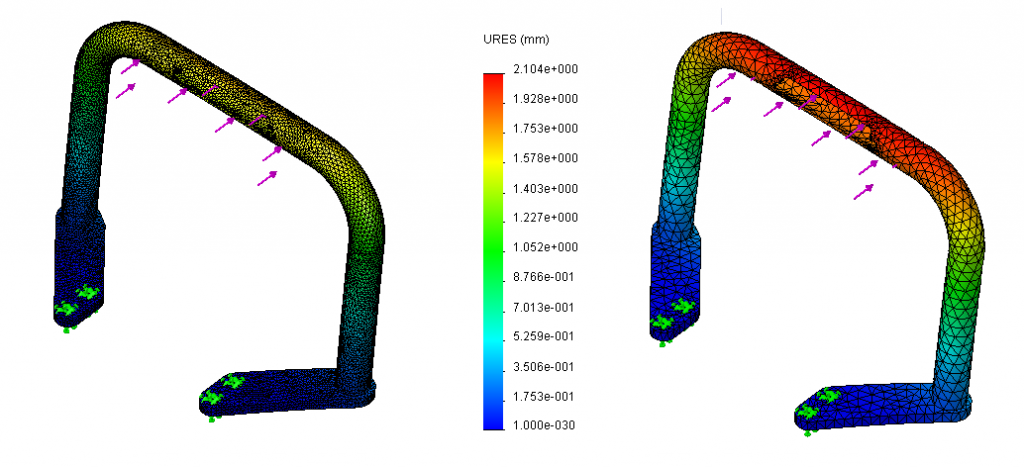
So, the moral of the story is this: the draft quality checkbox should be used
exactly like it’s named. Always set up your study and do a quicker “draft” run
with the Draft Quality Mesh checkbox on to verify your loads, fixtures, and
contact. Then, always switch back to the default high quality mesh for your
final results. You’ll be getting the right results and saving
precious CPU cycles for that Minesweeper window running in the background.
