After receiving a part, it’s sometimes necessary to test out certain dimensions in SOLIDWORKS. Maybe an angle where walls intersect needs to be verified, or the distance between two arc centers needs to be confirmed. While the Smart Dimension tool is an option, with the Measure tool, you don’t have to create permanent reference dimensions, and going into the sketch to see dimensions can be tedious if just for inspection. The solution is to explore the different ways we can use the Measure tool to measure arc distances, angles, edges and XYZ coordinates.
Measure Tool Basics
First, let’s start with the basics of the Measure tool. It’s found inside the Evaluate tab in the CommandManager.

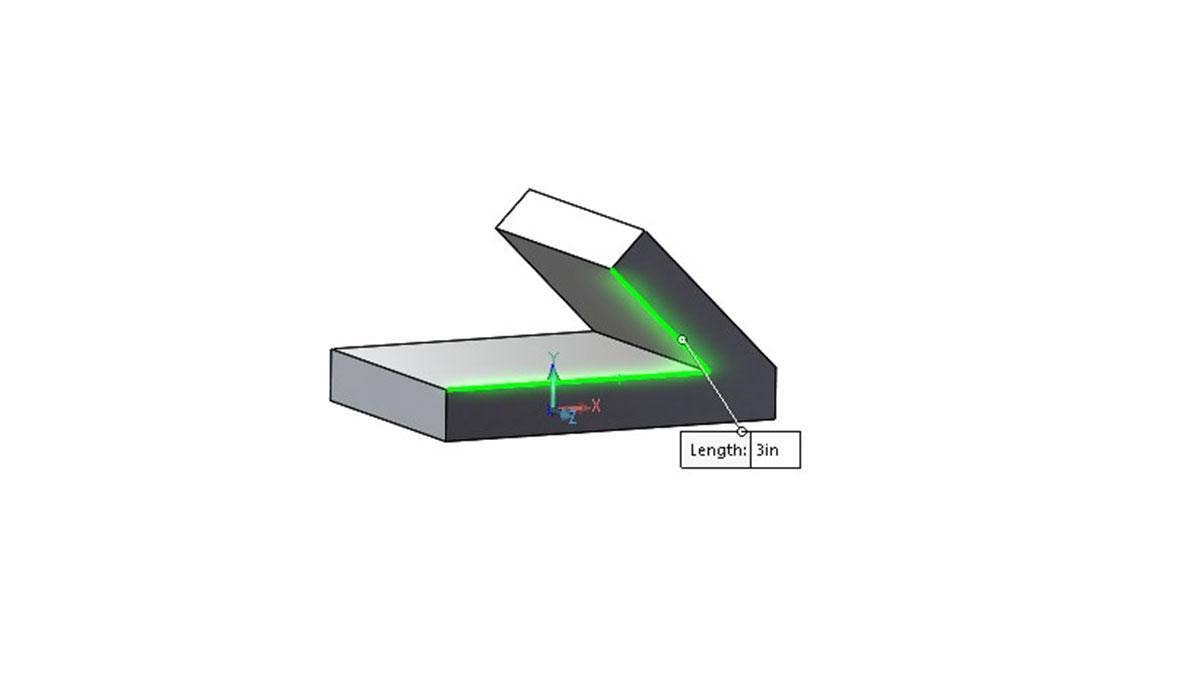
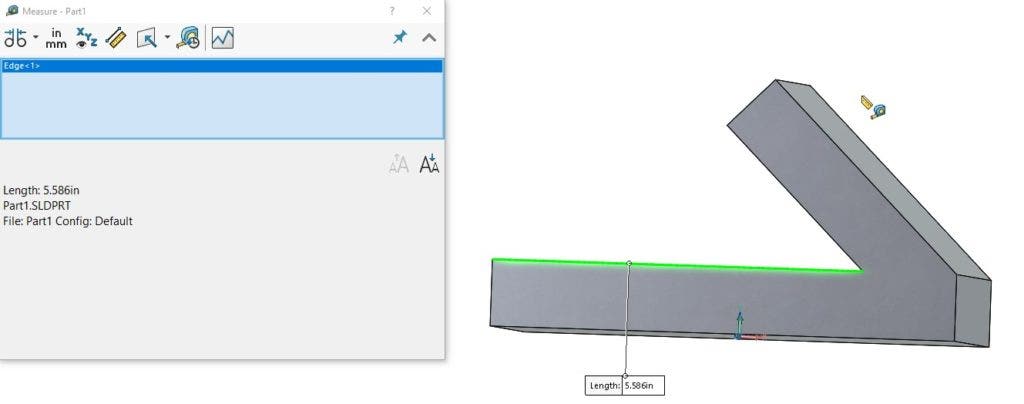
After clicking on the Measure tool icon, the cursor will now have a tape measure icon next to it. It’s good to note that if the Measure tool window is collapsed, you can simply expand it by clicking on the drop-down arrow on the top right corner. To measure an edge, all that is needed is to either select two points or the entire edge. SOLIDWORKS will take care of the rest and produce the measurement.
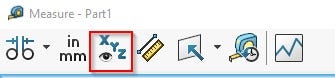
The option to just see the distance is always enabled, but if the XYZ coordinates need to be activated, simply click on the Show XYZ Measurements button to turn it on.
The same rules that apply to dimension an angle in a sketch apply to use the Measure tool as well. The edges that will be used to measure an angle cannot be co-linear or parallel to one another.
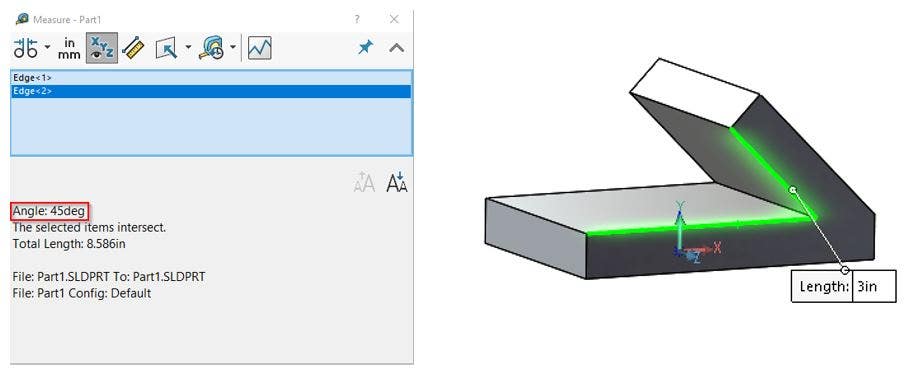
Also, it is possible to select an entire face and get its surface area, as well as getting the combined length of selected edges on a part.
Measuring Options
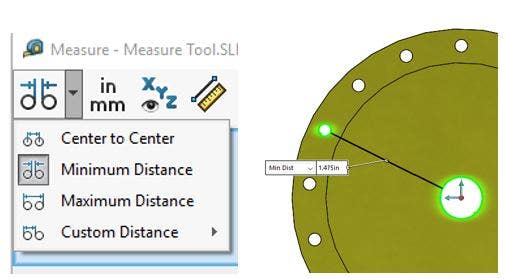
Now when it comes to measuring circles or arcs, it’s very important to know that it is not just limited to measuring from center to center. There are other options, such as measuring the minimum distance. All that is needed is to have both arcs selected and then click on the Arc/Circle Measurements button and change it to Minimum Distance.
Once selected, it will grab the shortest distance and display the appropriate measurement.
The same can be done when trying to get the maximum distance between arcs. Both arcs must be selected and then you can click on the Maximum Distance button, found under Arc/Circle Measurements, to produce the desired dimension.

Of course, if a custom distance between the arcs is needed, an option is readily available in Arc/Circle Measurements.
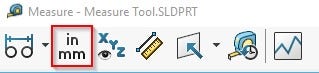
Although the part might have been made using metric units, it is possible to view the dimensions in a different unit system. Inside the Measure tool window on the upper left corner, you will find a Units/Precision button.
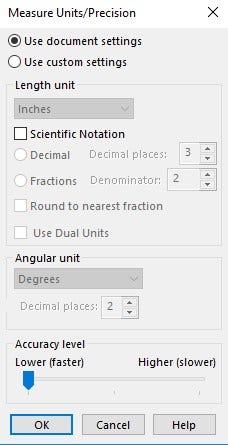
Once clicked, the Measure Units/Precision window pops up. We can leave the unit system that the part came with, or select Use custom settings.
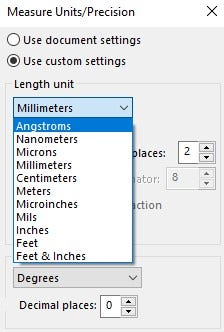
Once custom settings is active, the length unit can be changed to any standard unit available in the drop-down.
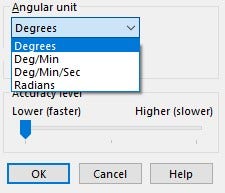
If the dimensions need to be shown in scientific notation, there is an option for it. The angular unit has several options as well.
Additionally, precision control is available at the bottom of this dialog to control how many places after the decimal the lengths will be shown.
Using the Measure tool helps us produce otherwise complex measurements simply and accurately without using Smart Dimensions. When it comes to measuring arcs or circles, the center to center option can be changed to get a minimum or maximum distance. Units can be changed while using the Measure tool and not have it change the units of the part.
If you have any tips or tricks on the Measure tool, let us know in the comments! For more information on SOLIDWORKS or if you have any questions, contact us at Hawk Ridge Systems today. Thanks for reading!


