There’s nothing quite like the feeling of opening a SOLIDWORKS document, only to find that your last eight hours of hard work have just been wiped out by the intern. Anyone who has experienced data loss certainly knows what true pain feels like, and while SOLIDWORKS PDM is our number one recommendation for collaborative file management, proper usage of read-only options can save you quite a bit of trouble in the interim. In this post, we’ll cover the basics of using these read-only options, as well as some important differences between setting this option in SOLIDWORKS versus Windows.
For the uninitiated, read-only is an option that prevents a file from being changed or overwritten. When opening a SOLIDWORKS file, for example, use the Open dropdown menu to open a file in read-only mode:
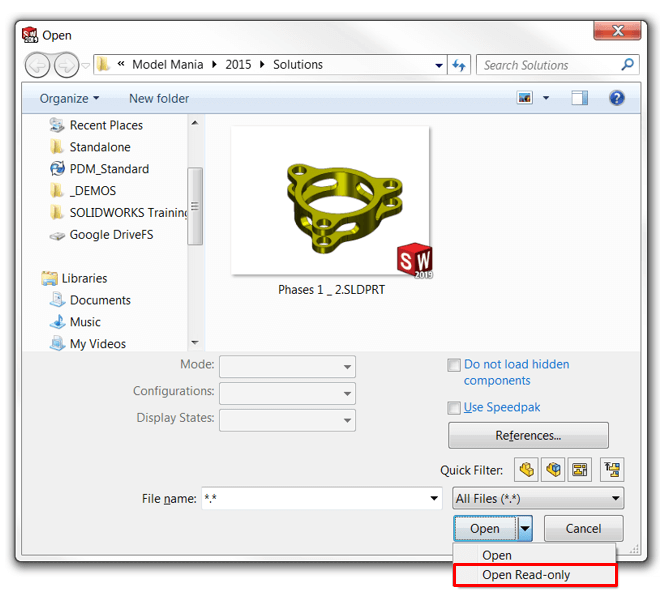
It’s important to note that opening a SOLIDWORKS file using this method does not prevent you from making changes or overwriting the file! Instead, a message dialog will appear upon saving informing you of the document’s read-only status:
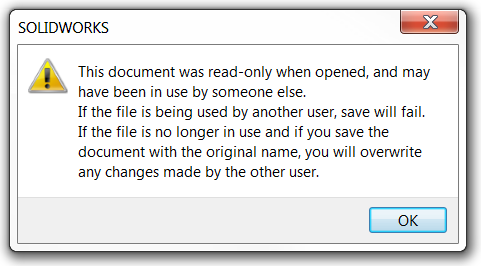
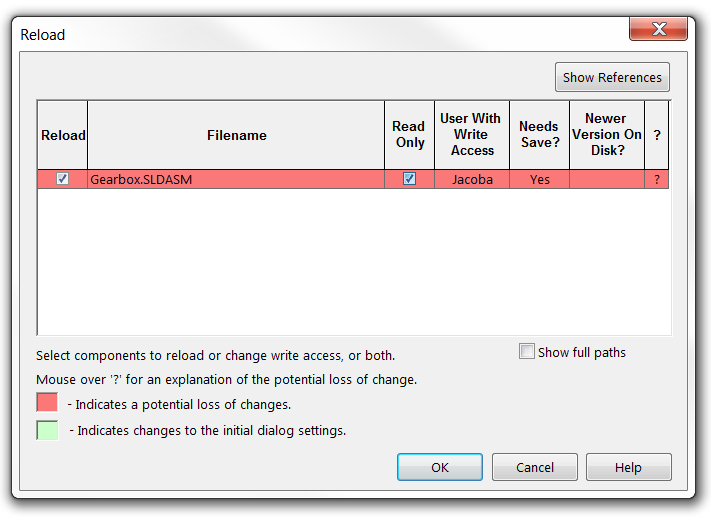
Clicking OK at this point will open the Save dialog as usual, and allow you to save without any further prompting. This can be especially dangerous, especially if another user with write access has already made design changes and since closed the part in question. When in doubt, use the File → Reload command to check if another user has access, and most importantly, if there is a newer version of the file available on the disk. This indicates that the file has been updated since you last opened it, and saving any changes on your end will likely overwrite changes made by the other user:
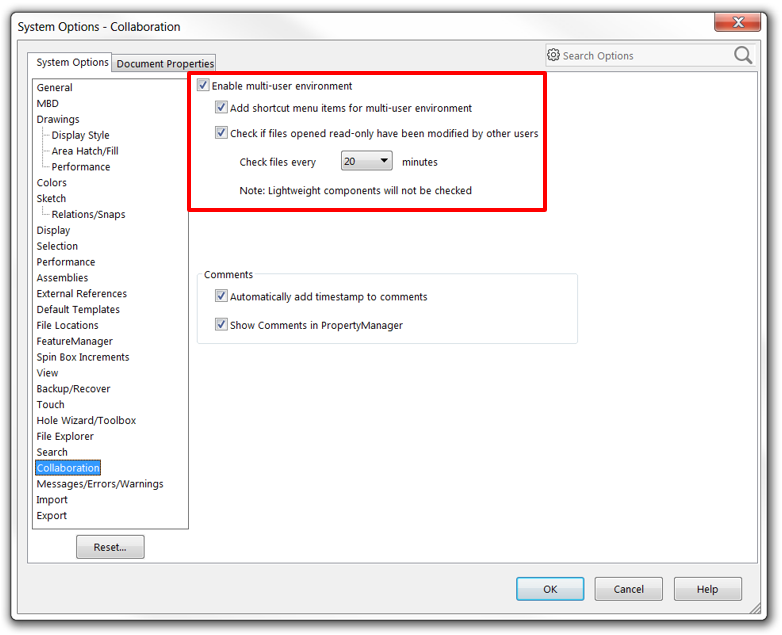
If you happen to be as forgetful as I often am, consider enabling system options to automatically check for out of date read-only documents. Go to System Options → Collaboration and click “Enable Multi-user Environment.” Then, enable “Check if files opened read-only have been modified by other users” and choose an appropriate time interval. If the system detects changes to read only documents, you will be prompted and the Reload dialog will be opened to update the files in question. You may also use the Check Read-only Files command to trigger this process manually.
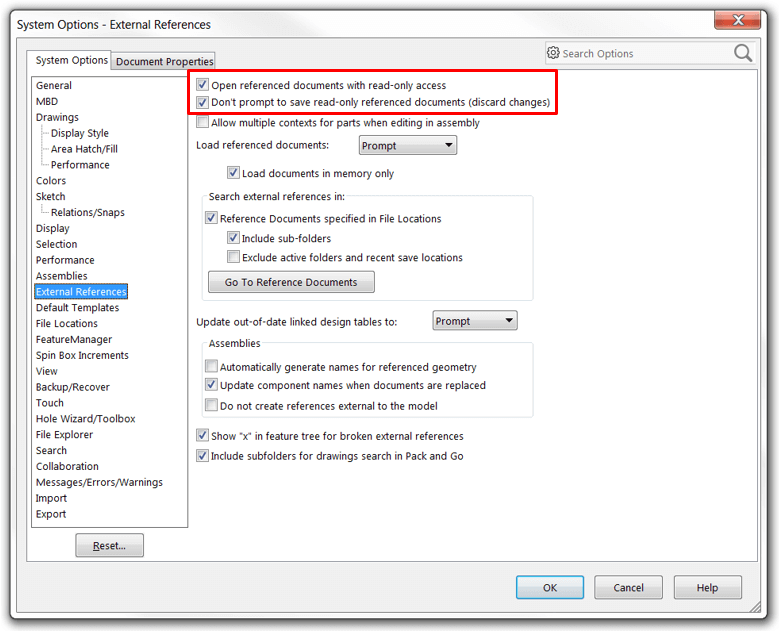
It’s also important to understand that when opening a parent document read-only (like an assembly or a drawing), the child components are not loaded read-only by default. To automatically load child documents read-only, access System Options → External References and enable “Open referenced documents with read-only access.” In addition, consider selecting “Don’t prompt to save read-only referenced documents” to avoid excessive save prompts.
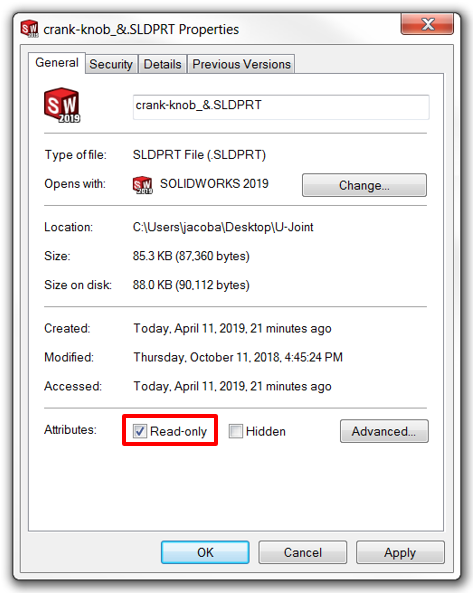
Despite all these options and warnings revolving around read-only access, we all know that one person who will ignore the prompts and overwrite a read-only file anyway. Remember, enabling read-only mode in SOLIDWORKS does not prevent the file from being overwritten. To ensure that a file is absolutely not overwritten, the read-only option can be set in Windows Explorer. Simply right-click a file (or batch of files) in Windows Explorer, choose Properties, and select the read-only option:
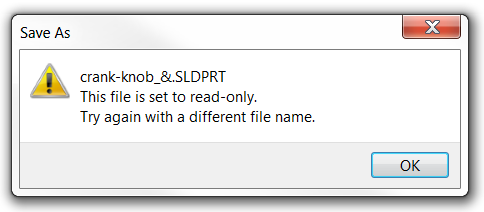
When a user attempts to save over this file, they will be prompted with the following dialog, preventing them from altering the original file:
If this all sounds like too much work, we agree. This type of collaborative file management can be significantly simplified by implementing SOLIDWORKS PDM in your organization. Workflows and file management practices can be customized and standardized for your organization, ensuring that your design and engineering data remains safe and secure despite the best efforts of the new employee. For a first look at what SOLIDWORKS PDM has to offer, check out this video:
Until then, use the tips and tricks shown here to keep your read-only files untouchable.
Do you have any other tips for proper file management? Let us know in the comments! Learn more about SOLIDWORKS PDM and what it can do for your file management, or contact us at Hawk Ridge Systems today. Thanks for reading!


