Have you ever had a user make changes to their settings and they use the
incorrect templates or library feature? The 2017 release has come up with a
way to allow locking the system settings.
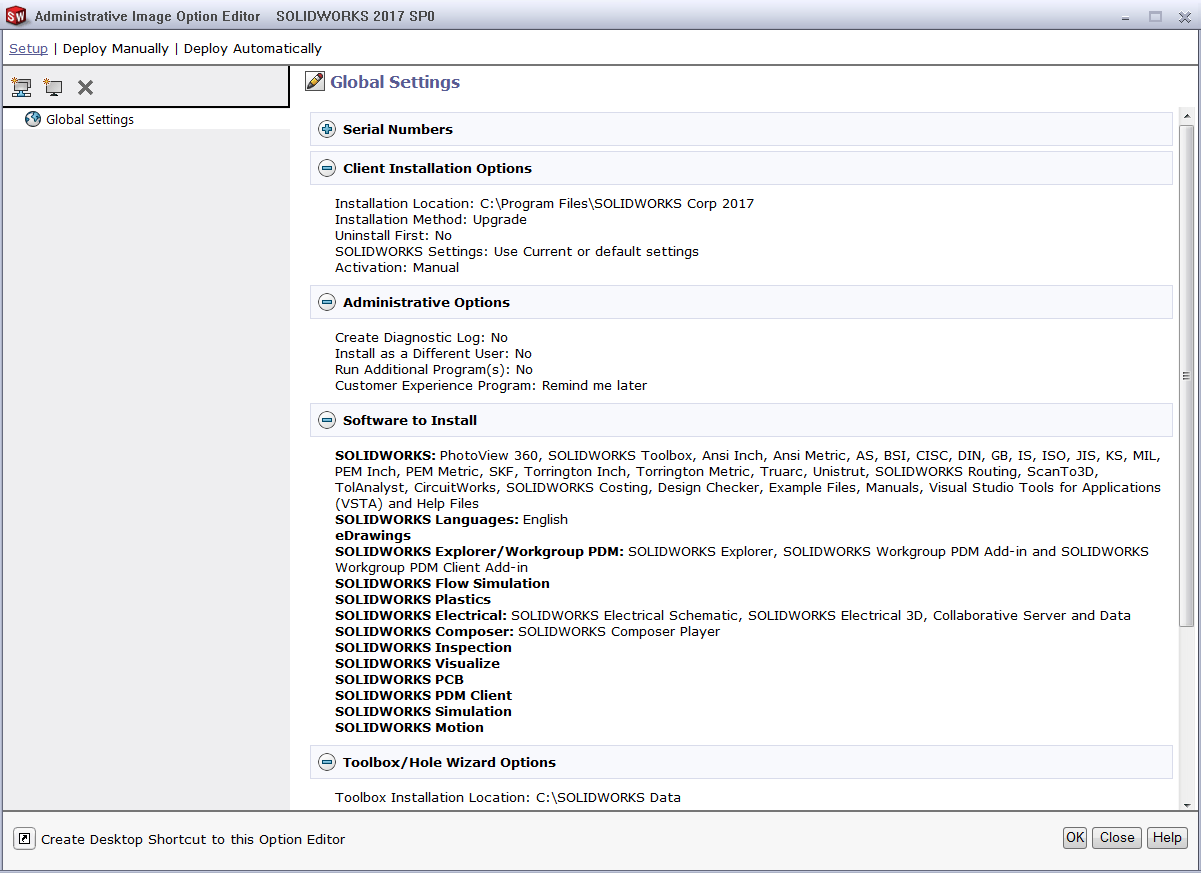
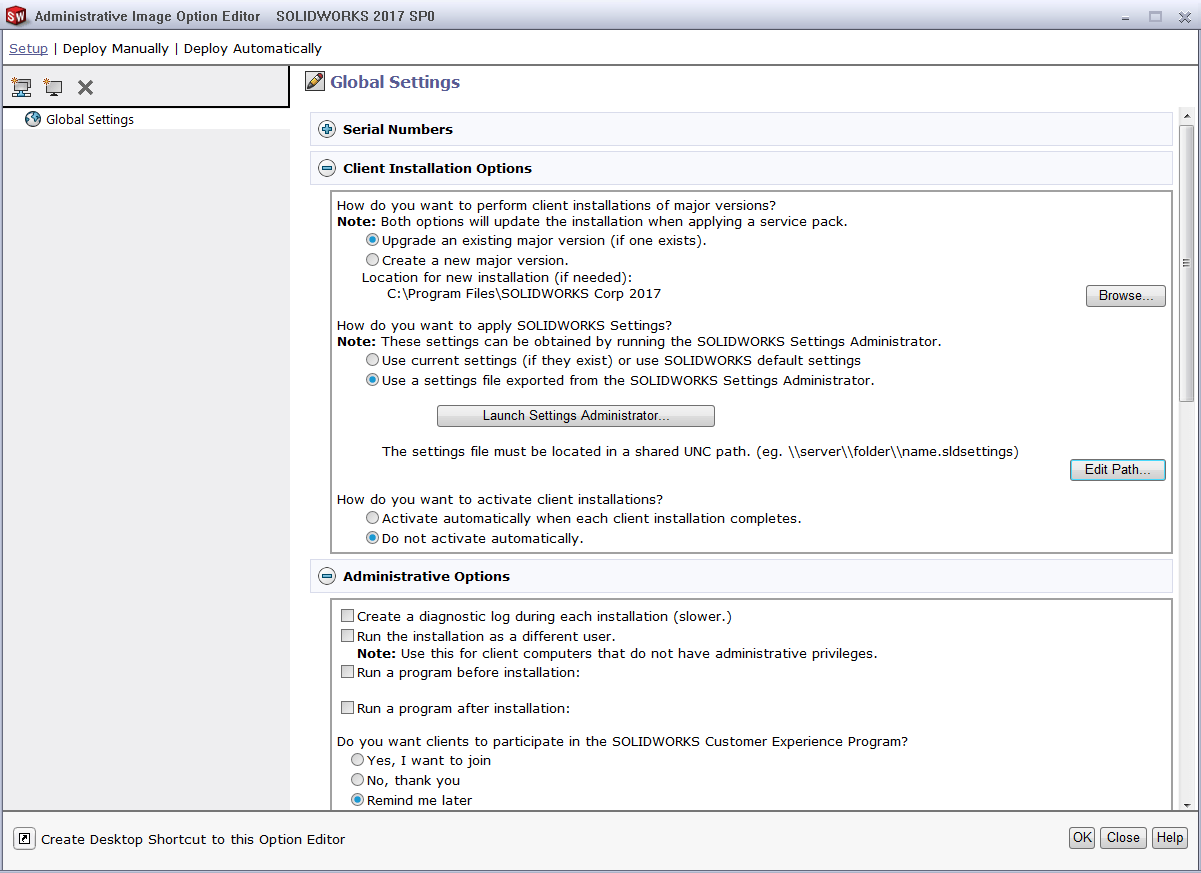
You will need to create and deploy an admin image to initiate this. After you
have created an image open the Option Editor. Then select to edit the Global
Settings.

From the Client Installation Options we will need to set this to “Use a
settings file exported from the SOLIDWORKS Settings Administrator.” Then
select the “Launch Settings Administrator” button.

This will launch the administrator and here we select how we want to apply
settings. To be able to add the locks we will need to select “Import
SOLIDWORKS 2017 options from this computer” then “Next”.
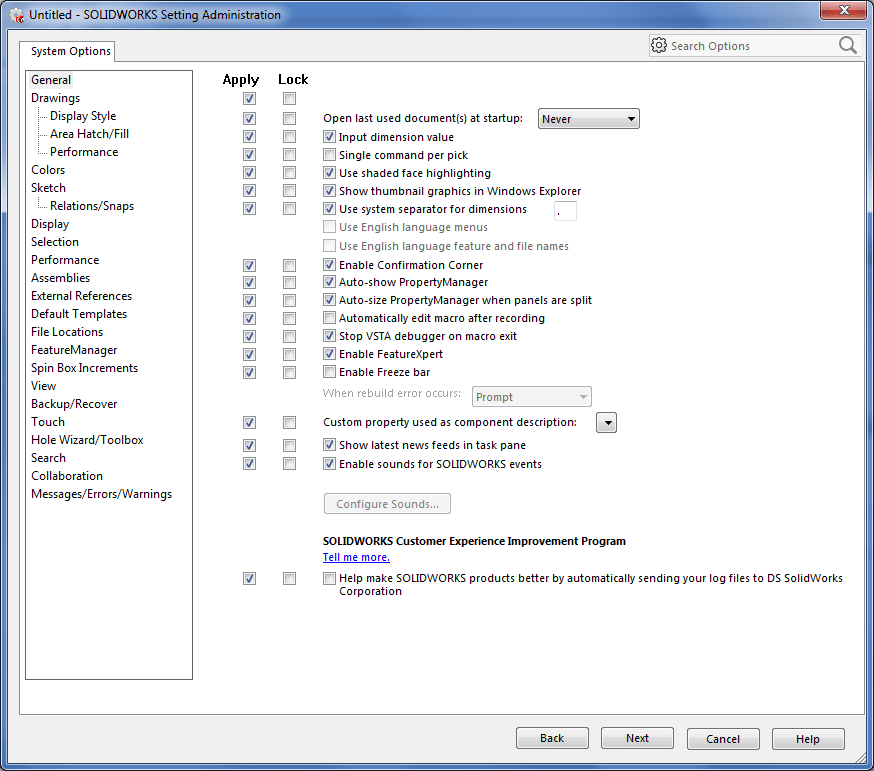
This will launch the SOLIDWORKS 2017 settings for this computer and Apply
which ones you want. There is also a check box to Lock them as well.
When we have these set to your preferences for Apply & Lock select Next.
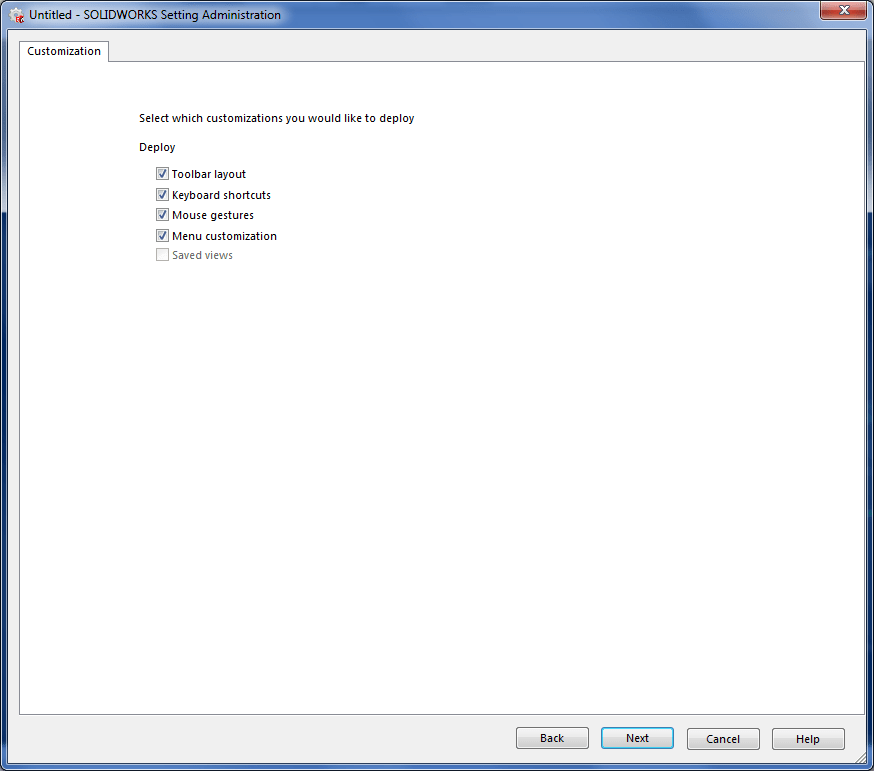
We then can select which of the settings will be pushed into the image to be
used for the clients like the Copy Settings Wizard from previous versions. The
“Menu customization” is what will bring the Locked options. We are almost
complete one more Next and we are ready to save.
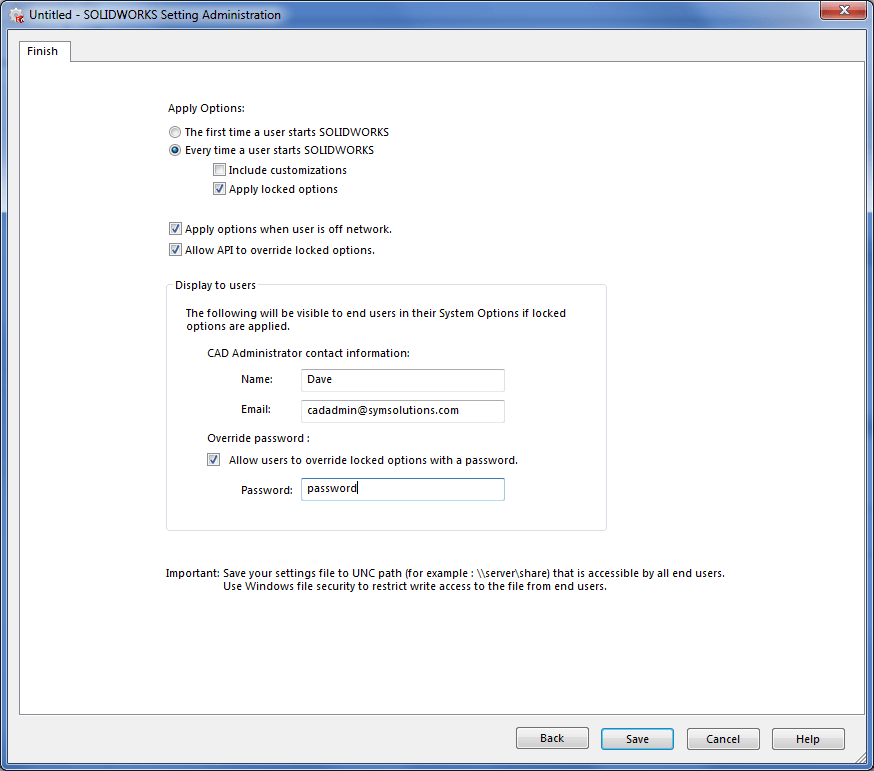
The Finish options for what will happen when the users look at the settings
are decided here. Decide will these be applied just the first time the run
SOLIDWORKS or every time and will this include any customization and will the
locks be applied. There is also control on if this will be applied even when
off line from the network and what API controls will do.
There is also settings on what the user will see in the pop up when they
encounter a locked setting. Including can they override them if they use a
password. Now we can save these I do recommend saving them to the same folder
the image is at so this can moved to a shared server location if not created
on one.
Once we have this located on the shared server location we can edit the path
for the settings file to make it a UNC path that is needed.
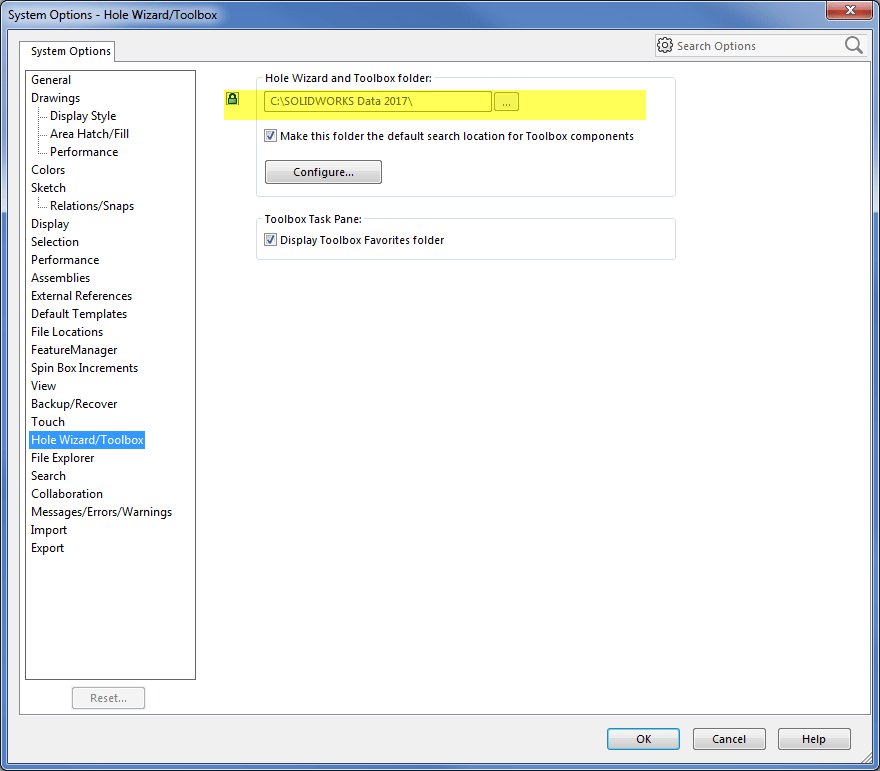
After this has been deployed to the clients and they open their options the
will see things like this.
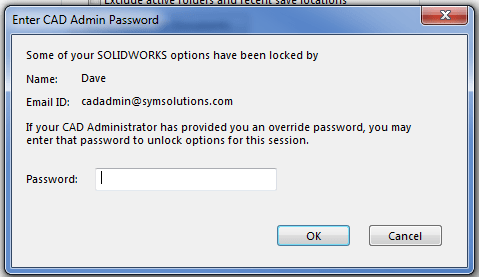
Then if the lock is selected they will possibly get a prompt like this below.
With who to contact for the password to allow the change

This will then unlock this item only and they can change it. Now how this is
handled after this is all in the setup. You can set it up to always need the
password to change or only the first time changing it. In this writing I set
this to be needed every time so if you use the exact same selected settings
the users will be prompted to unlock each item separately every time they go
to the options.
This should get you started on looking into using the lock options. If you
have any questions or run into an issue with this please contact your local
Reseller for assistance.


