A question that often gets asked in Support is how a designer is able to link
a note to a dimension of a feature, and that’s what we’ll take a look at
today! As a designer, changes are constantly being made to the part and ECO’s
(Engineering Change Orders) issued. By being able to link a note to a part
feature dimension, it’s one less thing for designer to have to remember to
change!
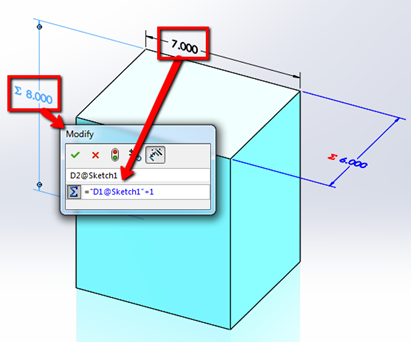
To start it off, we’re going to create a block that has a Length of 6 inches,
Width of 7 inches, and Height of 8 inches. We can reference other dimensions
with respect to another, which allows for the update process to be even
faster. For example, if we wanted the width of my cube (7 inches) to be
controlling the height (8 inches) and length (6 inches), we can double click
on the ‘Height’ dimension to open the ‘Modify’ dialog box, click “=”, click on
the ‘7.000’ inch dimension to represent the width, and then type “+1”. This
will yield me an equation that says the ‘Height = Width + 1’. Creating an
equation is not required to link a note to a dimension, but just for this
example, I wanted to show it since it follows a similar workflow as we’ll see
later on! We can repeat the process for the length, where I have it always
equal to the “width (7 inches) – 1” to give me 6 inches.
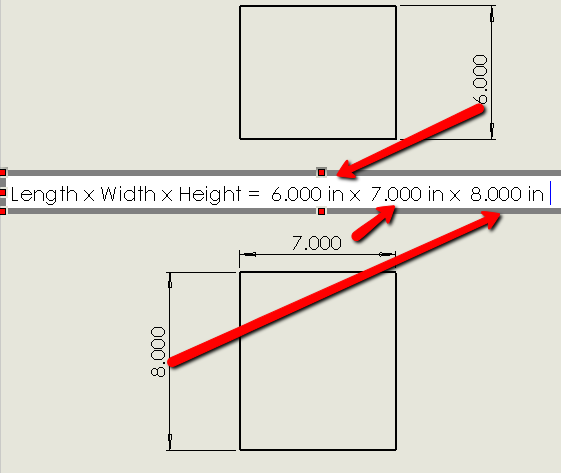
Once we have the part squared away, we can create a drawing with all front and
top views, and insert the dimensions using ‘Model Items’. To create a note
with the Length, Width, and Height dimensions, we’ll create a note that reads
‘Length x Width x Height’, type “=”, and click the “6.000” inch dimension for
the Length, “7.000” inch for the Width, and the “8.000” inch dimension for the
Height. That’s it!

To verify this was done correctly, we’ll want to hover over the note itself to
reveal the syntax. Your syntax won’t be the exact same as below because it’s
dependent on the features and name of the part; regardless, it should display
something along the lines of “Length x Width x Height =
“D1@NameOfFeature@NameOfPart@DrawingViewName…”
Here’s an example of the syntax for the cube we’ve been working with:

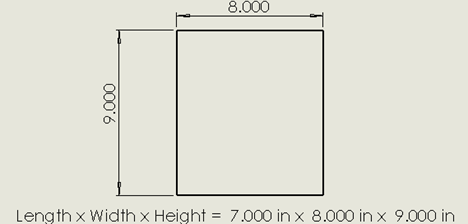
Once it’s completed, we want to make sure to test it out! We can double click
on the ‘7.000’ inch dimension in the Front Drawing view to “8.000” inches, and
we should see the ‘Length’ and ‘Height’ adjust both in the drawings views as
well as the note!
This opens up a whole world of notes that have intelligence to them; not only
can you include dimensions, but custom properties like Material or
Configuration Names can be added too. In conclusion, the benefit lies in the
fact that when dimensions change (sometimes more often than we’d like them
to!) we don’t have to worry about the note that references it and instead,
trust it gets updated, thanks to SOLIDWORKS!


