We’ve already covered techniques for creating models using the auto-surface tool combined with solid primitives. That approach works well for models that are predominantly free form in shape but have some critical areas that need to be expressed as proper CAD features. But what about the inverse?
If the model is predominantly prismatic in shape but has one or several key areas that are free form in shape, auto-surfacing is no longer an effective approach and other surfacing tools like Solidify will produce better results. The Solidify tool within Geomagic Design X allows us to intersect multiple surfaces and extract a solid body from the common internal space.
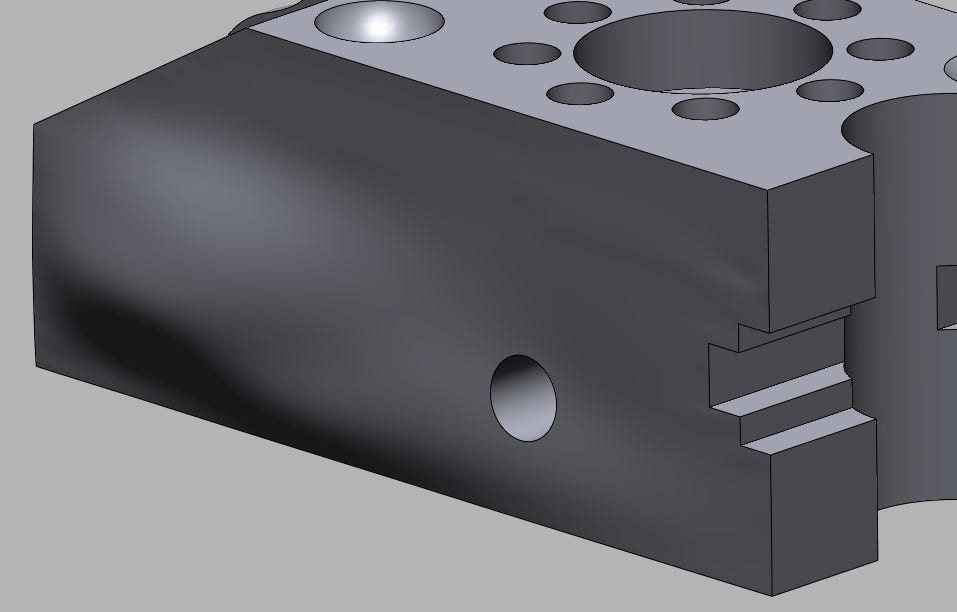
While most of this model is prismatic in shape and made from standard features like planar faces and cylinders, the side facing us poses a major challenge for traditional solid modeling techniques. It would be very difficult and time consuming to model with a traditional approach like lofted sketches, but the Mesh Fit tool in Design X makes it easy.
Creating the Solid Model
We begin by aligning the scan data to the world origin and running Auto-Segment to break the model into distinct regions. Then, we model as much of the part as possible with standard solid modeling commands. Working with the model as a solid for as long as possible can result in a more stable model later on. Standard solid modeling commands can reproduce all the features on this part except for the problematic free form sidewall, so we have expressed that side as a simple planar face for now.
Fitting the Free Form Surface
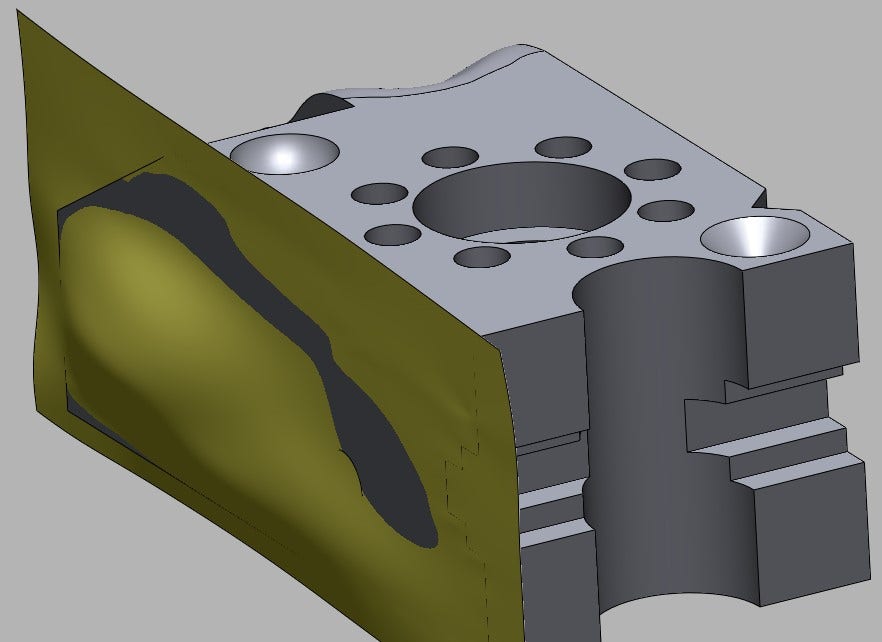
Solid modeling has taken us as far as it can, and now we’ll need to use surfacing commands to reproduce the complex curvature on the sidewall. In this case, we’ll use the Mesh Fit command, which can be accessed in the Model tab, or by simply right clicking on any of the colored regions.
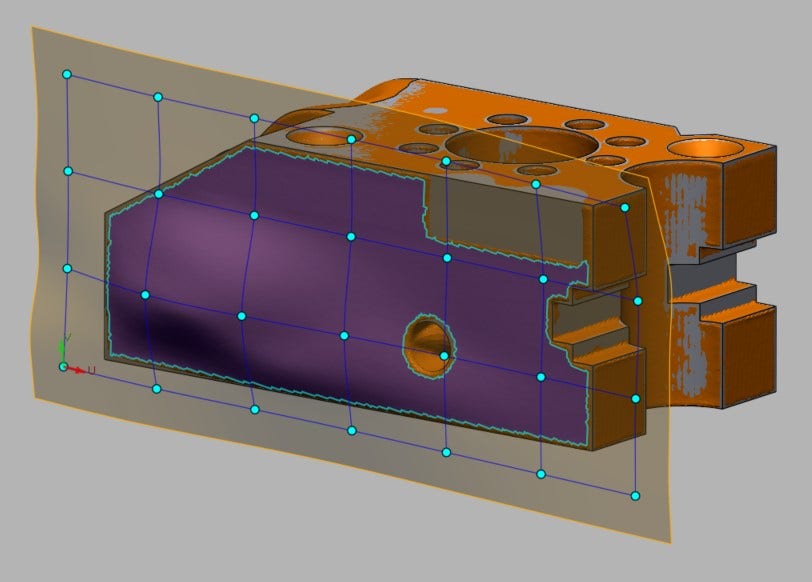
A surface being generating with the Mesh Fit command.
A surface extracted using the Mesh Fit tool overlaid on the solid model. All that is left is to combine them.
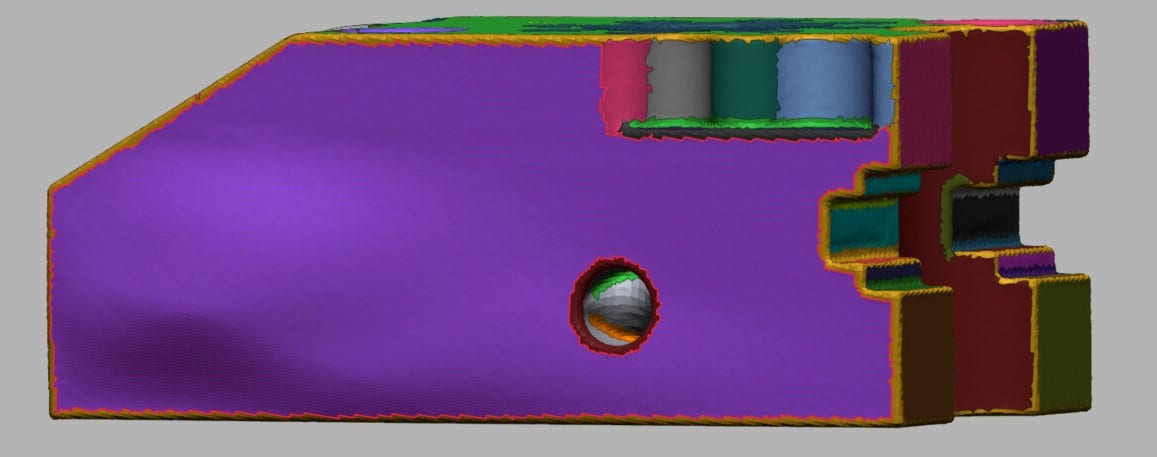
Now we’ll run the Accuracy Analyzer to confirm the accuracy is acceptable. The Accuracy Analyzer should be run before using the solidify tool so that we don’t duplicate efforts in the event that it needs to be refitted.
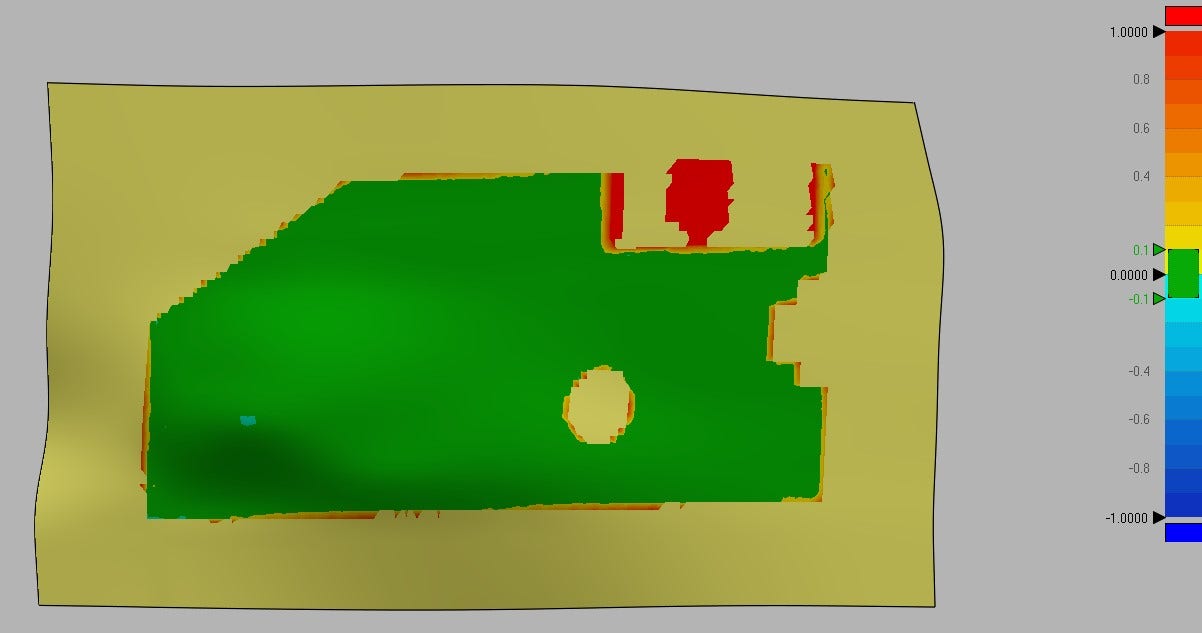
The Accuracy Analyzer shows that the mesh fit is well within spec.
Now that we have our freeform surface ready to go, we can get rid of the flat side that we used as a placeholder with the Delete Face tool in the Model tab. Deleting the face will cause the solid body to become a group of surfaces, which is exactly what we need to use the Solidify tool.
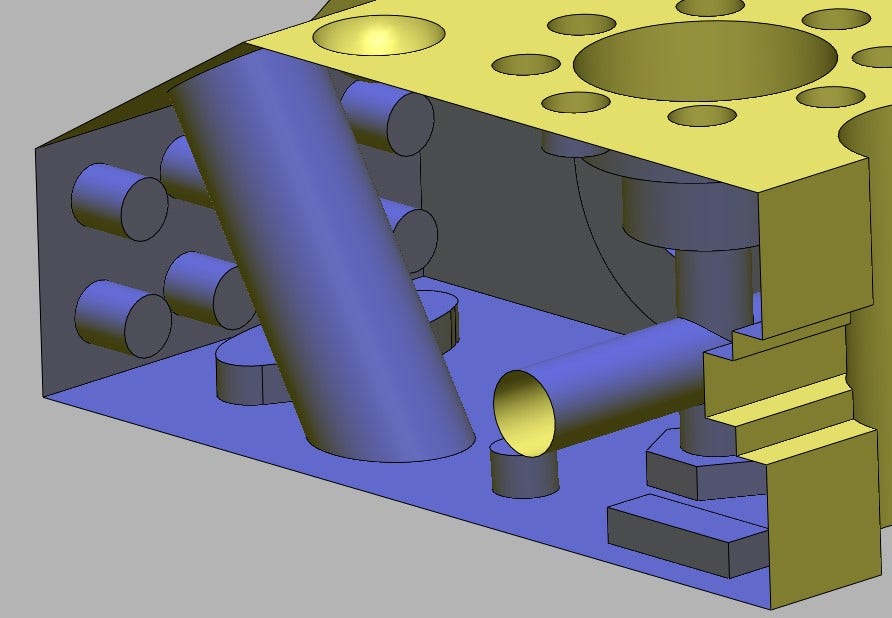
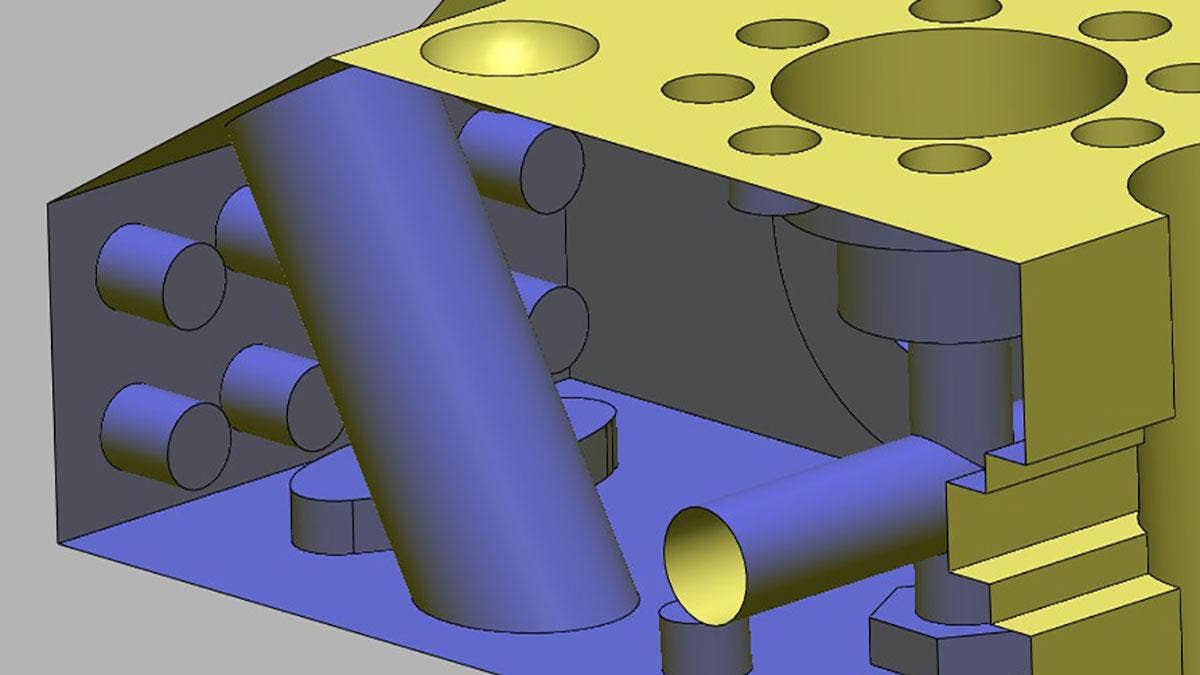
Solid models are displayed in gray in Design X, but once a face was deleted, the model became a series of surfaces, which is indicated by the yellow display color with blue backfaces.
The next step will be to extend the surfaces of the original solid body so that all surfaces intersect with the freeform mesh fit surface. Even small gaps will prevent the Solidify tool from working, so be sure to extend all surfaces, even the smallest fillets if present.
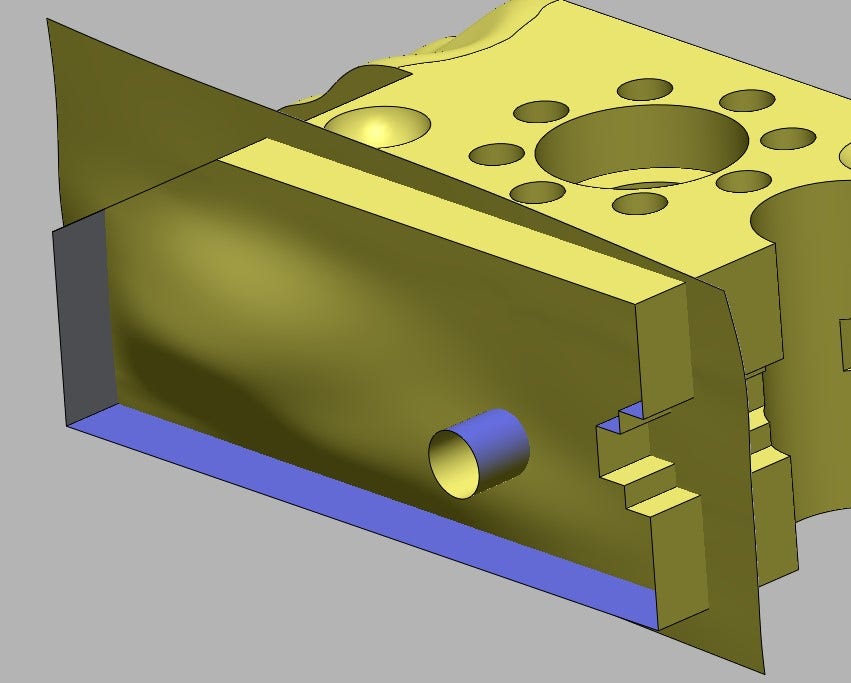
The mesh fit surface and extended CAD model surfaces intersecting.
Solidification
With everything properly intersected, we can now use the Solidify tool, found under Menu > Insert > Surface > Solidify.
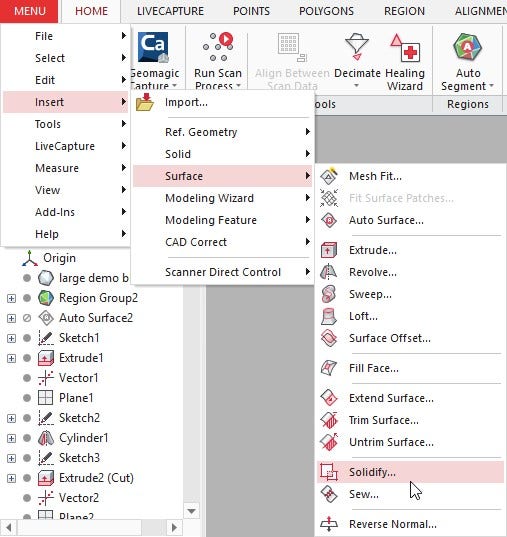
Solidify tool location. By default it is not in the ribbon, but can be added if used frequently.
Next, it will prompt us to select the surfaces we wish to create a solid from. All the surfaces selected will be removed and replaced with a solid model extracted from the common internal volume.
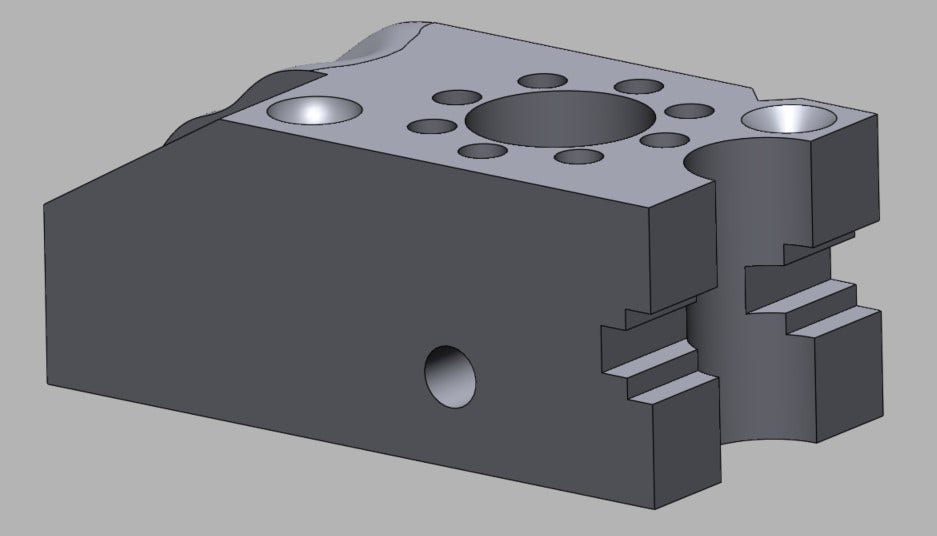
The finished model.
The free form surface is now present in the finished solid model. It is worth noting that Solidify is more than just a surface replacement tool and is useful for creating solid models from complex surfaces that would be difficult to model otherwise, like impeller vanes and propeller/fan blades.
Interested in trying the software for yourself? Get Geomagic pricing now. If you have any questions, contact us at Hawk Ridge Systems. Thanks for reading!


