The Configuration Publisher is a SOLIDWORKS
tool that filters through configurations using defining properties. On
insertion, instead of choosing a configuration’s name, the Configuration
Publisher prompts the user to choose parameters that filter which
configuration is needed. This is particularly useful for parts and assemblies
with many configurations that are used frequently. Configuration names that
are of part numbers or are not descriptive enough to accurately determine
which one is needed can also benefit from setting up a Configuration
Publisher.
The steps in making the Configuration Publisher are very straightforward.
After creating all of the desired configurations, right click on the
component/assembly name in the Configuration Manager and choose Configuration
Publisher as seen below:
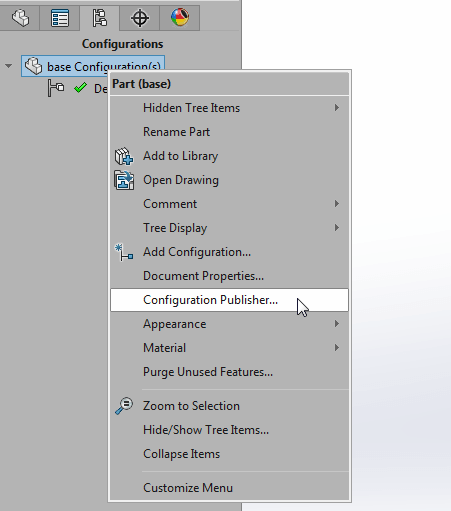 Figure 1: Select the Configuration Publisher
If a design table has not already been created,
SOLIDWORKS
will produce a prompt asking if one is needing to be auto-created as seen in
figure 2.
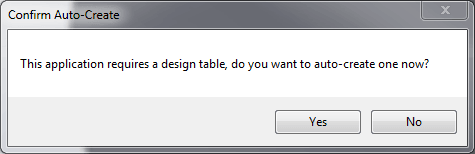 Figure 2: Prompt for creating a design table
The configuration Publisher box will then come up showing the different
properties (controls) that can be used to filter through the configurations.
These can be dimensions, materials, suppression states, etc. You then drag
these controls from the left into the middle to use, while the edit tab is
selected. (The process is the same for the Property Tab Builder).
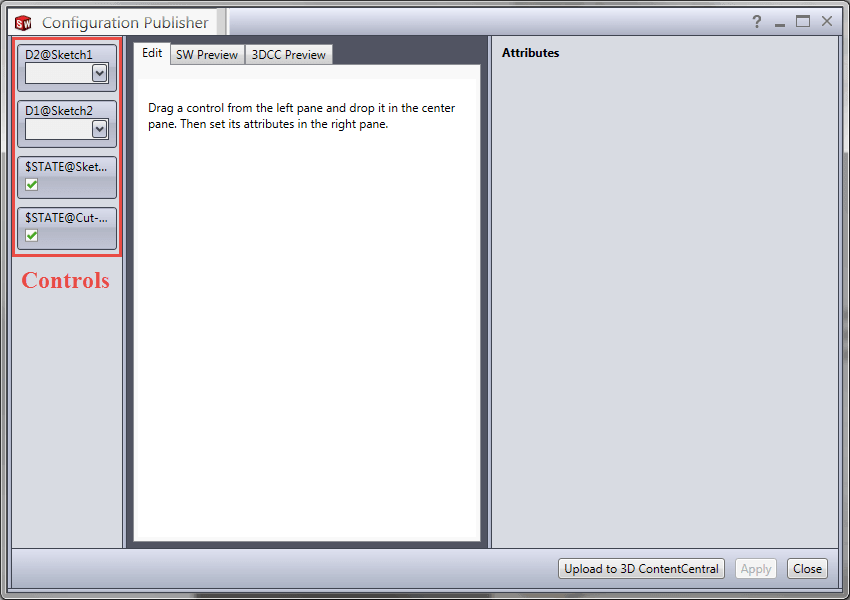 Figure 3: Left side of the Configuration Publisher holds the controls to
drag in the edit box
Selecting a control in the middle allows editing its properties on the right.
Here the variable on the design table is shown as well as the opportunity to
change how the user sees the attribute name. This is seen in the figure below.
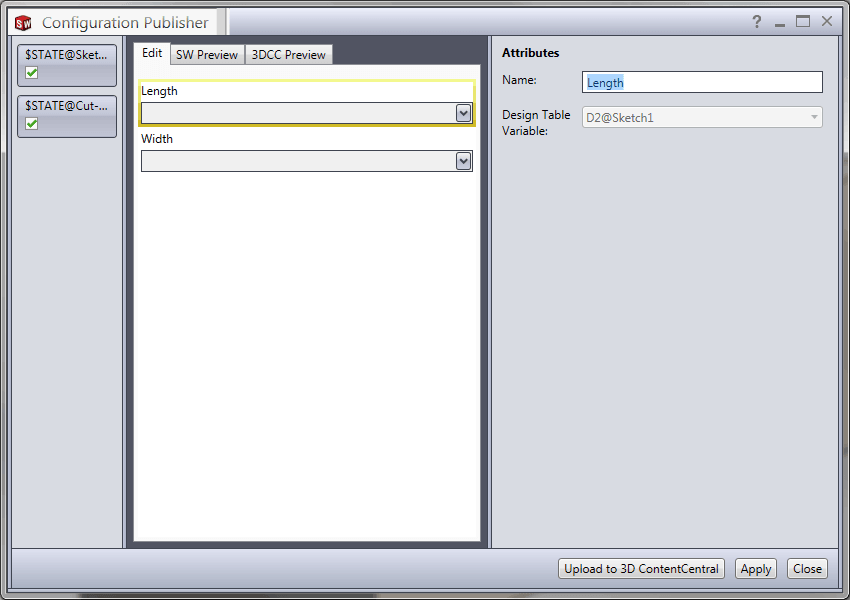 Figure 4: Change the attribute name on the right
After editing is completed, the SW Preview tab will allow the user to view how
the Configuration Publisher will display when initiated. When satisfied with
the results, make sure to Apply the changes.
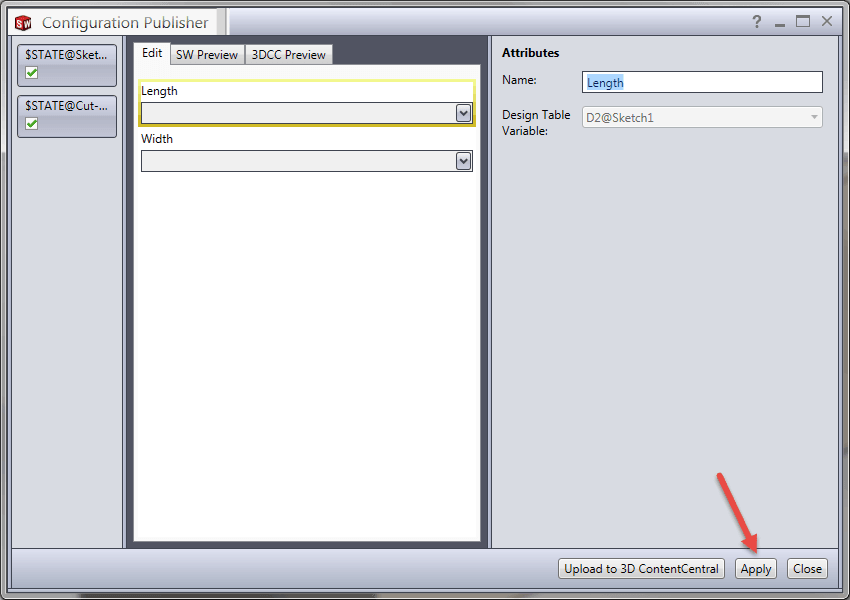 Figure 5: Apply the changes
Now after inserting this part/assembly,
SOLIDWORKS
will prompt the user to choose through the set parameters to determine which
configuration to pull in. As the parameters are chosen, Solidworks will filter
through the remaining parameters available.
An example of this is shown below. For a length of 3, there are 2
configurations available. (Both have a 1.25 width) One is with a 1.25 hole and
the other is with no hole. For a length of 4, only the default configuration
is available, with a 1.5 width.
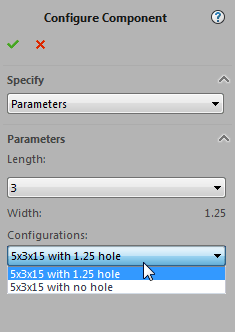 Figure 6: 2 configurations available for a length of 3
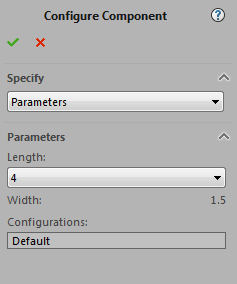 Figure 7: The default configuration is available for a length of 4
As the parameters are chosen, the part updates in the graphics area so the
user has a visual of which part is being selected before it is chosen. If the
chosen configuration needs to be changed and the user would like to utilize
the Configuration Publisher to choose it, the menu can be brought back up by
finding the part/assembly in the FeatureManager Tree, right click on it, and
then choose Configure Part/Assembly from the in-context toolbar as seen in the
figure below.
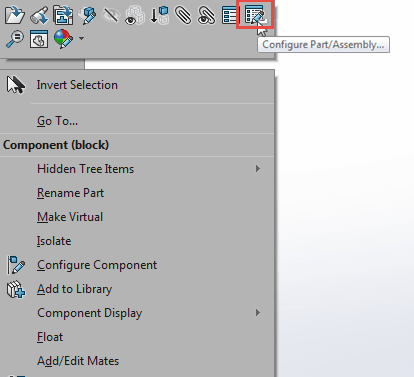 Figure 8: Configure Part/Assembly
The configuration can still be chosen directly, if desired. When the
part/assembly is inserted, the configuration can be chosen from the dropdown
bar instead of sorting by properties.
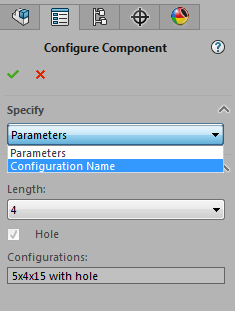 Figure 9: Configuration Name instead of Parameters
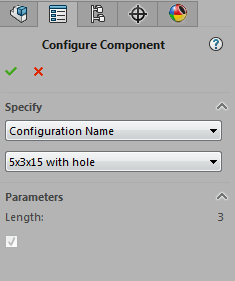 Figure 10: Parameters listed for configurations


