
Why use the Replace Face command in SOLIDWORKS?
SOLIDWORKS empowers the creation of complex models with both precision and flexibility. One powerful, but often overlooked, tool that contributes to this capability is the “Replace Face” command. This command allows the user to replace one or multiple faces in a surface or solid body with a new surface body.
What is Replace Face in SOLIDWORKS?
At its core, the “Replace Face” command does exactly what its name suggests. It lets you replace a face or set of faces with a surface. What really makes the command easy to use is that the surface does not need to be an exact match, it can be bigger or smaller (bigger is typically preferred) than the face(s) it will replace and it will automatically be trimmed or extended to fit the existing model, respectively.
It can be located on the Surfaces tab of the CommandManager by default.
How to Use Replace Face in SOLIDWORKS
Setup
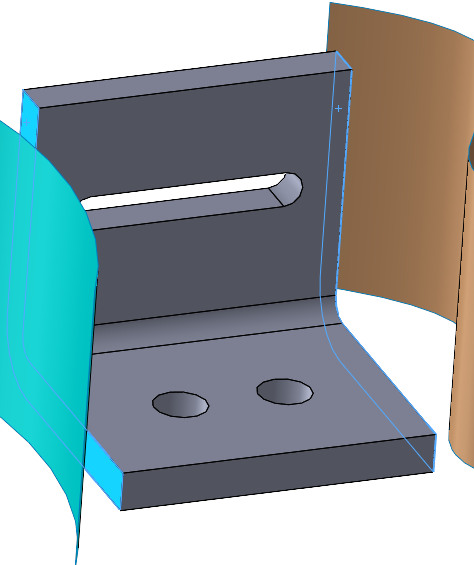
First, you’ll need a face or multiple faces to replace. If using multiple faces, they must be connected but not necessarily tangent.
Second, you’ll need a surface to replace the face(s). Ideally, the surface should be larger than the face(s) to be replaced, however the command can extend the surface if it is smaller.
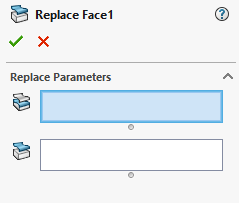
Selections
The PropertyManager only has two selection boxes. One for the face(s) to replace, and one for the surface(s) to replace it with.
In this case, two replacements are being done simultaneously. The faces are first selected.
Then the surfaces are selected in the same order.
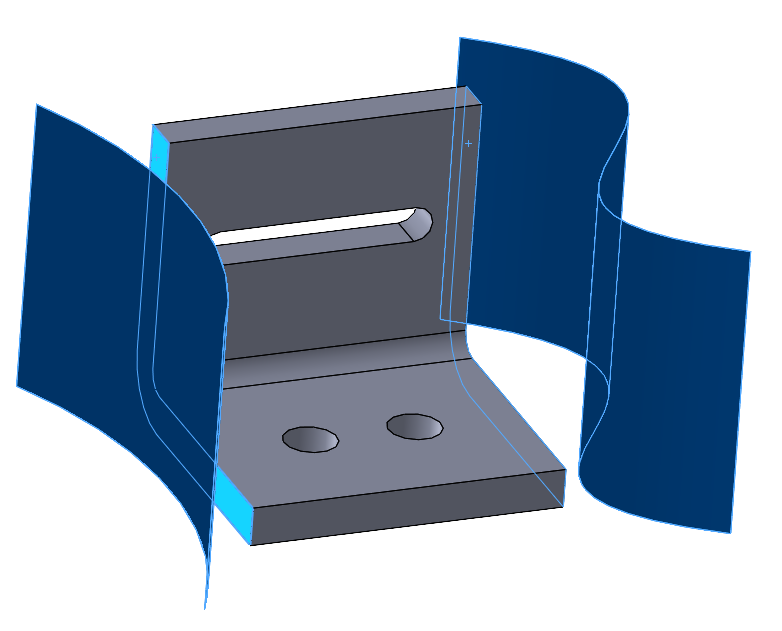
Note: Here, each of the two replacements consists of a single face being replaced by a single surface. This works well in a single command. Multiple connected faces can be replaced with a single surface, however this will typically work better with each replacement happening one at a time in its own Replace Face command.
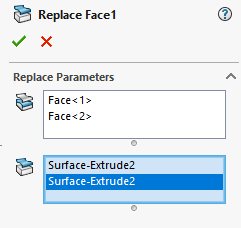
Clicking “Ok” completes the command and then the surfaces can be hidden or deleted to show us the final part. (Bonus: Hover the mouse over the surface body or solid body and hit the tab key on the keyboard to hide it!)

More tips on how to get the most out of SOLIDWORKS
Whether you’re looking to alter an existing design or just optimizing your workflow in a new ground-up design, the “Replace Face” command can be a valuable tool, combining powerful functionality with a simple and intuitive setup. Remember, a single surface can replace one face or multiple connected faces. For more tips on how to leverage SOLIDWORKS in your engineering workflows, check out our other tips & tricks articles on our blog.