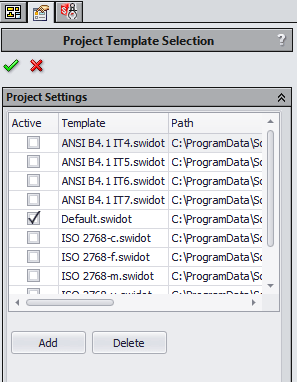
SOLIDWORKS Inspection does come with several very nice existing templates to use for projects but if you need to customize it there are ways to make that a saved one as well. So the first step is to turn on the add-in and open a file. This process is similar for both the add-in and standalone versions, you will need to start with an existing project. So you can either open one you have already created or create a new project using an existing template.

So we will be creating a new project. Then select the existing template..
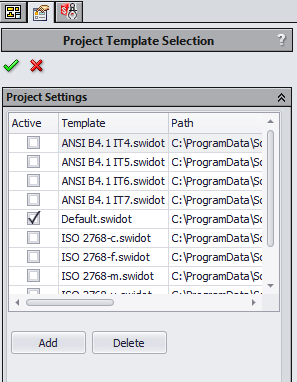
Now go through and make changes to all of the properties you would like to change from the set up for the project.
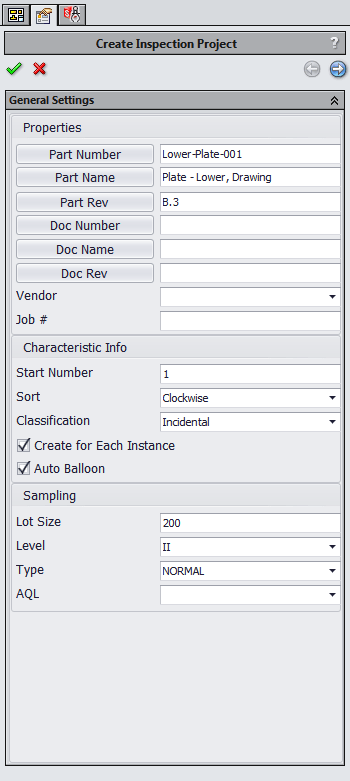 General settings link drawing properties and determine what data gets pulled for extraction.
 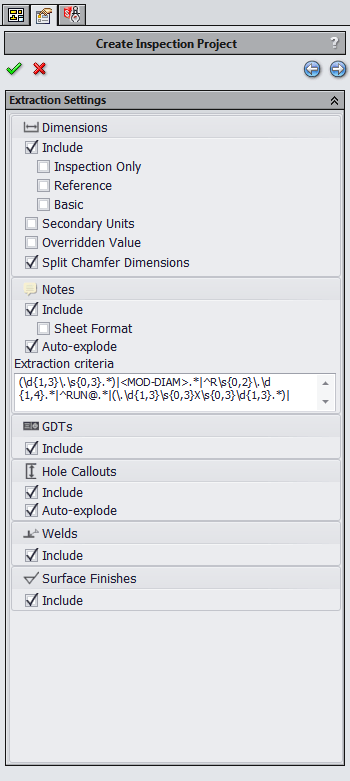 Extraction settings determine what dimensional and drawing data the inspection template pulls in.
Here we set the linked info from the properties of the drawing and what we want to include for the extraction.
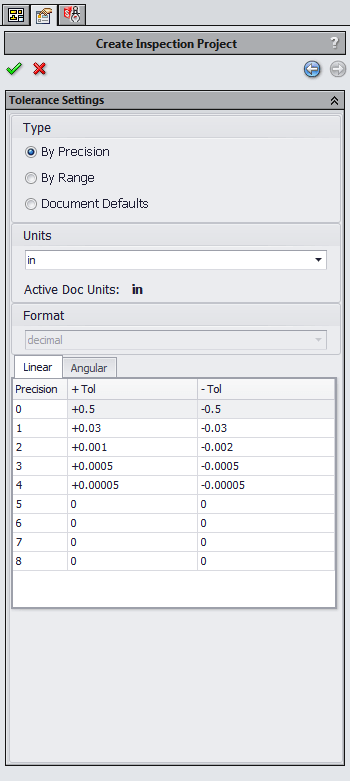 Tolerance settings control how dimensional characteristics are generated from the drawing setup.
 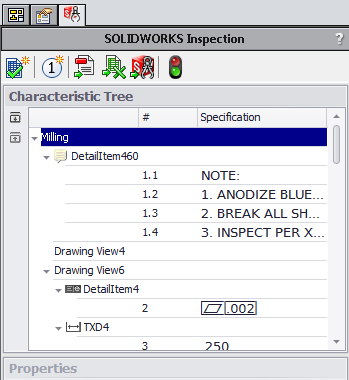 The characteristic tree lists every dimensional characteristic pulled based on the tolerance setup.
On these pages we set up how to control the tolerance and then we accept this and we get the characteristics as we choose from the set up.
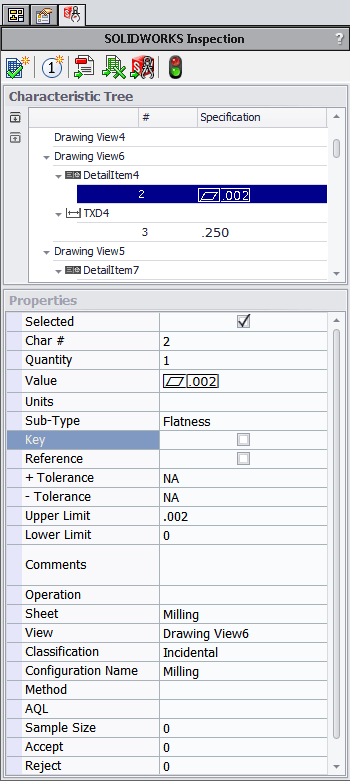
Then we can also look at each of the individual characteristics and modify them.
 Balloon options control which SOLIDWORKS layer, fit, and shape each characteristic balloon uses.
 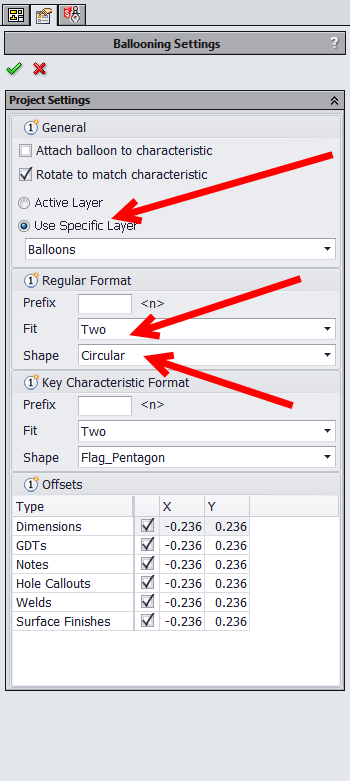 Balloon settings determine the appearance of each characteristic callout on the inspection drawing.
At this point we have changed what we are able to during the set up. From the menus above the characteristics we select the Balloon options the second one from the left. Here we can adjust how the balloon is going to look. What layer from SOLIDWORKS to use, what fit for it and the shape it will be. Also what shape and fit for a Key Characteristics balloons. There are also offset settings for locating the balloons by type of characteristic.
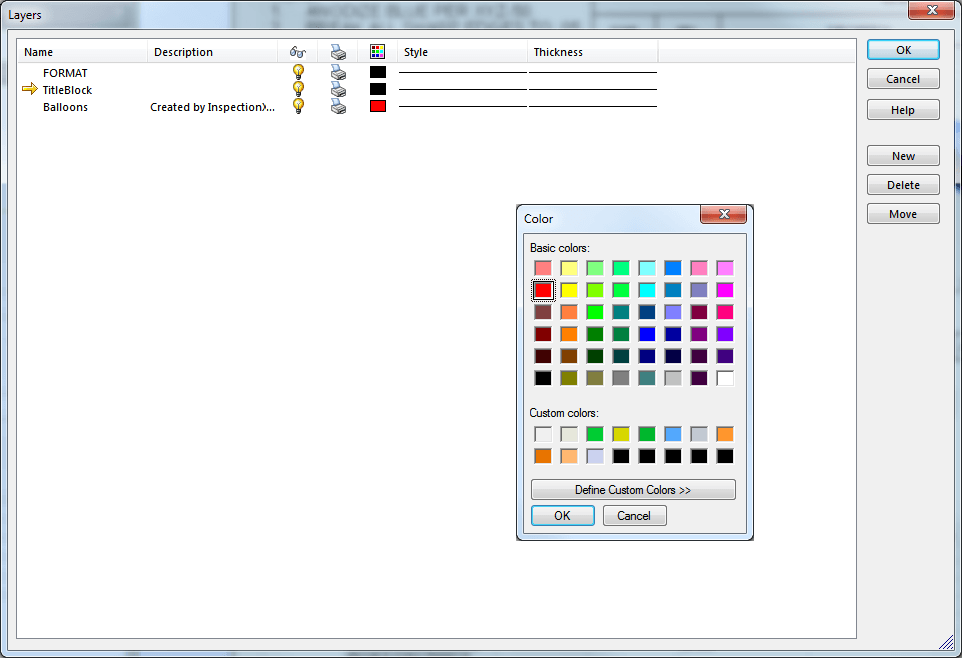
As far as the color of the balloon this is controlled by the layer in SOLIDWORKS. By default Inspection will create a layer called Balloons and make it red. So to better control this you can add this layer or one with a name you prefer and set it to the color and line data of your choice. As you can see here the Balloons layer has a description showing that Inspection created it.
So for the Standalone version once you are in the software and have a project open. We will need to get into the Options.

Now we can go through these options under the Project Options tab.
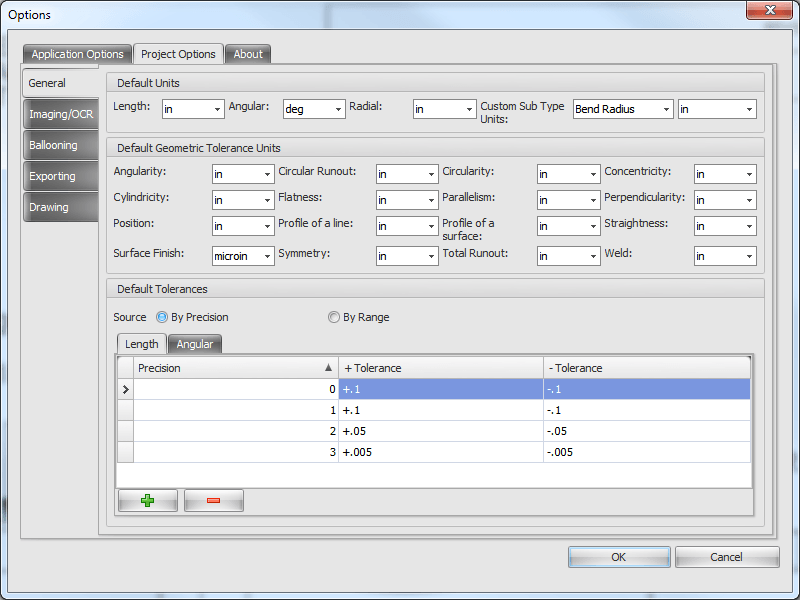
With the General area this is setting up the units and tolerance & GD&T.
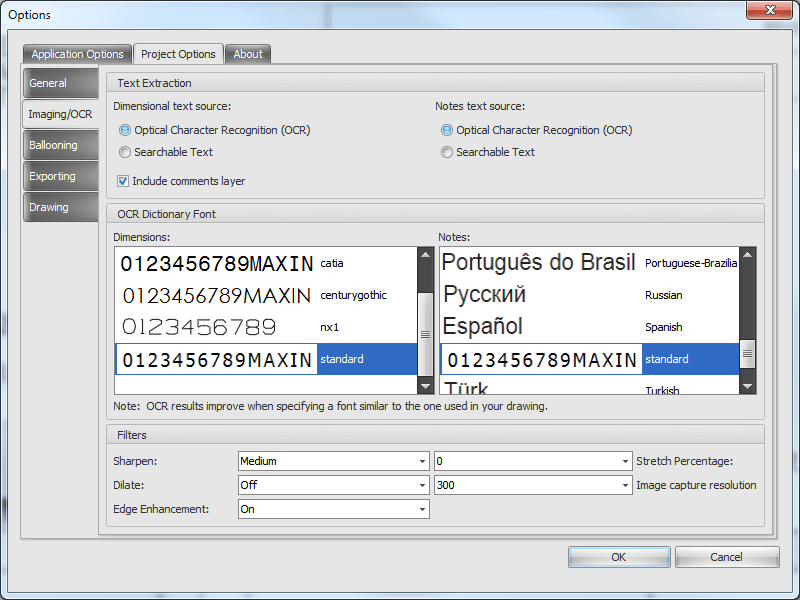
The Imaging/OCR is controls for Optical Character Recognition, to control how Inspection recognizes text and dimensions.
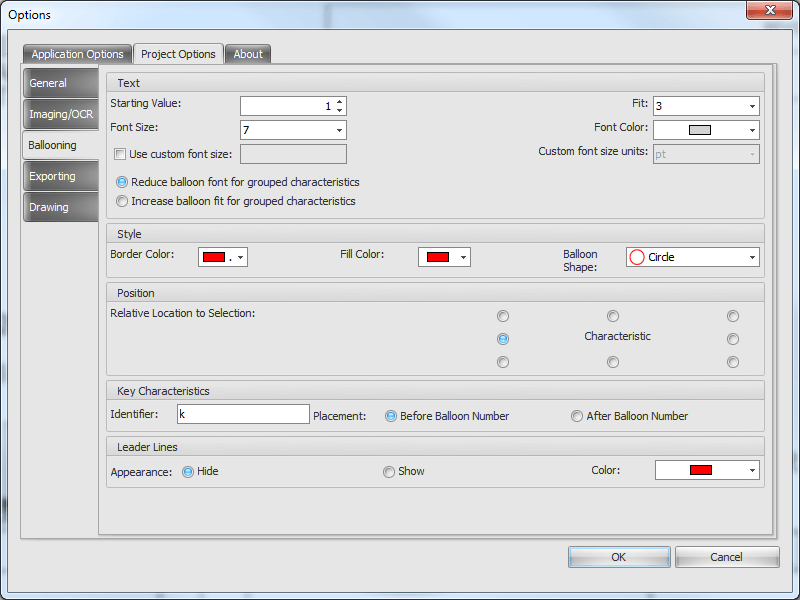
For Ballooning we can set up the balloons, the shape the will be the color and also a file if wanted.
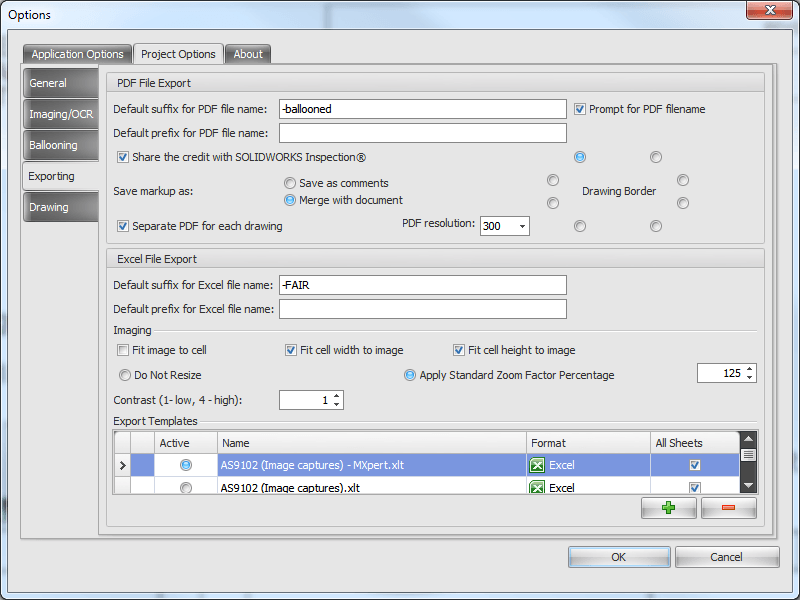
Exporting is the options for PDF and Excel export options including what Excel template to use.
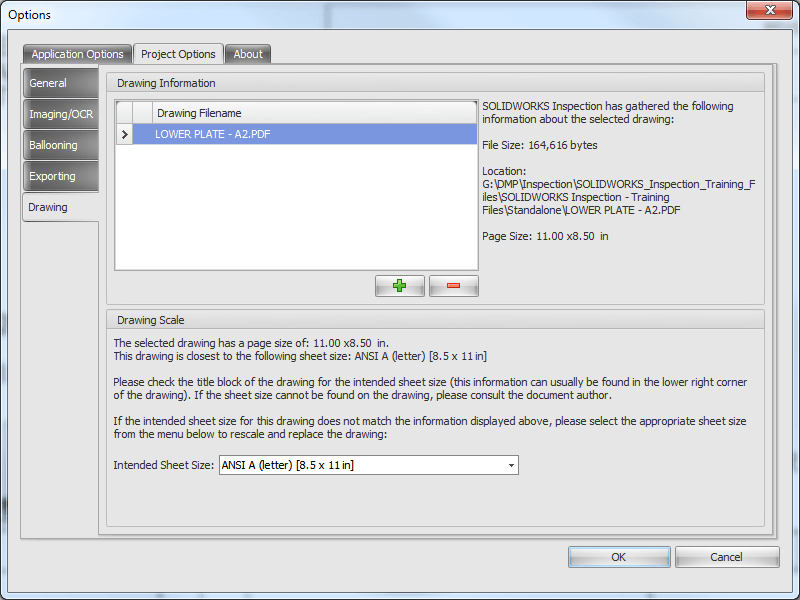
On the drawings tab we have information on the drawing like to file name and also the scale of the intended sheet size.
Now once we are done with any changes we need to make for either platform add-in or standalone. We will need to save these changes out to a new template. So from the standalone version we select the Inspection icon from the top left and from the add-in Create New Template and OK.
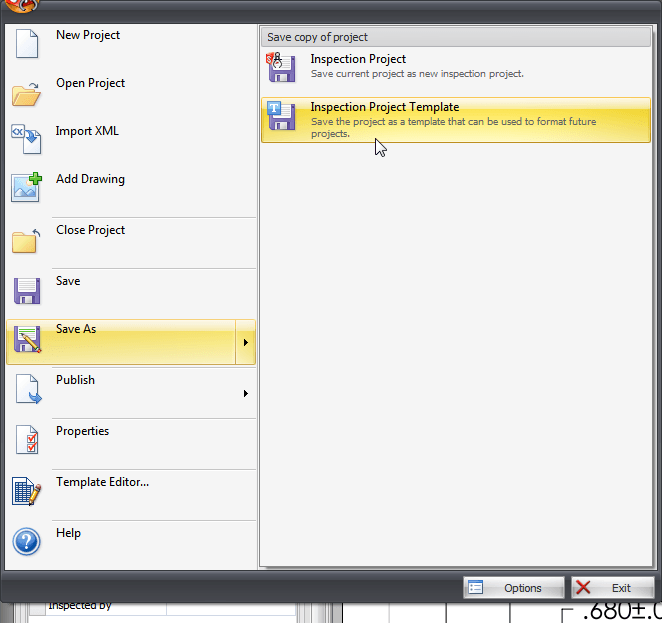 Saving as an Inspection Project Template stores the settings as a reusable .ixpdot file.
 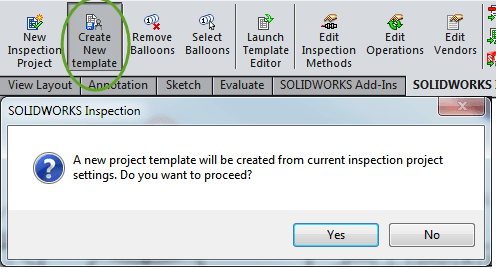 A finished Inspection template saves as .ixpdot for Standalone or .swidot for the SOLIDWORKS Add-in.
Then we can give them a name and save them into the templates location. This should be the folder that you are in with the save as. It will also save it to the extension for the template file as well Standalone is .ixpdot and the add-in will be .swidot.
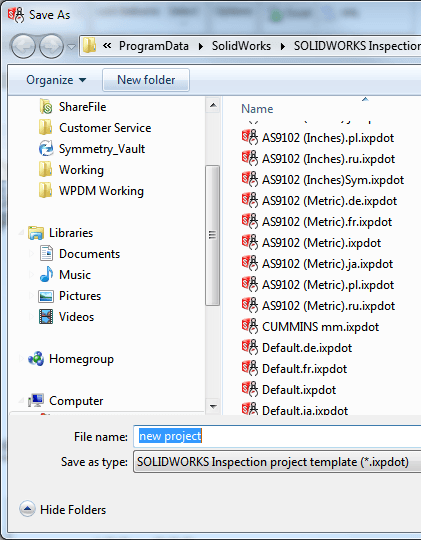 Templates save into the SOLIDWORKS Inspection folder alongside existing .ixpdot files.
 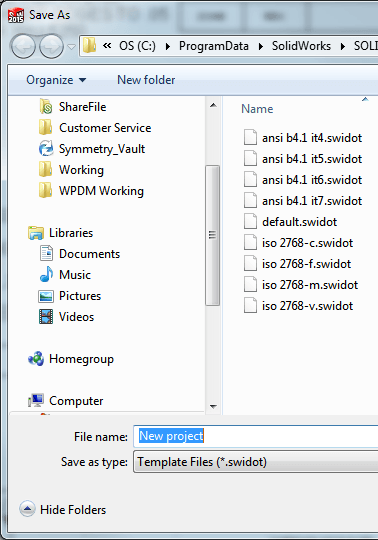 Add-in templates save with the .swidot extension in the same SOLIDWORKS Inspection folder.
Now if you are needing more assistance or run into issue please let us know and we can help find a solution.