Background
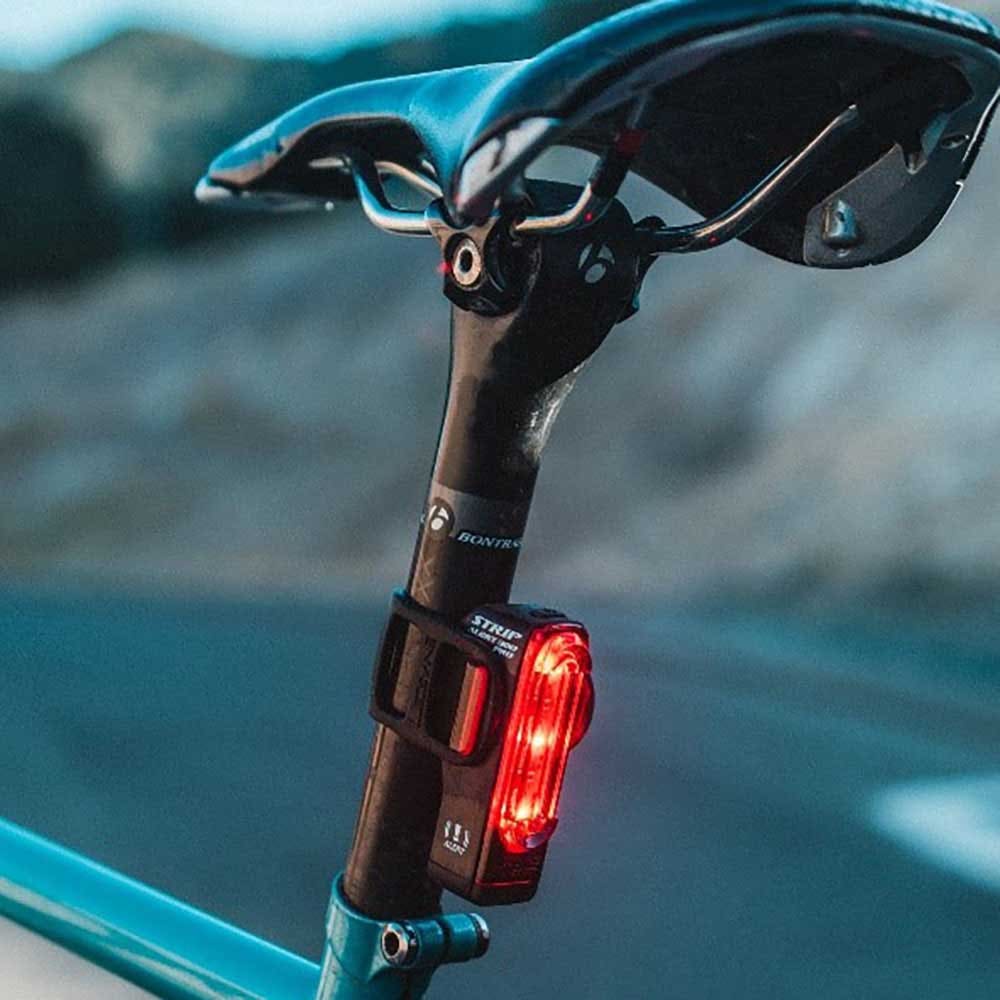
Can you attach your old trusty taillight on your new fancy road bike with its own proprietary mounting system? The answer is a resounding YES – if you know your way around SOLIDWORKS and have access to a 3D printer! After all, if you’ve just spent a few thousand dollars on a shiny new bike you probably want to save some money and keep using your old lights. Read on to see how we fitted an old Lezyne brand taillight to the proprietary Blendr mounting system found on Trek bikes.
Clash of the Mounting Systems
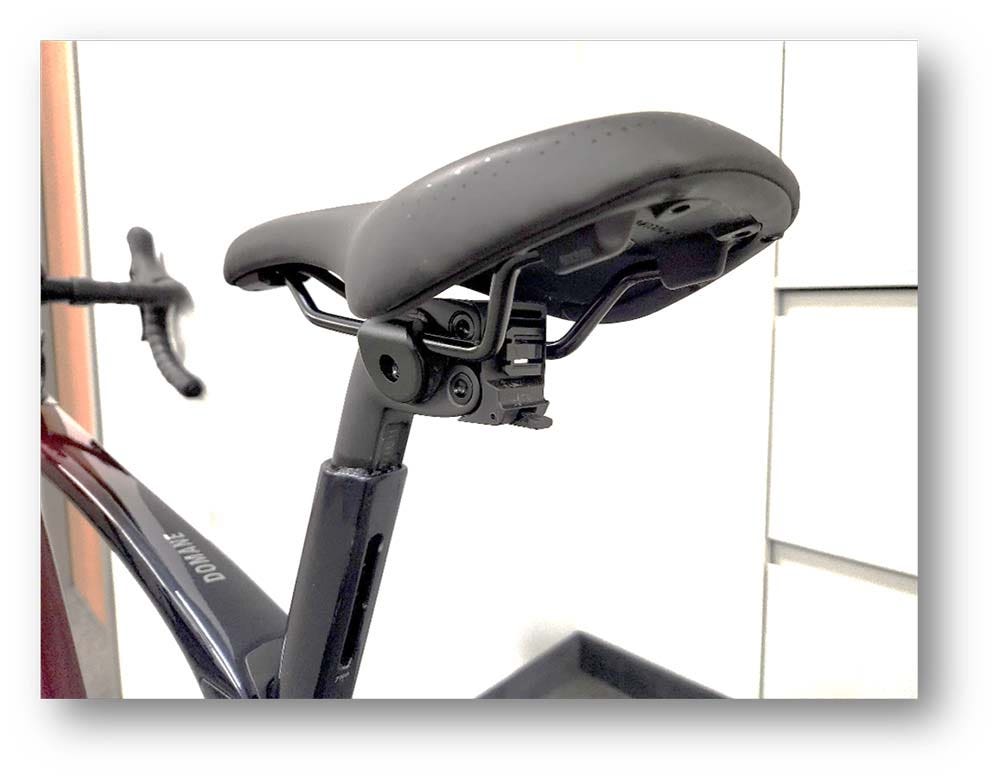
Trek Blendr
Trek has their own proprietary mounting system called Blendr. It uses a dovetail system that mounts a male piece beneath the saddle (seat) of the bike. It also includes matching female geometry on compatible Trek lights.
Lezyne
The Lezyne lights feature a brand-agnostic mounting system which wraps around the seat post of the bike. They’re shaped to fit around the post and have a rubber strap to keep them in place
Design and Model
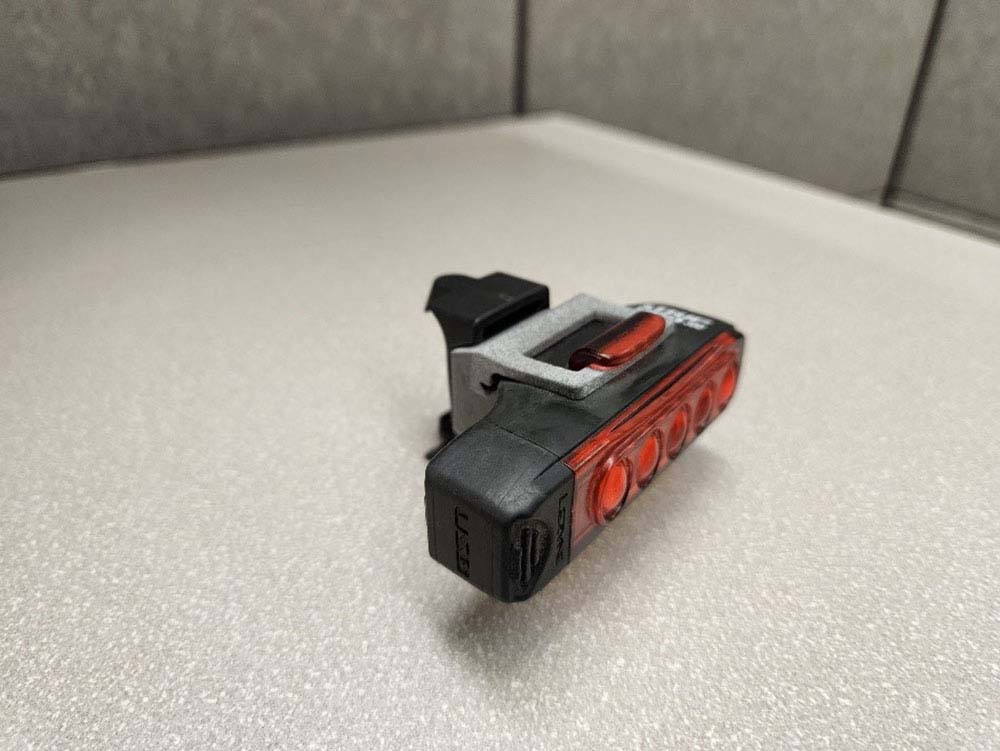
The design is an adapter that has a dovetail feature on one side, compatible with Trek’s Blendr system. On the opposite side, there are arms to grip onto the Lezyne light
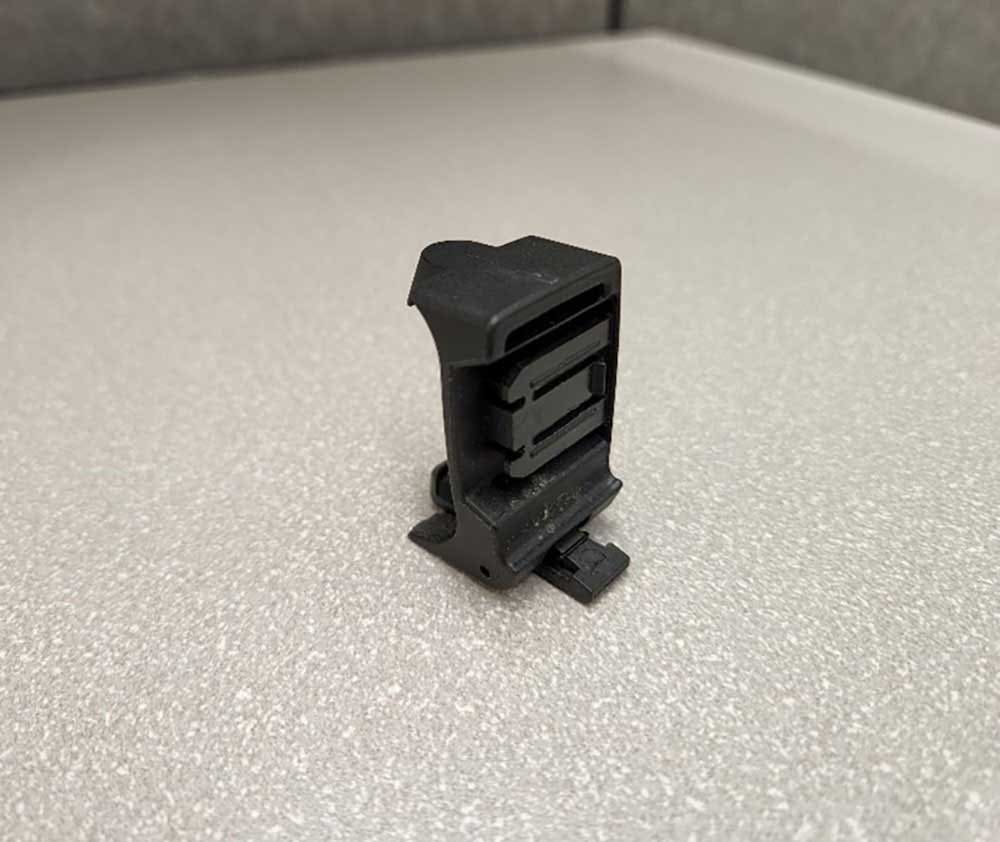
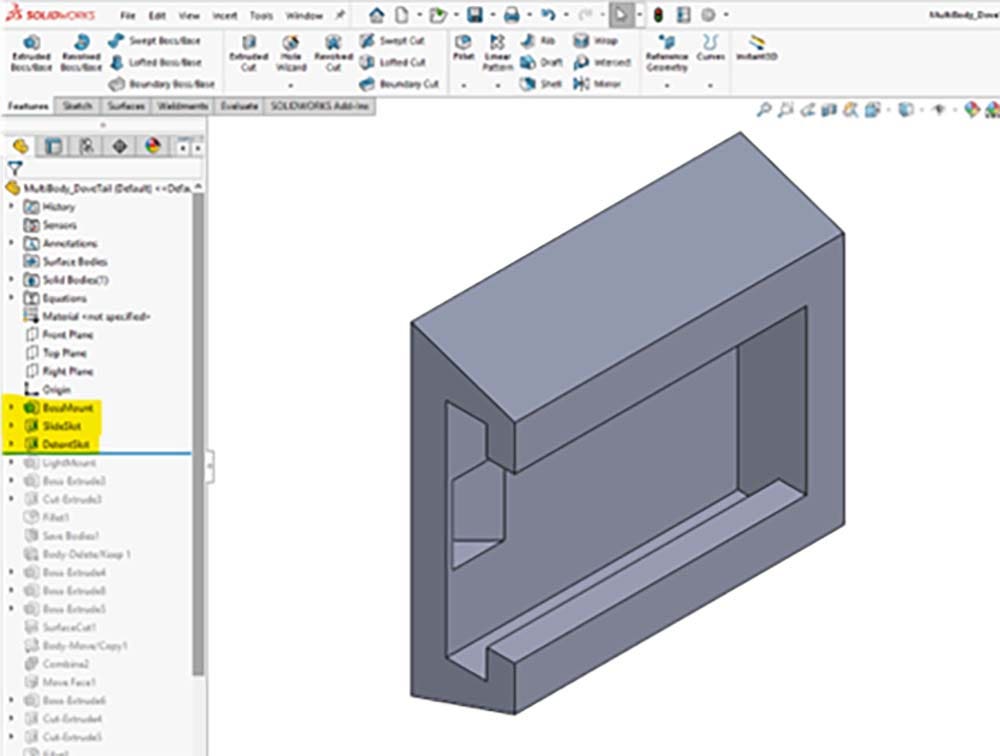
Blendr Mount
We start by modeling the female dovetail to interface with the Blendr mount on the bike. This portion is modeled in three separate features to allow easier adjustment of the dimensions to perfect the fit with the Blendr mount.
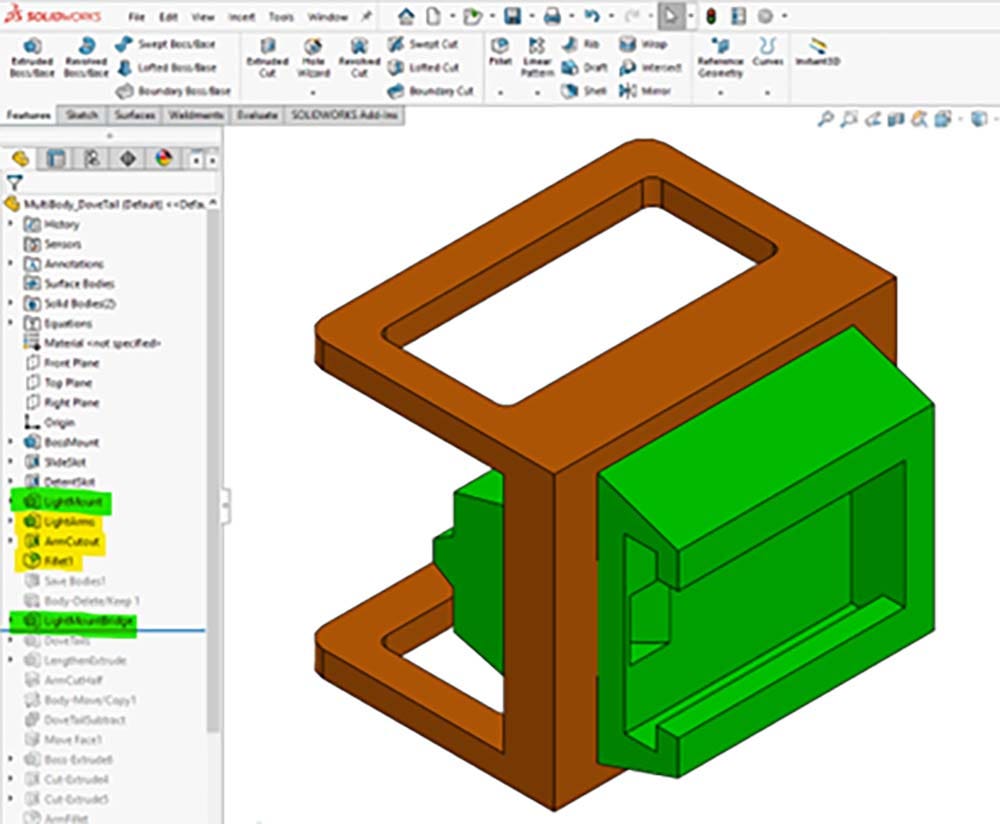
Lezyne Arms
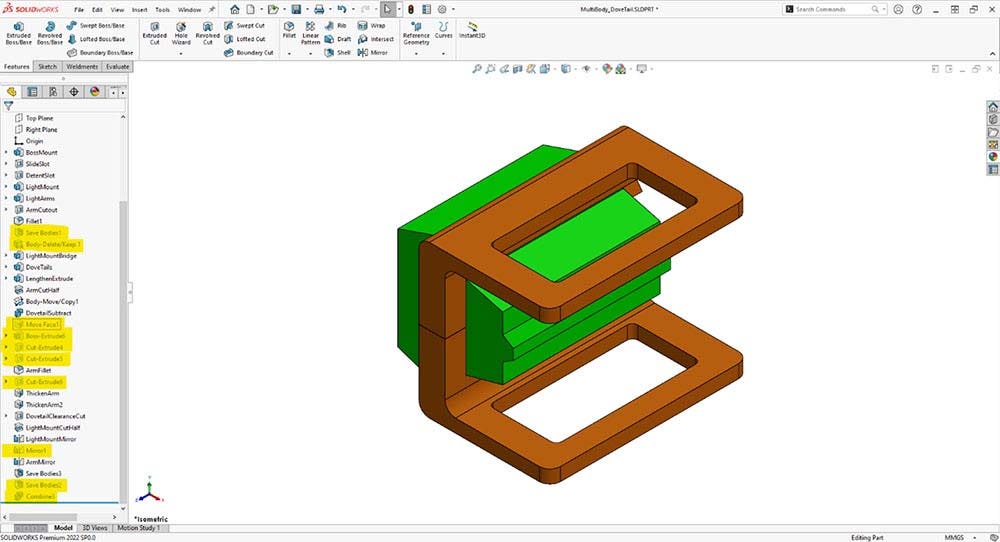
Next, arms are extruded to wrap around the light and hook onto where the rubber strap typically would. Notably, this feature keeps the Merge Result option unchecked. This makes the arms and the dovetail two separate solid bodies, allowing for each of them to be modified independently later. The arm features are highlighted in yellow; the dovetail is highlighted in green. Notice that another extrude (in green) has been added in the rough shape of a seat post to provide a secure seating area for the light.
Merging
Then, two smaller dovetail features are added to the green body. These allow the orange arms to detach, hook on to the light, then reattach. The Combine feature is used to subtract the dovetail geometry from the arms, which forms a matching tail. An Extruded Cut is then used to add a small clearance to the dovetail fit, this can be adjusted later after testing the fit. To simplify the workflow, the arm was halved using the Cut with Surface command.
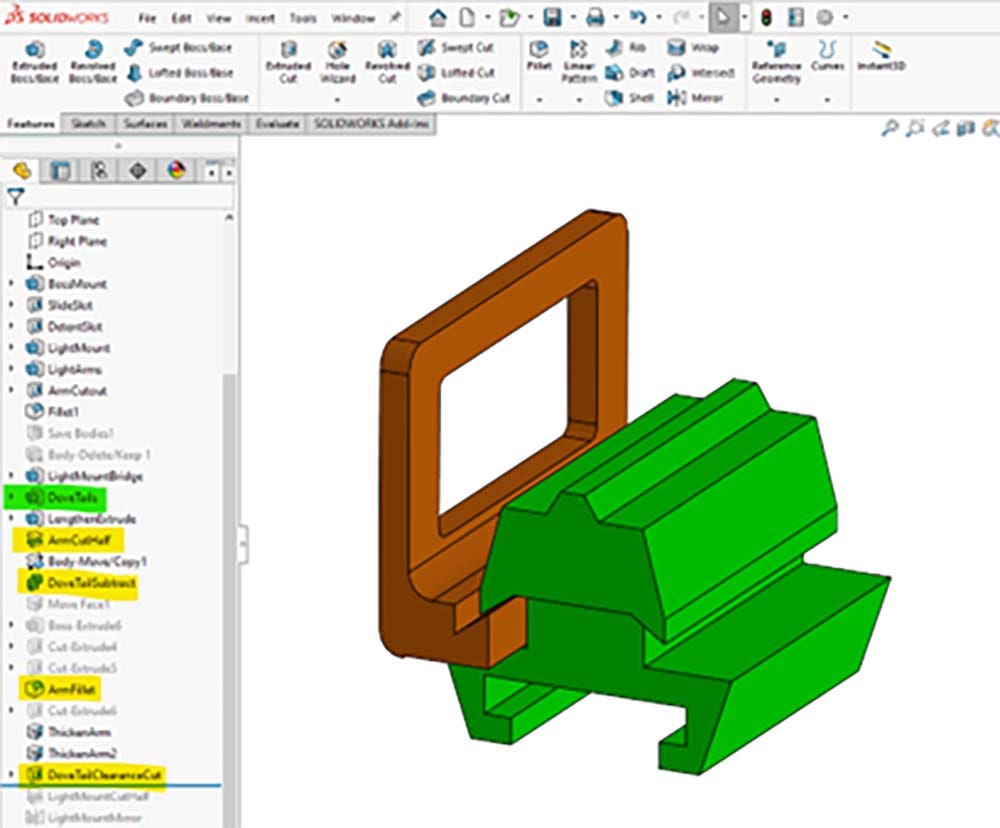
To finish, the arm body is mirrored across the top plane. This leaves three separate bodies which can be exported using the Save Bodies command into their own part files. From there, they are exported to STL files and sent off for printing.
Making Quick Changes
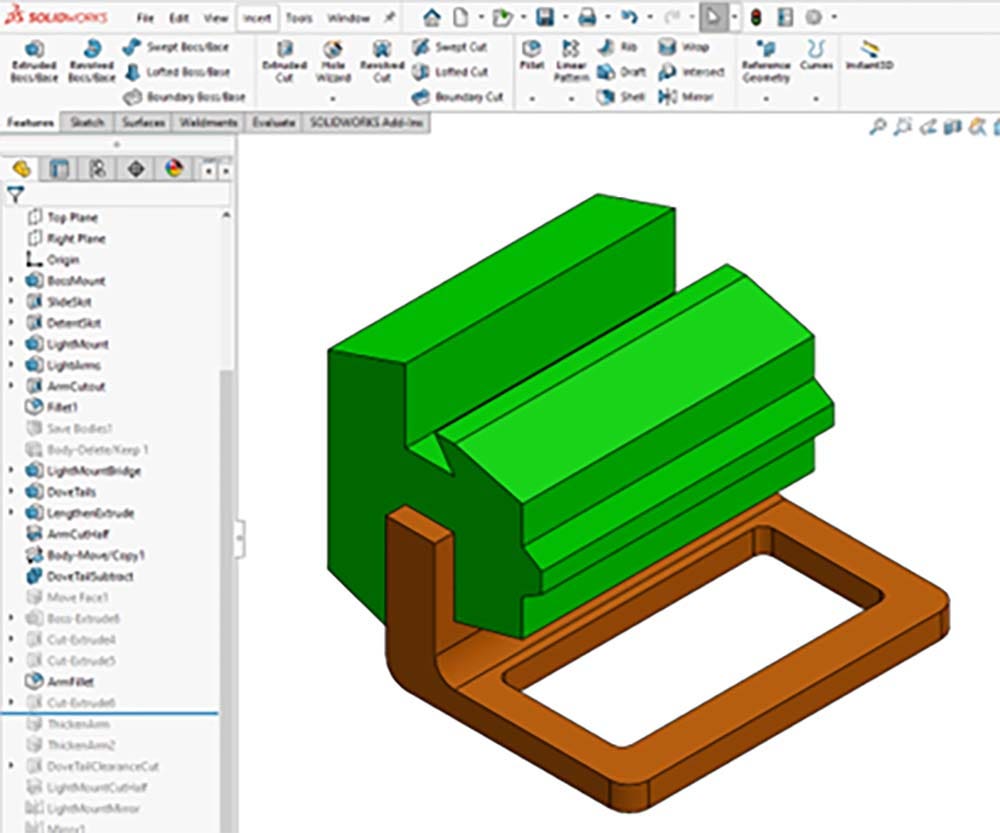
Move Face
After printing the model, the fit between the arms and light was much tighter than expected. This was good because the light doesn’t need to detach from the adapter very often, if at all. The dovetail joint can slide on and off the Blendr mount to let the light and adapter assembly come off the bike for cleaning or charging. However, it did mean the arms were undersized for how much tension they were under. To quickly add material to the arms, the Move Face command was used. The rollback bar was moved above the dovetail clearance cut and mirror feature. Because the clearance cut was made with a Through All end condition, the added material would still be cut away to let the pieces fit together. Also, by performing this operation before the mirror feature both arms would be affected.
This was a perfect use case for the Move Face command as it allowed quick and easy design iteration in combination with a 3D printer, and as the design was nearly complete the small loss in associativity was acceptable.

New Manufacturing Method
This part was originally designed with FDM (Fused Deposition Modeling) printing in mind. It was intended to print in three separate parts and then be glued together to optimize layer orientation and eliminate the need for supports. After the modelling had been started, MJF (Multi Jet Fusion) printing was selected instead, which eliminated the layer orientation and support concerns present in traditional FDM. In short, this was possible because MJF uses a bed of powder that passively supports the part without needing to create dedicated support geometry. This created an opportunity to revise the design and use dovetail joints where butt joints with adhesive were previously designed.
Configurations and Feature Suppression
To quickly change the design, features were suppressed in the Design Tree, which effectively deleted them while still allowing them to be called back later if necessary. While this use of the suppress option may not offer the same level of robustness as a ground-up redesign, it is nearly unparalleled in its speed and allows concepts to be visualized nearly immediately. If this design were to be picked up again, configurations could be used as well to add another level of organization by being able to quicky suppress and un-suppress certain features to jump between variations of the mount.

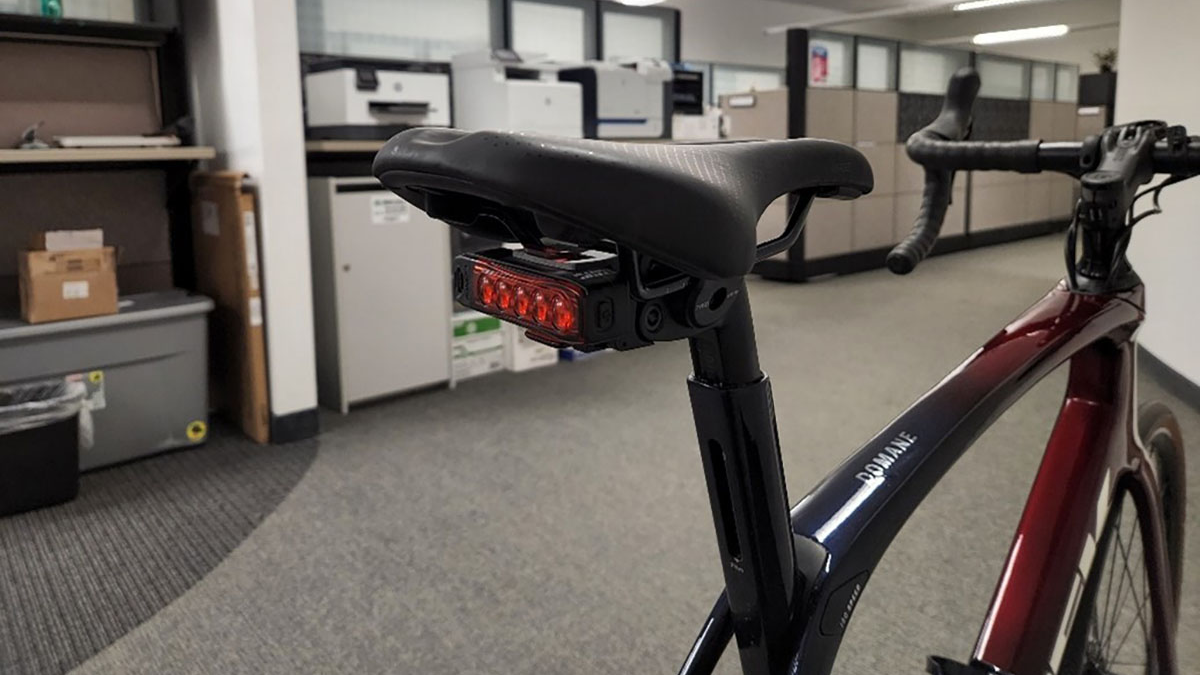
The Functional Print
Although our 3D printer could make this part in one piece, it was broken into three pieces to allow it to assemble around the Lezyne taillight snugly and without fasteners or adhesives. This assembly effectively converts the taillight into a Trek Blendr compatible light. The entire assembly can then click into the bike securely and still be easily removed if necessary for cleaning or charging.