
What if there was a way to control a part through a table? A table that would let you add configurations without going to the configuration manager tab or let you not worry about dimension changes. Luckily, SOLIDWORKS gives us the ability to create design tables that control materials, dimensions and configurations – making it easier to create and edit part configurations.
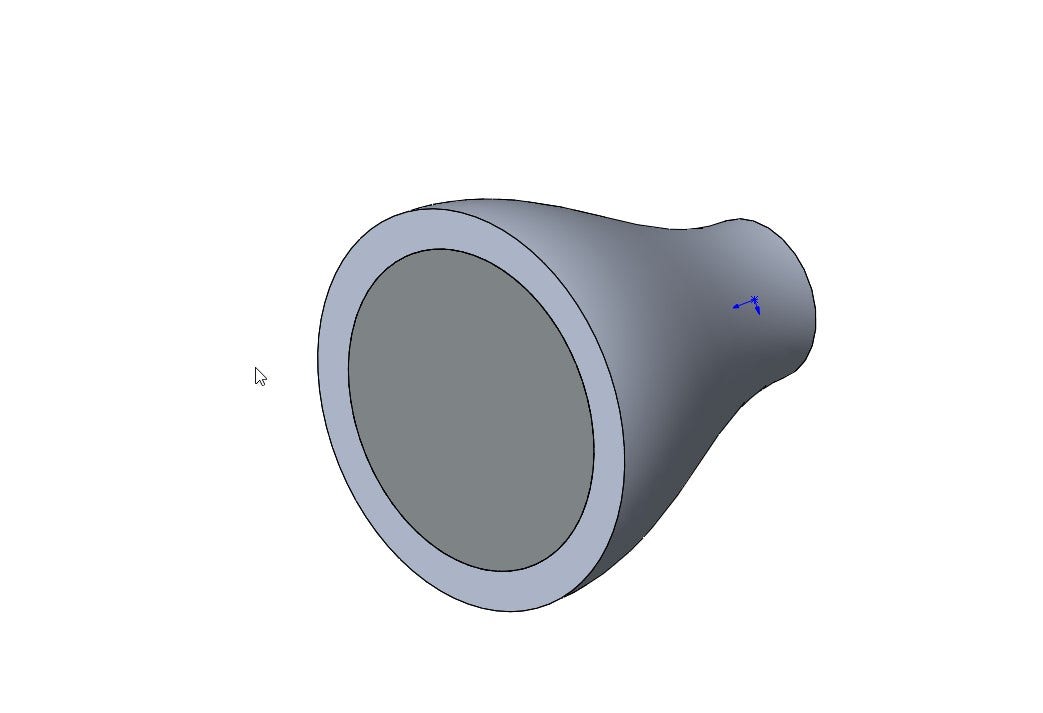
For this example, a plug will be designed for a fishing net release system that attaches to a net so that it doesn’t float away.
Using the Modify Configurations Table
We want to compare how much the plug would weigh if it was made from a different material. Without creating a part from scratch, we will use our Configure Feature Table to control different materials with each configuration. There are three places to access the Modify Configurations Table: we can right-click on a feature, edit material or on a dimension. In this example, we will access it by right-clicking on edit material in the Feature Manager Design Tree and selecting Configure Material.
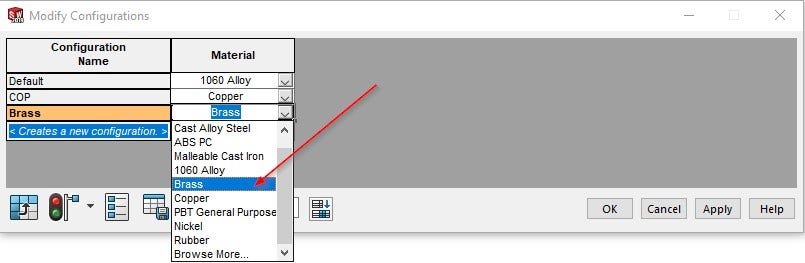
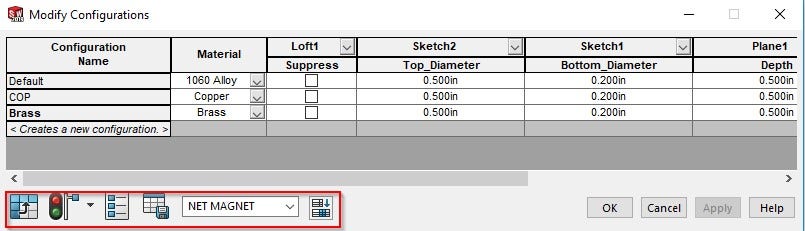
Now that the table is active, we can see the default configuration and material column. The Default configurations material is 1060 Alloy. To add a new material, select “Create a new Configuration” and type in a new name, in our case COP. After a new configuration has been created the material can be selected from the Material drop-down menu.
Following the same process, we will create one more configuration and call it Brass. Once again, we will click on the drop-down box for material and change the material for Brass configuration to Brass.
Modifying Dimensions
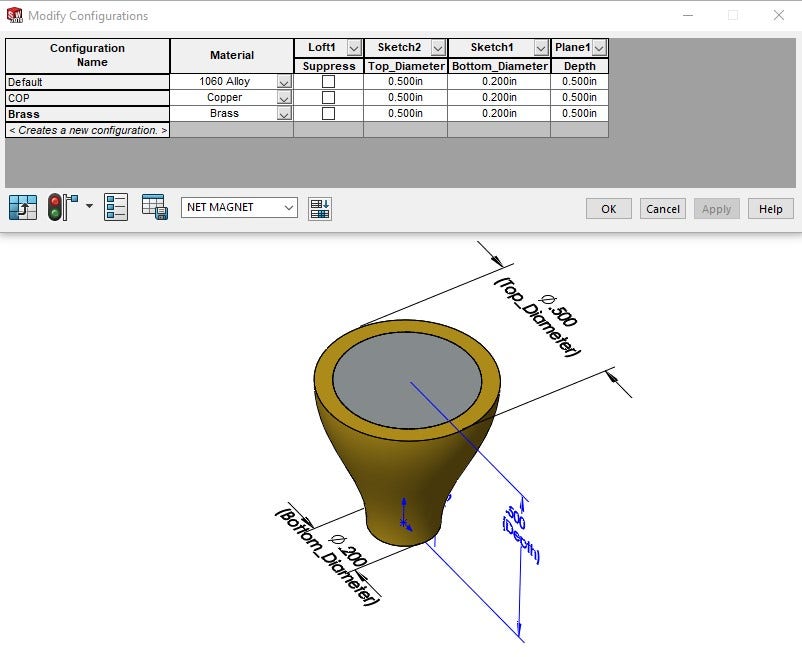
Once the material for the configurations has been set the dimensions of different configurations can be modified. We don’t have to worry about how the change in dimension will affect the other configurations since the changes take place on the table itself.
Now we will double click on the body to click on the dimensions we want to add. The diameters of both circles and the depth are selected. Also, since we double-clicked on the head, the loft has also been added to the Configure Feature Table. From the configure feature table, we can suppress the loft between the different configurations.
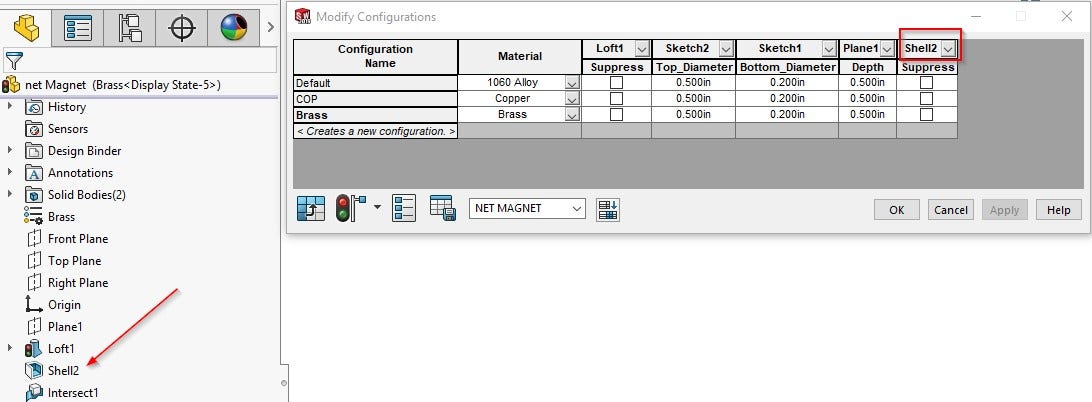
Just like the loft was added it is also possible to add other features to the Feature Configuration Table. If we want to add the Shell2 feature, we simply double-click on it inside the Feature Manager Design Tree. Another option is to double-click on the shell inside the graphics area.
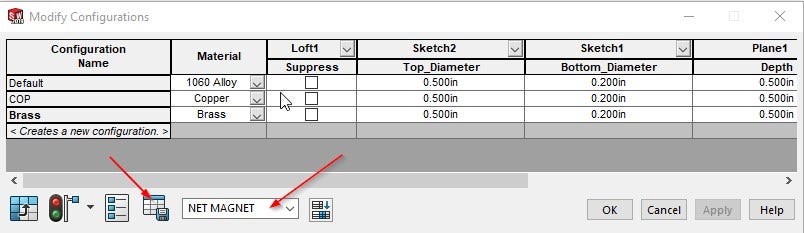
At the bottom left corner, we can find tools that can help us change or modify the table.
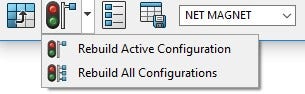
We can flip rows and columns. If we want the only active configuration to be rebuilt every time changes are made in its row, then we click on the drop-down arrow next to the traffic light and select Rebuild Active Configuration. Another option is to select Rebuild All Configurations. Rebuild All Configurations ensures that anytime a dimension or any other change is made, it will automatically rebuild it without it being the active configuration.
Saving the Table
Lastly, it is essential to name the table and save it. If our table is not saved, then all the information we put in our table will be lost along with the table.
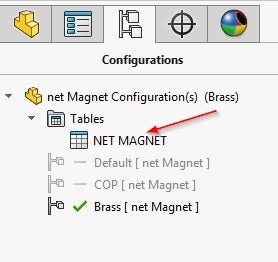
Now that the table has been saved. The table can be accessed through the folder named “Tables” that is found inside the Configuration tab in the Feature Manager. In case the table needs to be accessed again, all that you need to do is double-click on the table Net Magnet and it will activate again.
Through the Configuration Feature Table, we have seen how we can control dimensions directly from the table and have other configurations not be affected. As well as being able to change materials suppress features for configurations in the Configuration Feature Table.
If you have any tips or tricks on the Configure Feature Table let us know in the comments! For more information on SOLIDWORKS or if you have any questions, contact us at Hawk Ridge Systems today. Thanks for reading!


