Getting Started with the Filled Surface Command in SOLIDWORKS
Surface modeling in SOLIDWORKS offers a huge level of functionality and control that conventional solid modeling cannot. However, with that added functionality often comes more work as the tools rely on more and more data and input from the user. The Filled Surface command is therefore a breath of fresh air in that it offers lots of functionality to close holes in your designs while remaining relatively simple and quick to use. In this article we’ll cover how easy it is to use in SOLIDWORKS so you too can design more efficiently.
What is Filled Surface in SOLIDWORKS?
Filled Surface, as its name suggests, fills an area with a surface patch. This area’s boundary is a loop, most commonly formed by selecting edges in the model, however, sketch entities and curves can also be used. There are also options to control the boundary condition of the surface, ranging from contact to tangency to curvature continuous.
What Can Filled Surface in SOLIDWORKS Help With?
Use Filled Surface anywhere on your model where you have a hole to patch. Imported a model and some faces are faulty? Filled surface. Complex fillet blends resulting in lots of small artifact faces? Filled surface. You can also use it to fill in holes in a part for parts that don’t import correctly into SOLIDWORKS (For example, if faces are missing.)
How do I use Filled Surface in SOLIDWORKS?
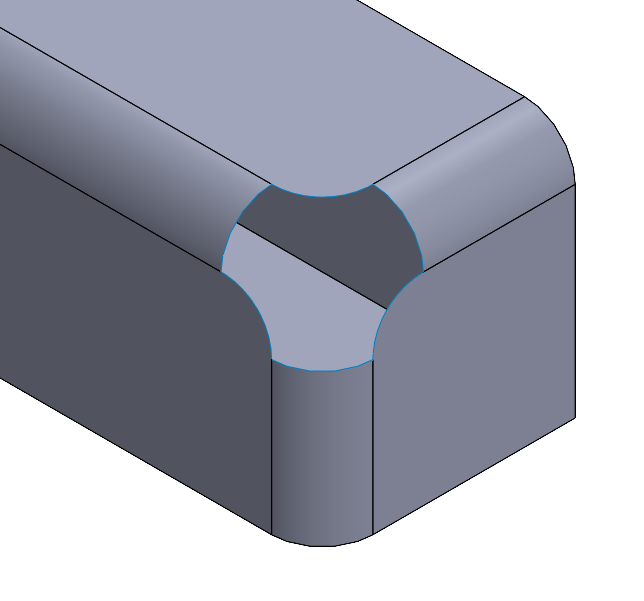
1. Identify the hole to be filled
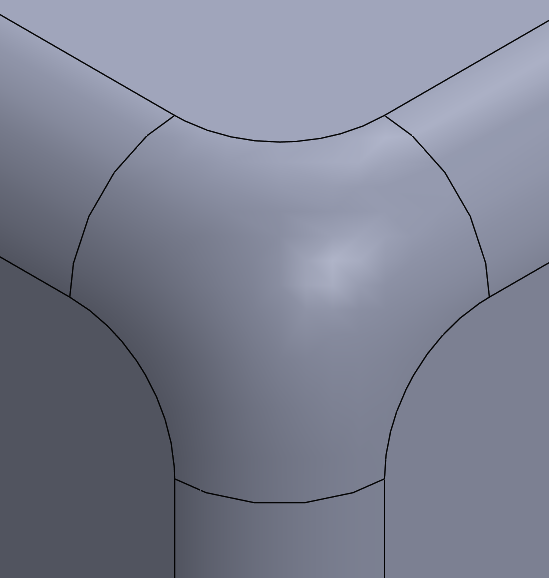
First, a hole in the model should be selected. This will most commonly be done by selecting edges, but sketches and curves can also be selected. The hole can already exist in the model as part of a new design, or it can be cut out from an otherwise complete model to remove a problematic area.
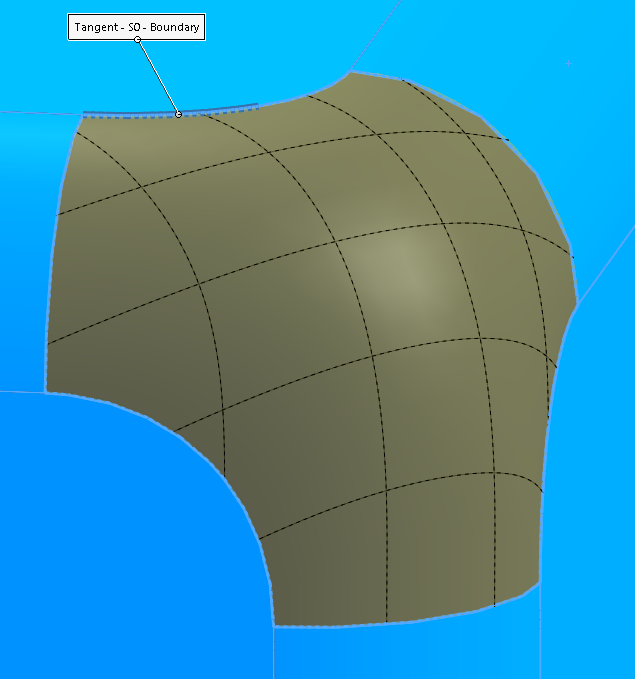
2. Adjust the boundary conditions
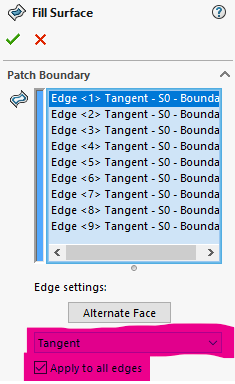
How should the new surface connect to the existing geometry? Select from contact, tangent, or curvature. While this can be done for each individual boundary entity, the “Apply to all edges” checkbox can save time and apply the same condition to all edges.
If any edges from a solid are selected for the boundary, the “Alternate face” button can be used to change which face the surface will be continuous to.
3. Fix Up Boundary, Merge Result, and Mesh Preview: Other Useful Options in SOLIDWORKS
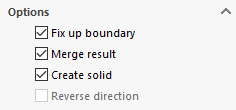
Fix up boundary
Check this box to smooth over any small imperfections in the boundary loop. It can trim back entities that are too long or extend entities over gaps. Generally, this setting can be left turned on all the time.
Merge result
Check this box to automatically knit the surface with the adjacent surfaces. If this option is checked and would result in an enclosed surface, “Create solid” can also be turned on.
Mesh preview
This can make it easier to visualize the surface and the shape it will form as compared to the default preview shading alone.
Using Filled Surface to Design More Efficiently
The Filled Surface command is a well-positioned tool to close holes in your models, whether they exist naturally as part of a new design, or if you are cutting out a problematic section on an existing design. With its quick setup and simple options, it is also a viable choice for designers using a solid modeling workflow as they can go from solid to surface and back to solid with minimal extra steps. Even in a more complex surface modeling workflow, it still is a valuable go-to tool before resorting to something more intensive like a Boundary or Loft Surface. Why go through the extra setup of those tools when a Filled Surface may do the job just as well and much quicker?