Hey everyone, welcome to my second article in a series on Draft Analysis. In
this series, I’m going over the basics of a tool that is helpful to anyone
working on cast or molded parts. This second article will set up the analysis
and show off the different options. If you need to, you can read my first
article here: 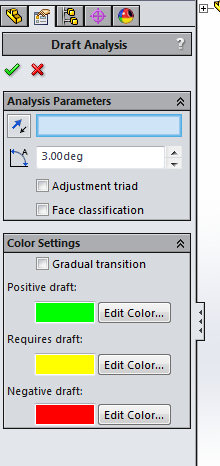
Let’s pick up where we left off. I had just clicked on Draft Analysis and
started the tool to check out a power strip cover. Here is what the property
manager looks like:
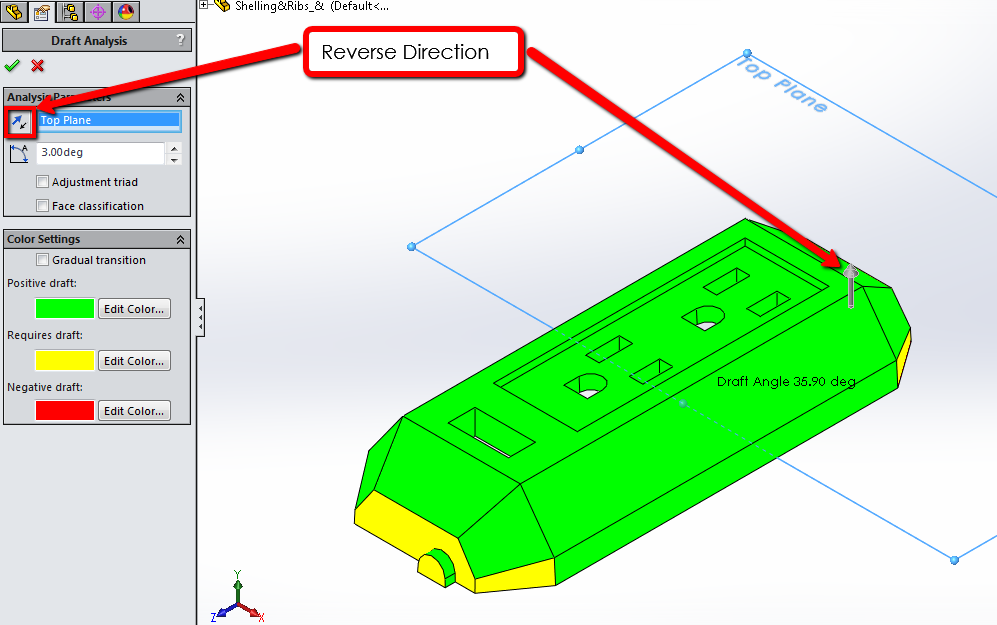
Figure 1: Draft Analysis property manager.
The first box (highlighted in blue) is looking for the Direction of Pull. If
you are unfamiliar with this term, this is the direction that the part will be
ejected from the mold. If you choose a face or a plane, the direction of pull
will be perpendicular to your selection.
After selecting the Top Plane, I get a gray arrow showing me which way the
direction of pull goes. As with other areas of SOLIDWORKS, I can switch this
arrow by clicking on it in the Graphics Area or hitting the Reverse direction
button.
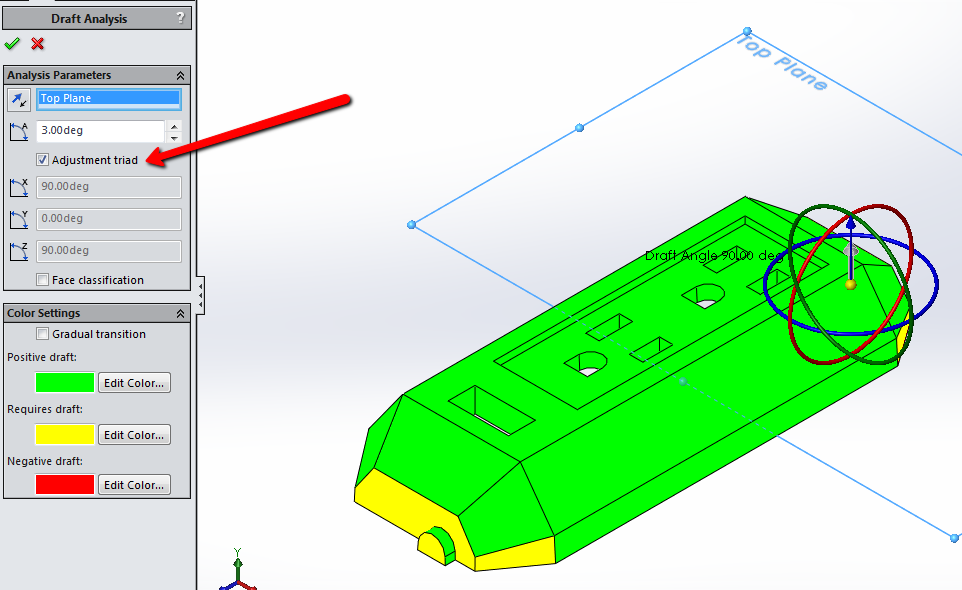
Figure 2: Direction of Pull selected.
I’m going to make sure it’s pointing up. The adjustment triad can be turned on
by clicking the check box. This allows you to dynamically adjust the direction
also.
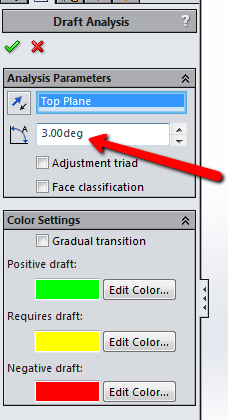
Figure 3: Using the Adjustment triad to change the direction of pull.
The next box is asking for the minimum draft angle that you want to measure
the draft of the part against. This means if I set this angle to 3 degrees,
any face that has less than 3 degrees of draft will show up as requiring
draft. By default, faces that have positive draft are green, faces that
require draft are yellow and faces that have negative draft are red. You can
change that by hitting the Edit Color button next to each one.
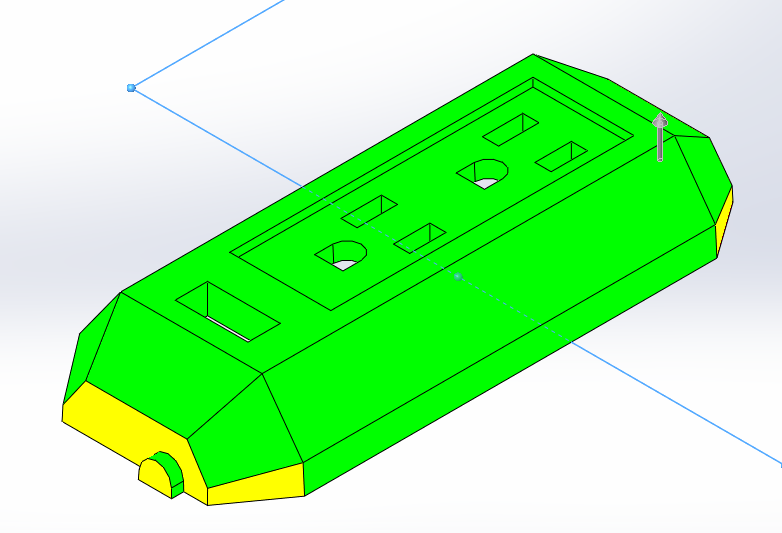
Figure 4: Draft angle and Color Settings.
Don’t get drawn into thinking positive as good and negative as bad. Think of
the showing of these faces a light shining above or below the part, parallel
to the direction of pull. Any face that is hit by the light on top that has 3
or more degrees of draft will show up in green. By contrast, if a light
shining on the opposite side hits a face with over 3 degrees of draft, it will
show up in red. This is considered negative draft based on the direction of
pull, but if you switch that direction, this will also switch which faces are
which. What we are really looking for are any faces that require draft.
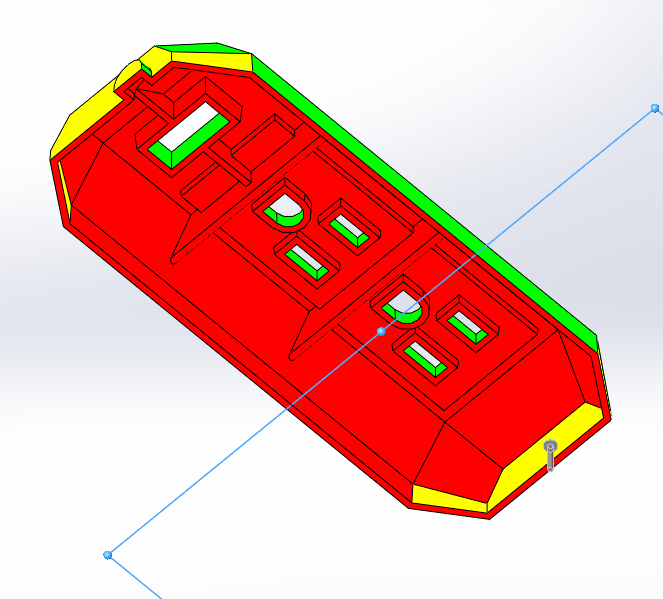
Figures 5 and 6: Positive and Negative draft faces.
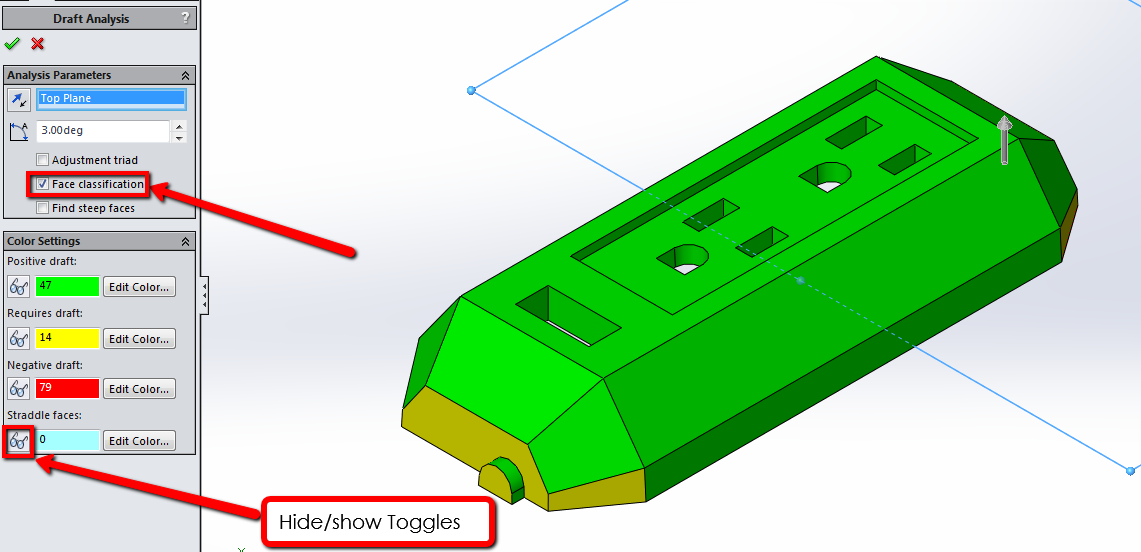
It’s pretty apparent that the faces on the ends require draft, but let’s
investigate this part further. The next thing I’m going to turn on is Face
classification. This shows us how many faces are in each category. I can hide
and show the different groups of faces by hitting the buttons with the glasses
on and off. There is also an extra category here called Straddle faces. These
are faces that straddle the parting line, but since there are 0 faces in this
category, this part has no straddle faces.
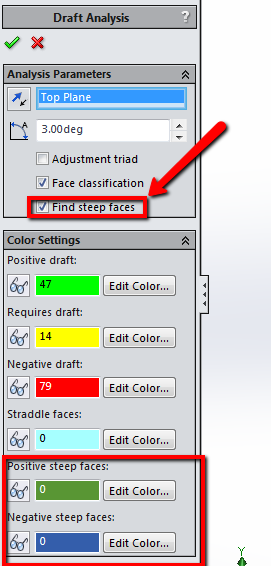
Figure 7: Face classification.
The last option I can turn on is the Find steep faces check. Steep faces are
faces that portions of them that require draft. Again, this part doesn’t have
any steep faces, so I can turn that option back off.
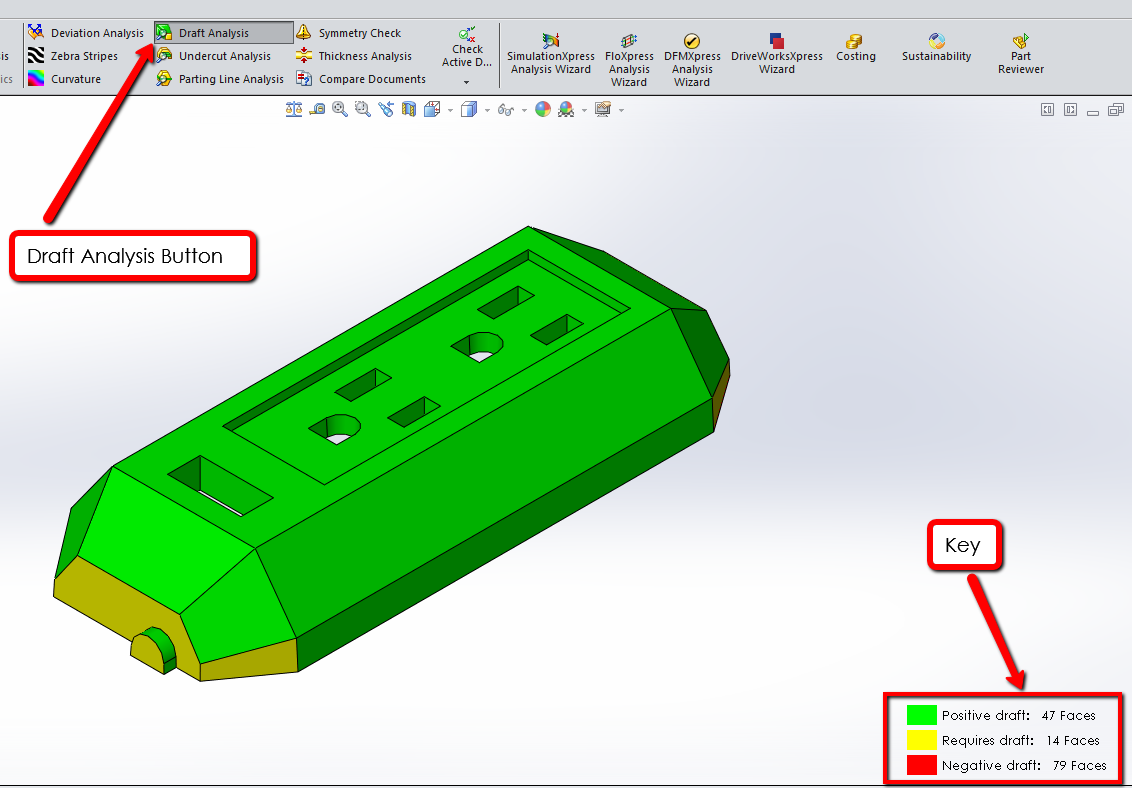
Figure 8: Find steep faces turned on.
Clicking the green check leaves draft analysis on so that you can make changes
to the part and make sure you are meeting your design requirements. An
important thing to note though, if your video card driver is not up to date,
you will not be able to keep it on. Use SOLIDWORKS Rx to run diagnostics on
your system if you are unsure of this.
With draft analysis on, a key is displaced on the lower right corner of the
graphics area. Draft analysis will stay on until you click the button on the
Evaluate tab again, but if you want to turn in back on, you will need to
re-select the direction of pull.

Figure 9: Draft Analysis kept on.
With draft analysis on, we can make changes to the part, but that will be in
the third article in this series. That’s going to wrap up this second article
on Draft Analysis. Please check back for the last article, and thanks for
reading! Also, if you prefer to watch a video here a link to my video on Draft
Analysis:
https://www.youtube.com/watch?v=PteHTMtS2t0