Creating a part to be as realistic as possible allows us to make accurate models in SOLIDWORKS. If an accurate value for mass is needed, how can that be achieved? What about coordinates for center of mass, or design volume?
Assigning Mass Properties
Luckily, the simple and convenient Mass Properties dialog provides all these values, and more. Before we begin, it’s critically important that your parts (or all components, in the case of an assembly) have material(s) assigned to them. While the Mass Properties dialog will always report a value for mass, it may be inaccurate if any parts or bodies do not have the proper materials assigned. Want to learn how to assign materials to parts and even create your own materials? Check out this video on SOLIDWORKS custom material library.
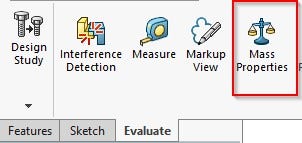
To access the Mass Properties tool, click on the Evaluate tab in the CommandManager.
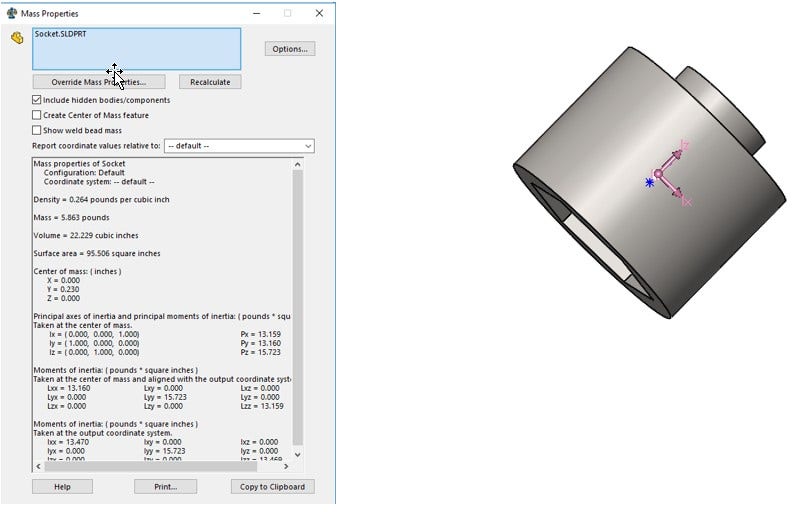
In order to use this tool, we must be in a part or assembly environment. Once clicked on, the Mass Properties dialog shows us the mass, volume, coordinates of the center of mass, and a visual location of the center of mass in the form of a pink triad.
Individual Parts Mass Properties
Now if the file consists of multi-bodies, each body can be selected to see its individual mass properties. The same process can be used when trying to see how much each individual parts mass properties are in the context of an assembly.
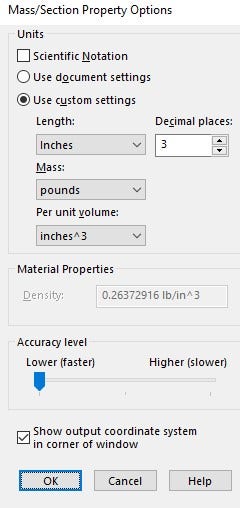
In this example, our socket is in English units. If our customer needs to see the mass of the part in kilograms, for example, we can change the units shown in the Mass Properties window by clicking on Options. Within the Options window, select “Use custom settings” and choose the desired units for length, mass and volume.
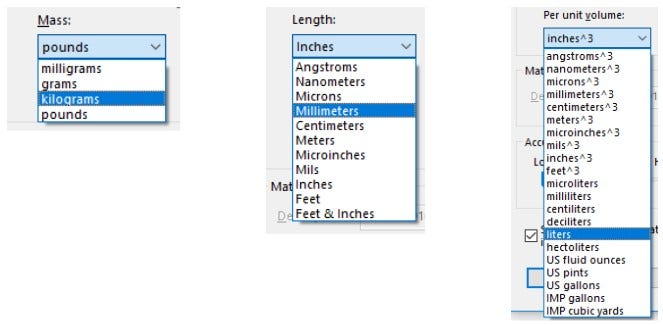
All available units are shown below:
The unit precision can be changed to up to eight places, but we will leave ours at one. After clicking OK the units are updated in the dialog, as seen in the picture below:
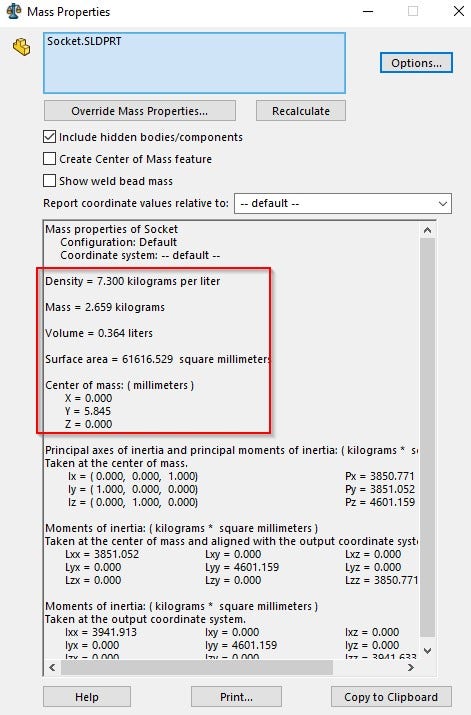
The socket’s center of mass is visible on the part, and we can see both the coordinates of the center of mass as well as moments of inertia in the window. We can use a reference coordinate system if desired (rather than the default origin) by clicking on the drop down box shown in the picture below:
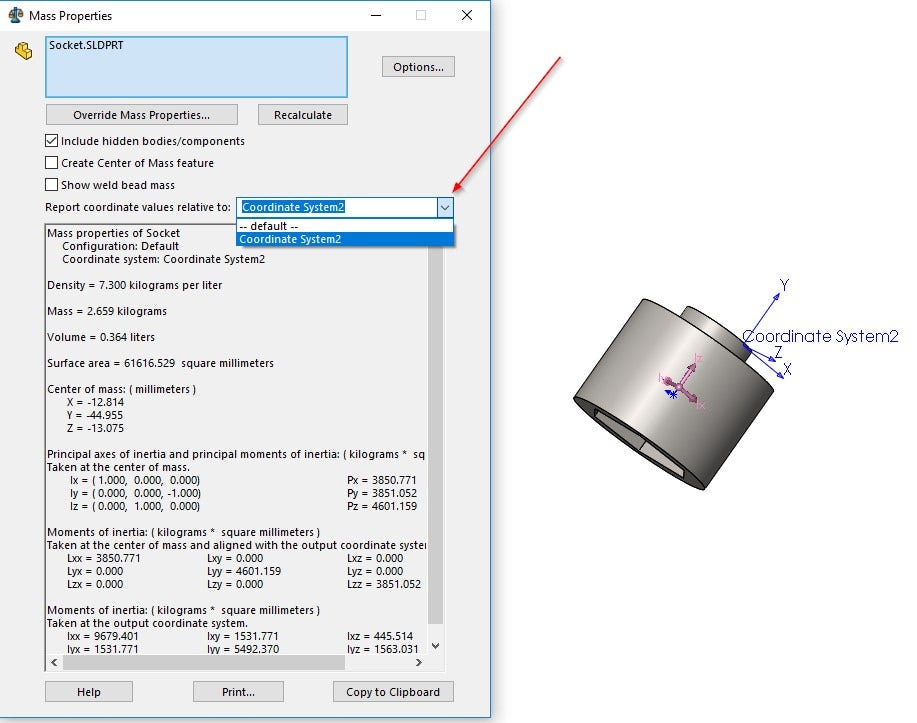
The mass moment of inertia coordinates updates instantly, and we can always go back to the original coordinate system by clicking on the drop-down box and selecting default. We got all the information we needed about the center of mass, but we still need some sort of visual representation of it. We can check on the box next to Create Center of Mass feature, resulting in a visual reference for the center of mass in the part environment even after the window is closed. It should be noted that while this center of mass feature can be used to create reference dimensions, it cannot be used to create driving dimensions.
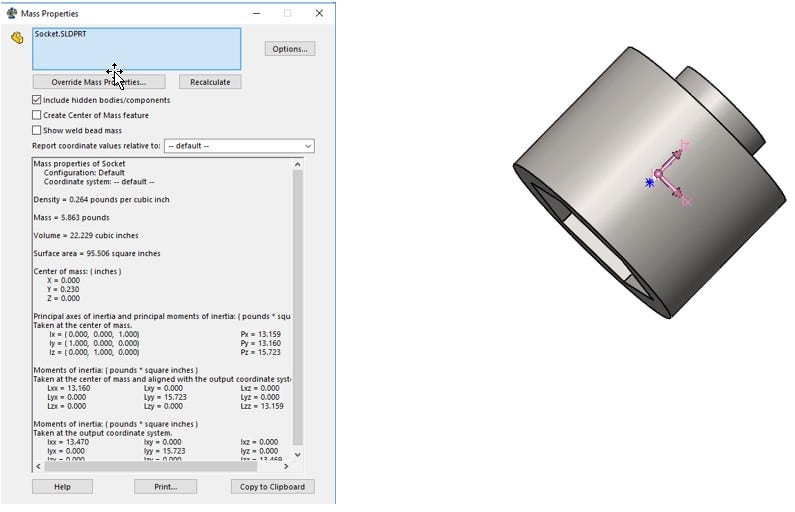
Since the socket is composed of multiple bodies, it is possible to select each one individually inside the selection box that is highlighted blue and have its mass properties shown. For example, we can select the small cylindrical boss after clearing the part from the box and click Recalculate. Now all the Mass Properties have been updated for the small cylindrical boss.
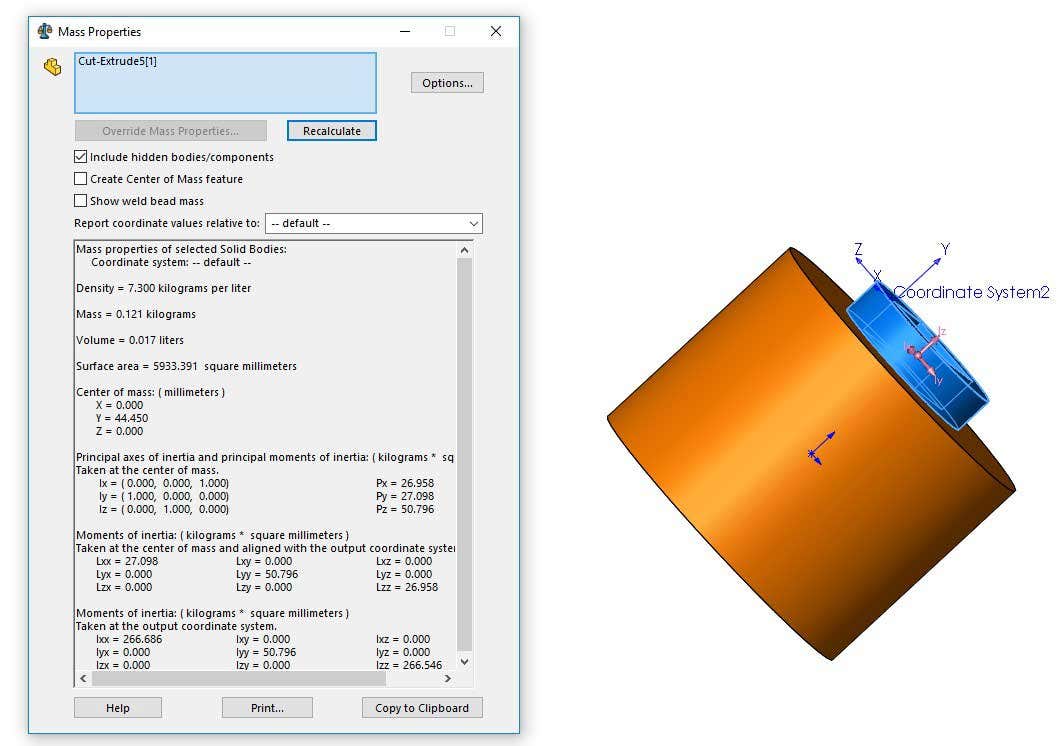
Using Mass Properties has helped us determine the mass, density, volume, surface area and center of mass coordinates from one convenient window. SOLIDWORKS gives us the convenience of changing units in the window without affecting the part’s default unit system. A convenient Center of Mass feature can even be created via a simple checkbox in the dialog.
If you have any other tips and tricks for the Mass Properties tool let us know in the comment section! For more information on SOLIDWORKS or if you have any questions, contact us at Hawk Ridge Systems today. Thanks for reading!


