
In the first CAD tool I learned to use, it was almost every day that I would
reuse sets of shapes repetitively to represent common items such as hardware.
Rather than drawing a new hexagon every time I needed a bolt, I saved the
first one I drew and reused that time and time again. Sound familiar? I am
talking about Blocks, a saved set of entities that you can reuse whenever
needed. Ever since I made the jump to SOLIDWORKS, my need for blocks has been
almost entirely replaced by simply reusing 3D models, like those from the
Toolbox. However, blocks still have a place in the 3D world, and you can make
and use them easily with SOLIDWORKS.
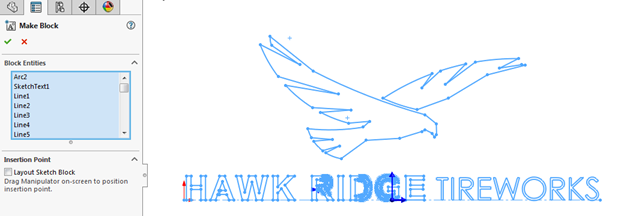
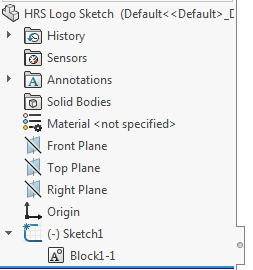
To make a block from scratch, you first need a sketch that you would like to
turn into the block. Here I have a sketch of the Hawk Ridge Systems logo which
I modified slightly.

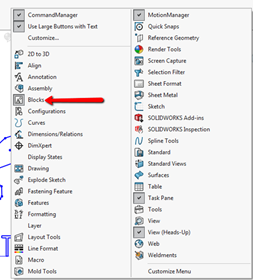
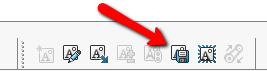
In order to access the block options, I am going to turn on my block toolbar.
I do that by right clicking on the Command Manager and
clicking on the Blocks option.
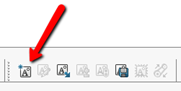
Now I can turn my group of various sketch entities into a single block by
selecting the Make Block command from the Block toolbar.
The Make Block command is simple; first specify which entities are supposed to
be part of the block. I do this quickly with a box select. That is all that is
required to create the block, however we are going to go one step further.
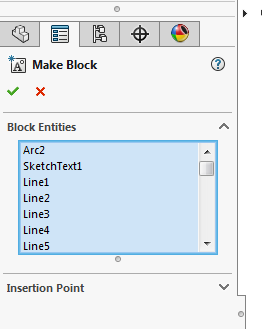
I also want to specify an Insertion Point so that any time I use this block I
can better control where it goes. Any time the block is used, the insertion
point will be the tip of your cursor when placing the block. The insertion
point is also where scaling and rotation will be about. To add the Insertion
Point, simply expand the menu item, this will make the insertion origin show
in the graphics area. You can then drag the Insertion Point to the spot you
would like to use. Then click the green check to accept.
Once your block is created, it will turn to the color specified in your System
Options under Colors > Sketch, Inactive. (Grey by default)
You will also notice that under your sketch in the tree, the block is added as
an absorbed item and given the next available block number in that part and an
instance number.
When a block is created, all of the dimensions for any of the forming entities
become internal to the block. This means the block will be free to move around
unless you add additional dimensions or constraints. Since this part is
sacrificial just to create this block I will skip that step. However, to use
this block outside of this part, I need to save it for reuse. You can save the
block from the toolbar; click on your block, then choose
Save Block.
Save the block with an easy to identify name in a location where you can find
it again. I recommend creating a folder just for blocks; you can then add this
folder to your Design Library. With the block saved, you are ready to use it
in future designs. I want to add my logo to a tire design I am working on.
With the part open, I will start a sketch on the plane where I want it placed,
in this case the Right Plane. With the sketch active you will have the option
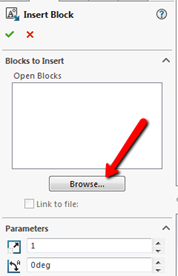
on your block toolbar to Insert Block. From the Insert Block
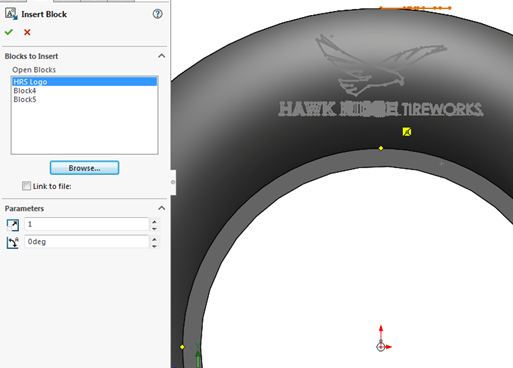
Feature Manager you will see any blocks already in your part or you can browse
to insert a new block. Click on Browse, and navigate to where
you saved the block.
Now, moving your cursor over the graphics area, you will see the block is
ready to be placed and aligns with your cursor based on the Insertion Point we
selected. Before you click to place the block, you can also rotate the block
or scale it from the Feature Manager if needed. I will place the logo on the
upper portion of the sidewall, vertical from the origin.
With the logo placed where I want it, we can hit the green check and then use
it for a feature such as a Split Line, in order to create white lettering.
However, before I do that, if you would like to make any special changes to
the block for this instance or simply don’t want it to appear as a block in
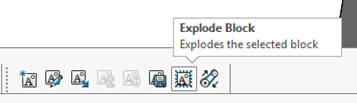
your sketch, you can return the solid block to individual entities. We do this
by clicking on the block and selecting Explode Block from the toolbar.
With the block exploded, our sketch will appear as though we made it from
scratch. Some features will require you to explode the block, others can use
the block with no problem. Blocks are a great way to save time on repetitive
designs. They can also be used for drawings, to place symbols or annotations,
or for assemblies, to control a layout. To see the video tutorial,
check out our YouTube channel!