What are some of the reasons that you may want to change your sketch color?
Well, perhaps black is just too bland for you, or more realistically, you are
trying to trace an image in your design that has black lines. In order to see
where you have already been, or traced, it is very helpful to change the
sketch color.
In order to get a sketch picture into my part, I started a new sketch and used
the sketch picture command. I placed the sketch picture into its own sketch
because it is easier to delete or suppress when you are done tracing it. From
here, I exited the sketch and started a new sketch in which I used splines to
trace my graphic.
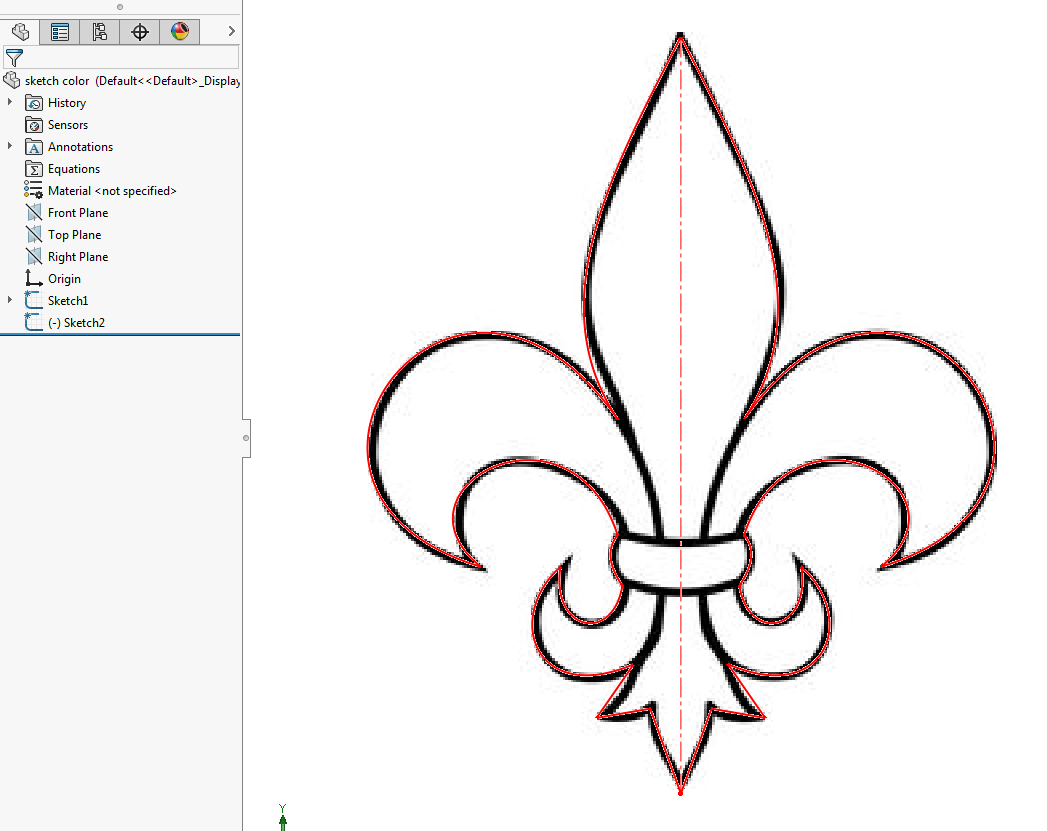
Now when I exit the sketch, the black lines from the sketch are hidden by the
black lines of the image that I imported. In this case, I want to see what
part of the graphic I have already sketched, but upon exiting out of my
sketch, the sketch lines turned from blue (under defined) to black. Black
lines on a black image are not very helpful, so in order to see my trace
lines, I switched the color of the sketch to red.

To change the color of the sketch in your display, go to the FeatureManager
design tree, right click Sketch > Sketch Color. This will
take you to the Sketch/Curve Color property manager (see image below). Inside
the property manager, you can set any desired color for the sketch. There are
standard colors to select and if you need any other color, you can create it
using the adjustments under color properties. Now that I have my sketch lines
red, I can see my traced image over top of the sketch picture.

Keep an eye out for more great SOLIDWORKS content on the blog and subscribe to
our
YouTube channel.
If you would like to see a video using this technique, please click
here.


