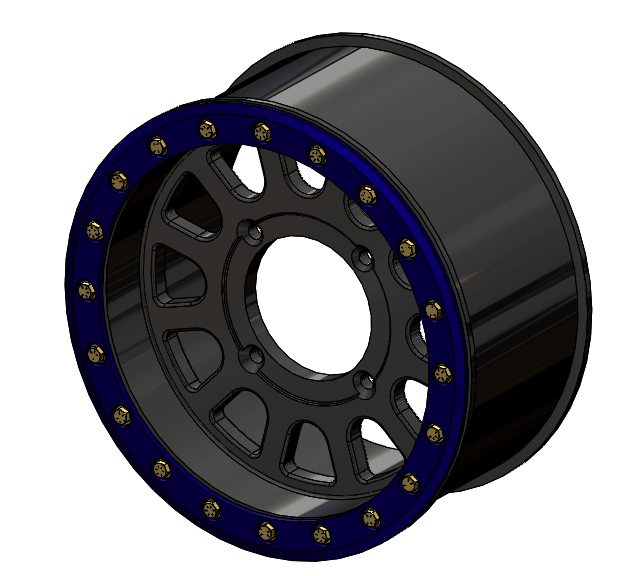
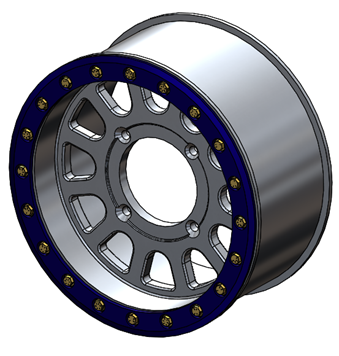
So you just finished an awesome design that took you quite a bit of time to
model, and you are feeling pretty proud of it. You immediately begin to apply
some appearances to the part to really bring it to life. This stage normally
take a considerable amount of time if you don’t have just one preset
appearance to apply. Some designs have dozens, or even hundreds of individual
appearances, most of which need to be modified in order to be the perfect
color or radiance. Well, by the time you get through the appearances to make
your part look just right, you have spent a good chunk of your time on this
model.
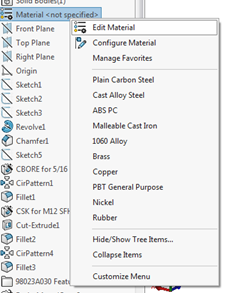
That’s usually right about the time I realize I forgot to apply a material to
this part so that I can get an approximate weight. No big deal, that’s why
SOLIDWORKS comes with a fully loaded library of materials so you can use them
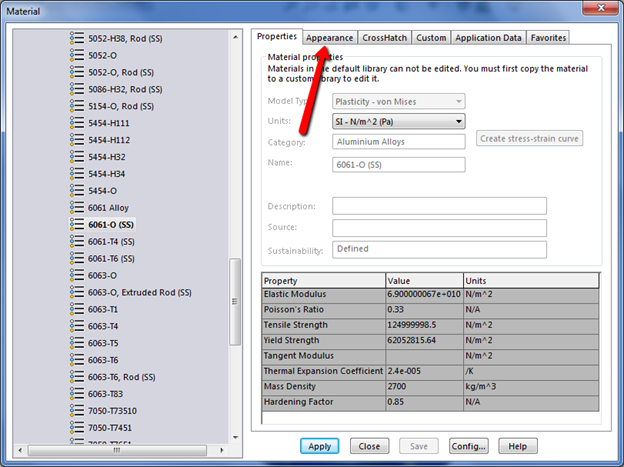
for measurements and simulations. So, you navigate over to the design tree,
right click on the material and select
Edit Material. Then you choose the perfect material and hit
Apply.
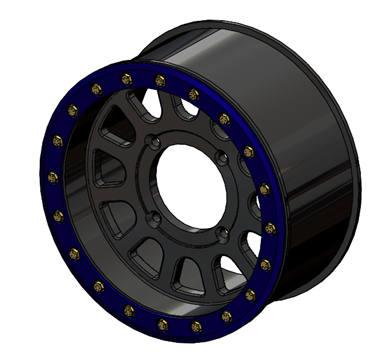
If you did, you just witnessed part of your beautiful appearances disappear,
or be replaced rather. That is because when you apply a material, by default
it will also apply an appearance to match that material to the part.
As you can see, appearances which are applied to specific faces or features
will override the part level appearance. In fact, the appearance application
toolbar that pops up when you apply an appearance reveals the order of layers.
The lowest layer for an appearance is the part itself, followed by body,
feature, and face. (Right to left in the image below) This basically means
that an appearance on a face will show over all other appearances and so on
down the list.

However, your customized part appearance is gone now since it was replaced by
the material appearance. Sure we can reapply it, but why when there is an
easier fix? Start by taking a step back and hitting the undo button so you can
get that beautiful appearance back on there.
![]()
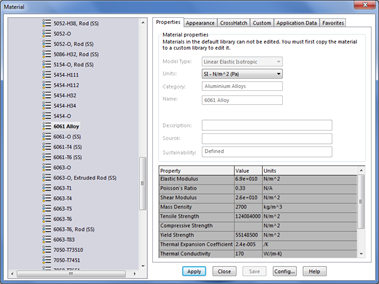
Now let’s reapply that material the correct way this time. Right Click on the
material in the tree and choose Edit Material again. Navigate
to the material you want, but this time don’t hit the
Apply button just yet. First, go to the Appearance tab from
the material library.
This will show you what that boring appearance will look like. However, it
also gives us the opportunity to not apply a new appearance. We do this by
deselecting the checkbox next to Apply Appearance of:…
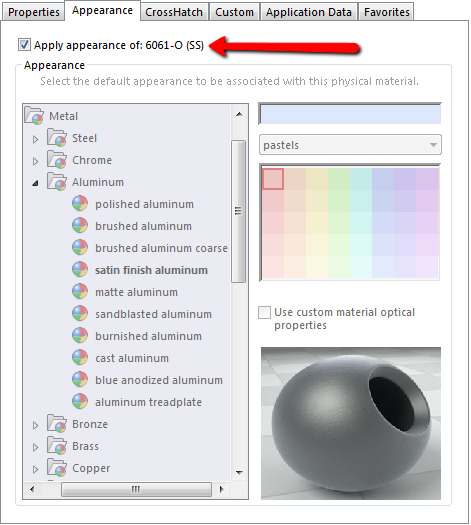
With that unchecked, it is safe to apply the material. Easy, right? Now you
don’t have to worry about following a strict process of applying materials
before appearances. Go forth and design beautiful models in SOLIDWORKS, use
custom appearances, and apply materials freely.


