
Did any of you assemble those small model airplanes or cars when you were
younger? Remember how much of a pain it was to apply the logo stickers and
keep them straight? Luckily in SolidWorks, it’s very easy to apply any logo as
a decal and we have many different options to control how it looks. I will be
discussing a few of these options below.
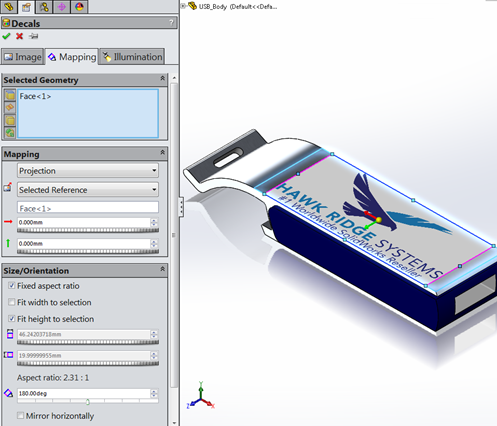
When applying decals, I like to do so at the part level because you have more
control over how the decal is applied. To select the decal to apply, click on
the Display Manager tab on top of the Feature Manager Design
Tree, and select View Decals. You can then Right-Click
anywhere in the gray area in the Property Manager and select
Add Decal.

From this menu, you can click the Browse button and navigate
to your image file (note the numerous supported image file types). To apply
the decal, click on the Mapping tab and select the geometry
you would like to place it on (i.e. a face, surface, body, or feature). Once
the decal is applied, you can adjust the size and orientation of the image
using the spin boxes.
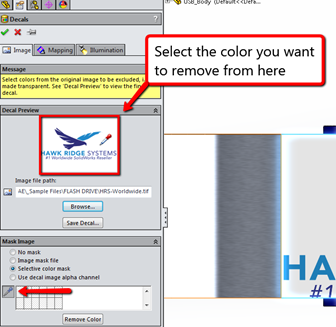
The image file you use for your logo may not give you the desired look on your
part when it is applied, such as the white background in my image. To filter
out the white, we’ll switch back to the Image tab and select
the option to use a Selective Color Mask in the Property
Manager. Click on the color selector icon, and then click on the desired color
to remove from the Decal Preview window.
Depending on the quality of your image, this may or may not produce acceptable
results. You can see in the image below that the decal isn’t as clean around
the edges of the colored portion. There are still some remnants of the white.

A better solution would be to use the Image Mask File option.
An image mask file can be created by saving the same image used for the logo
as a black and white image. This can be done in Microsoft Paint by opening the
file, and clicking on
File > Save as > Monochrome bitmap. You can then click
the Browse button to the select the new black and white image
and apply the mask. Think of the image mask file as a transparency sheet that
you lay over the decal. The areas of the decal that are covered by the black
portion of the mask are removed, and the white areas are retained. So you may
need to check the box to Invert Mask depending on your
situation.

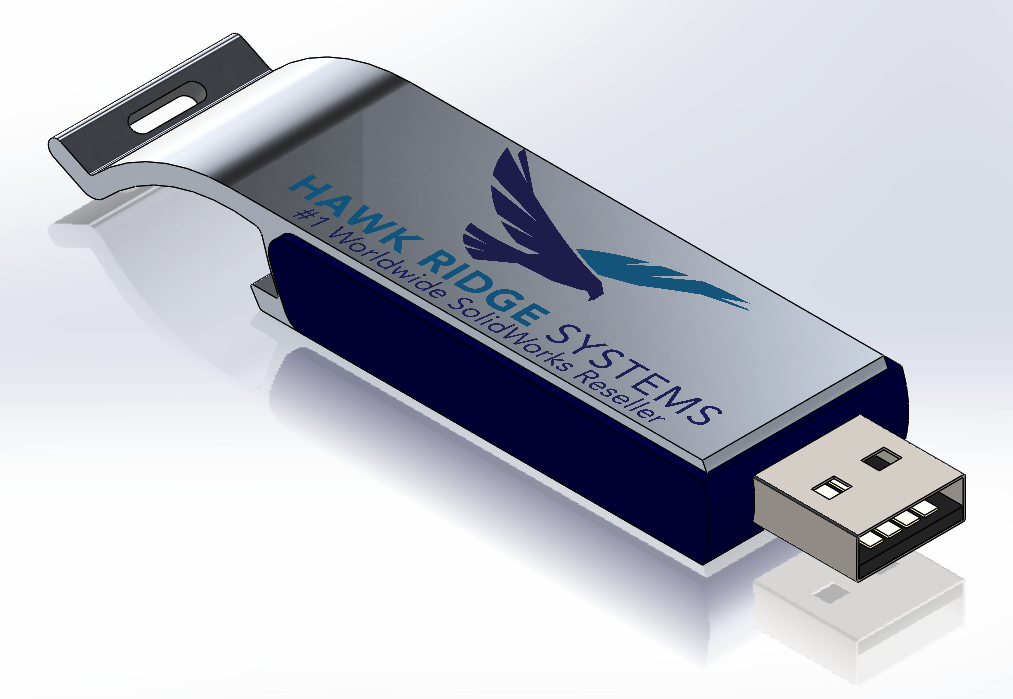
And there you have it! A great looking decal with clean edges applied to your
part! A video demonstration of this process can be found
here, along with
other great tips and tricks on our YouTube channel!
Check us out!


